(Legacy) Uploading Work Plans (without Subphases)
While Mosaic can be used to create Work Plans, Work Plans can also be uploaded from tools to Mosaic for complete overviews on your team's current, past, or upcoming work
To upload Work Plans via spreadsheets:
-
Confirm either Mosaic Support or your Customer Success Manager have enabled the Work Plan upload tool on your account. To request this tool be added to your account, reach out to our team via [email protected]
-
Next, download the Work Plan template here and fill out all the fields. You can find details regarding the fields and requirements below.
Note: You can replace the "Hours per day" column with "Total Hours"
It is recommended to use pre-existing projects and phases in MosaicIt is possible to create and import new projects for your imported Work Plans during the import process. However, to help prevent any mistakes when importing, it is recommended to import/update Work Plan details into a project that already exists on Mosaic.
If importing into a pre-existing project then the names and numbers must match exactly as is on Mosaic. If they do not match exactly you may get error fields during the import process, indicating where the names do not match, or unintentionally create new projects.
Here is an overview of the details needed for each column:
Field | Guide | Example | Required |
|---|---|---|---|
Email of employee.
| Yes | ||
Portfolio | Name of portfolio containing the project.
| Sample Portfolio | Yes |
Project Name | Name of the project.
| Central Park | Yes |
Project Number | Identifying project number.
| 1234.00 | Yes |
Phase | Phase within the project being worked on. | Surveying | Yes |
Phase Number | Identifying phase number.
| 123 | No |
Work Category | Type of work being performed.
This is only required if the matching phase has work categories. If this is a new phase, or one that has no matching work categories, this field is not required. | Planning | No |
Start | Date the work will start/started. | 2021-05-04 | Yes |
End | Date the work will end/ended.
| 2022-05-04 | Yes |
Total Hours | Total hours given to complete the project.
This is the default field for Work Plan hours. Hours Per Day is an alternative field to Total Hours. | 30 | Yes |
Hours Per Day | Hours per day allotted between the given start/end dates.
| 7.5 | No |
Description | Description of the work Plan. | Fall 2022 Work Plan | No |
Include Days Off | Whether or not the Work Plan should add work on days off for the given task. Work can be scheduled in Mosaic for 7 Days/Week. If you want plans to only be scheduled on work days (M-F) and not weekend days, this should be "false".
This is set to false as default, and can be left blank. | false | No |
Is Tentative (Coming soon) | Whether the work plan is tentative or not.
| true | No |
Every Line Denotes a New EntryFor each individual in the Work Plan, create a separate line. If a person is assigned to multiple phases or work categories, each assignment should also have its own line. For example, if you're adding two people to a project with two phases, but only one person is working on both phases, the spreadsheet should display three data lines.
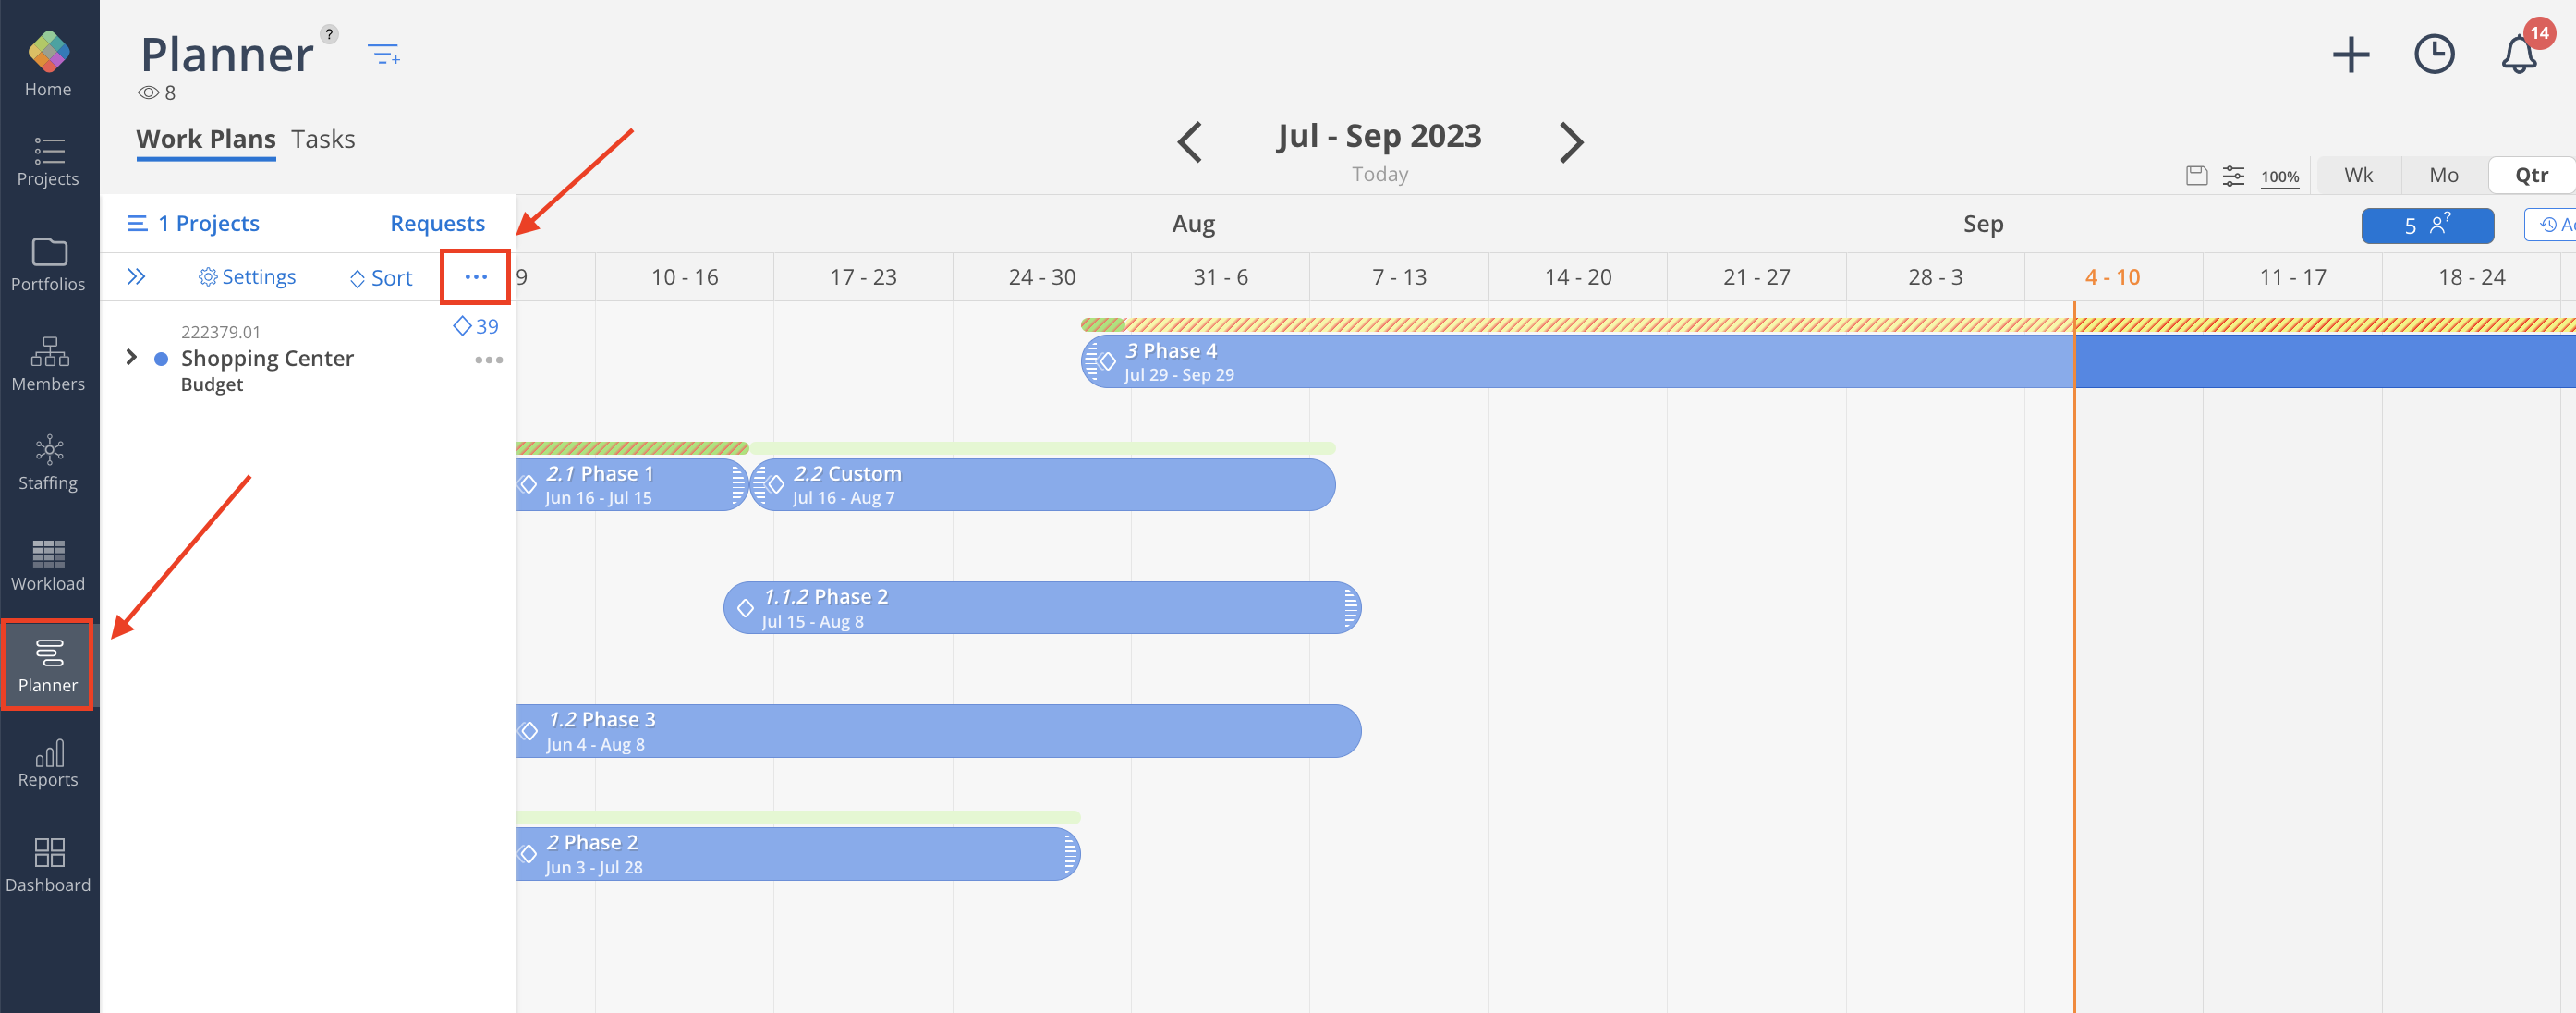
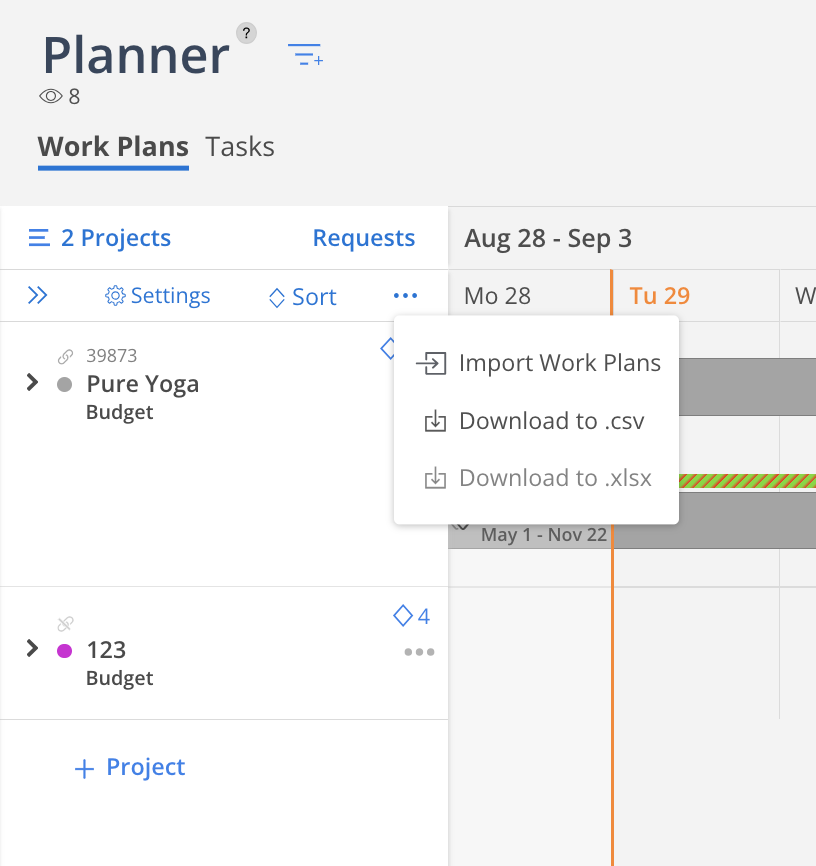
- Navigate to the Planner page from the sidebar menu on the left, and select the 3 dot menu beside the "sort" button under Work Plans, as shown below:
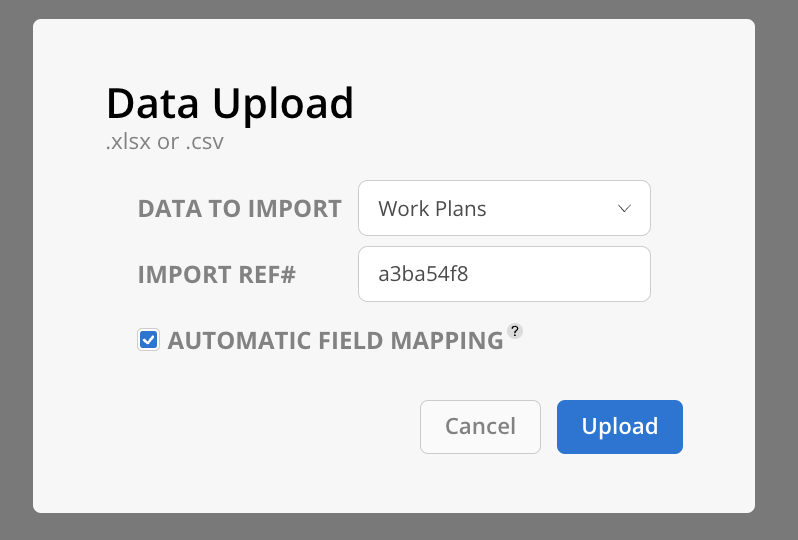
- Make sure data to import is work plans, then click the upload button once finishes loading. Deselect the Automatic Field Mapping option to prevent columns from automatically mapping, thereby avoiding potential improper data imports.
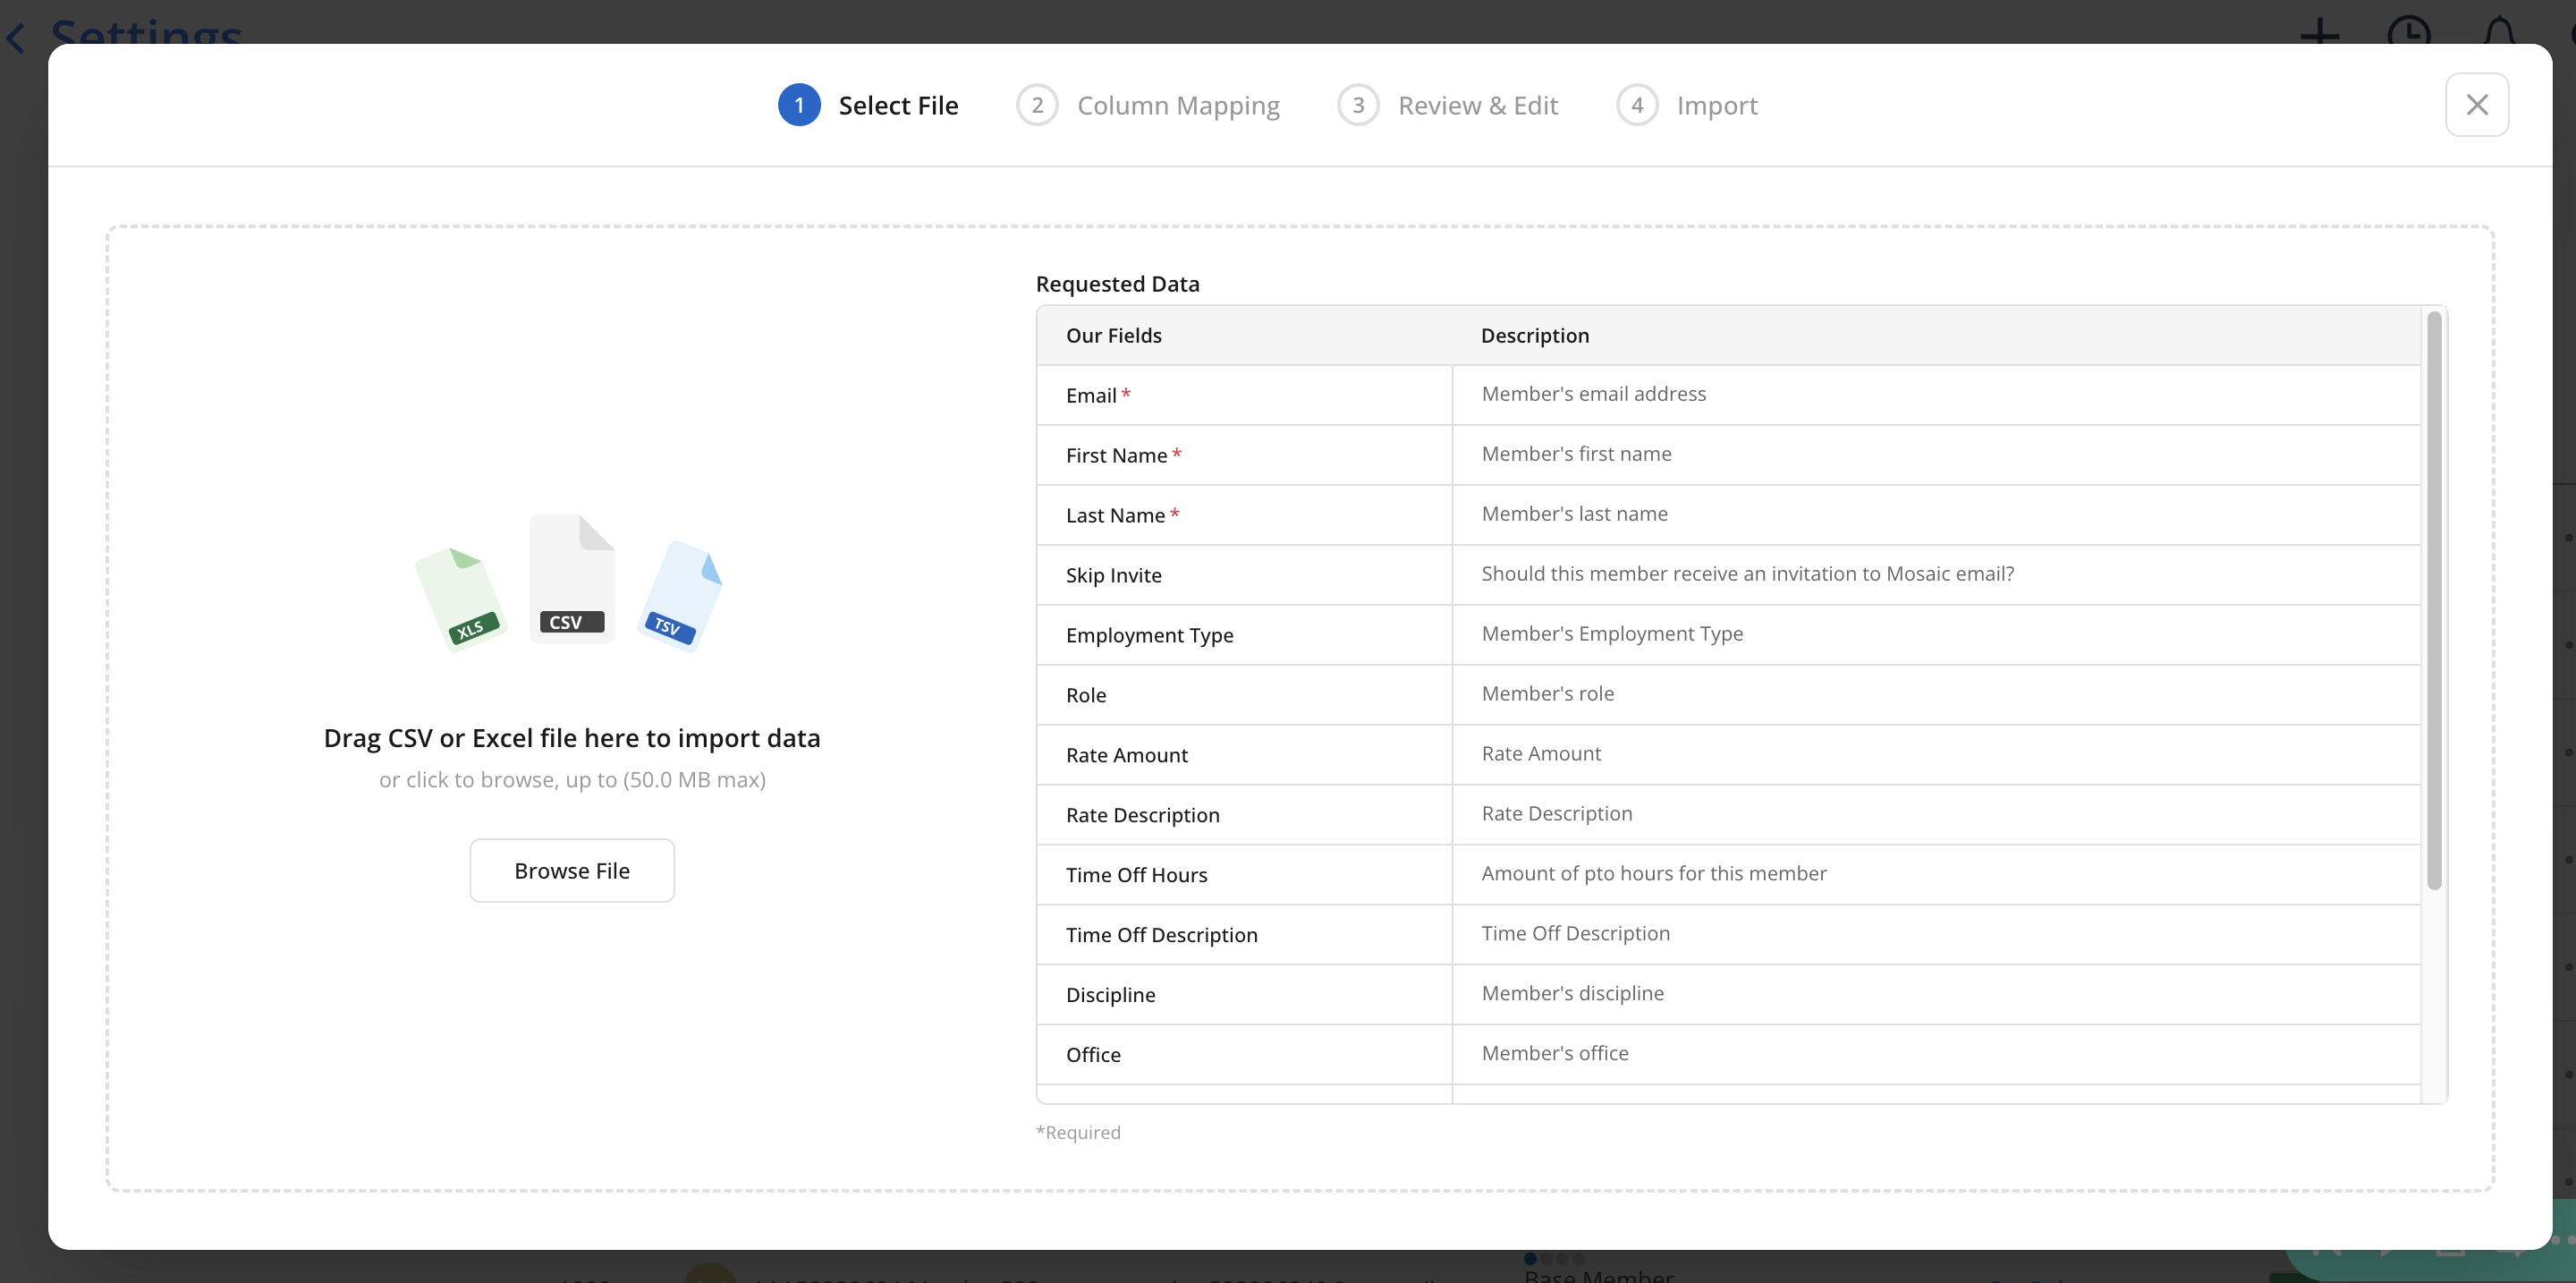
- Select the file you would like to import using the file selector or drag and drop the file here. After filling in the first row, the other rows should auto-populate.
- For each of the columns, the software will try to auto-map the information that we need. You can also change the mapped columns by clicking the dropdown from your columns. It may take some time for the information to auto-populate in our field columns.
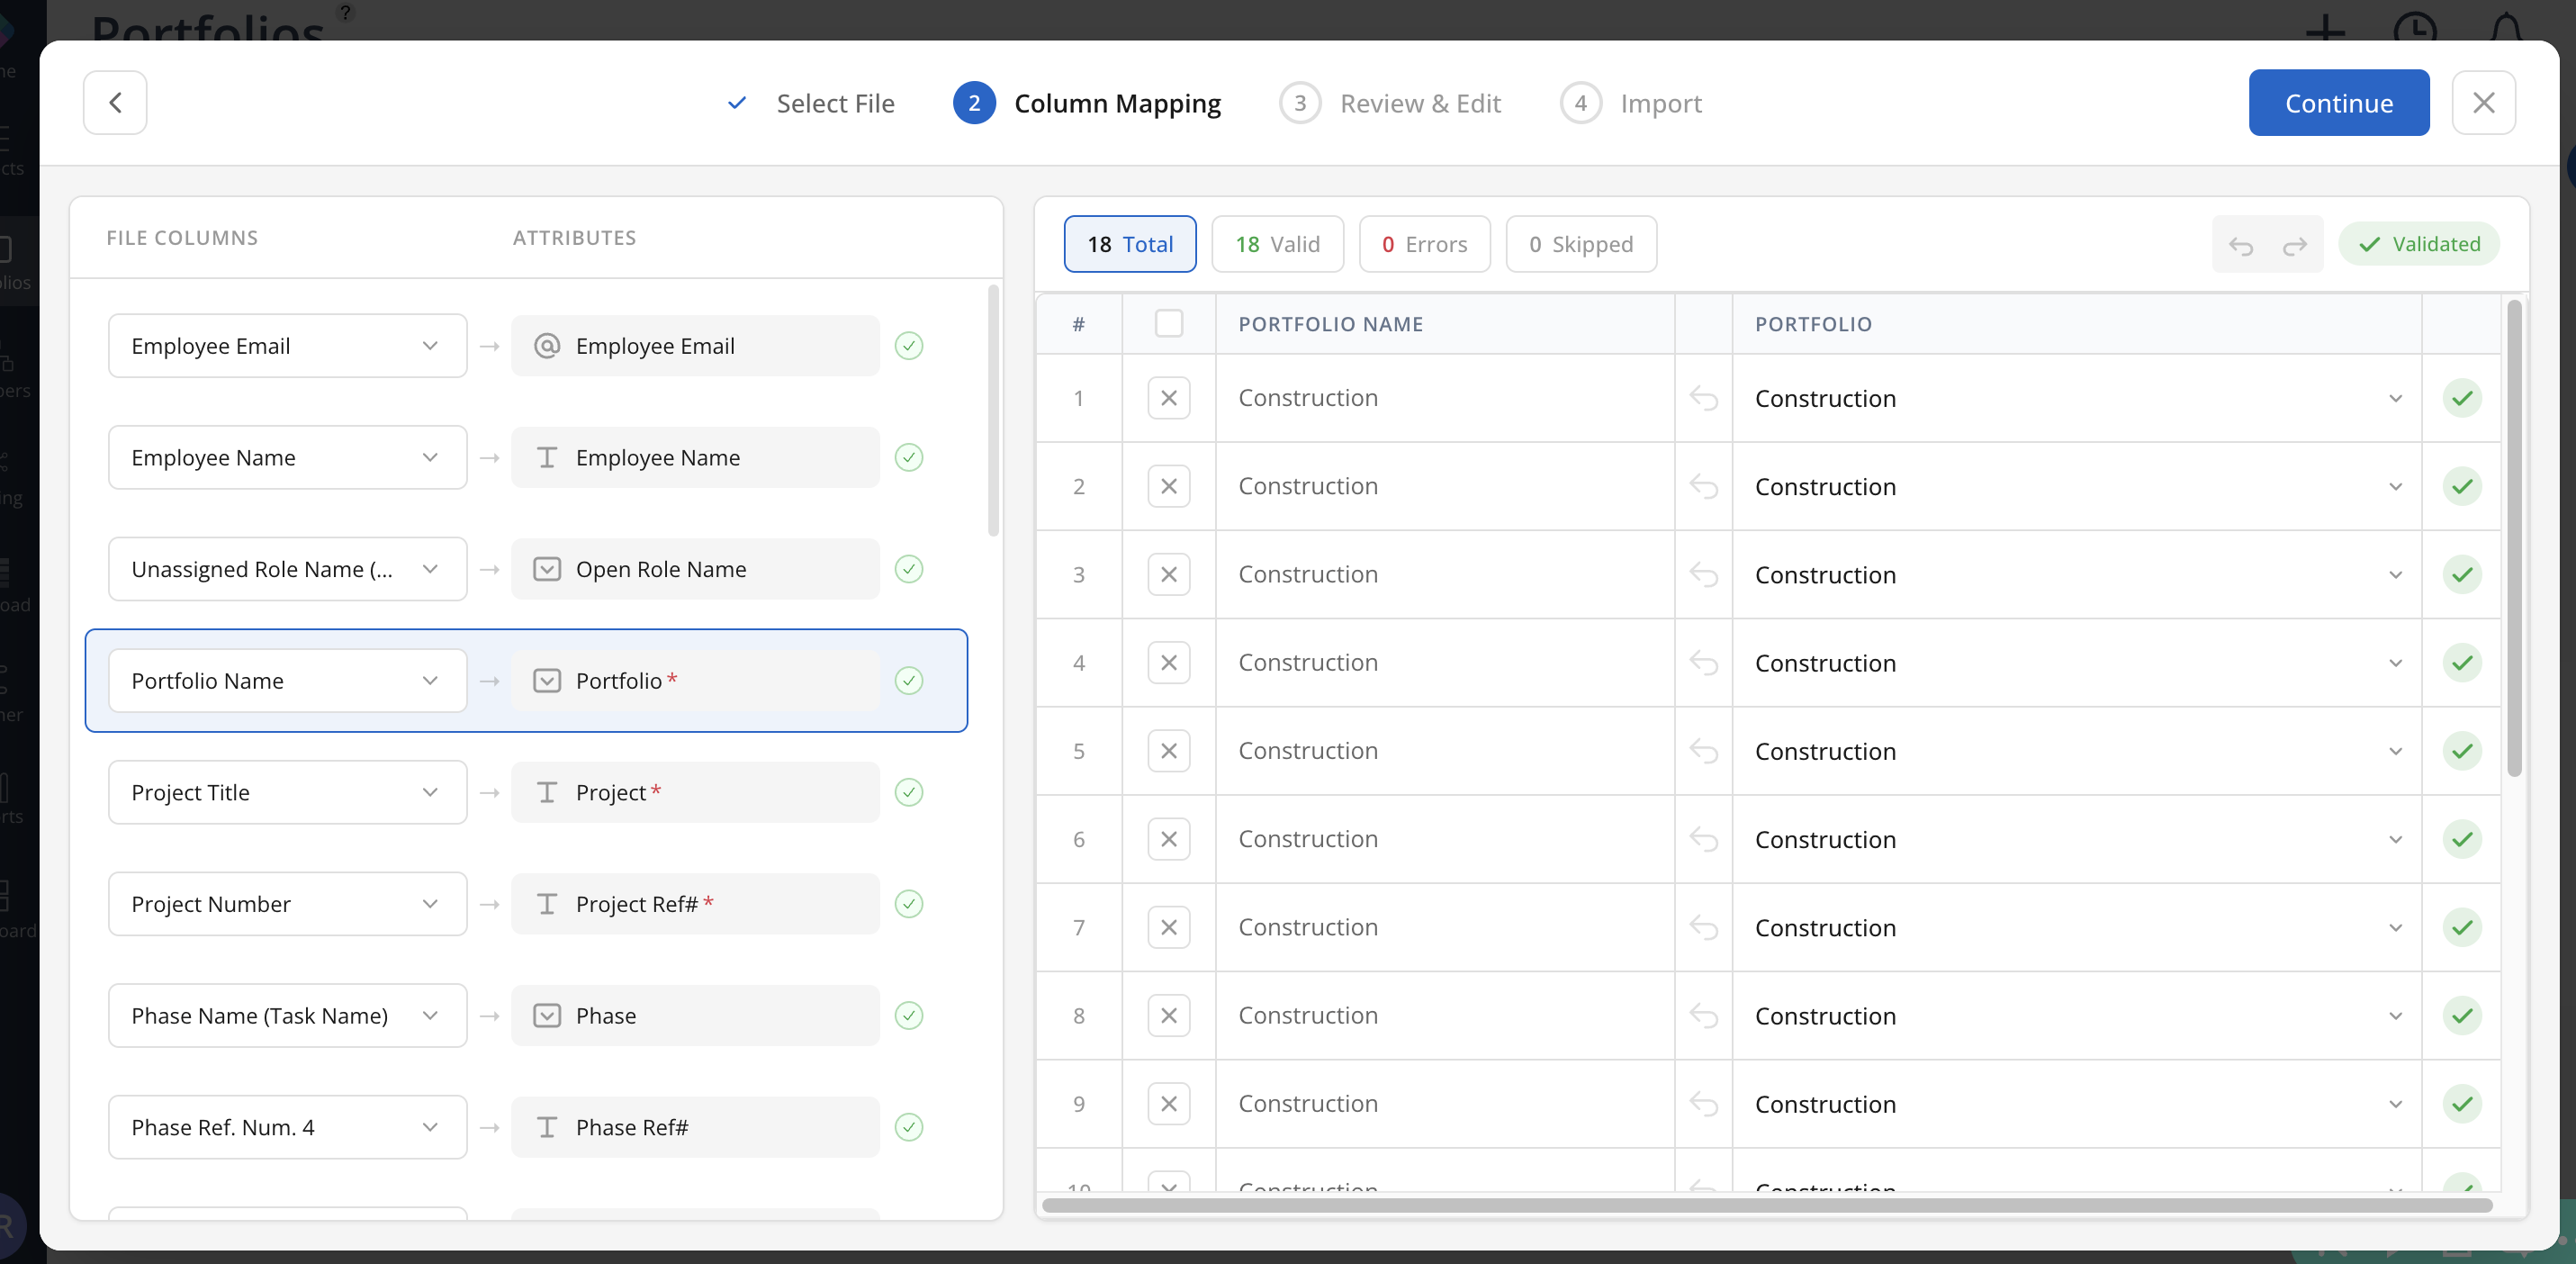
Note: If there are any issues with the data, it will show number of errors for each column, and the rows that have issues.
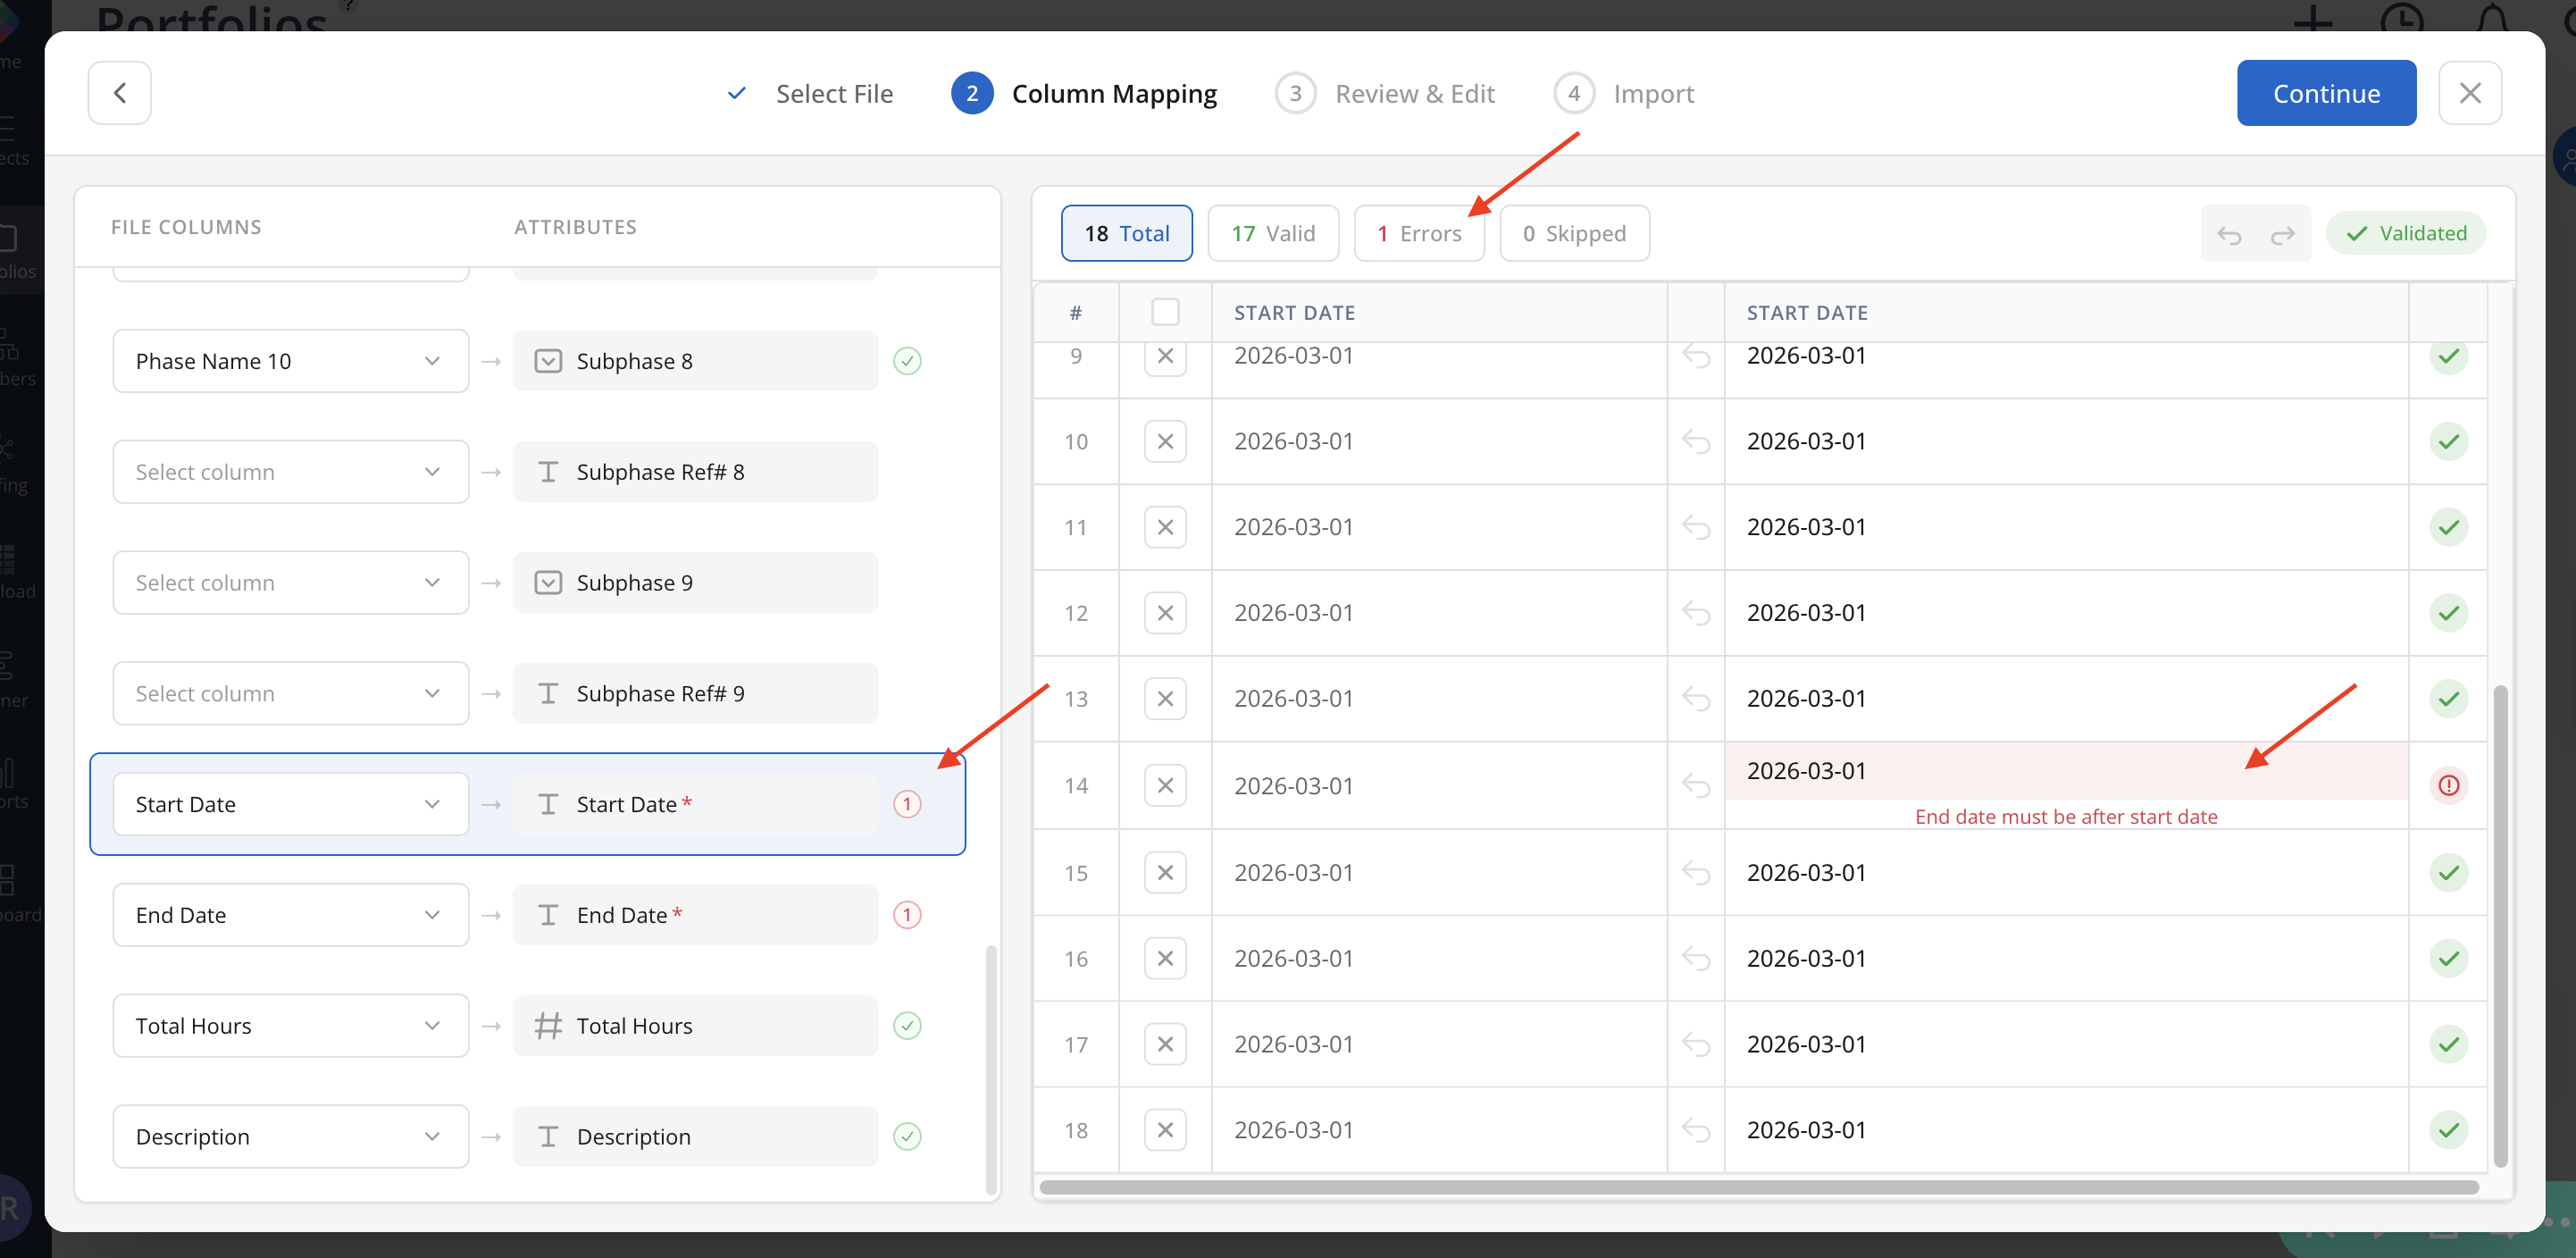
-
Once columns have been linked, and any red rows have been addressed, select
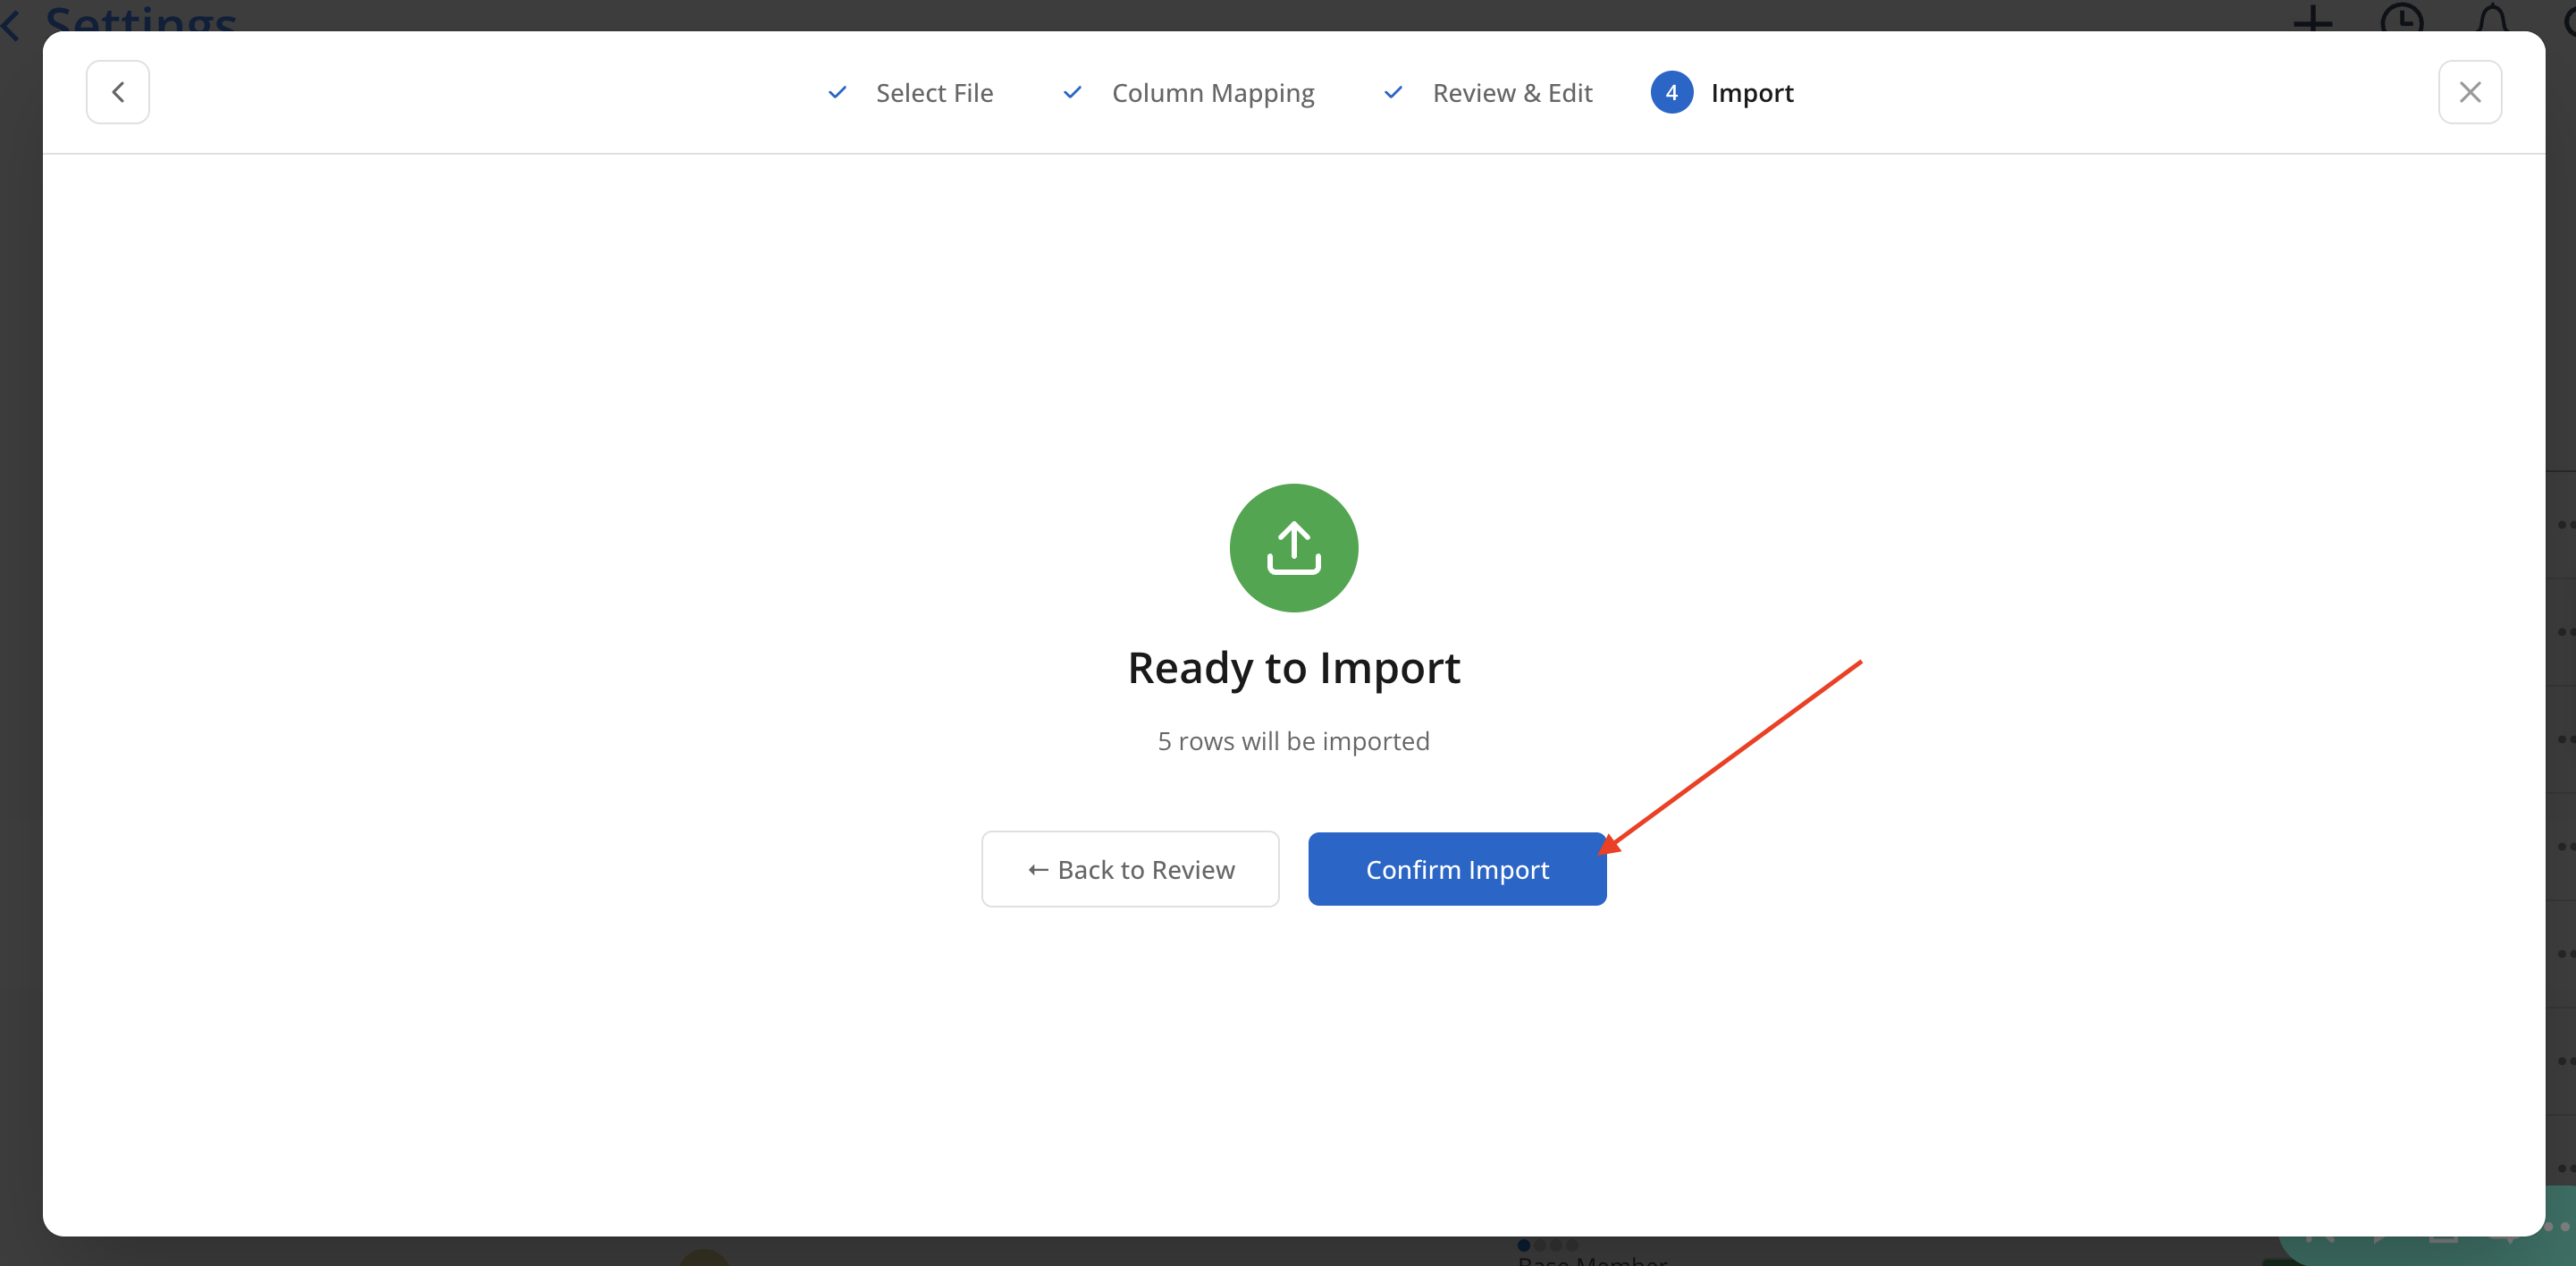
Continuein the top right corner. Review your data once more in Review & Edit step, then clickContinue. Then in the Import step, clickConfirm Import.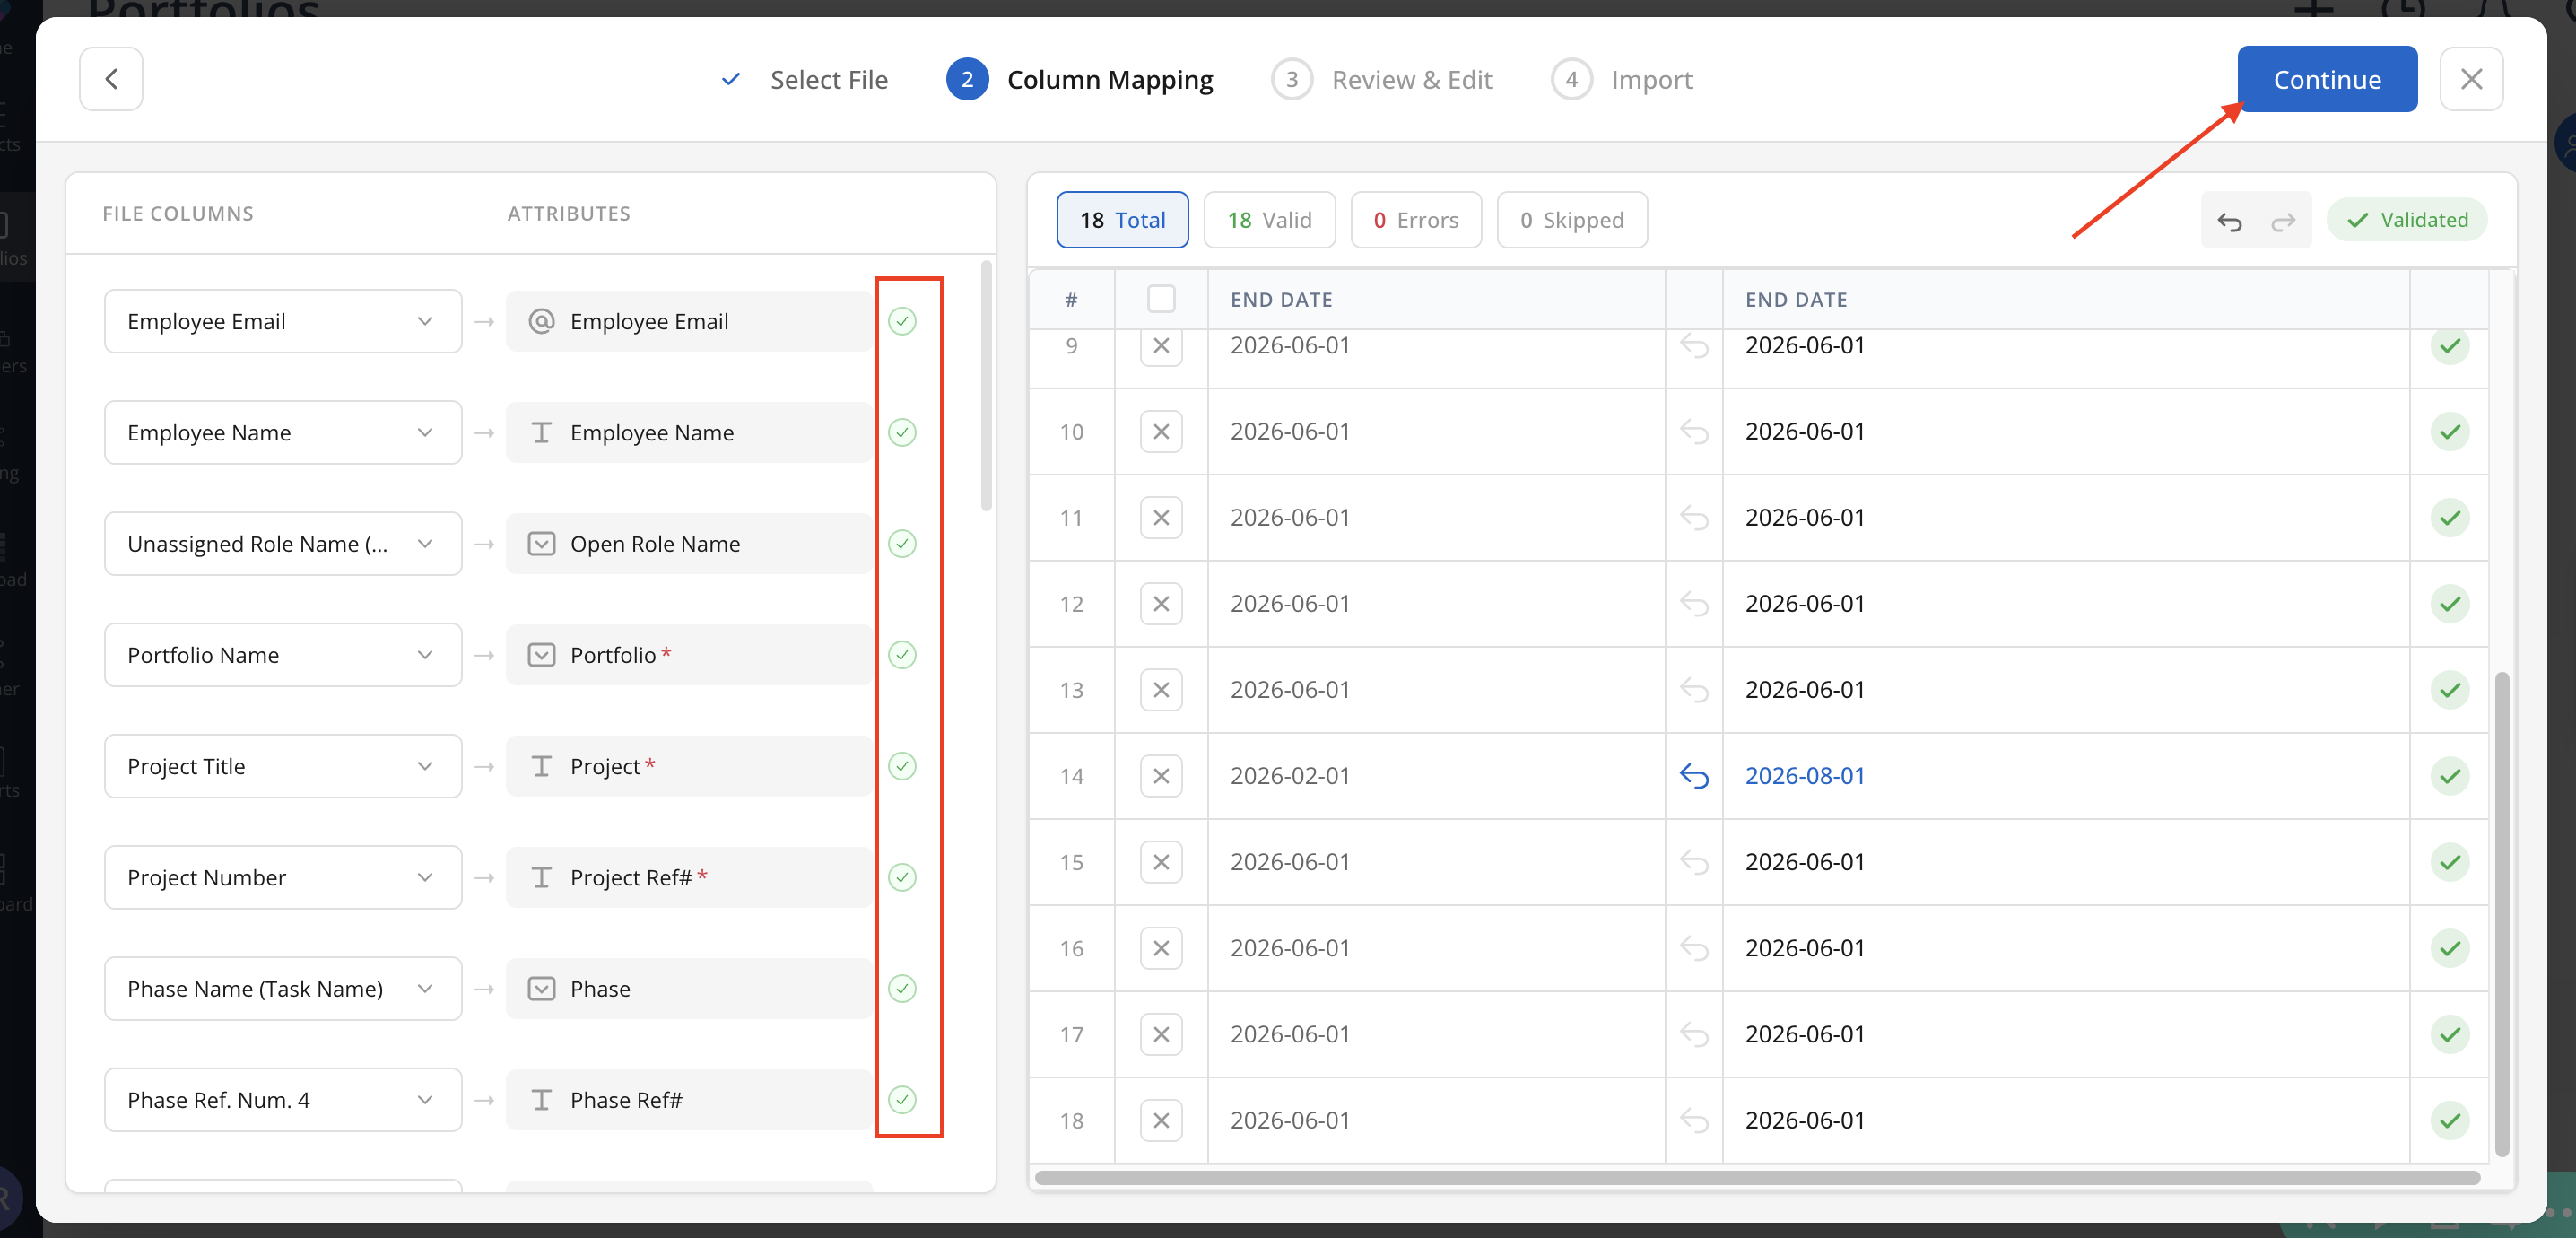
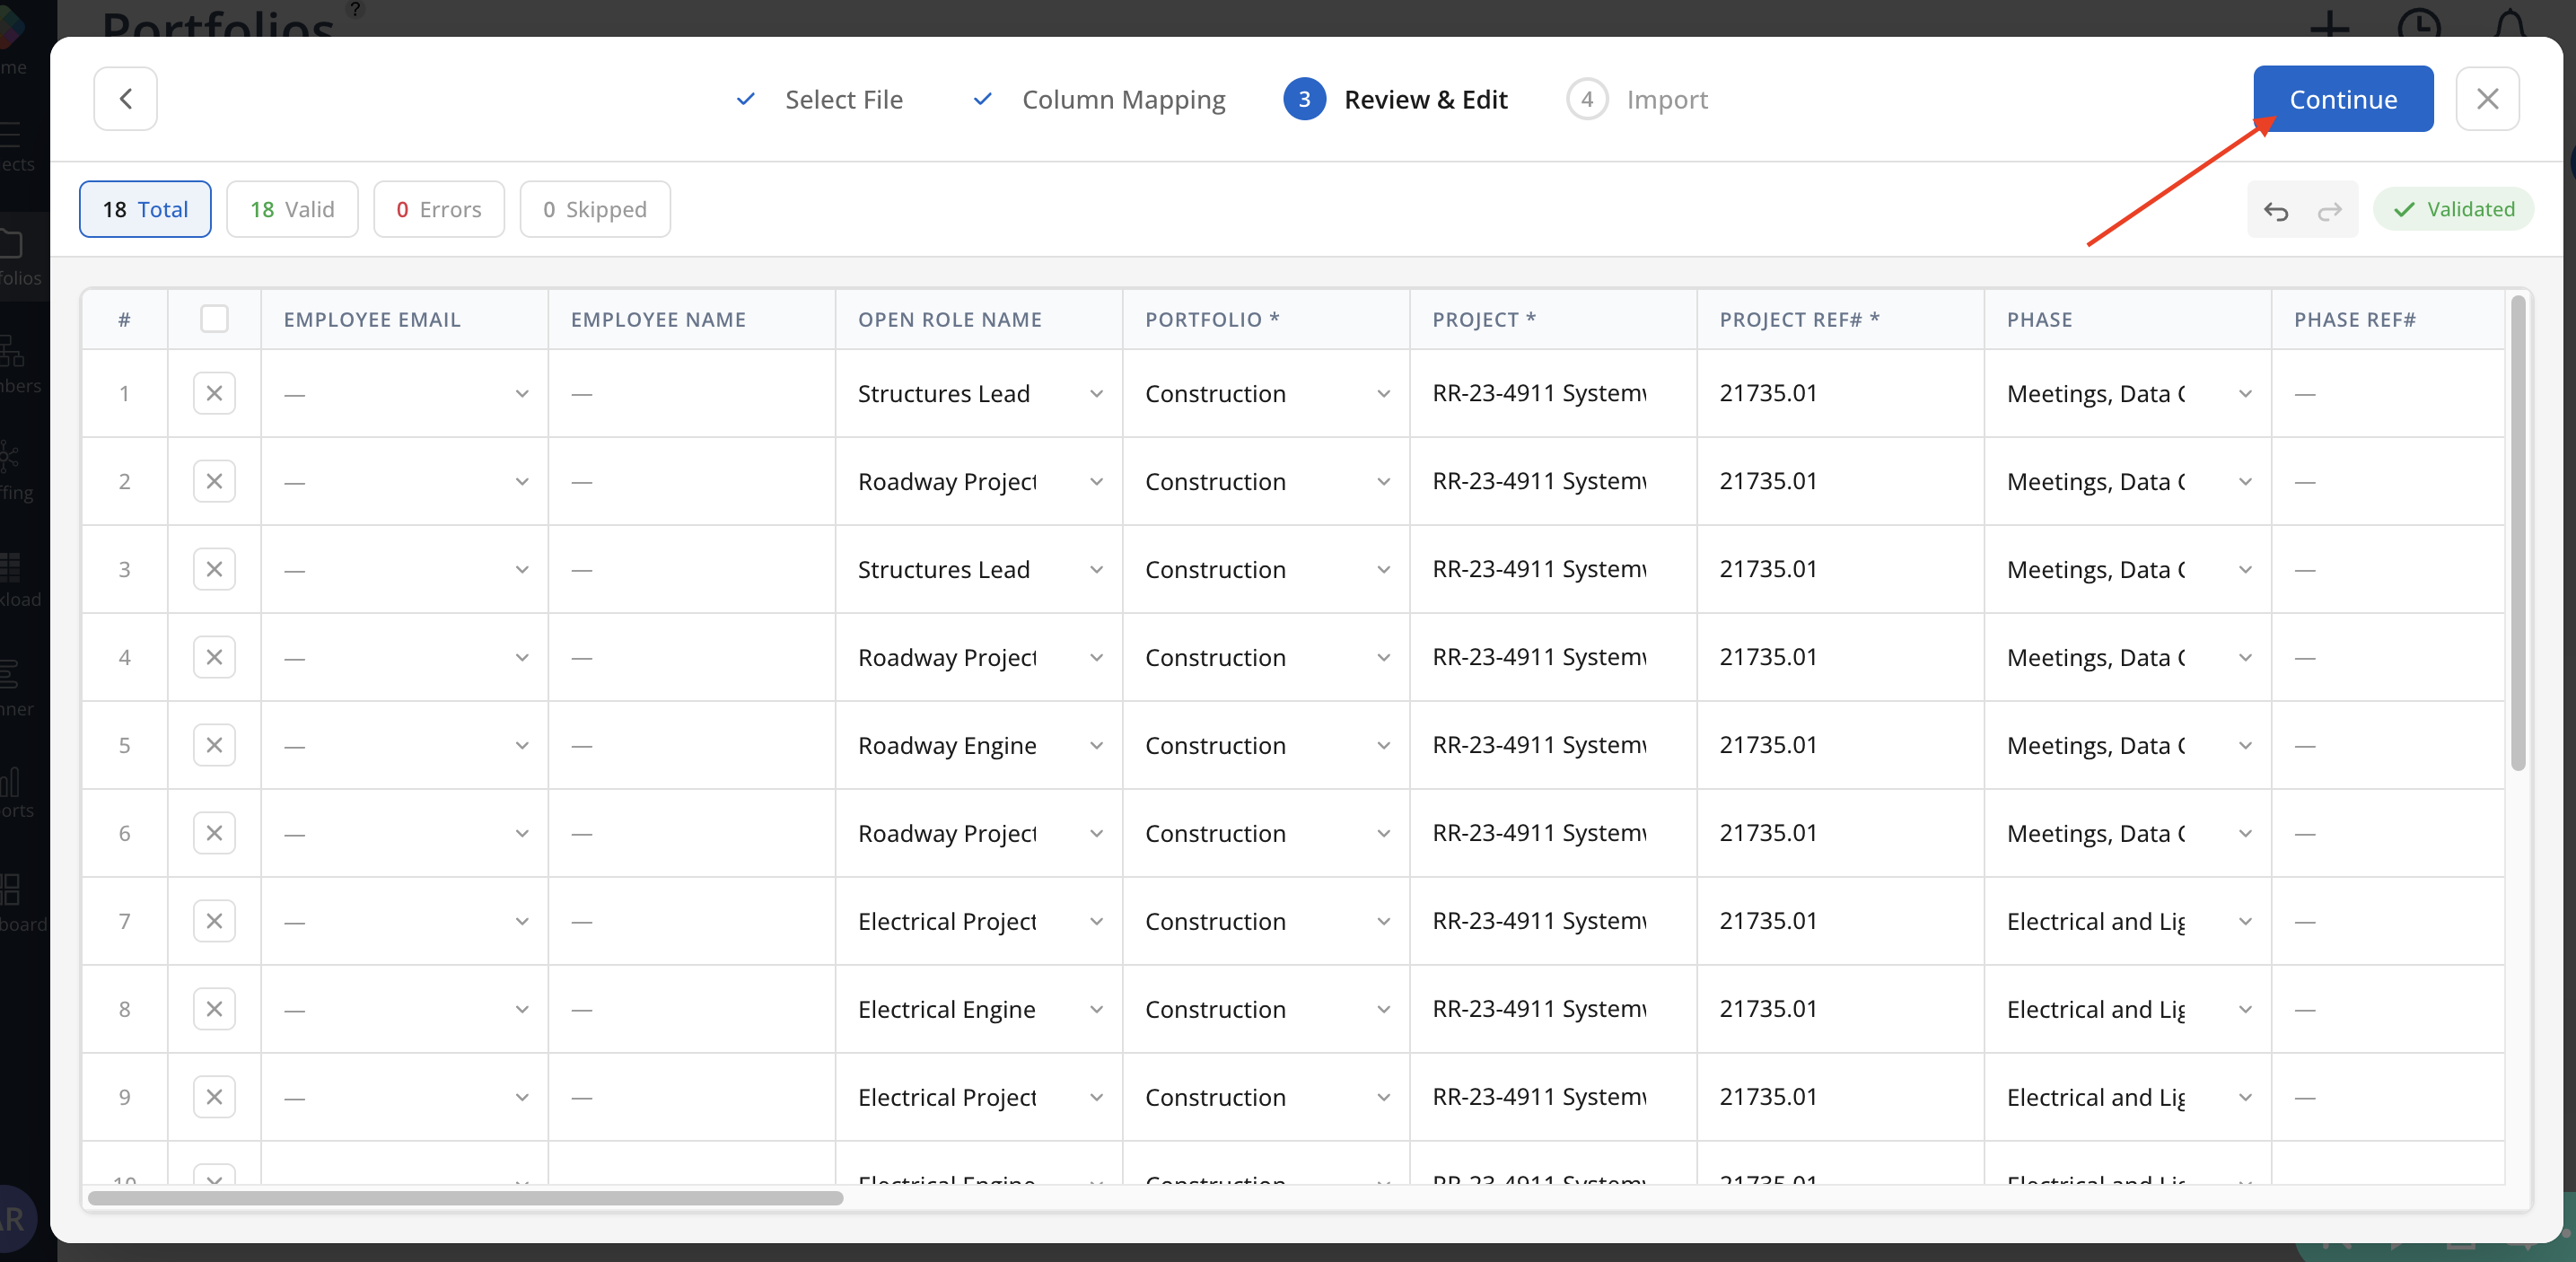
-
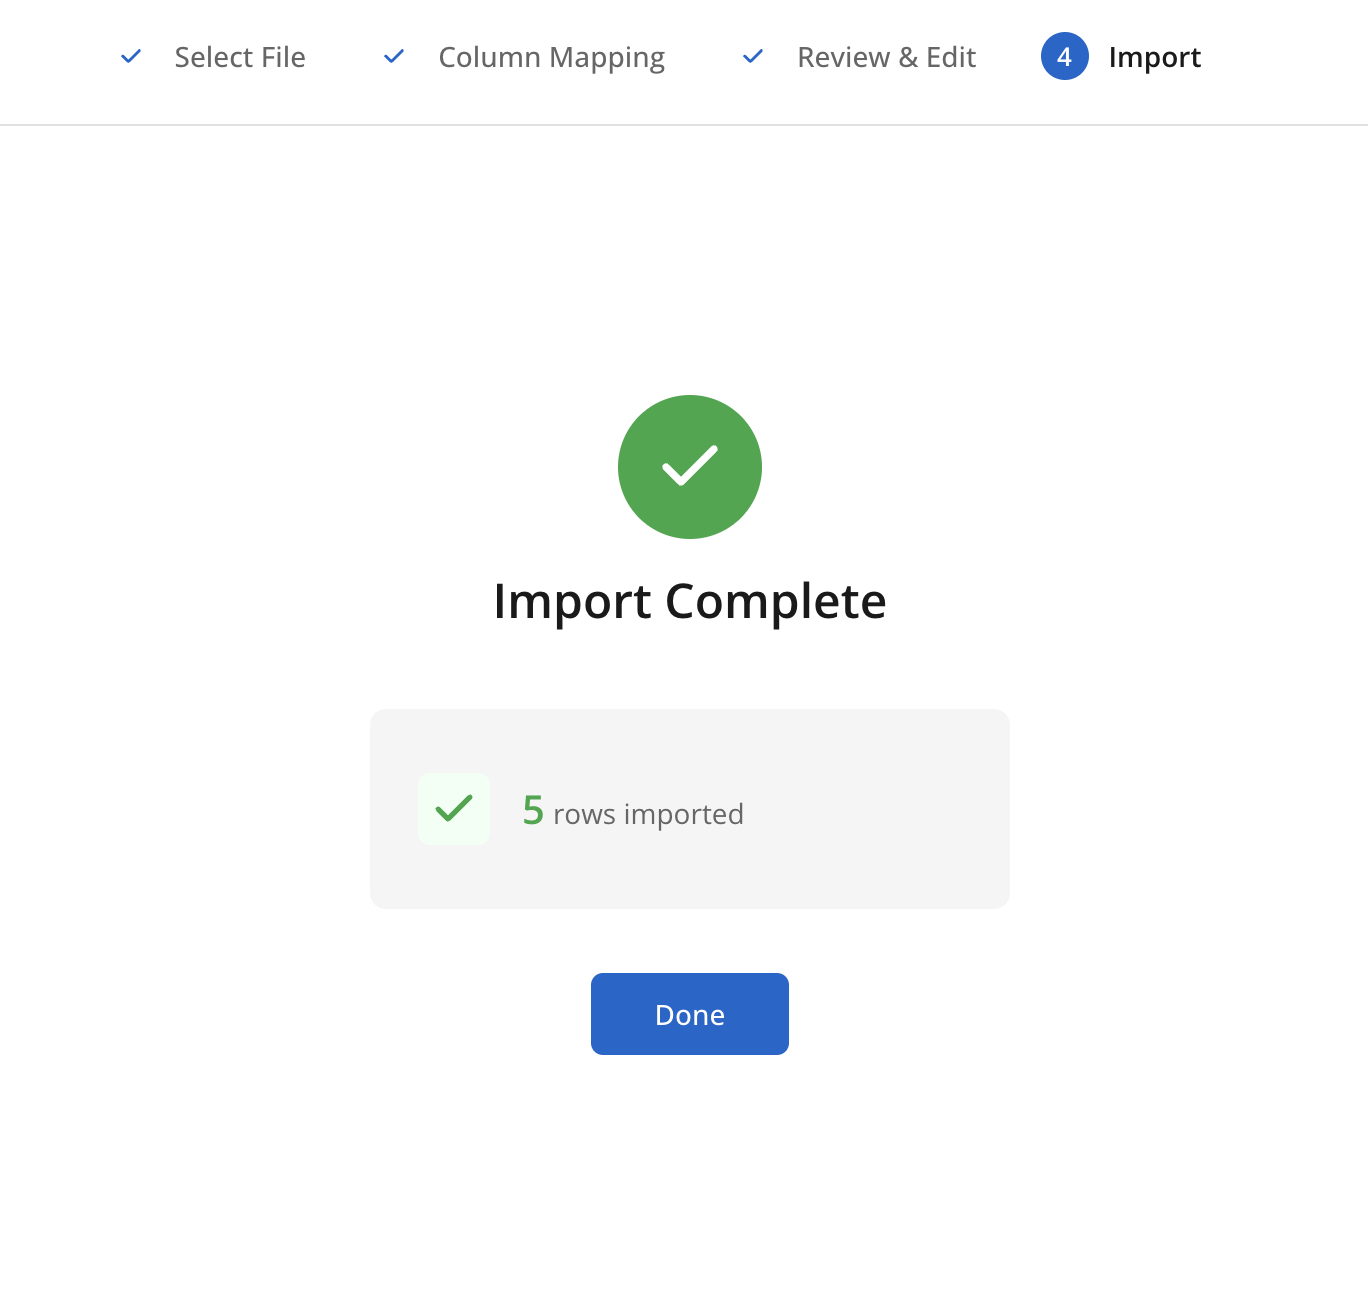
When the data is successfully uploaded, you will see see a message like this:
-
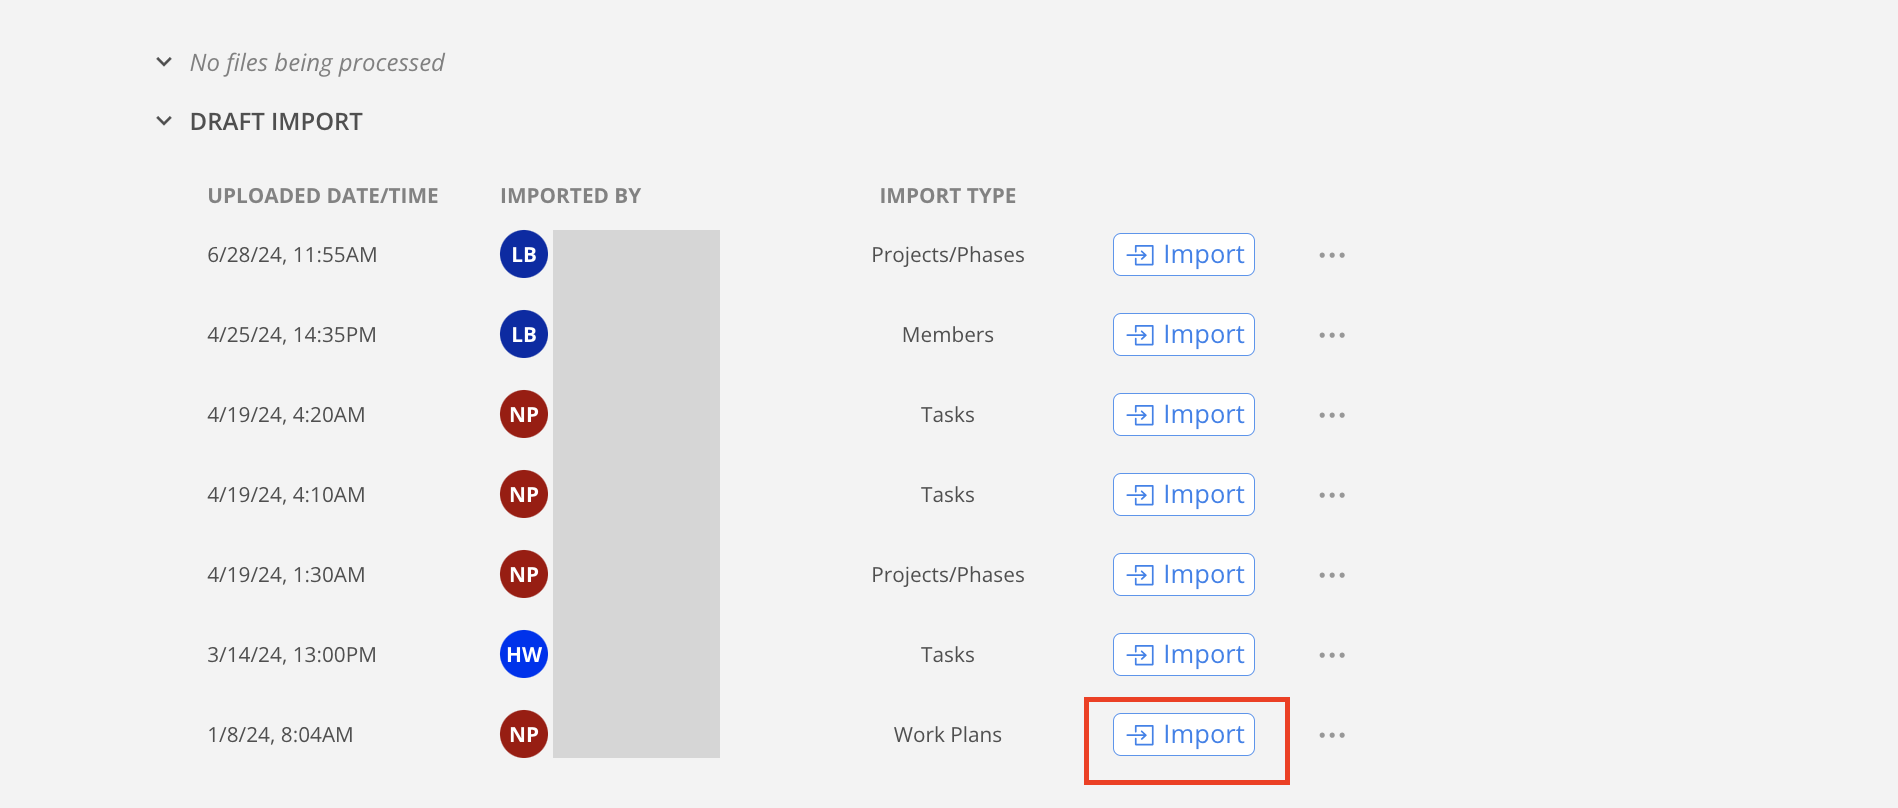
Navigate to Company Settings -> Import to find your uploaded import in the Draft Import section. Click Import button.
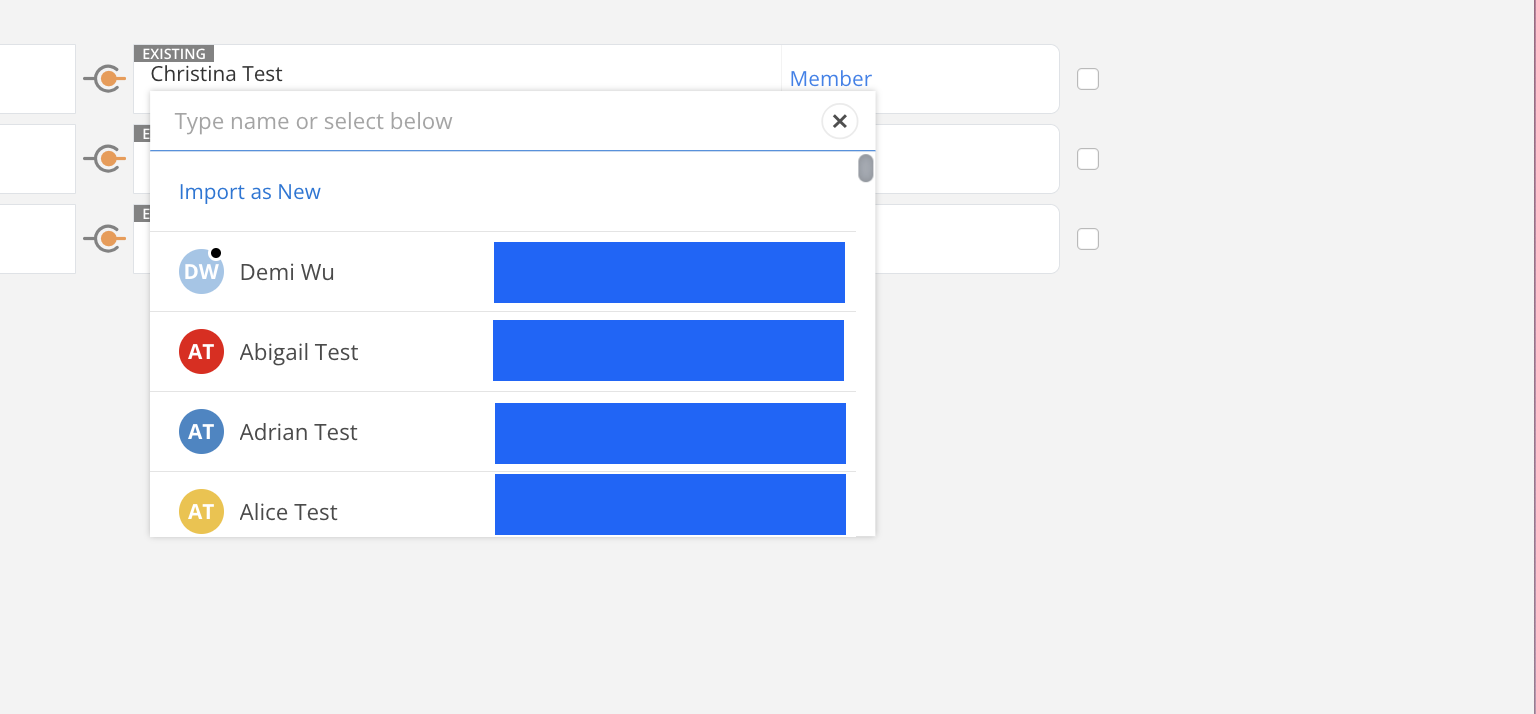
- New employees on the file will show on here. You can either link them with existing or imported as new. Once you are finished reviewing your Employees, click Continue.

- Change to All Members Imported View to see members linked with the existing members in Mosaic.
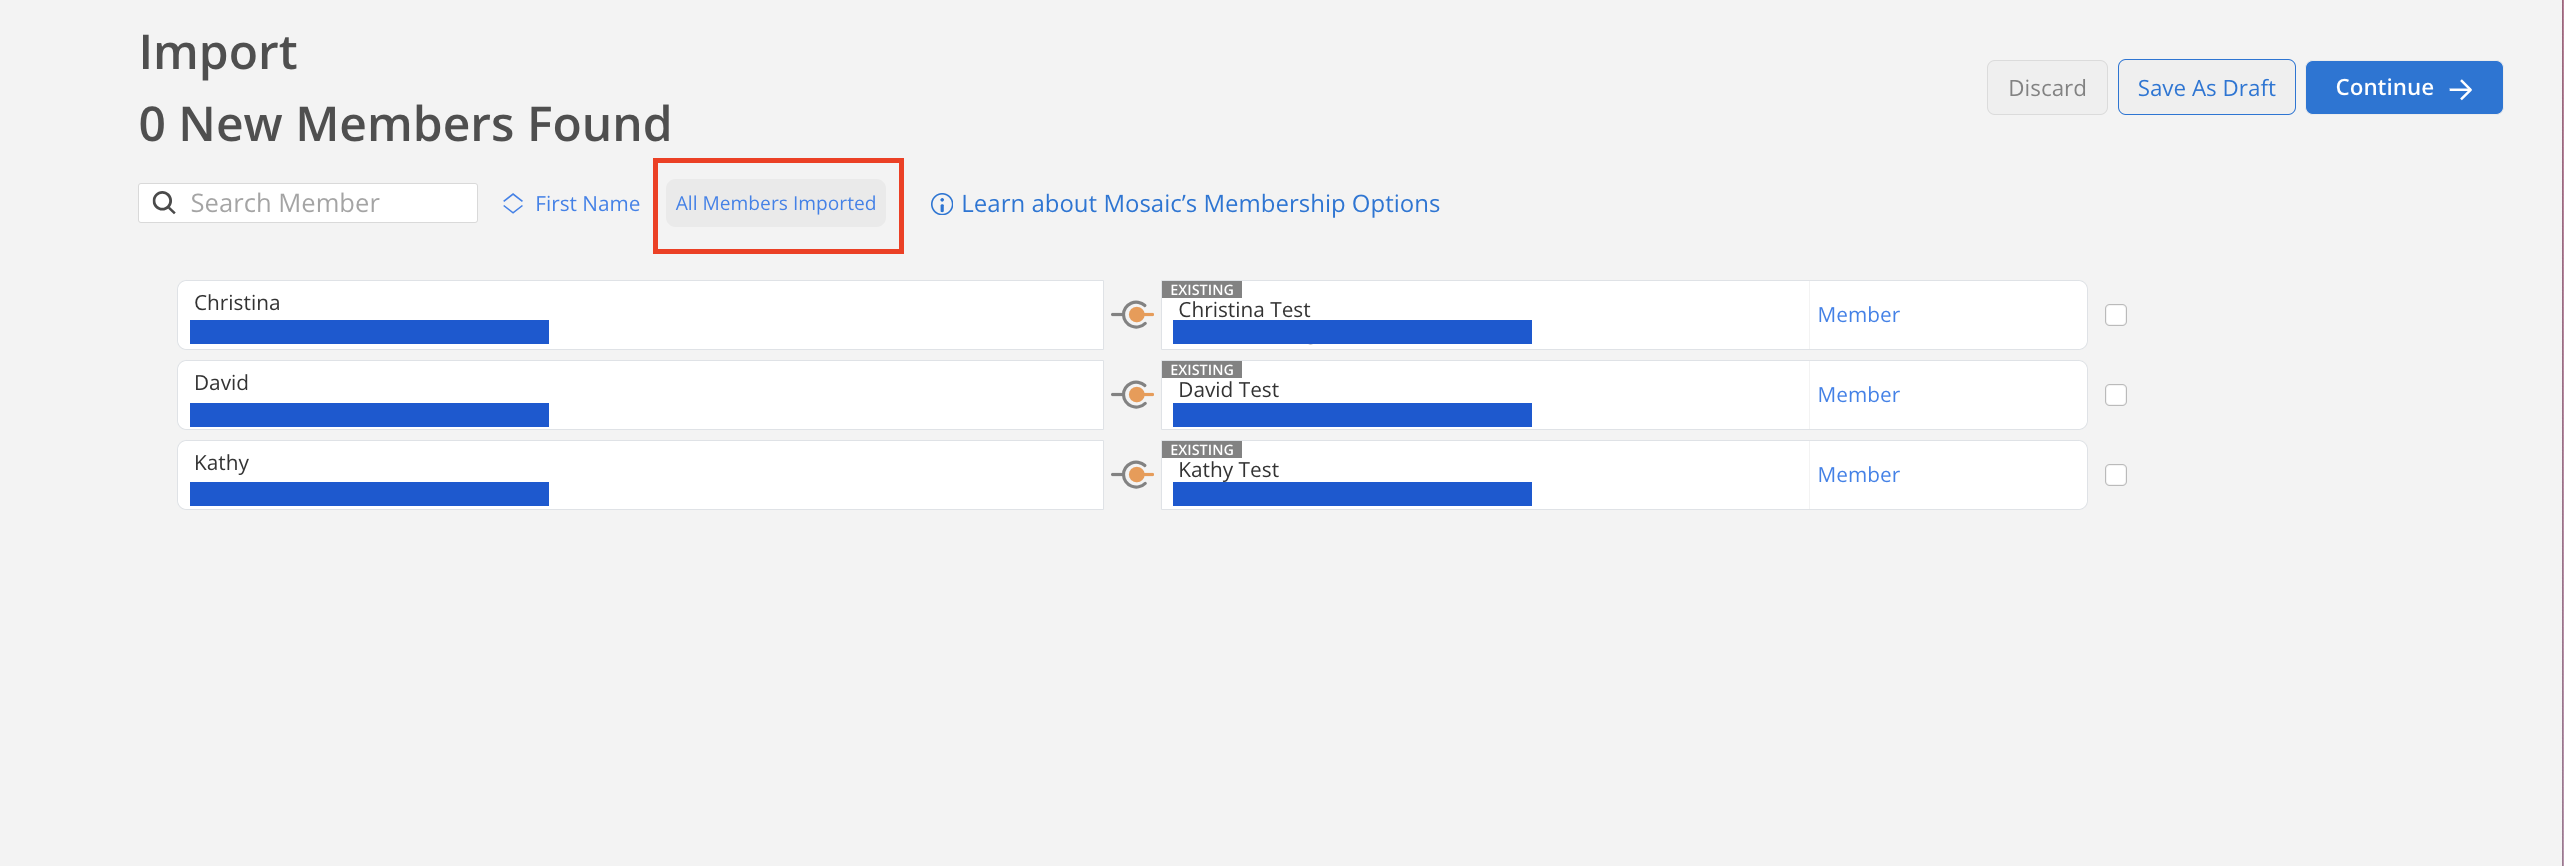
If you want to modify the member linked with existing, click on the member name and click select Alternate. Then select the member that you want to link or Import as New.
Once you are finished reviewing your Employees, click Continue.

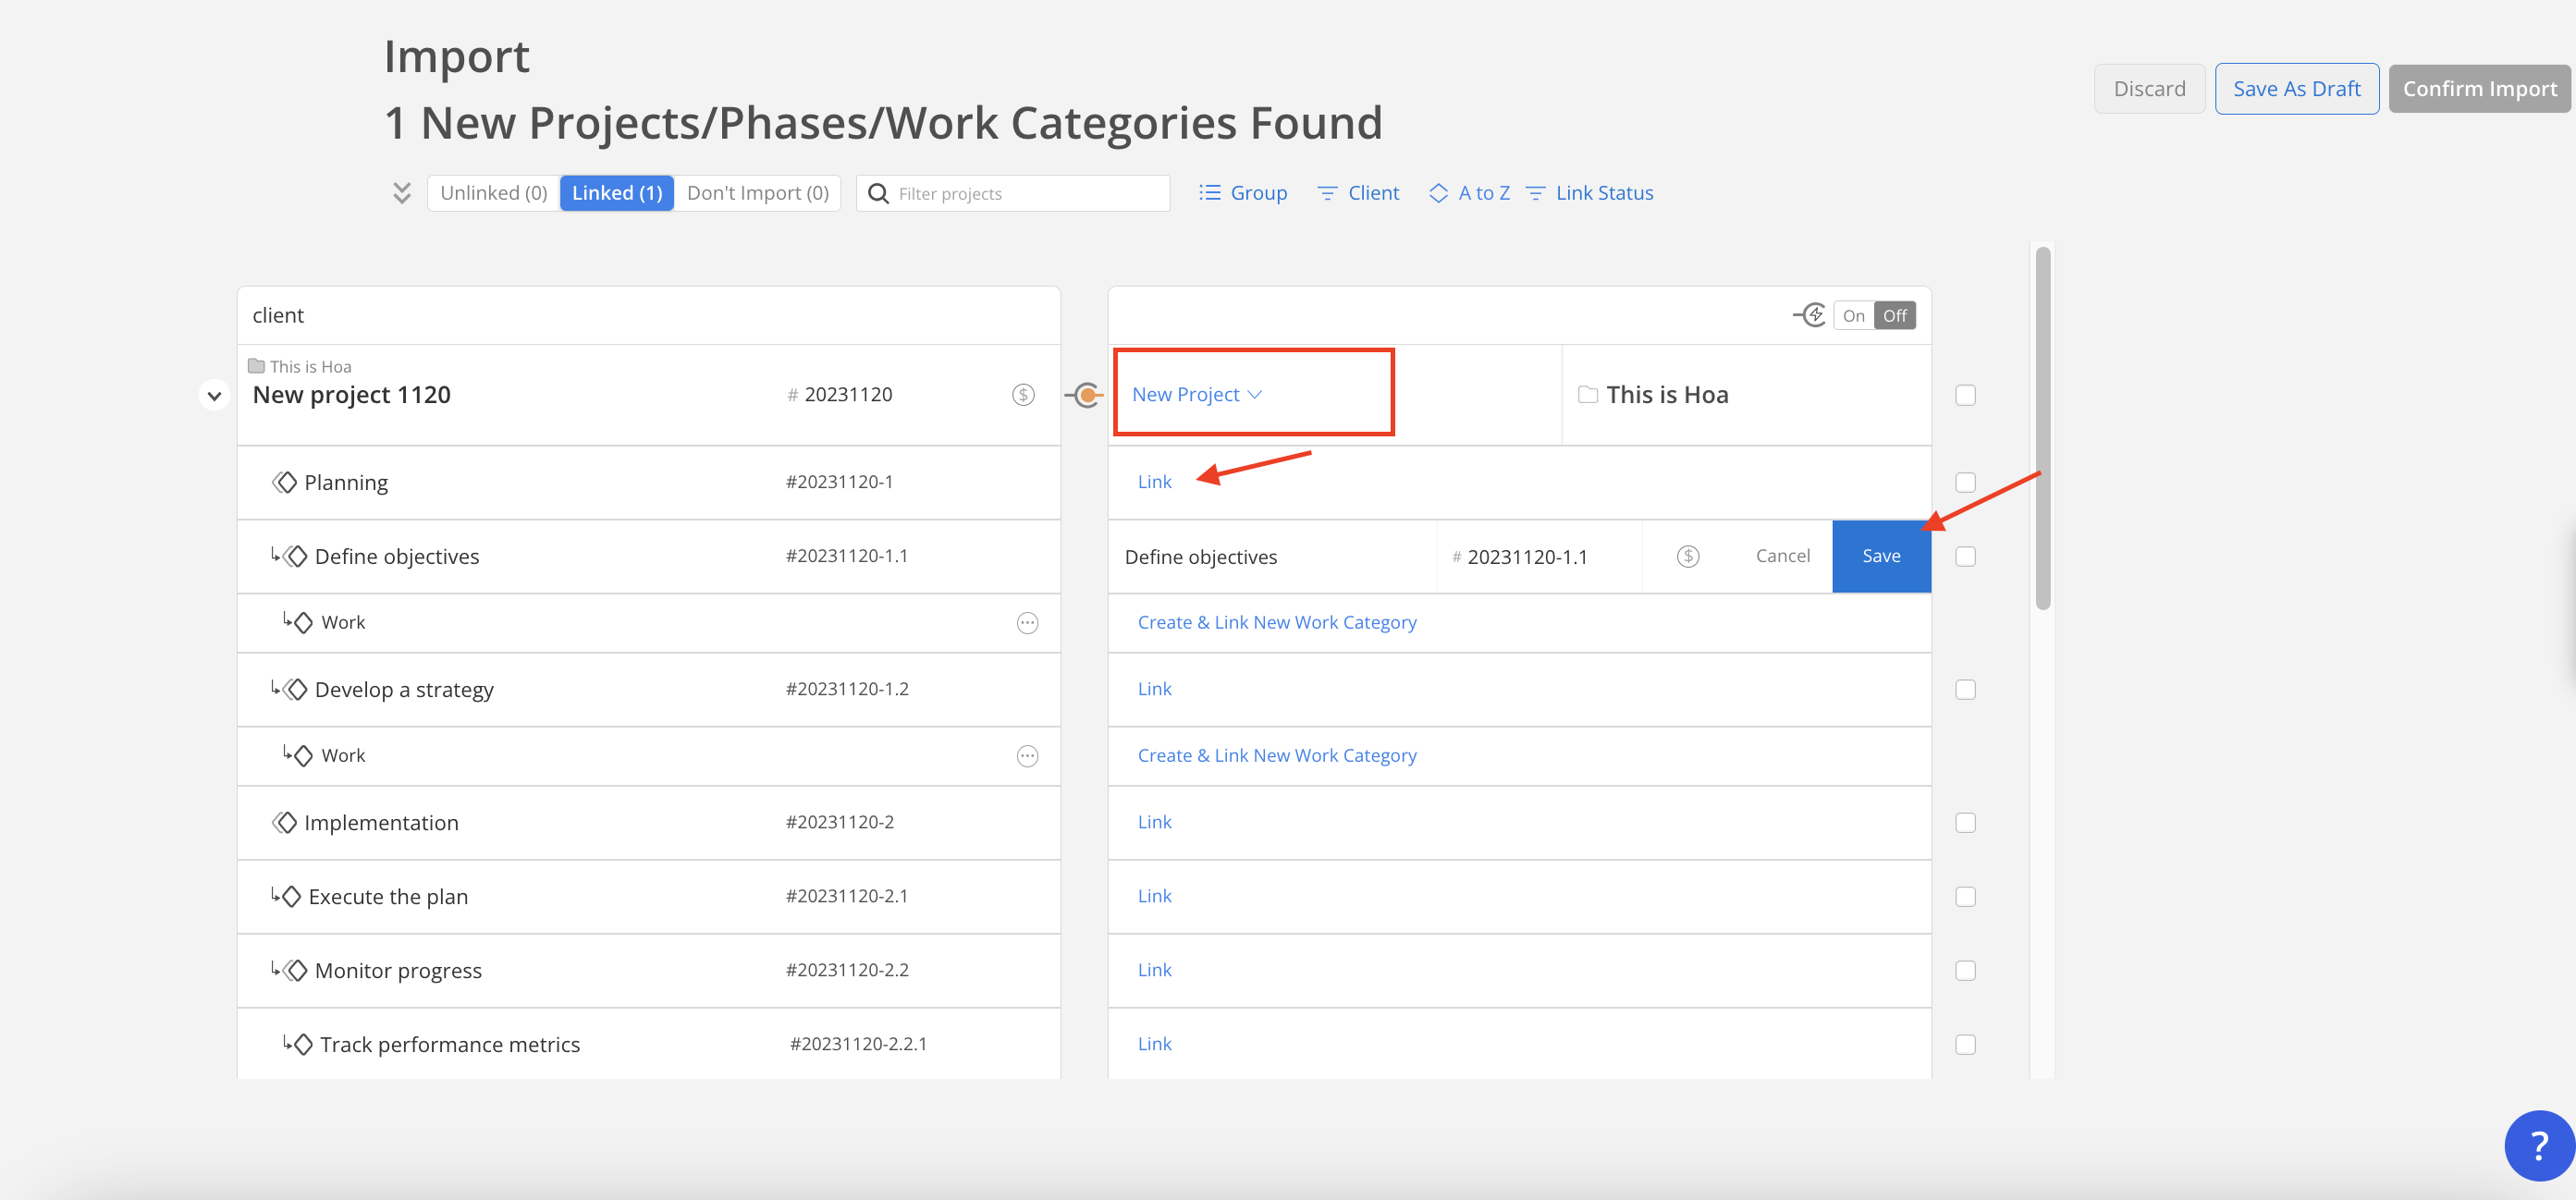
- On this page, Projects, Phases, Subphases and Work Categories can either be linked with existing or imported as new.
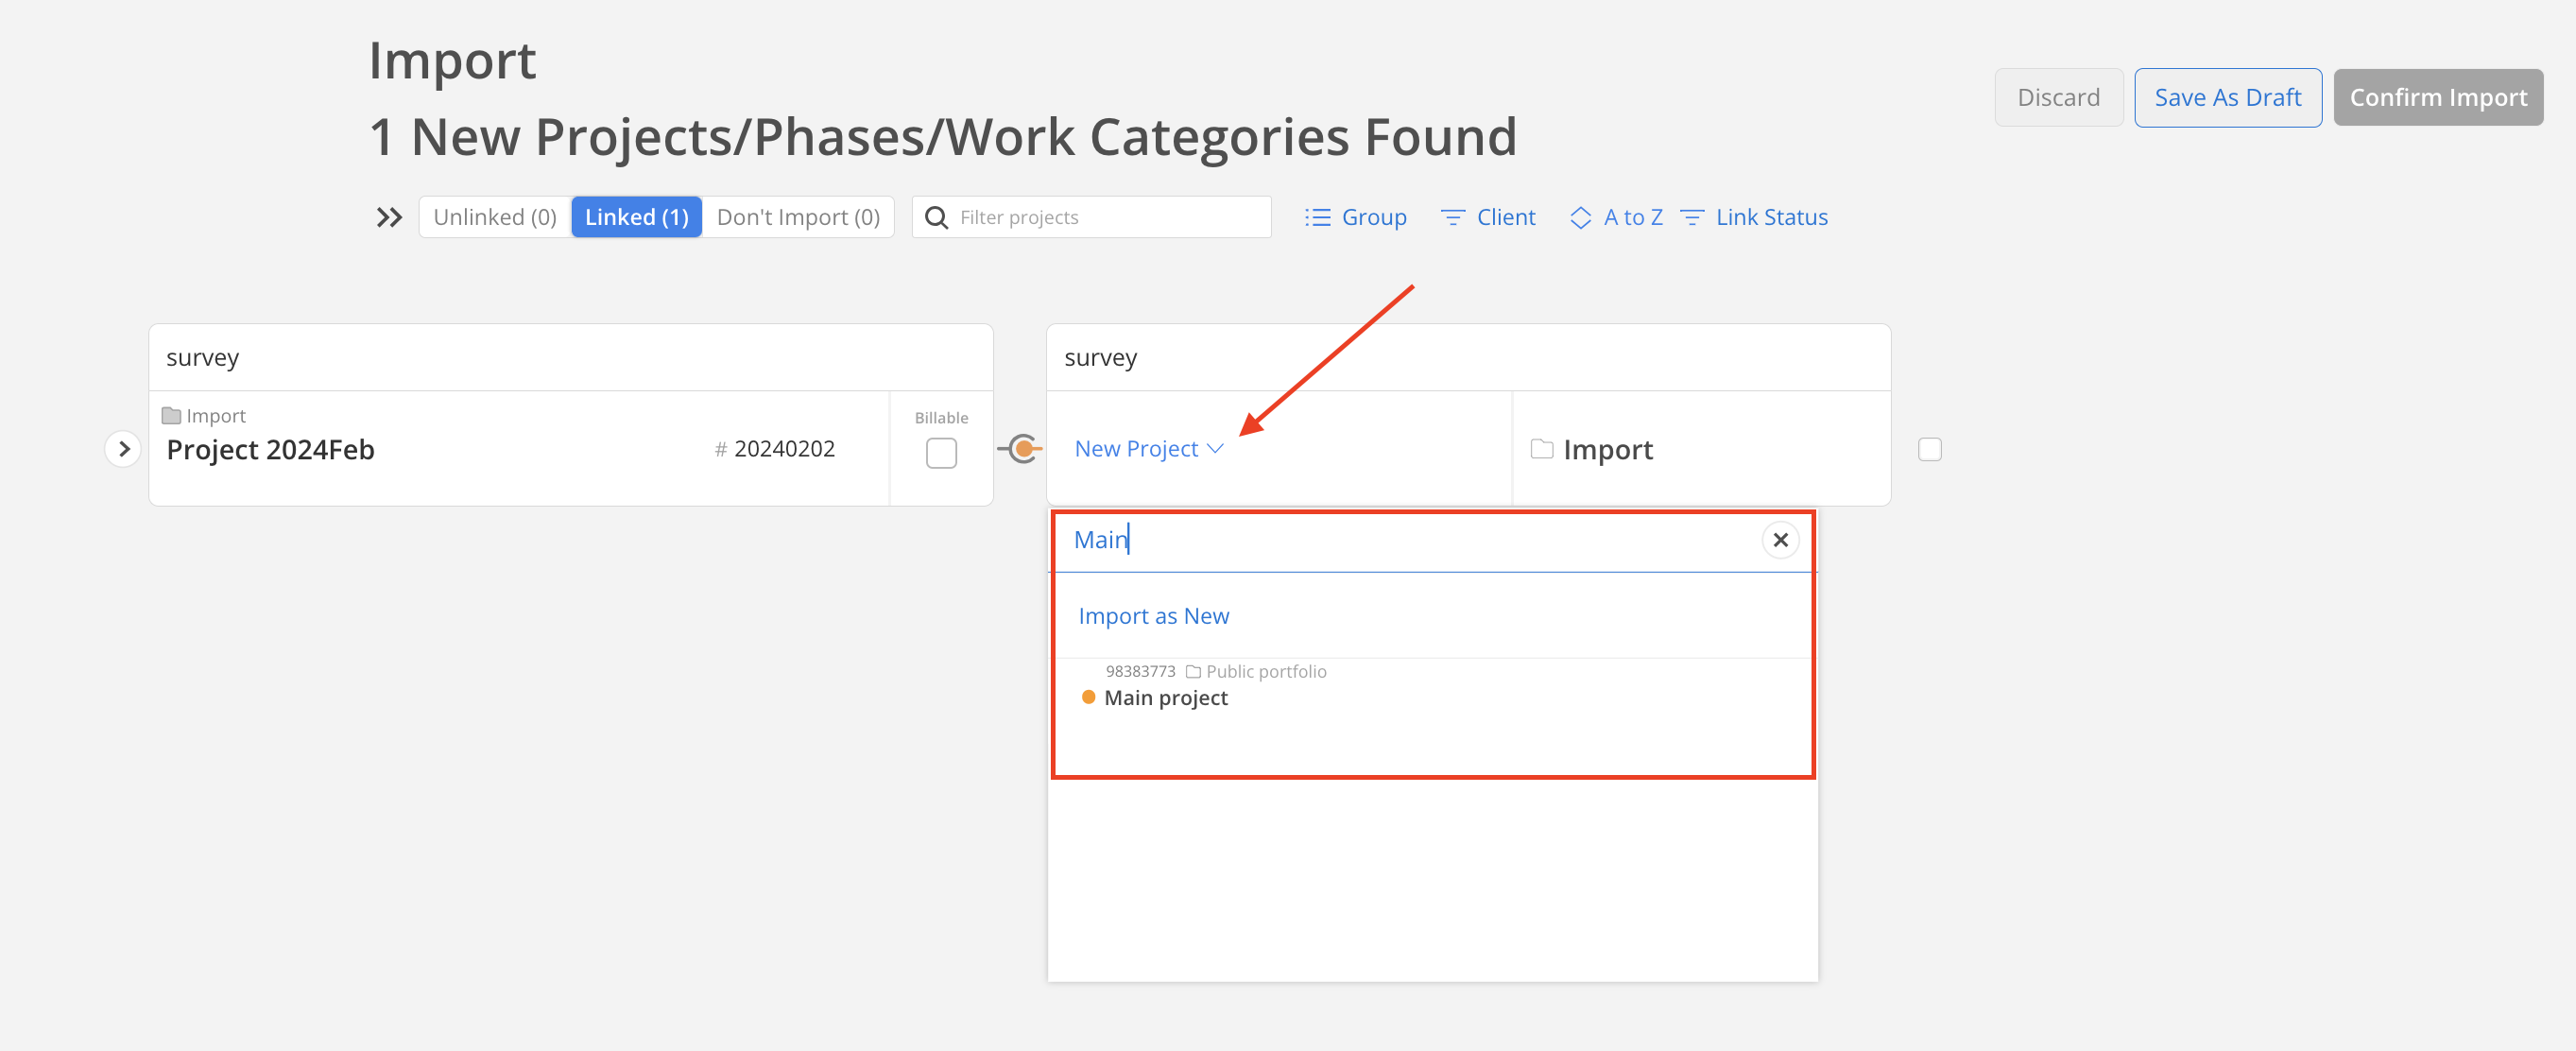
To link this project with existing Mosaic project, click the New Project dropdown and select the project you want to link with.
- To link a project with existing, click the plus icon on the right side and select an existing project to link. Click Save.

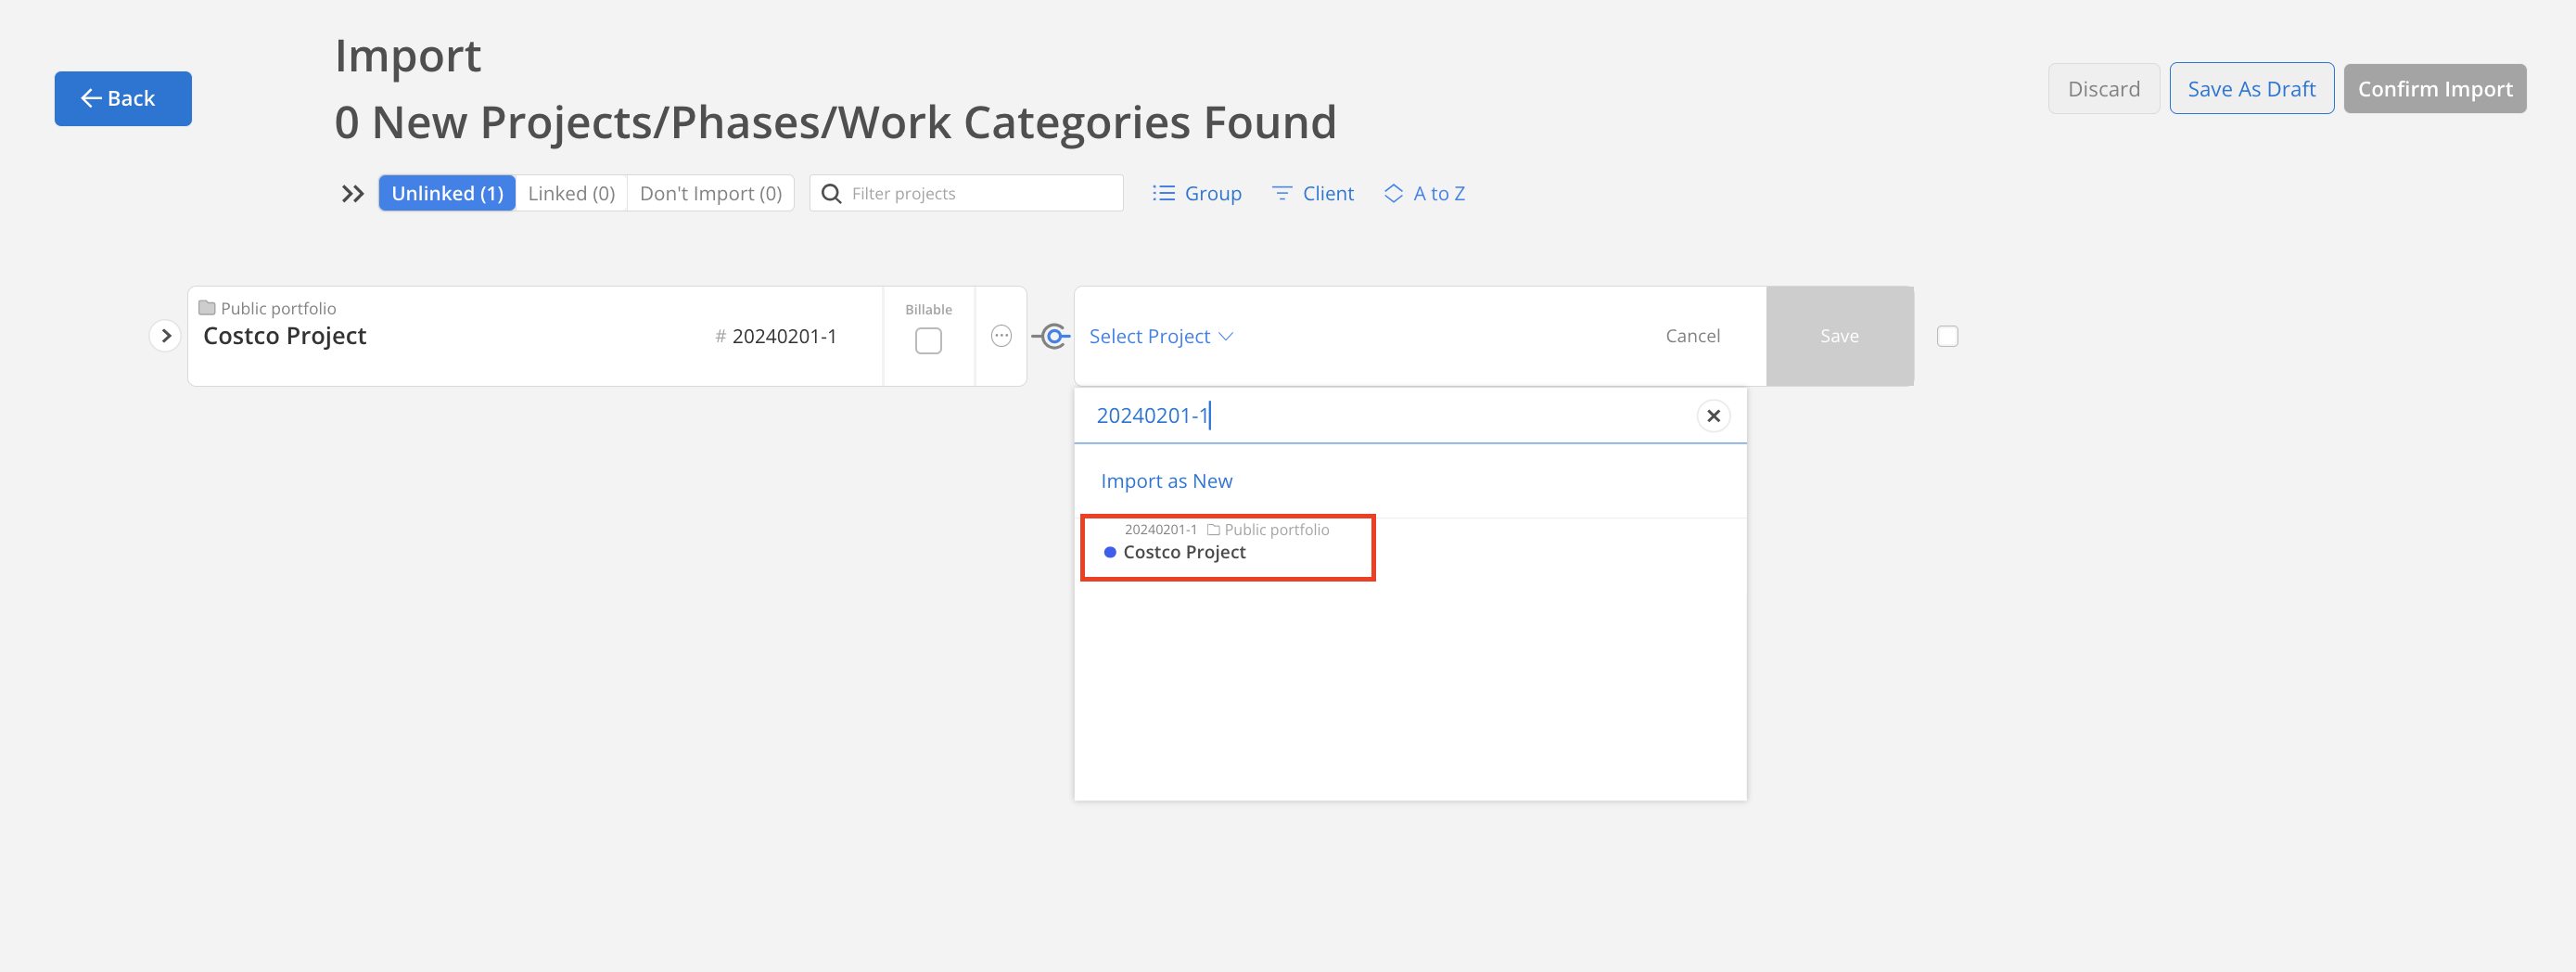

- To link a phase with existing, click three dot on the mosaic phase, click link with existing phase.
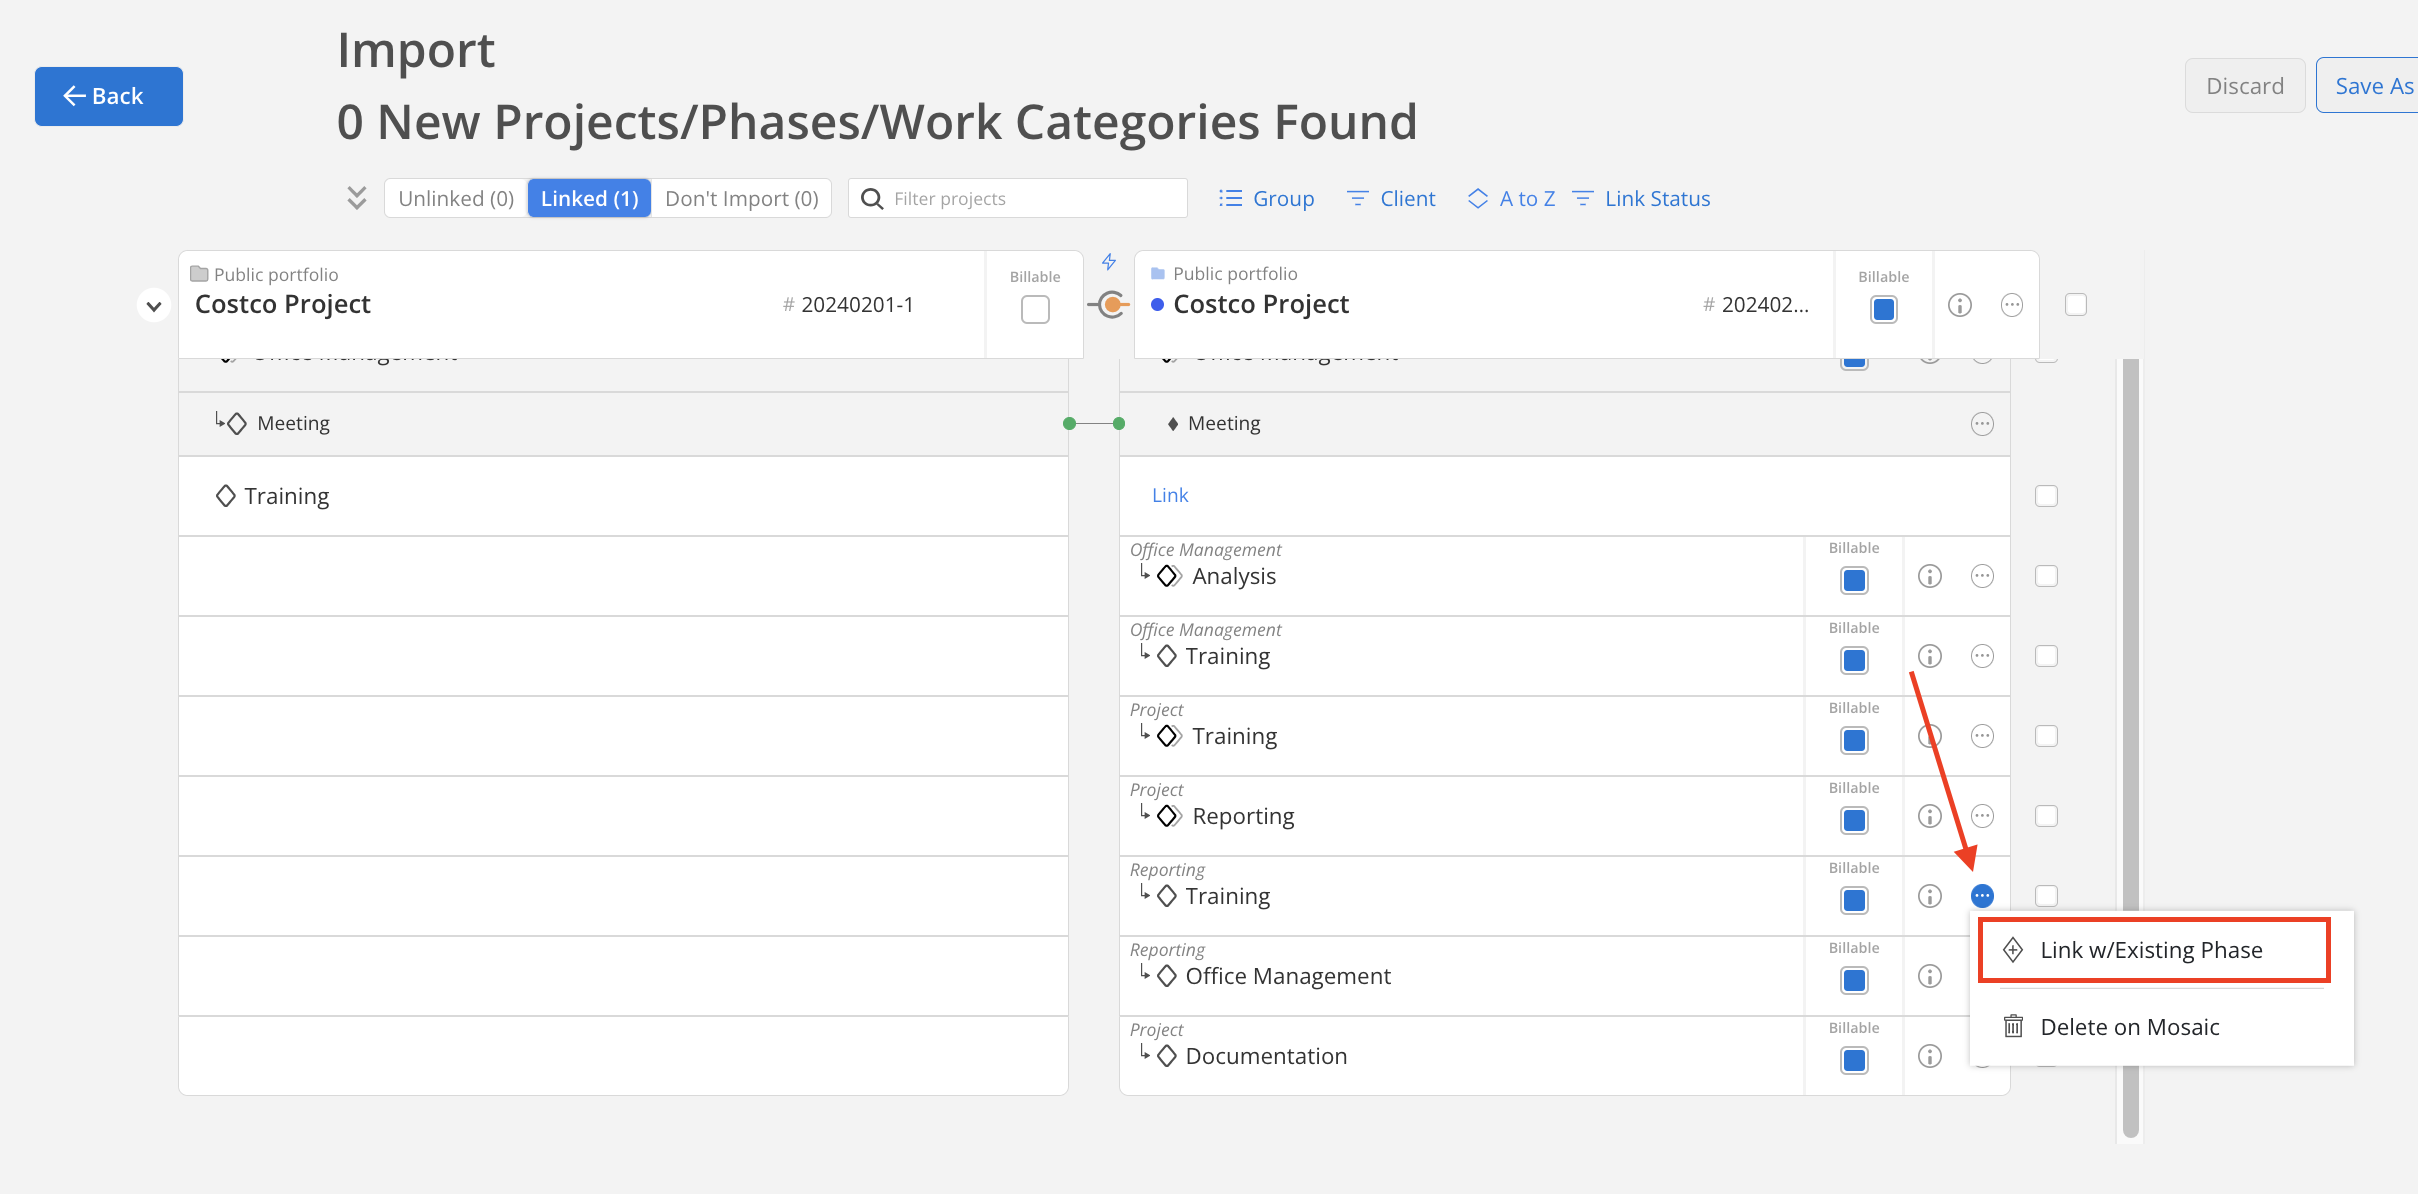
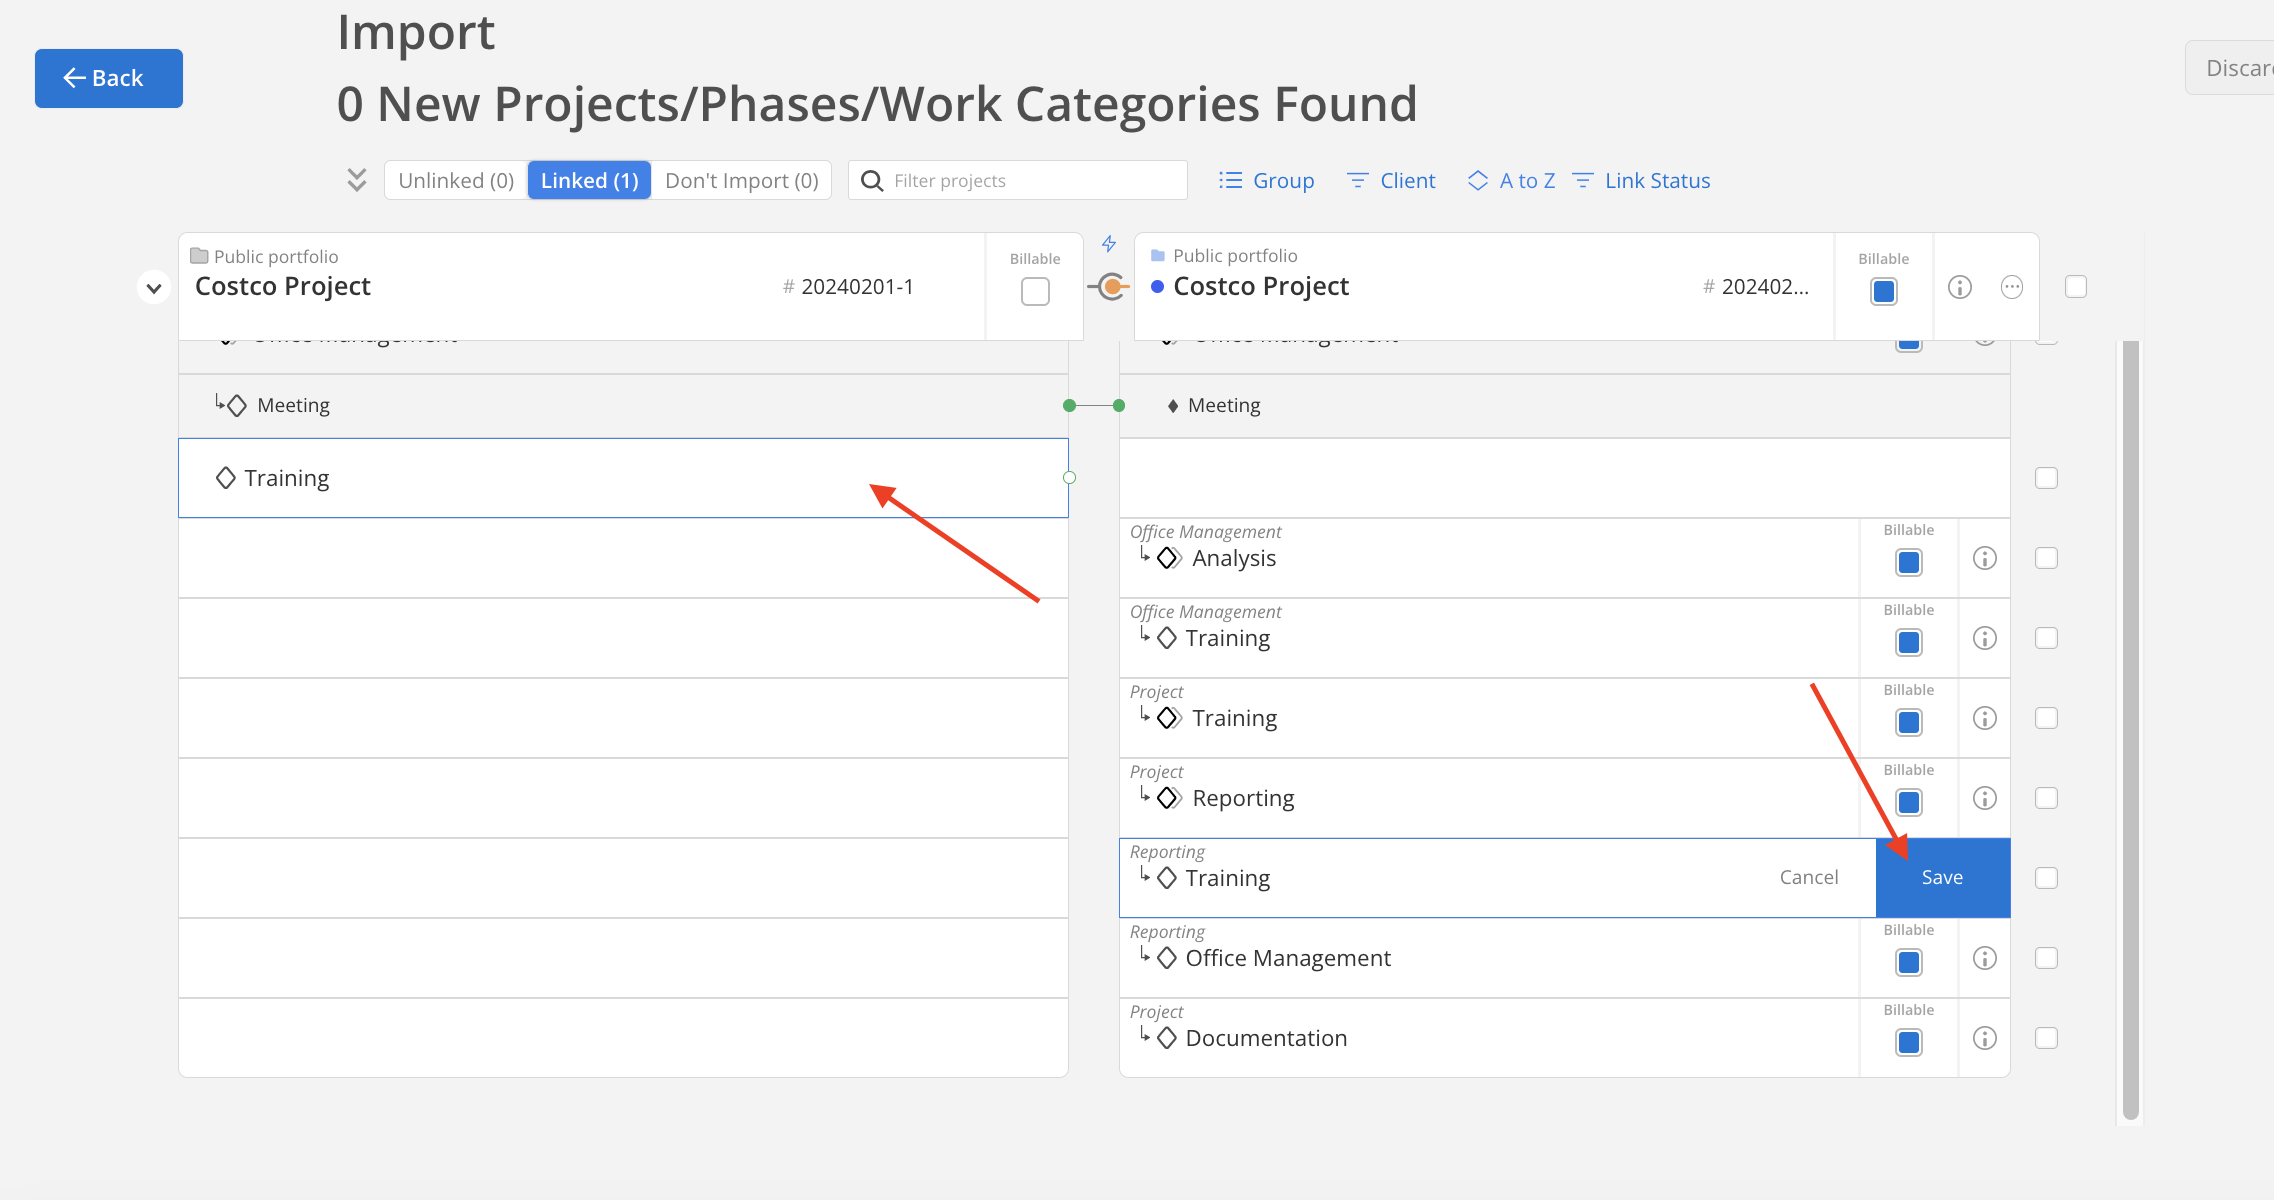
Select the phase on the left side to link, click save.
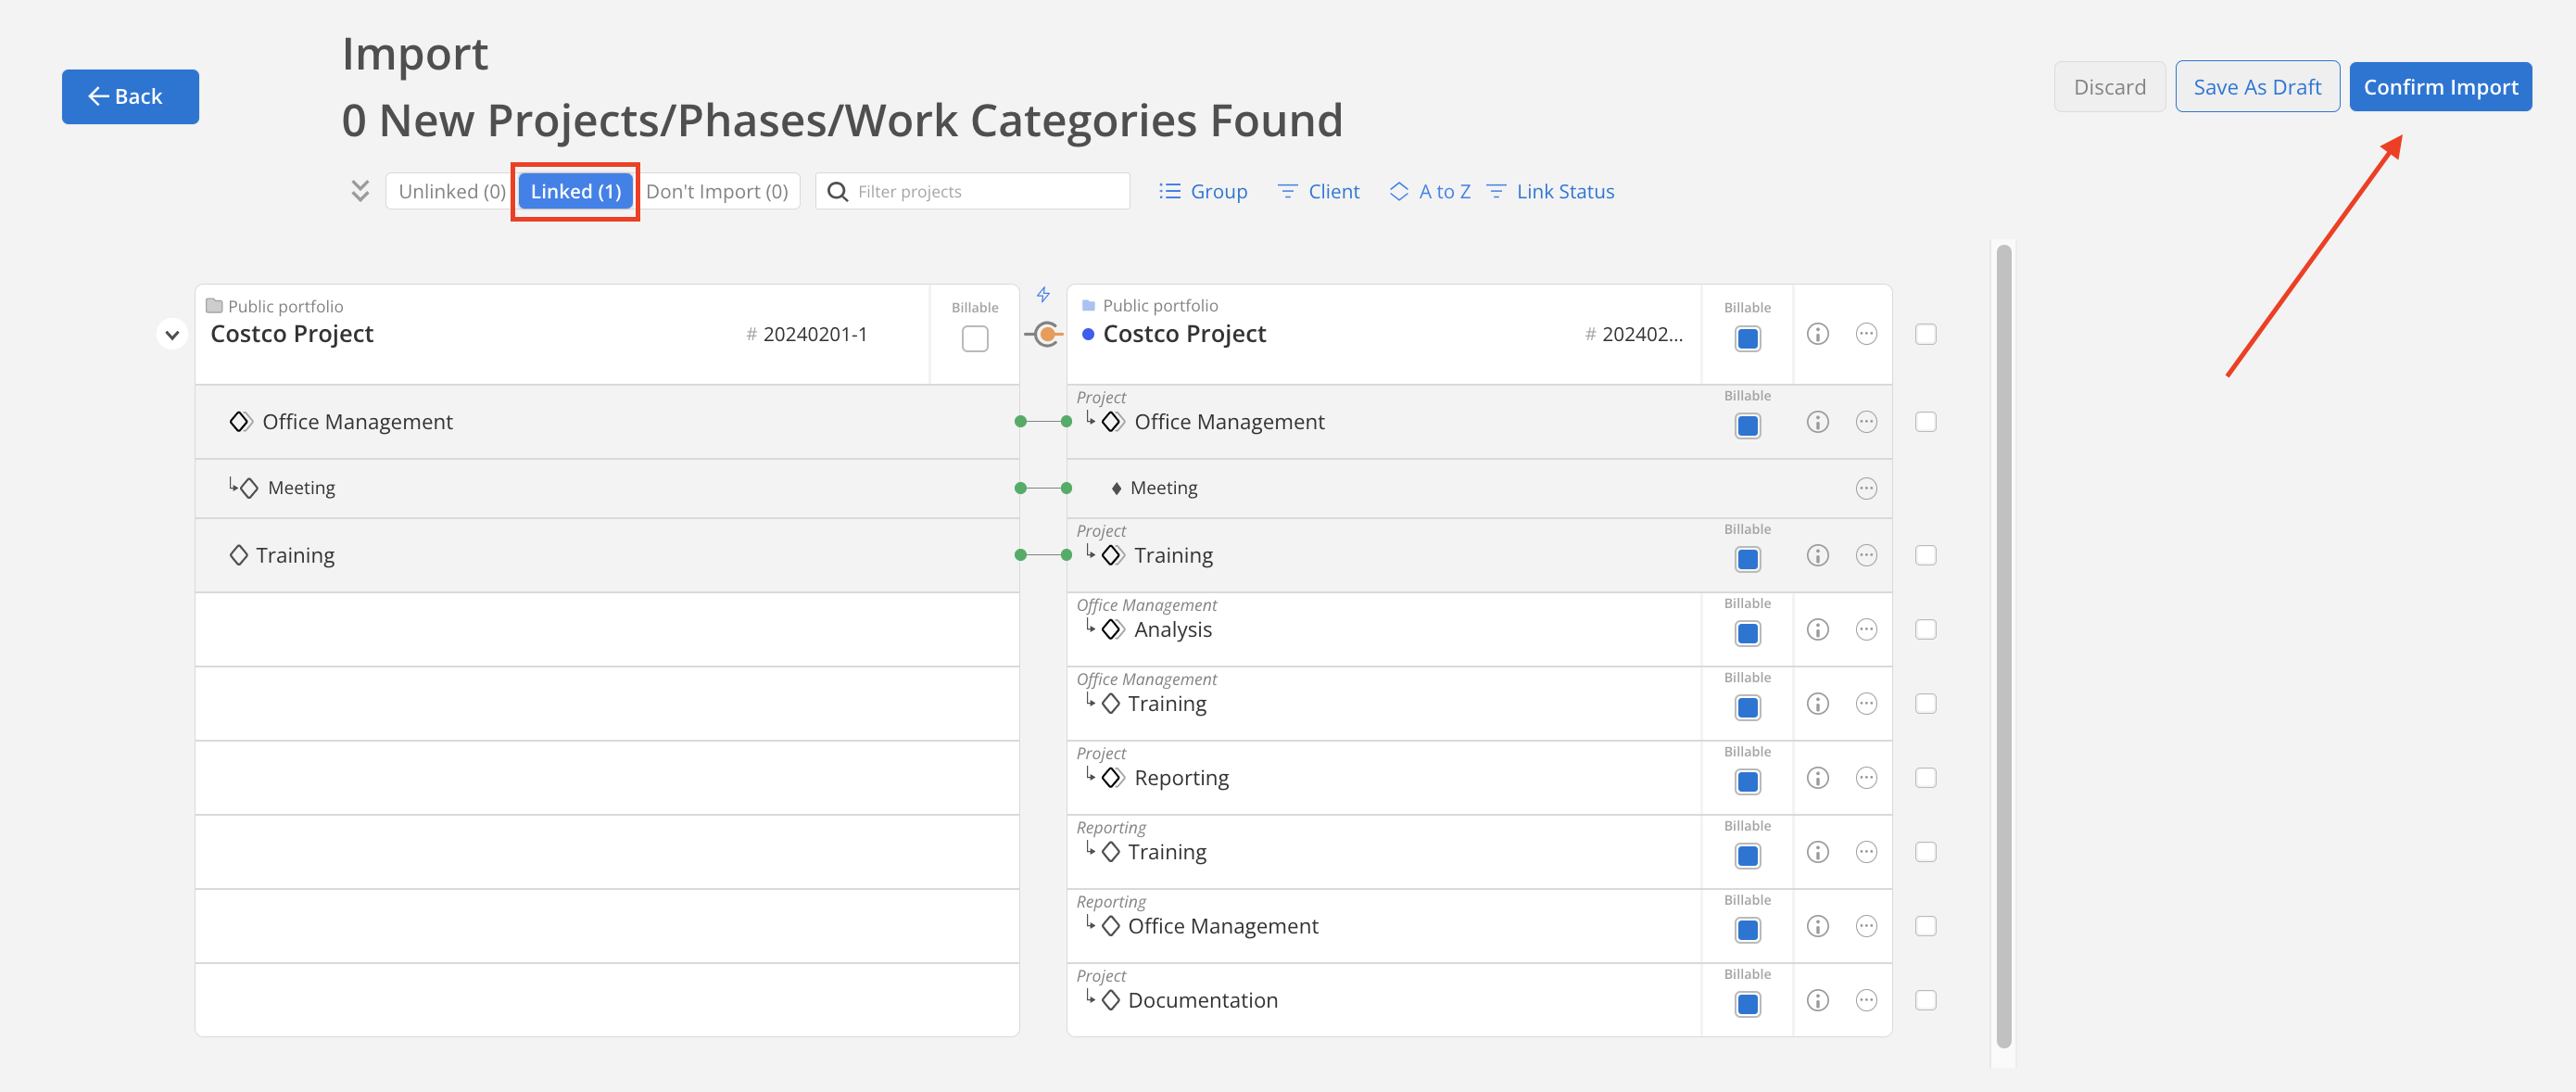
- All linked projects will show in linked section. Once you finish reviewing, click Confirm Import on the top.
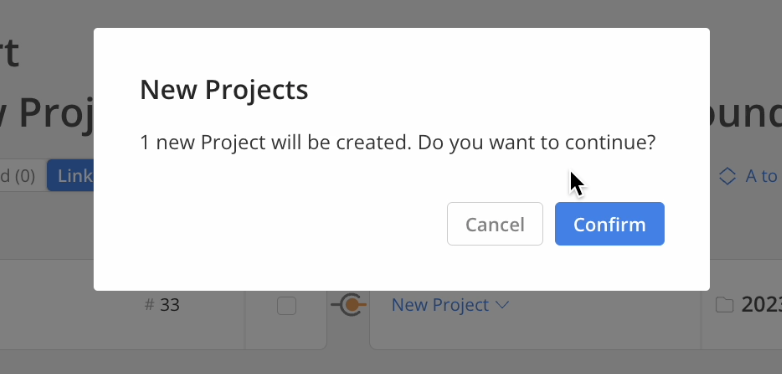
New Project ConfirmationA confirmation modal will appear, displaying the total number of newly imported projects. If the number seems incorrect, click cancel and verify that all projects are mapped properly.
- The import will show in the Processing section. Wait for the import to complete.

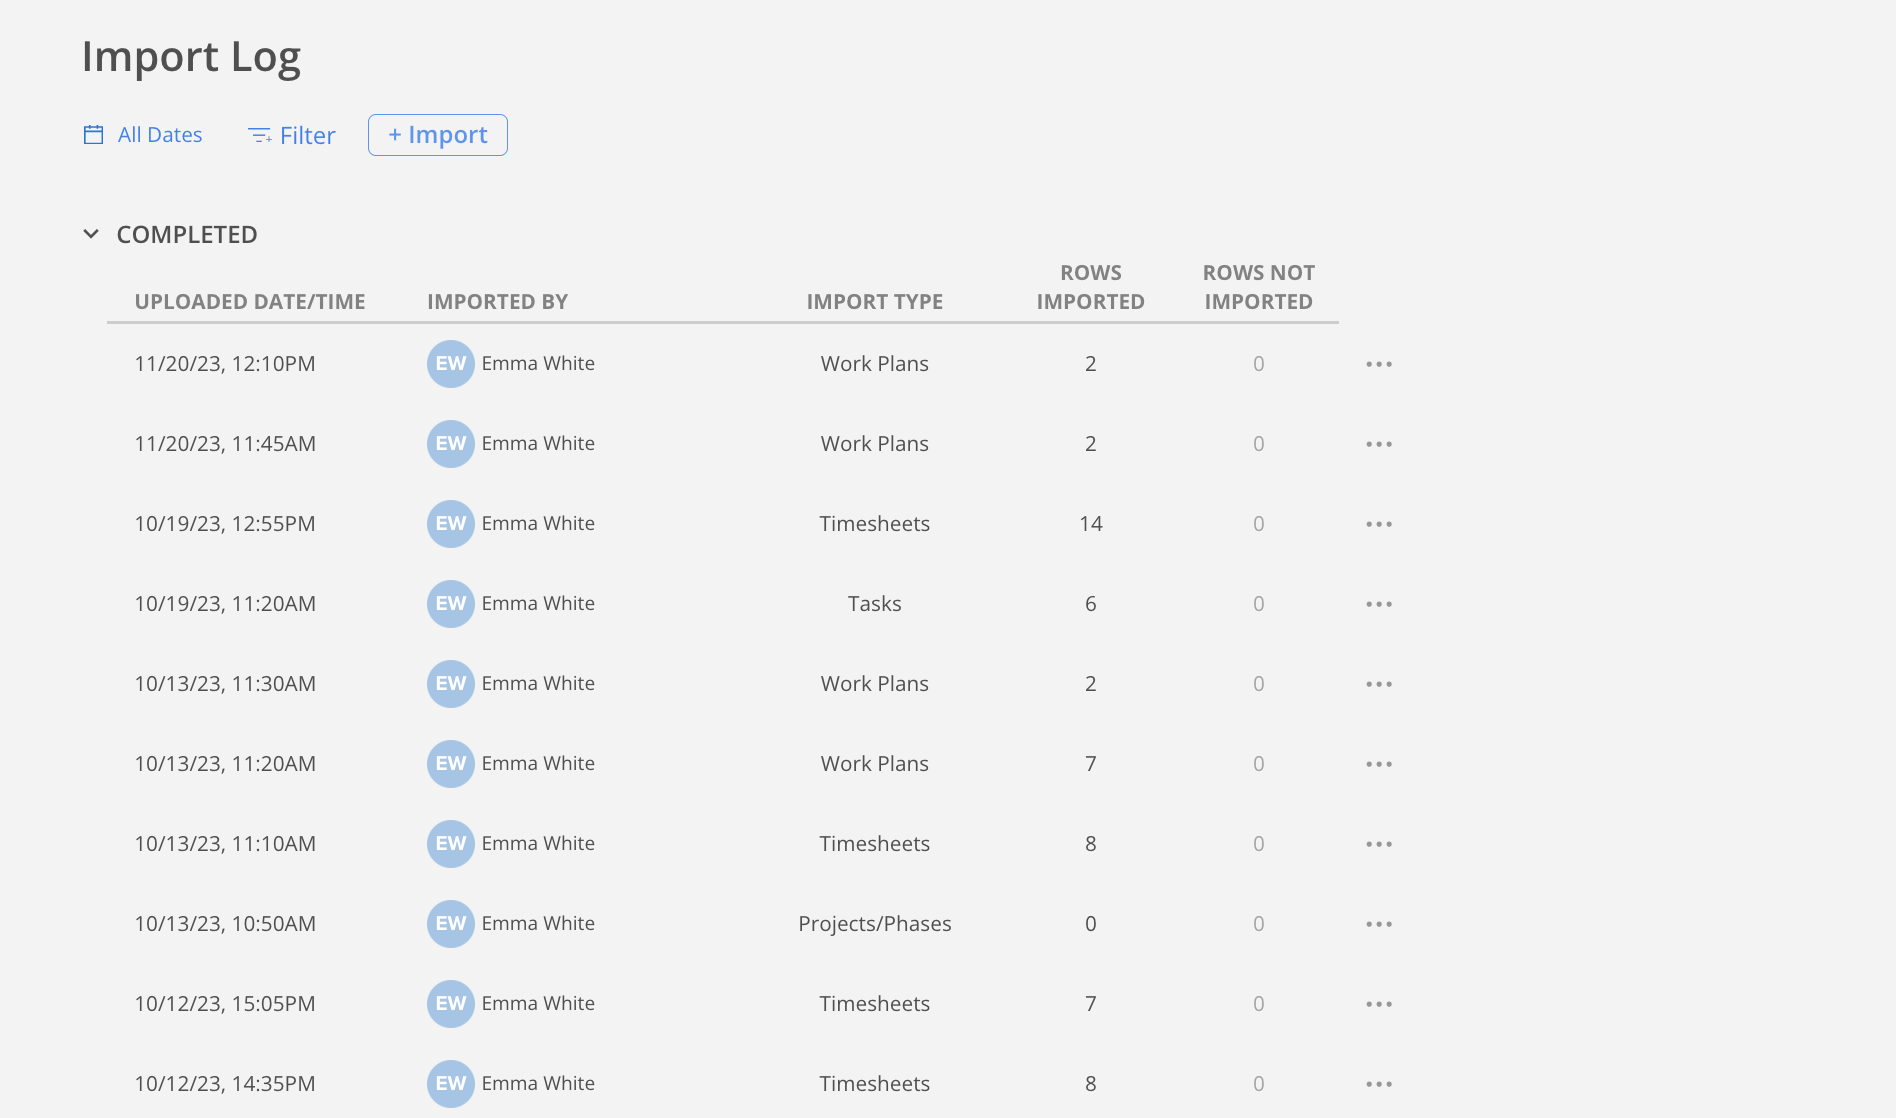
- Click done and that's it! Once the file processing is completed, it will show in the Completed section. Please allow up to 24 hours for all Work Plans to finish populating on Mosaic.
TO Work Plans
The process is the same as normal work plans, but since Time Off project is a default project that is created by Mosaic, so you won't be able to find it in your projects or portfolios.
Here is the information you need:
- Portfolio Name: default name is your company name
- Project Name: default name is Time Off
- Project ID: no project ID on Time Off project by default, but you can manually set an ID for it
- Project Phase: Time Off project has one default phase, but if your Time Off project have multiple phases, make sure to specify which phase the work plan should be in.
Where to find these information?
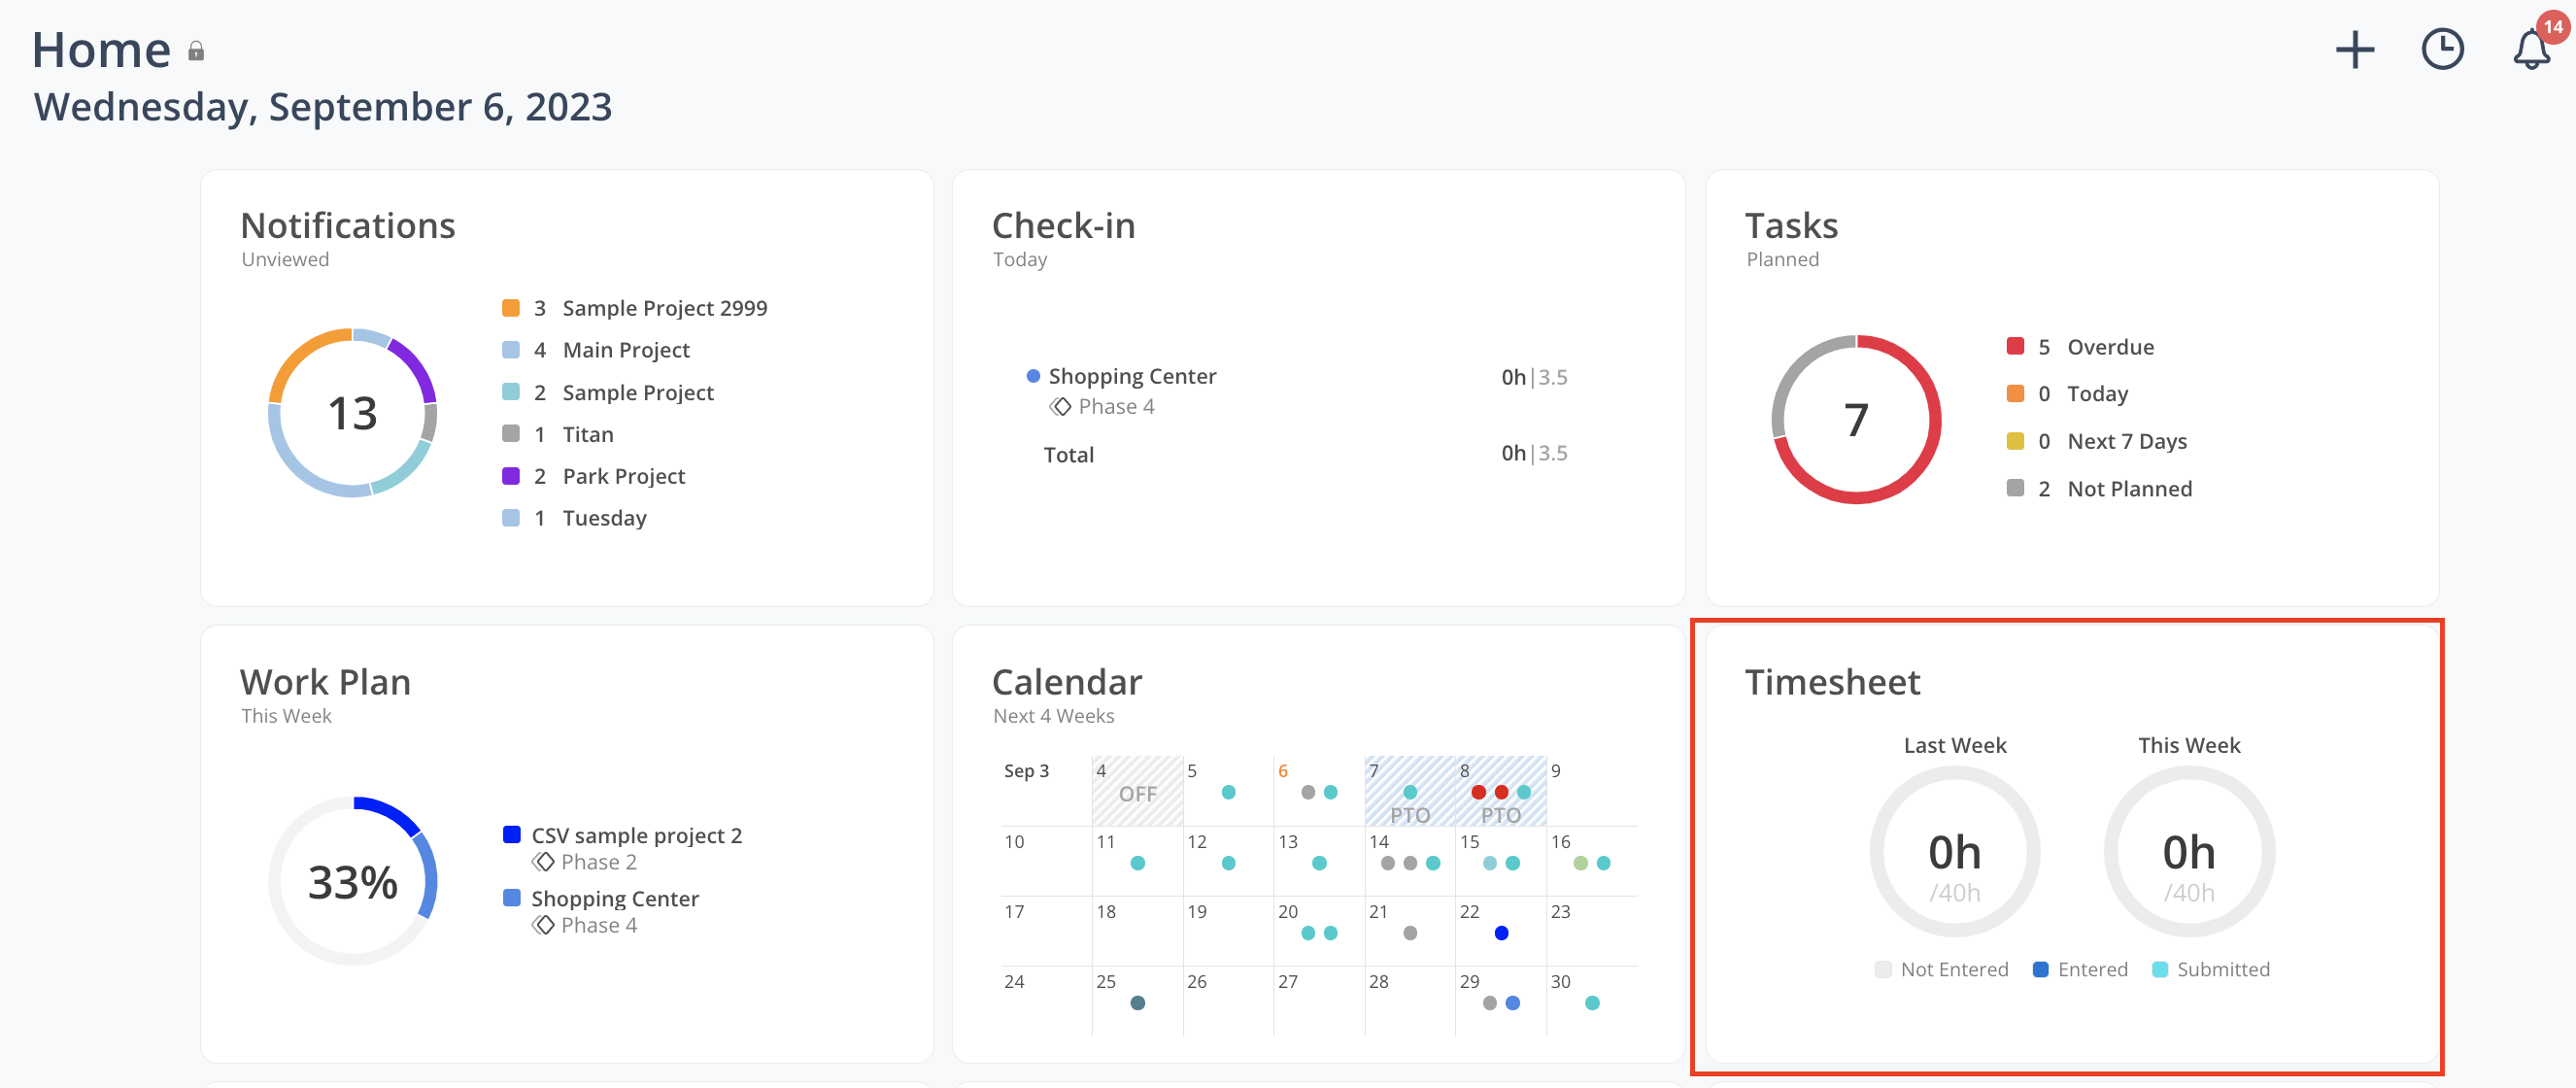
- Go to Home > timesheet
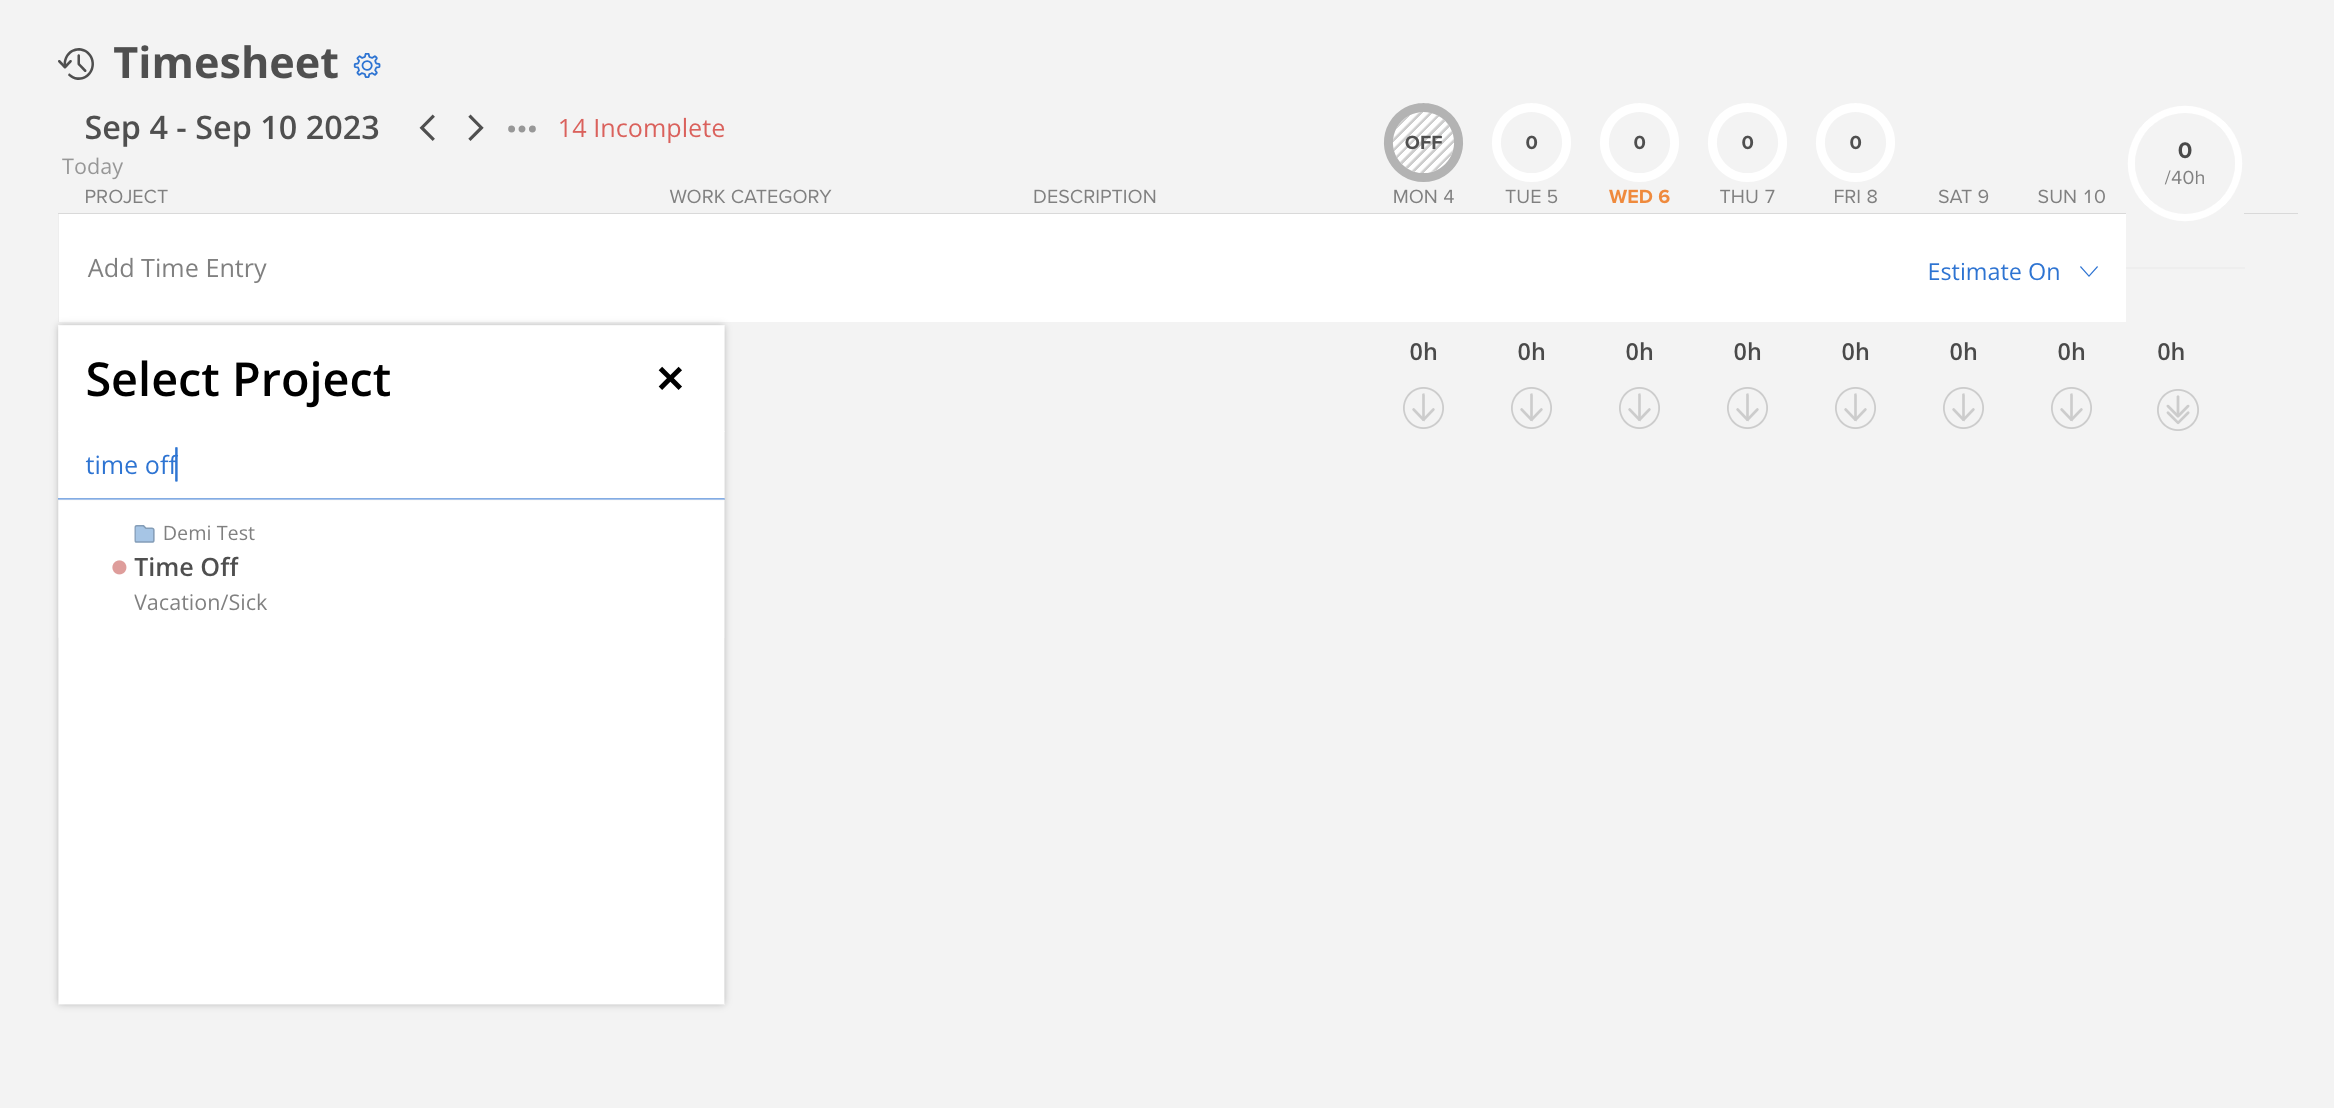
- Click "Add Time Entry"

- Time Off project usually is the first one to show on the project list, but you can also type in the name to search.
- Project Name: Time Off.
- Portfoilo Name: The folder on the top of the project, usually is your organization name.
- Project ID: The number on top of the project (if any)
- Phase Name: Under the project you can see 4 phases, these will be the phase names to put on the work plans.
"Vacation/Sick" is the default description of the project, this is not necessary when importing work plans.
What if I didn't see a project ID or I want to change the project name?
If you didn't see a project ID on top of your Time Off project, this means it doesn't have one yet. But you can add a project ID to this project.
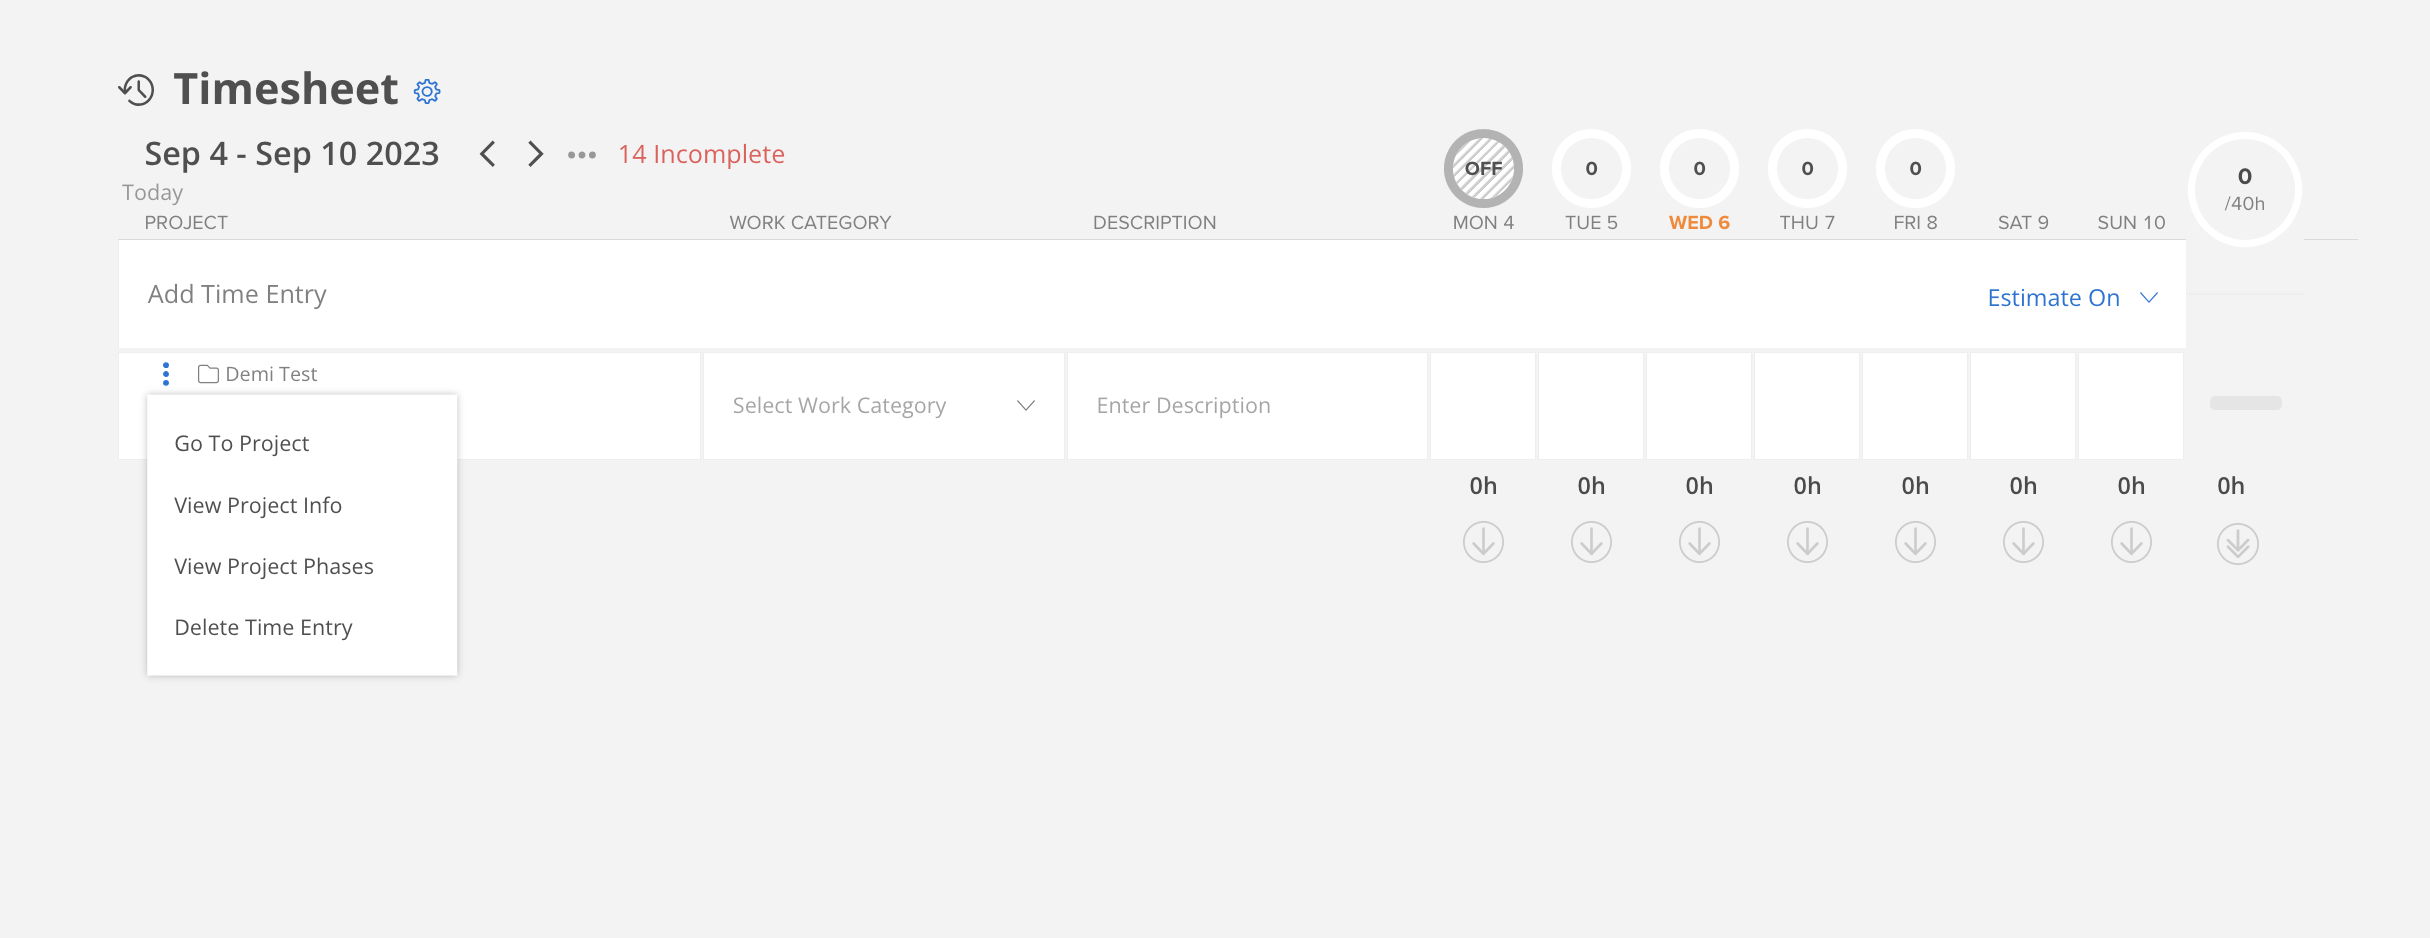
- Click on the project and select a phase (if any). This will create a time entry like below.
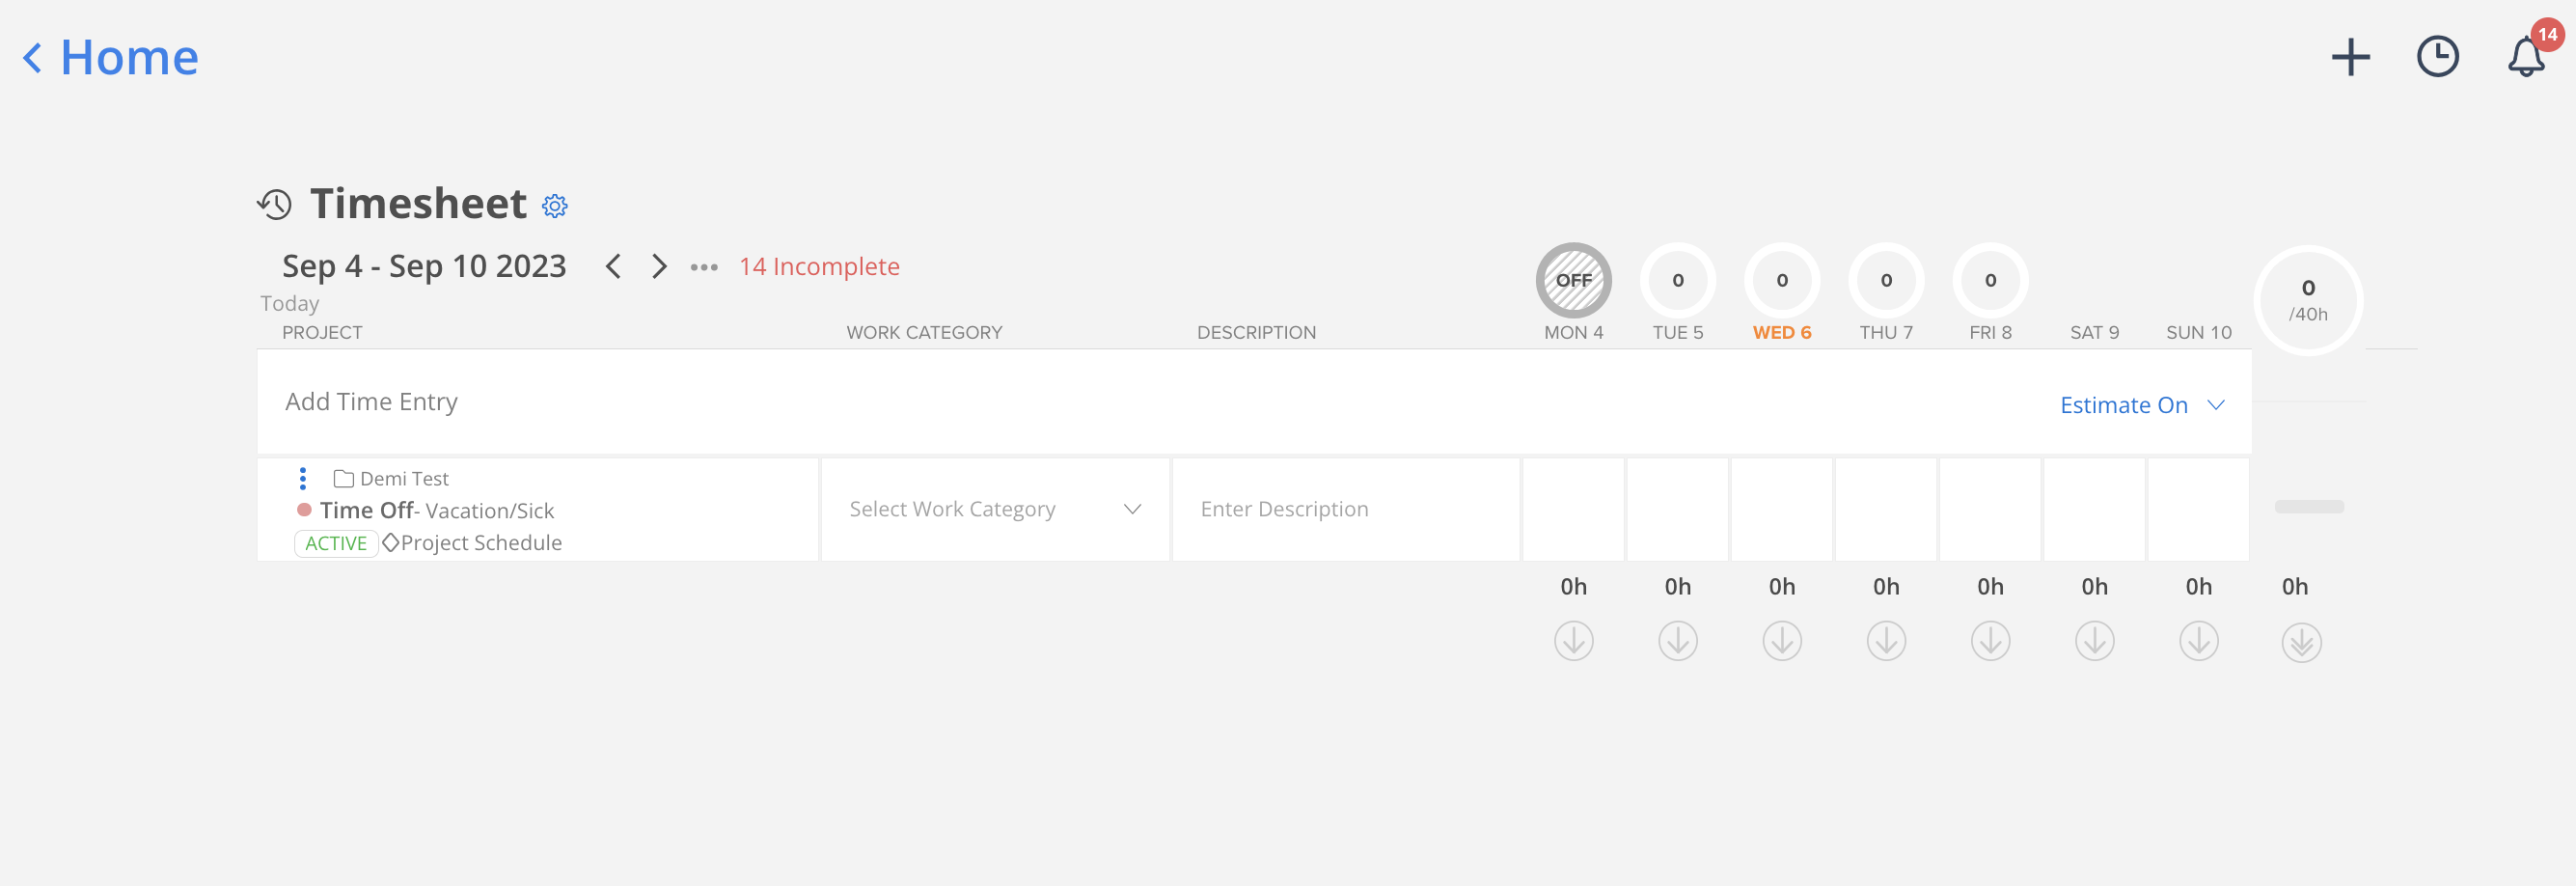
- Click the three dot and select view project info.
- You will see a modal like below. From here, you can add an ID to your project or change the project name if needed and just simply press save when you are done.
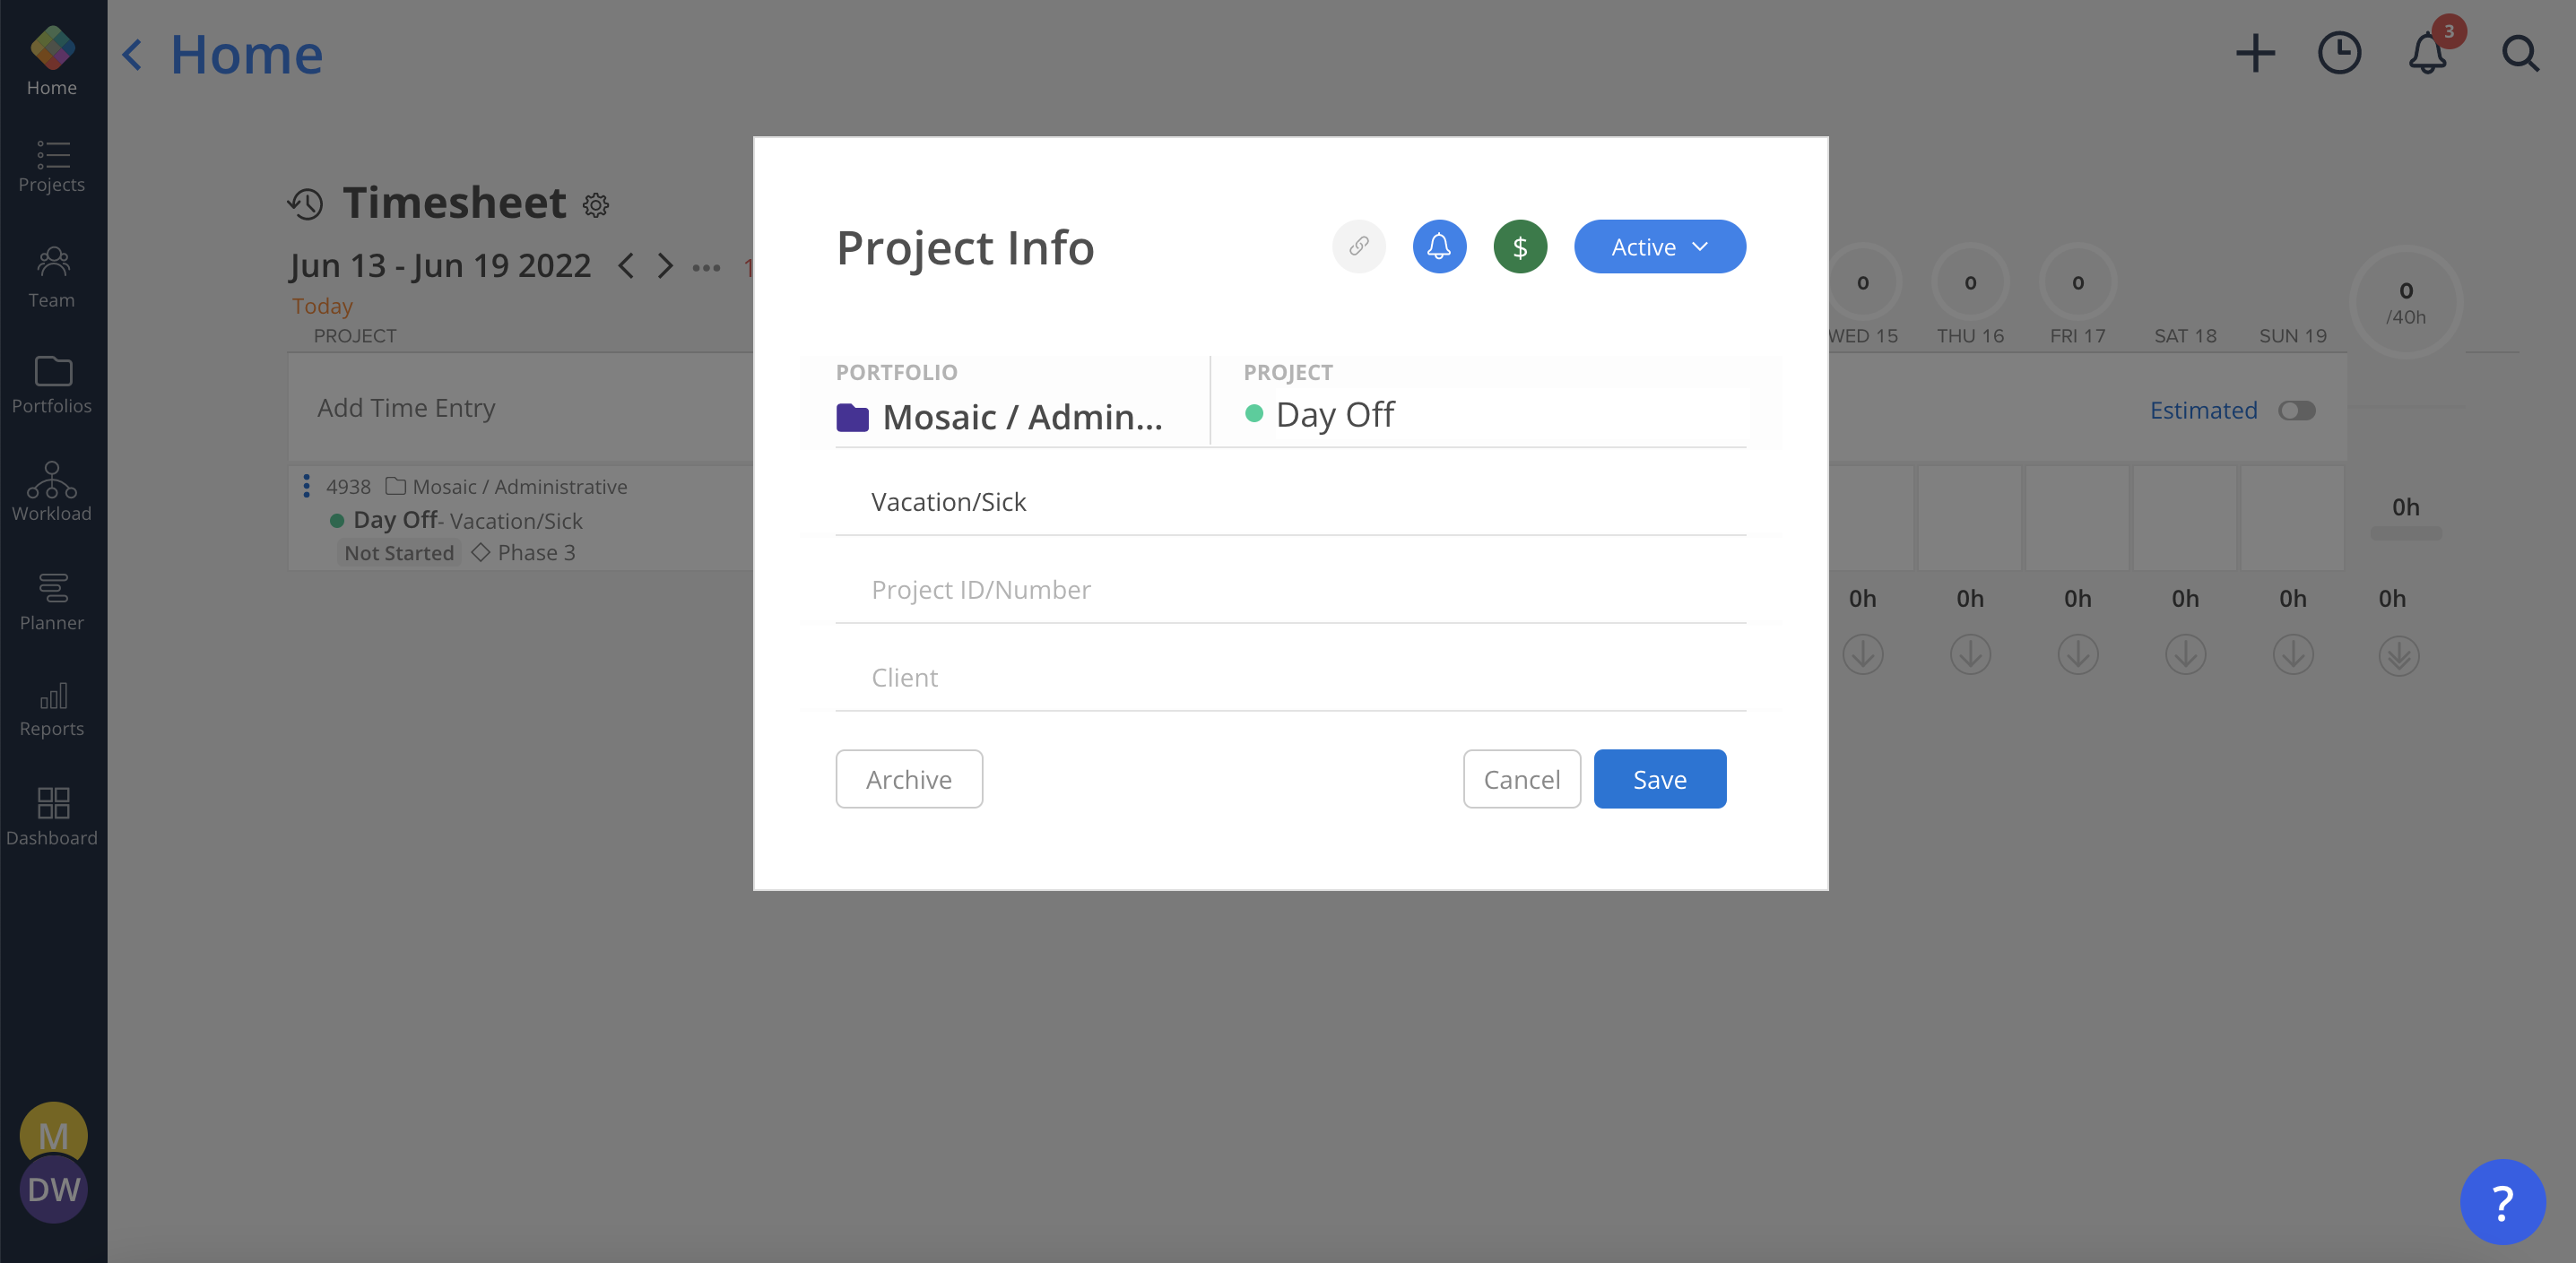
- You should see your project ID (and new name) appear on the top of the project now.

Creating duplicatesIf the email, project name/number, phase name/number, work category, start/end dates, and description match a previously existing Work Plan, then the existing Work Plan will be updated with the new Work Plans hours.
Note if the optional fields (eg. description, phase number) are omitted in both the original and new, this will count as matching.
Updated 12 days ago
