Unanet A/E Cloud Integration
| Direction | Est. Data Transfer Time | Vendor | Vendor Docs |
|---|---|---|---|
| 1-way from Unanet A/E to Mosaic. | Up to 12 hours. | Unanet A/E Product Website | Unanet Support Login |
Part 1: Integration Setup
-
Login to Unanet A/E.
-
Create a User with a Usernameand Password. You will need to copy over the Username and Password onto Mosaic in Step #10.
-
Provide the User permissions to the following:
- API Management Applet
- Data Dictionary
-
Find the Server URL, it will have a format similar to
https://<subdomain>.infocusapp.com/api/<database-name>. You will need to copy over the Server URL onto Mosaic in Step #10.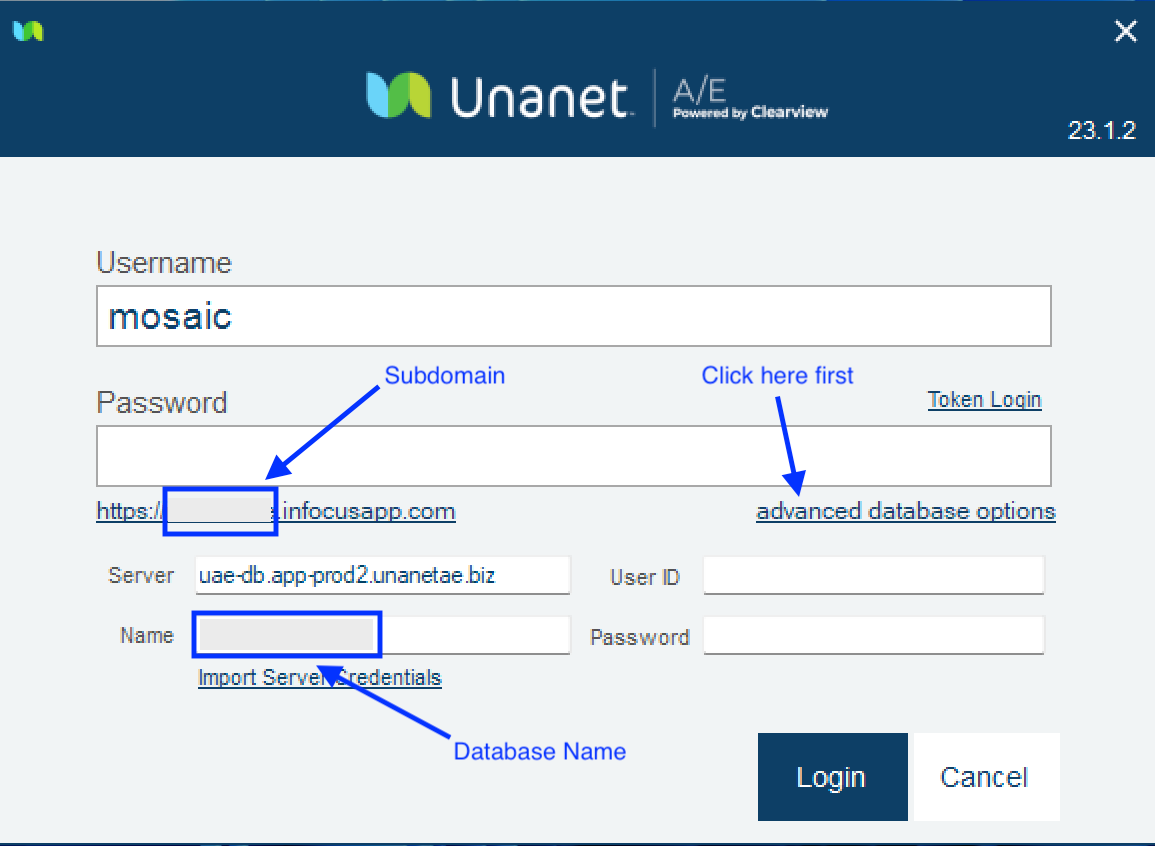
-
Find the Company ID (usually the Subdomain name). You will need to copy over the Company ID onto Mosaic in Step #10.
-
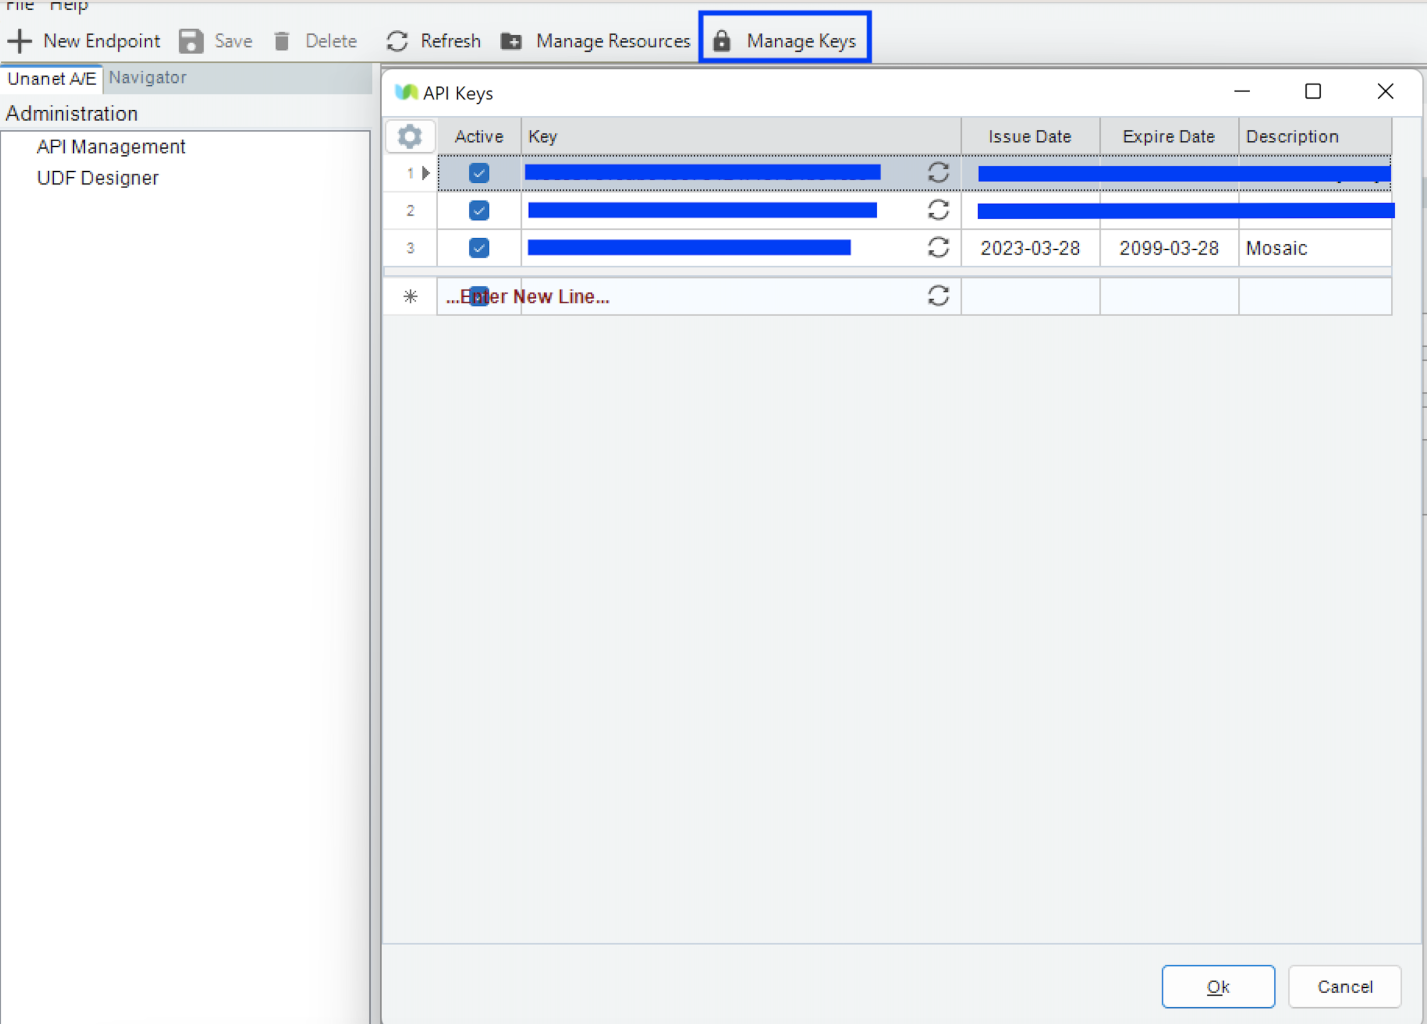
Navigate to Administration > API Management > Manage Keys to create a new API Key for the integration. You will need to copy over the API Key onto Mosaic in Step #10.
Part 2: Providing Credentials for Mosaic's Development of Unanet A/E APIs
Mosaic requires specific credentials to develop endpoints for data retrieval. Please provide the following information:
- Username
- Password
- Server URL
- Company ID
- API Key
Submit these credentials to your Customer Success Manager for processing.
Once Mosaic receives these details, we will begin developing the Unanet A/E APIs. You will receive a confirmation email from your Customer Success Manager when the APIs are complete. After that, you can proceed to Part 3: Integrate with Mosaic.
Part 3: Integrate with Mosaic
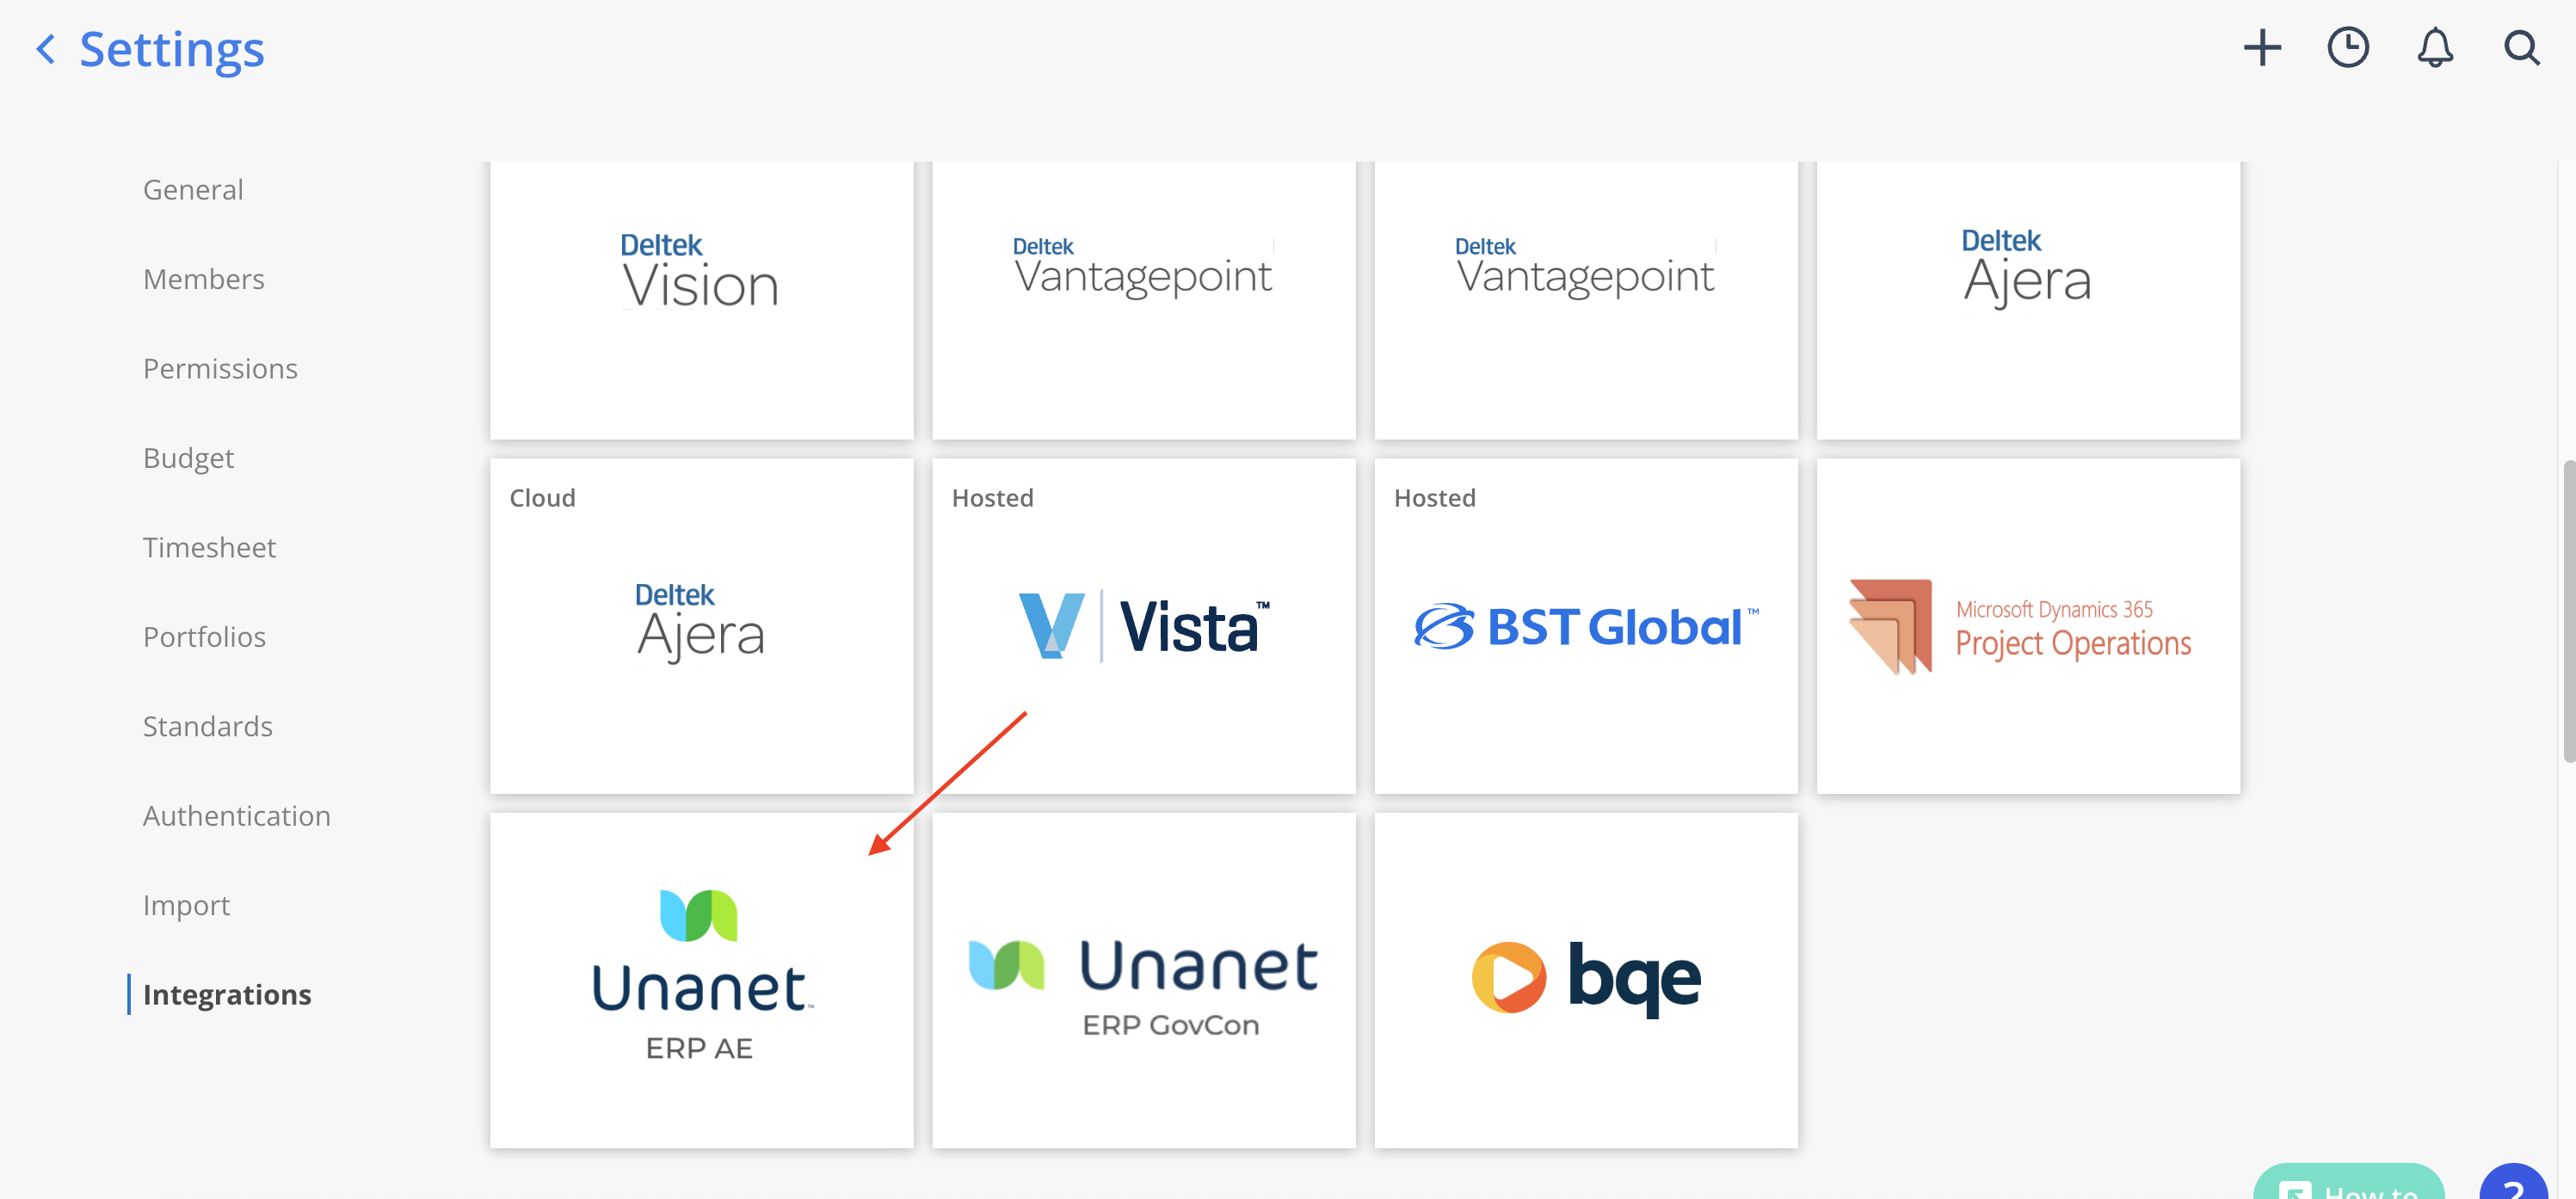
- Login to Mosaic and navigate to the company settings from the Home screen.
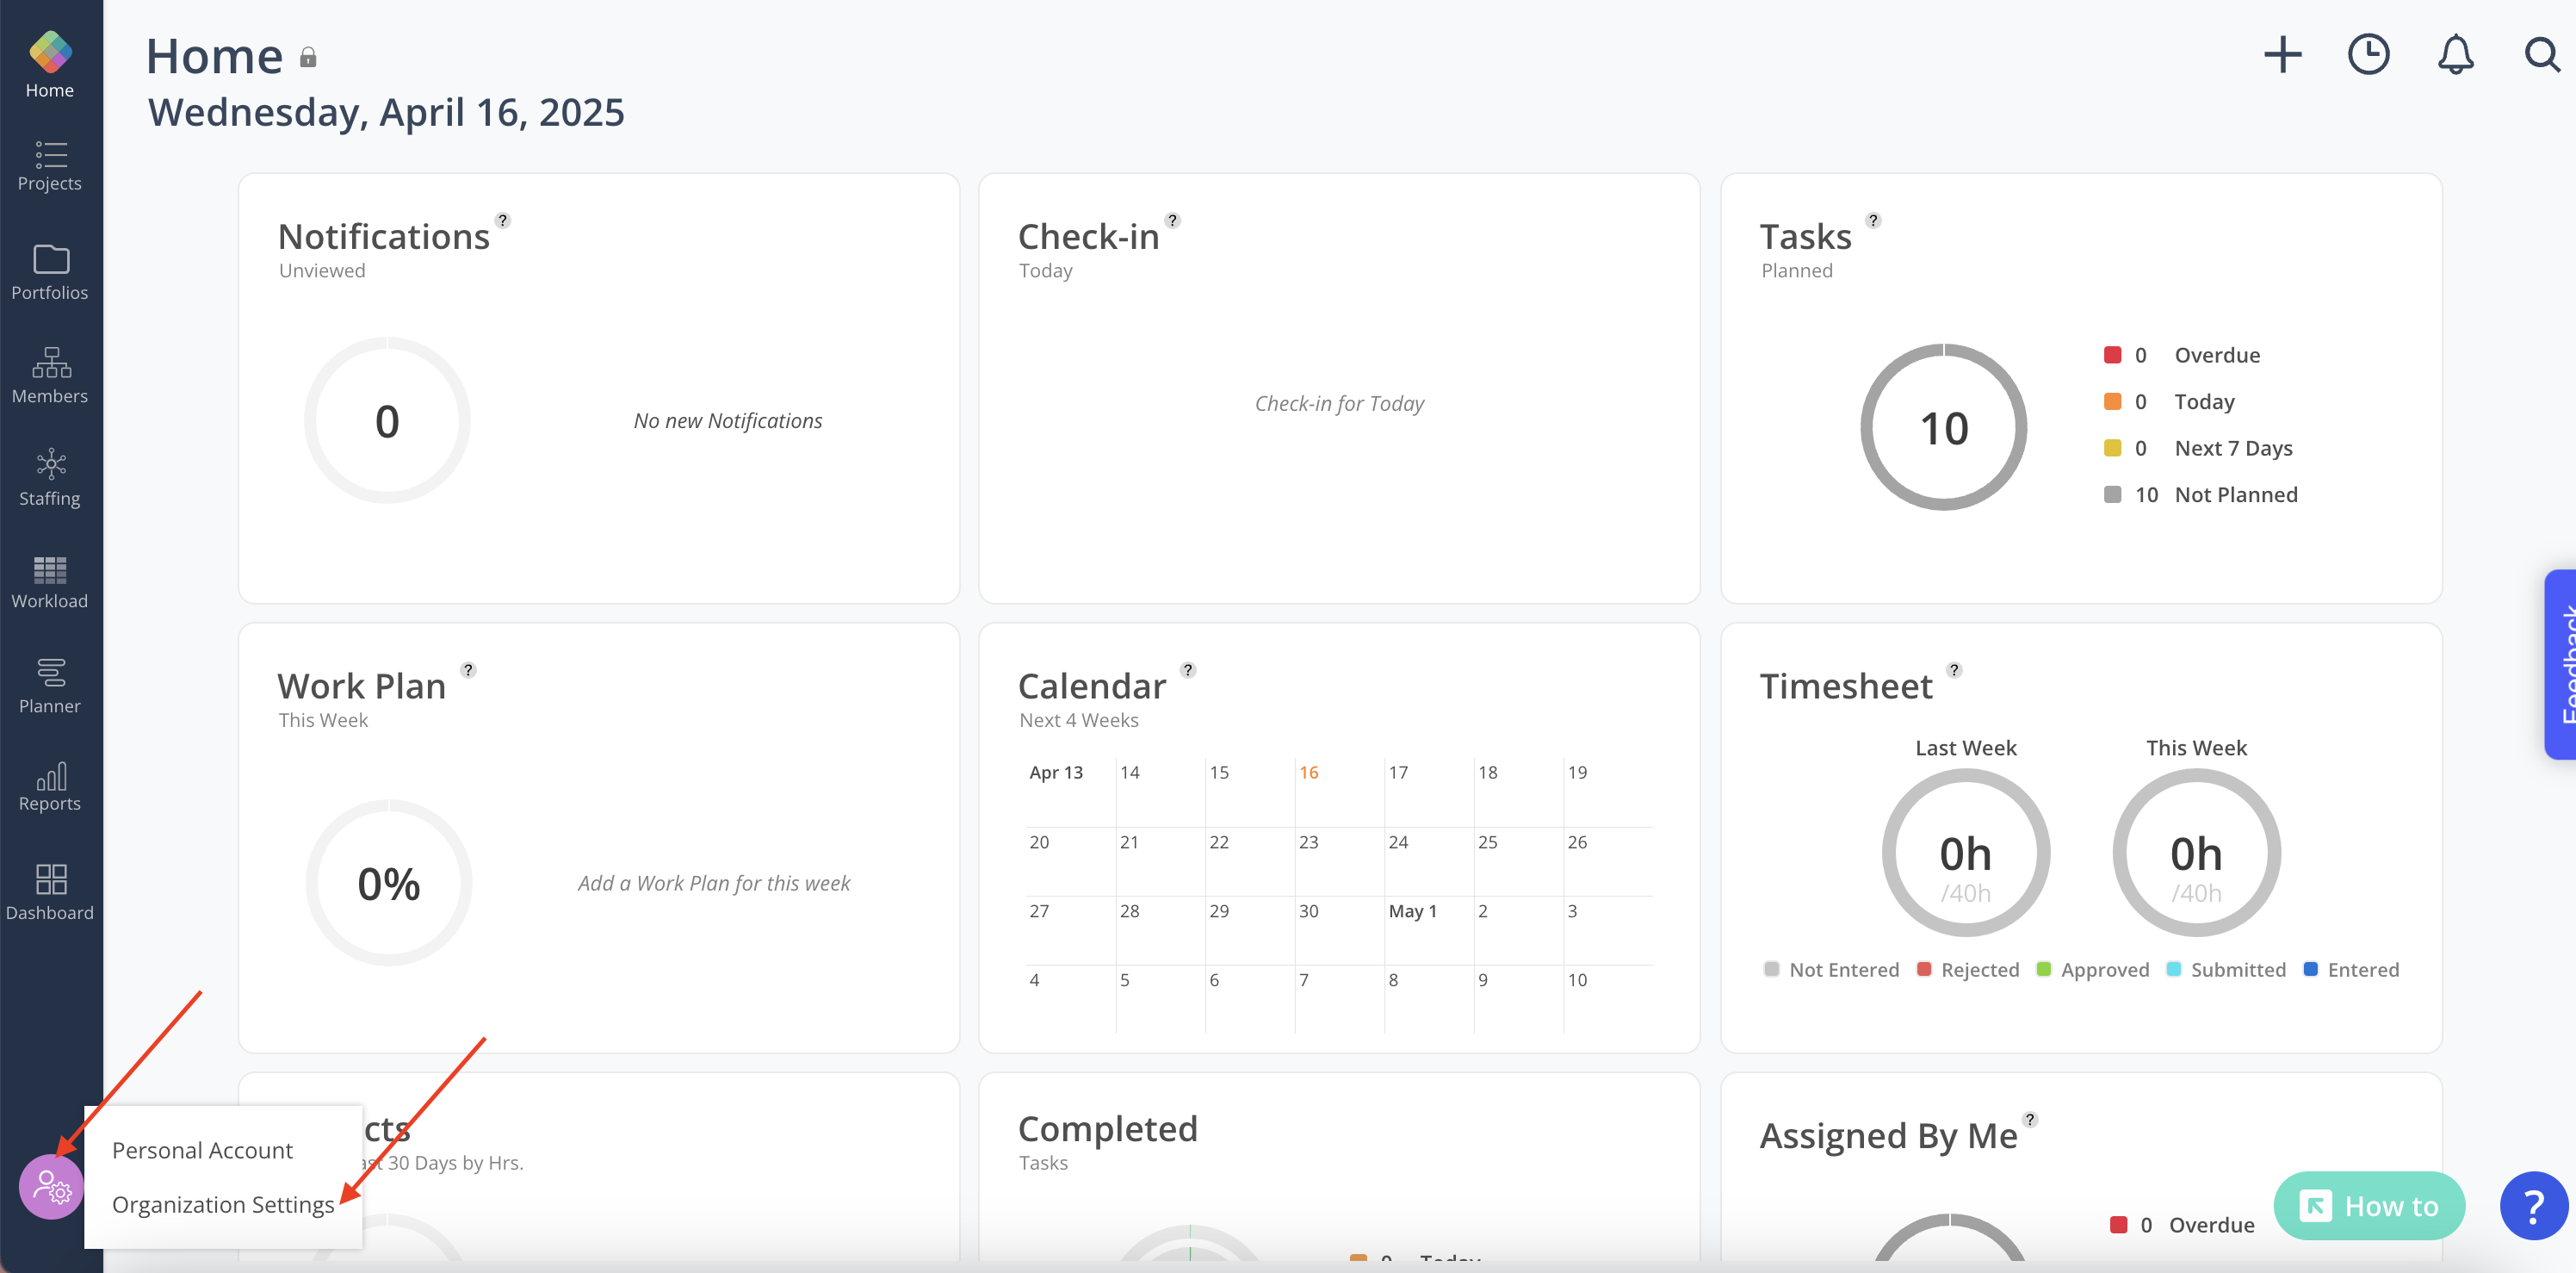
- Select Integrations from the Settings menu.
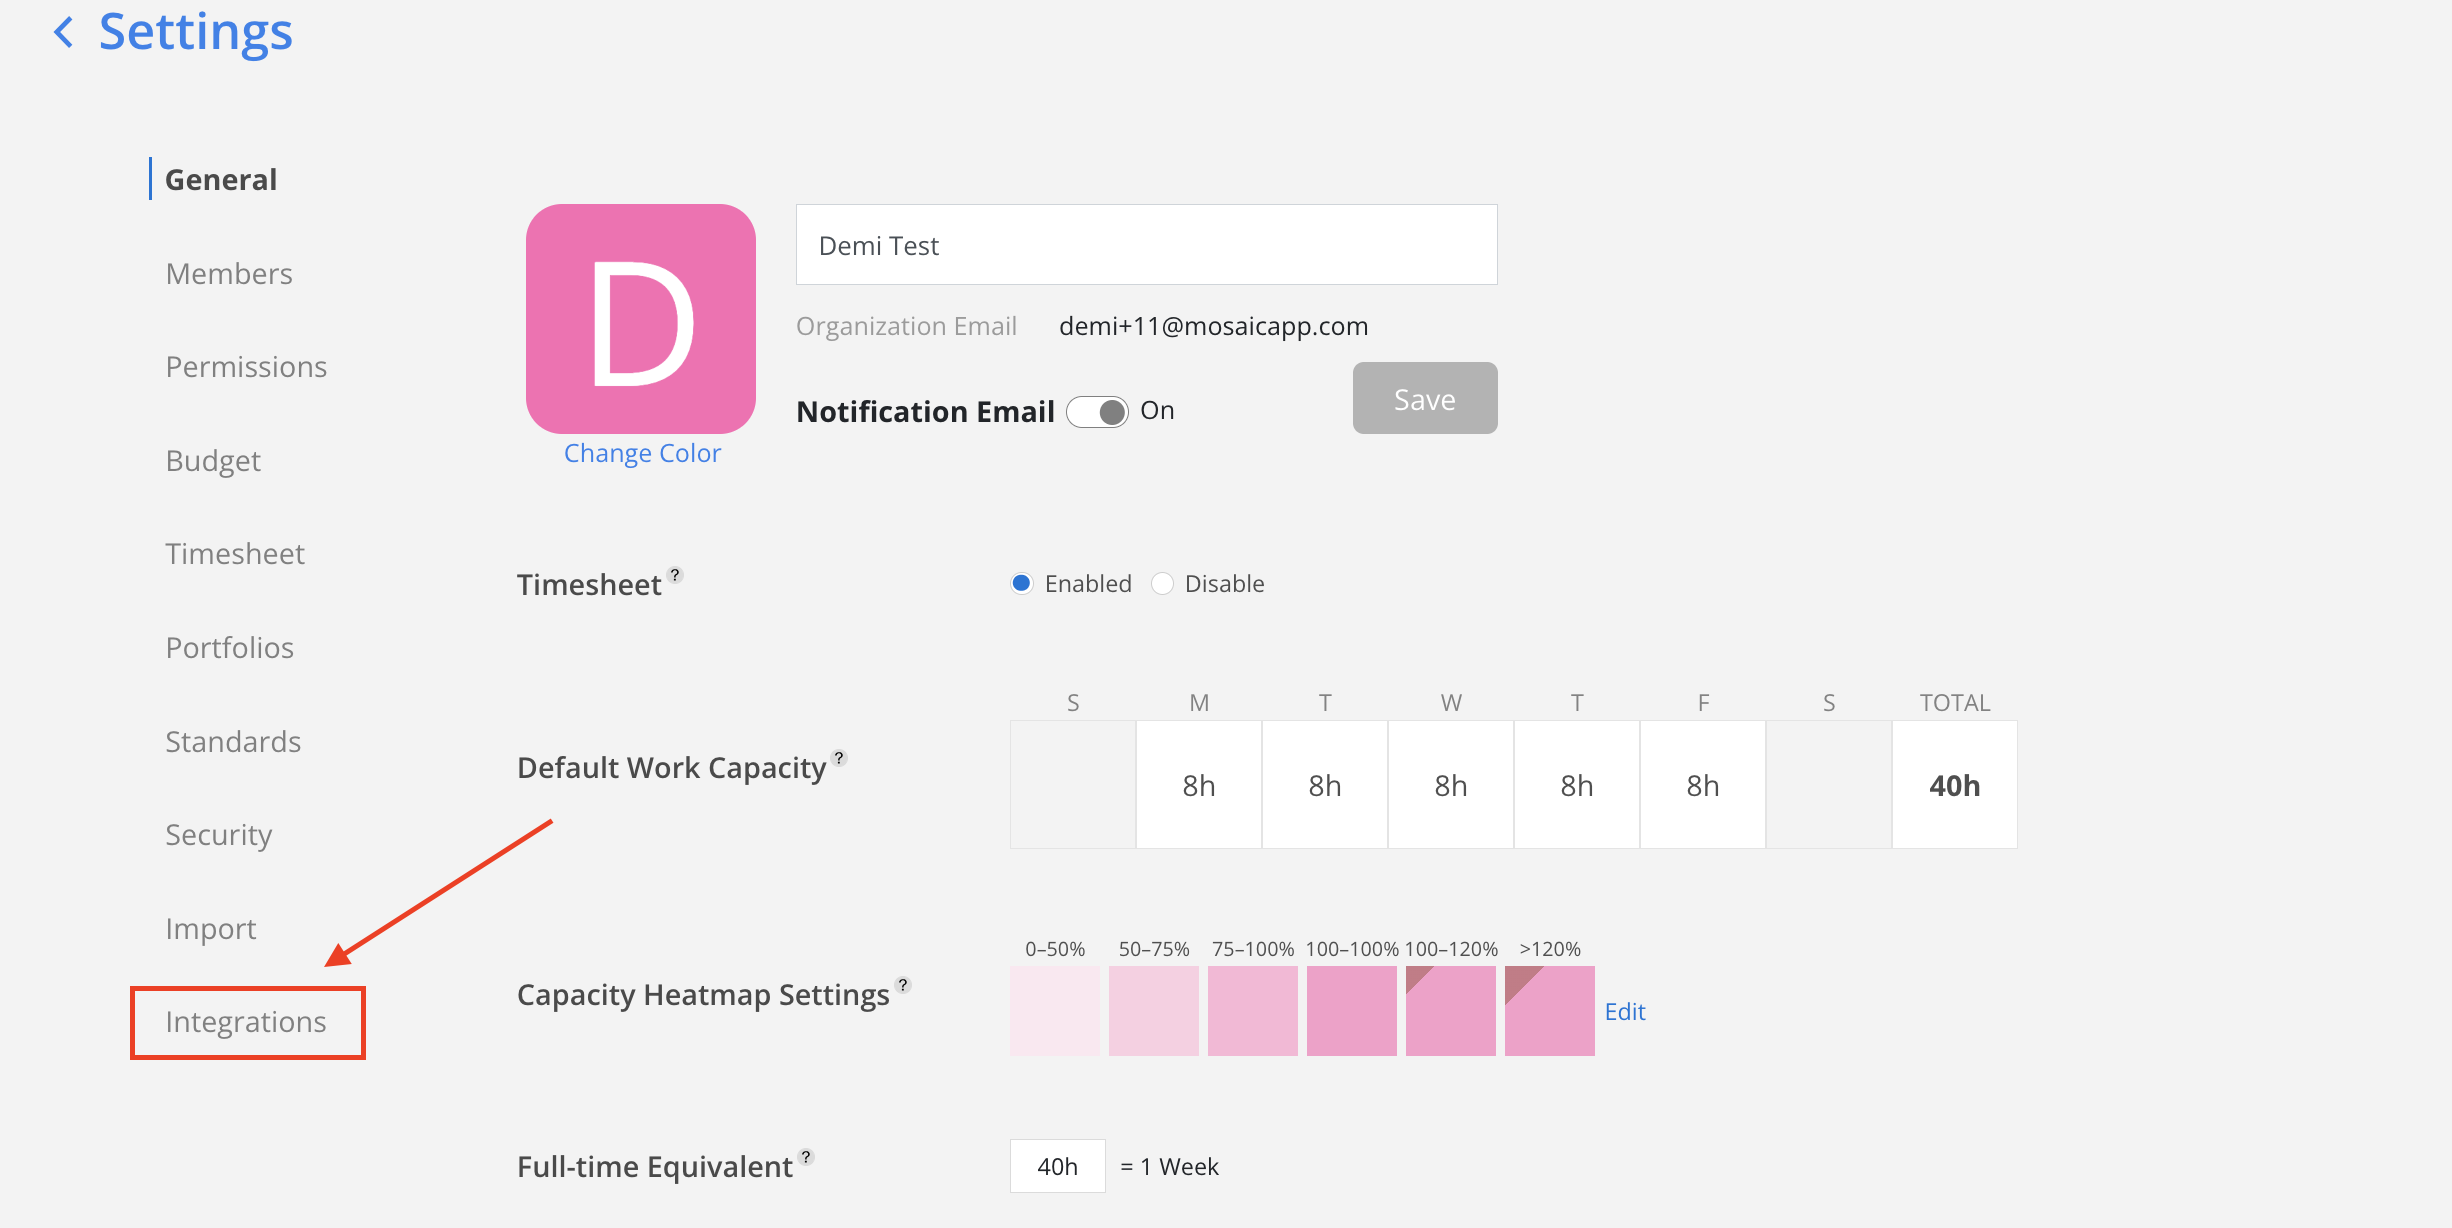
- Select Unanet A/E Cloud from the Financial options.
-
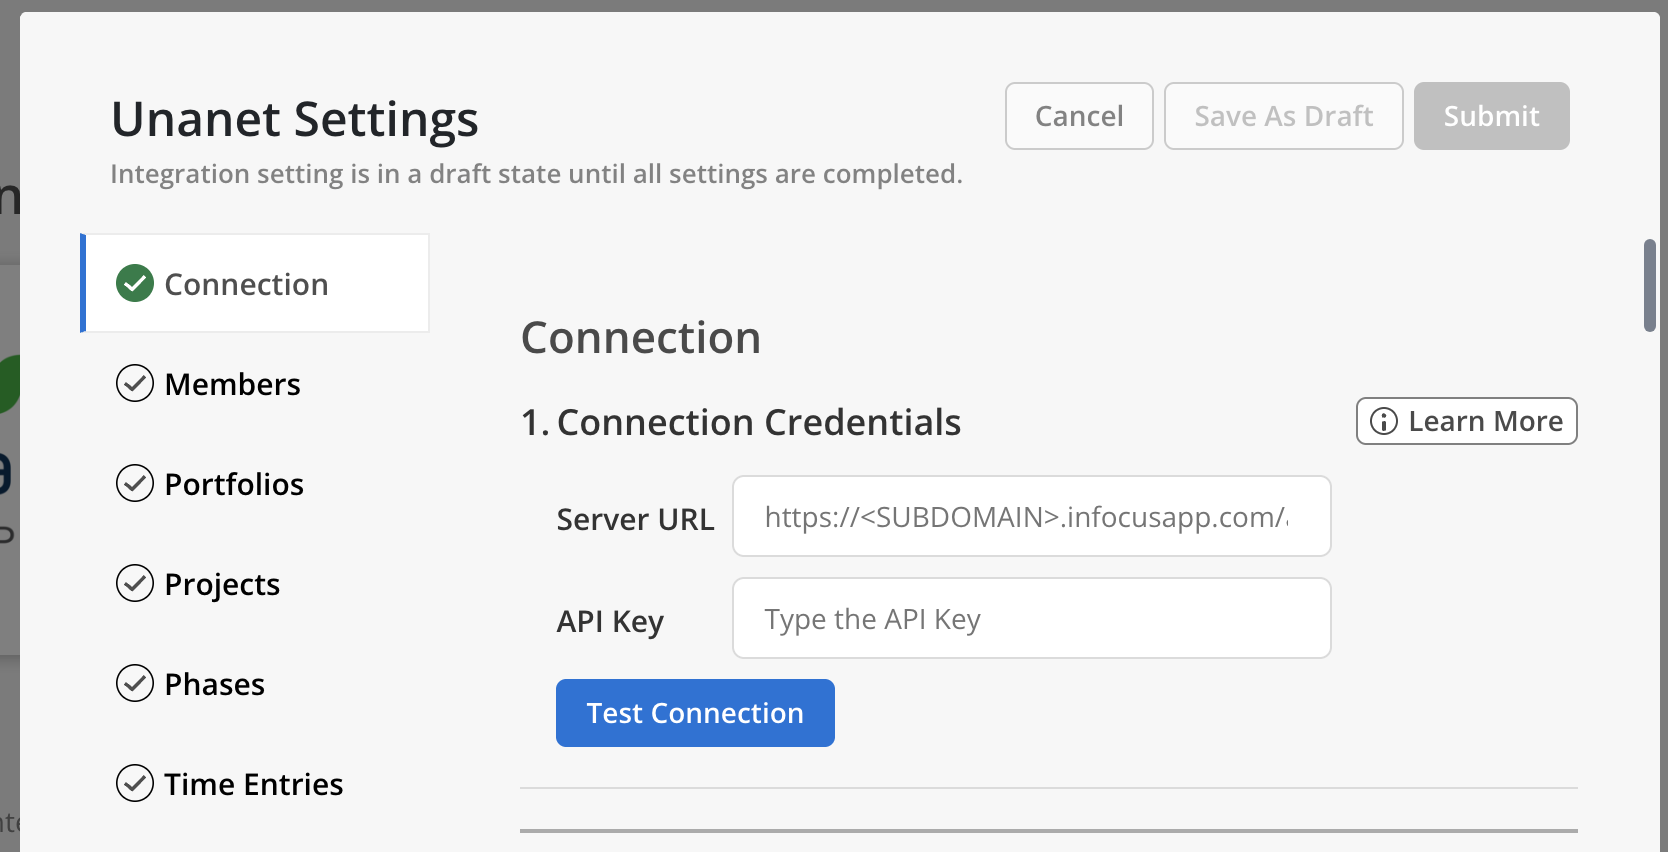
Enter the following details and click Test Connect:
- Server URL
- API Key
Any connection errors will show below the button.
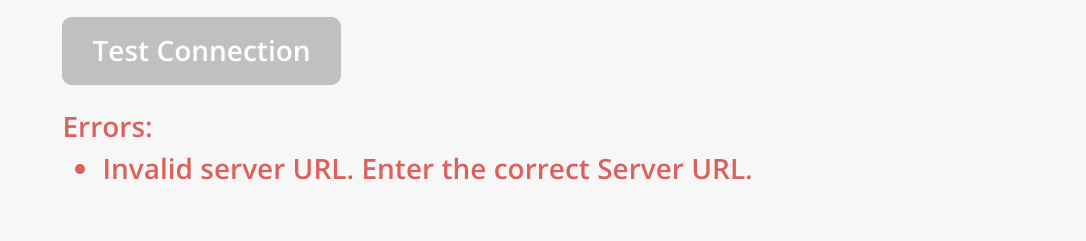
If all the information is correct, Connection Saved text will show after clicking on Test Connection button.

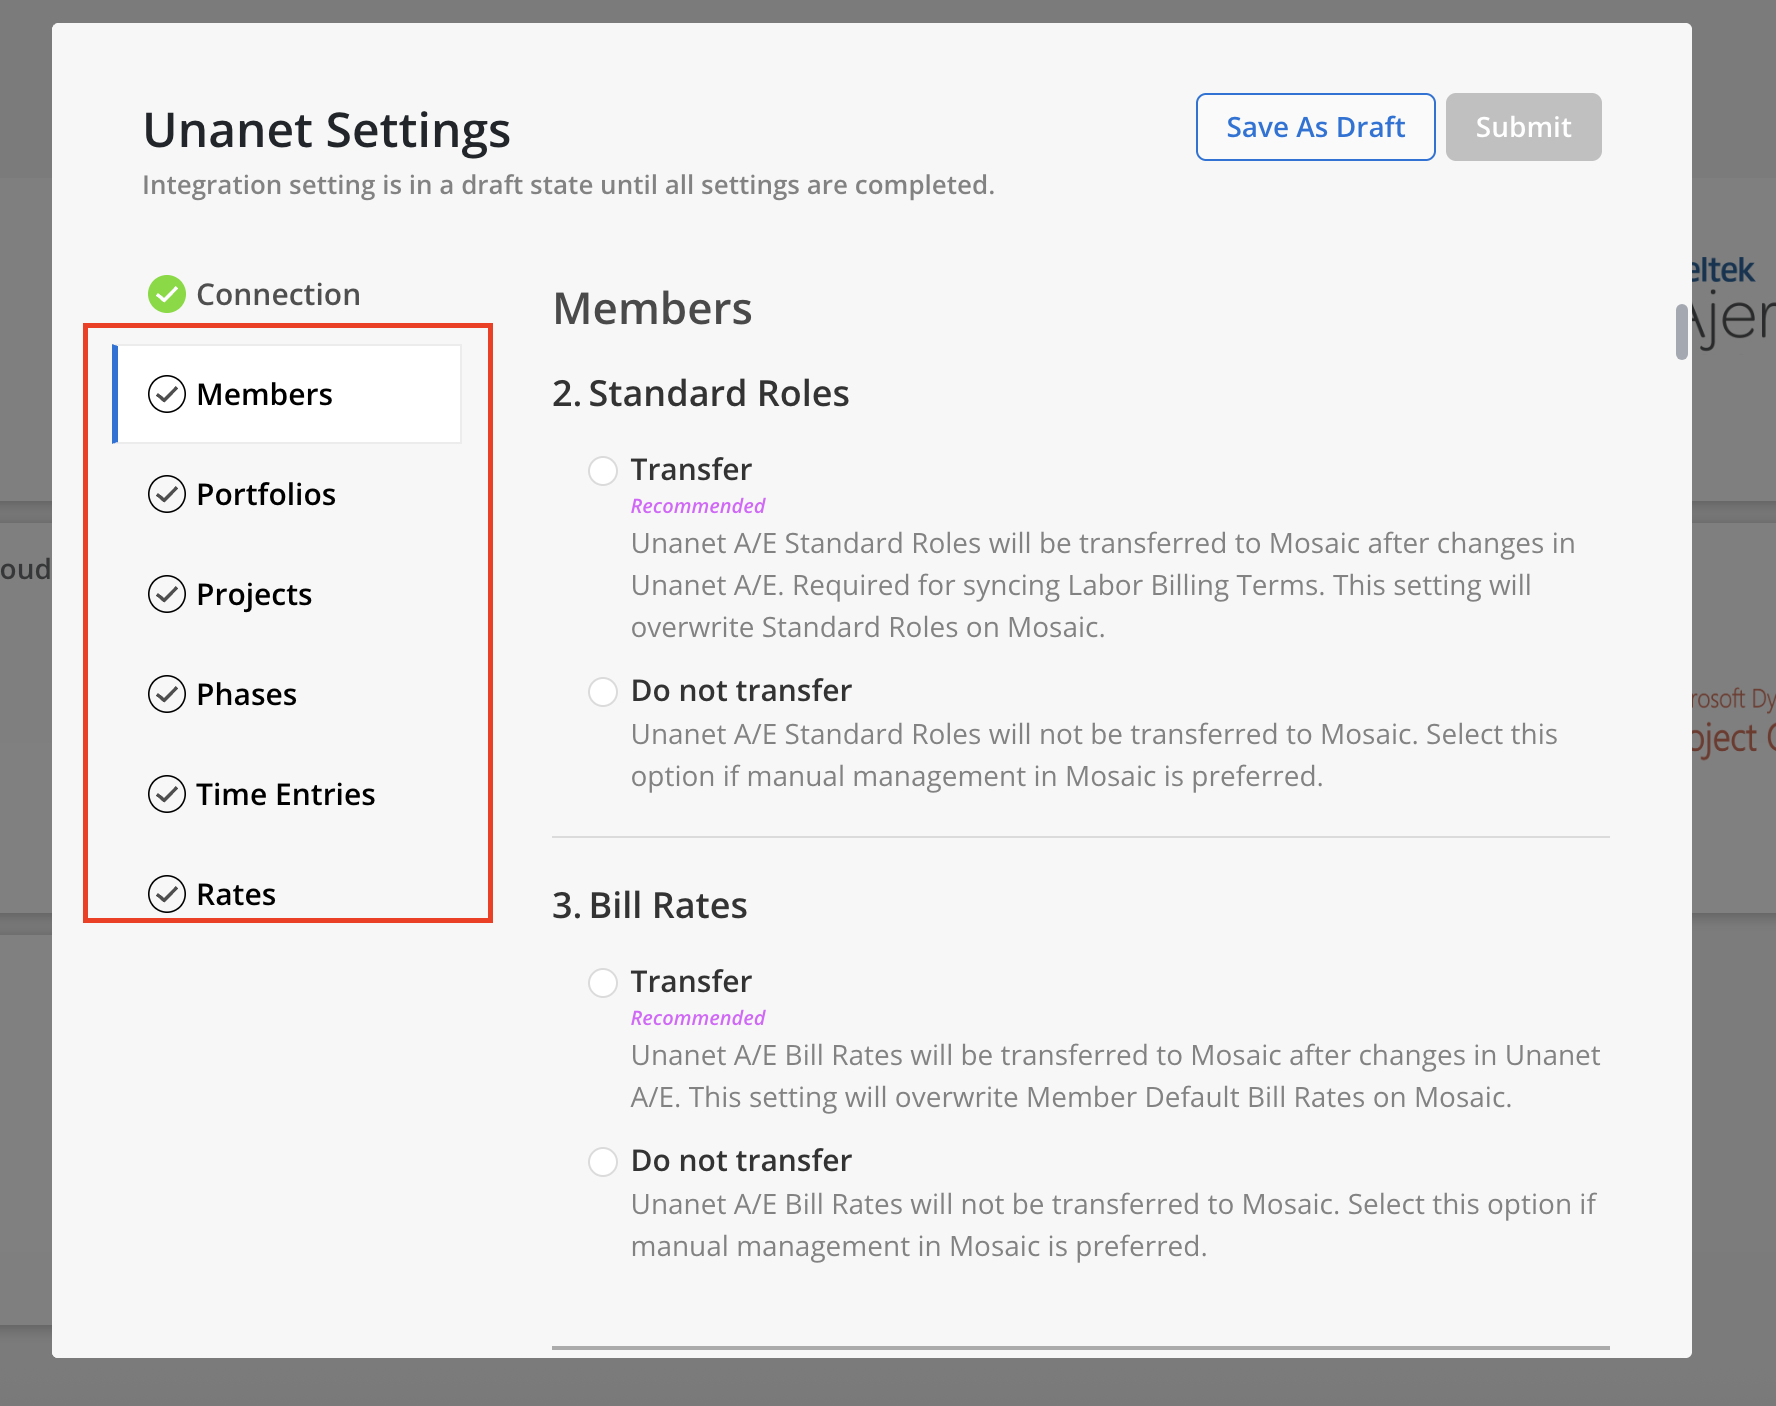
- Complete the settings for each data type section. A green checkmark will appear next to the section header once all required fields have been completed. Use the Save As Draft button to save progress and return to complete the settings later if needed.
Credentials
Connection Credentials won't be saved when you click
Save As Draft. Credentials will only be saved if the Test Connection is also successful.
- After all data types display a green checkmark and the connection is successful, select the
Submitbutton at the top to finalize the connection to the integration.

Updated 1 day ago