Deltek Vision Cloud Integration
Direction | Est. Data Transfer Time | Vendor | Vendor Docs |
|---|---|---|---|
One-way from Deltek Vision to Mosaic. Two-way sync is not supported for Vision. | Up to 12 hours. |
Part 1: Deltek Vision Integration Setup
Create a New Role
- Create a new role by navigating to Configuration → Security → Roles → New
- Under the General tab:
- Give your role an appropriate name (e.g., MOSAIC), and select “Admin” for role type
- Check “Allow Access to SOAP API”
- Select permissions to access the following areas:
- Info Center
- Client
- Employee
- Project
- Planning
- Project Planning
- Billing
- Billing Terms
- Transaction Center
- Transaction Entry
- Time & Expense
- Timesheet
- Info Center

- Under the Access Rights Tab select the “Functional Area” from the drop down, select “Application Tabs”, then check “Full access to all tabs”

- Save your new role.
Please Note:If your company uses the Multicompany feature, you must assign the Role to the Company in Roles -> Access Rights -> Companies. For instructions, see Deltek docs.
Create a New User
- Create a new user by navigating to Configuration → Security → Users → New
- Unselect Force User to Reset Password at Next Login and Disable Login

- Give your new user an appropriate name (e.g., MOSAIC), and a strong password.
- In the drop down for “Role”, select the role that you just created
- Save the new user.
- Confirm that you can log into Vision Cloud with the New User credentials.
- (Optional) Use field level security to disallow access to any sensitive information. See Field Level Security for details.
Part 2: Integrate with Mosaic
Step 1: Upload Stored Procedures to Vision Cloud
To begin, please refer to our comprehensive guide on Adding Stored Procedures to Vision for detailed instructions on uploading stored procedures to your Deltek Vision Cloud environment. You can obtain the required scripts for the following processes by reaching out to your Customer Success Manager:
- For synchronizing Time Entries, you will need to upload the "Combined Time" Stored Procedure (Required).
- For synchronizing Work Plans, you can choose to upload the "Work Plans" Stored Procedure (Optional).
- If you wish to synchronize Profit Centers, you can also upload the "Profit Centers" Stored Procedure (Optional).
Once Deltek has confirmed the successful upload of these stored procedures to your Deltek Vision Cloud environment, you can proceed to Step 2.
Step 2: Connect to Vision Cloud in Mosaic
Once your Stored Procedure(s) have been uploaded to your Deltek Vision environment, please proceed to entering the credentials on Mosaic.
- Login to Mosaic and navigate to the company settings from the Home screen

- Select Integrations from the Settings menu

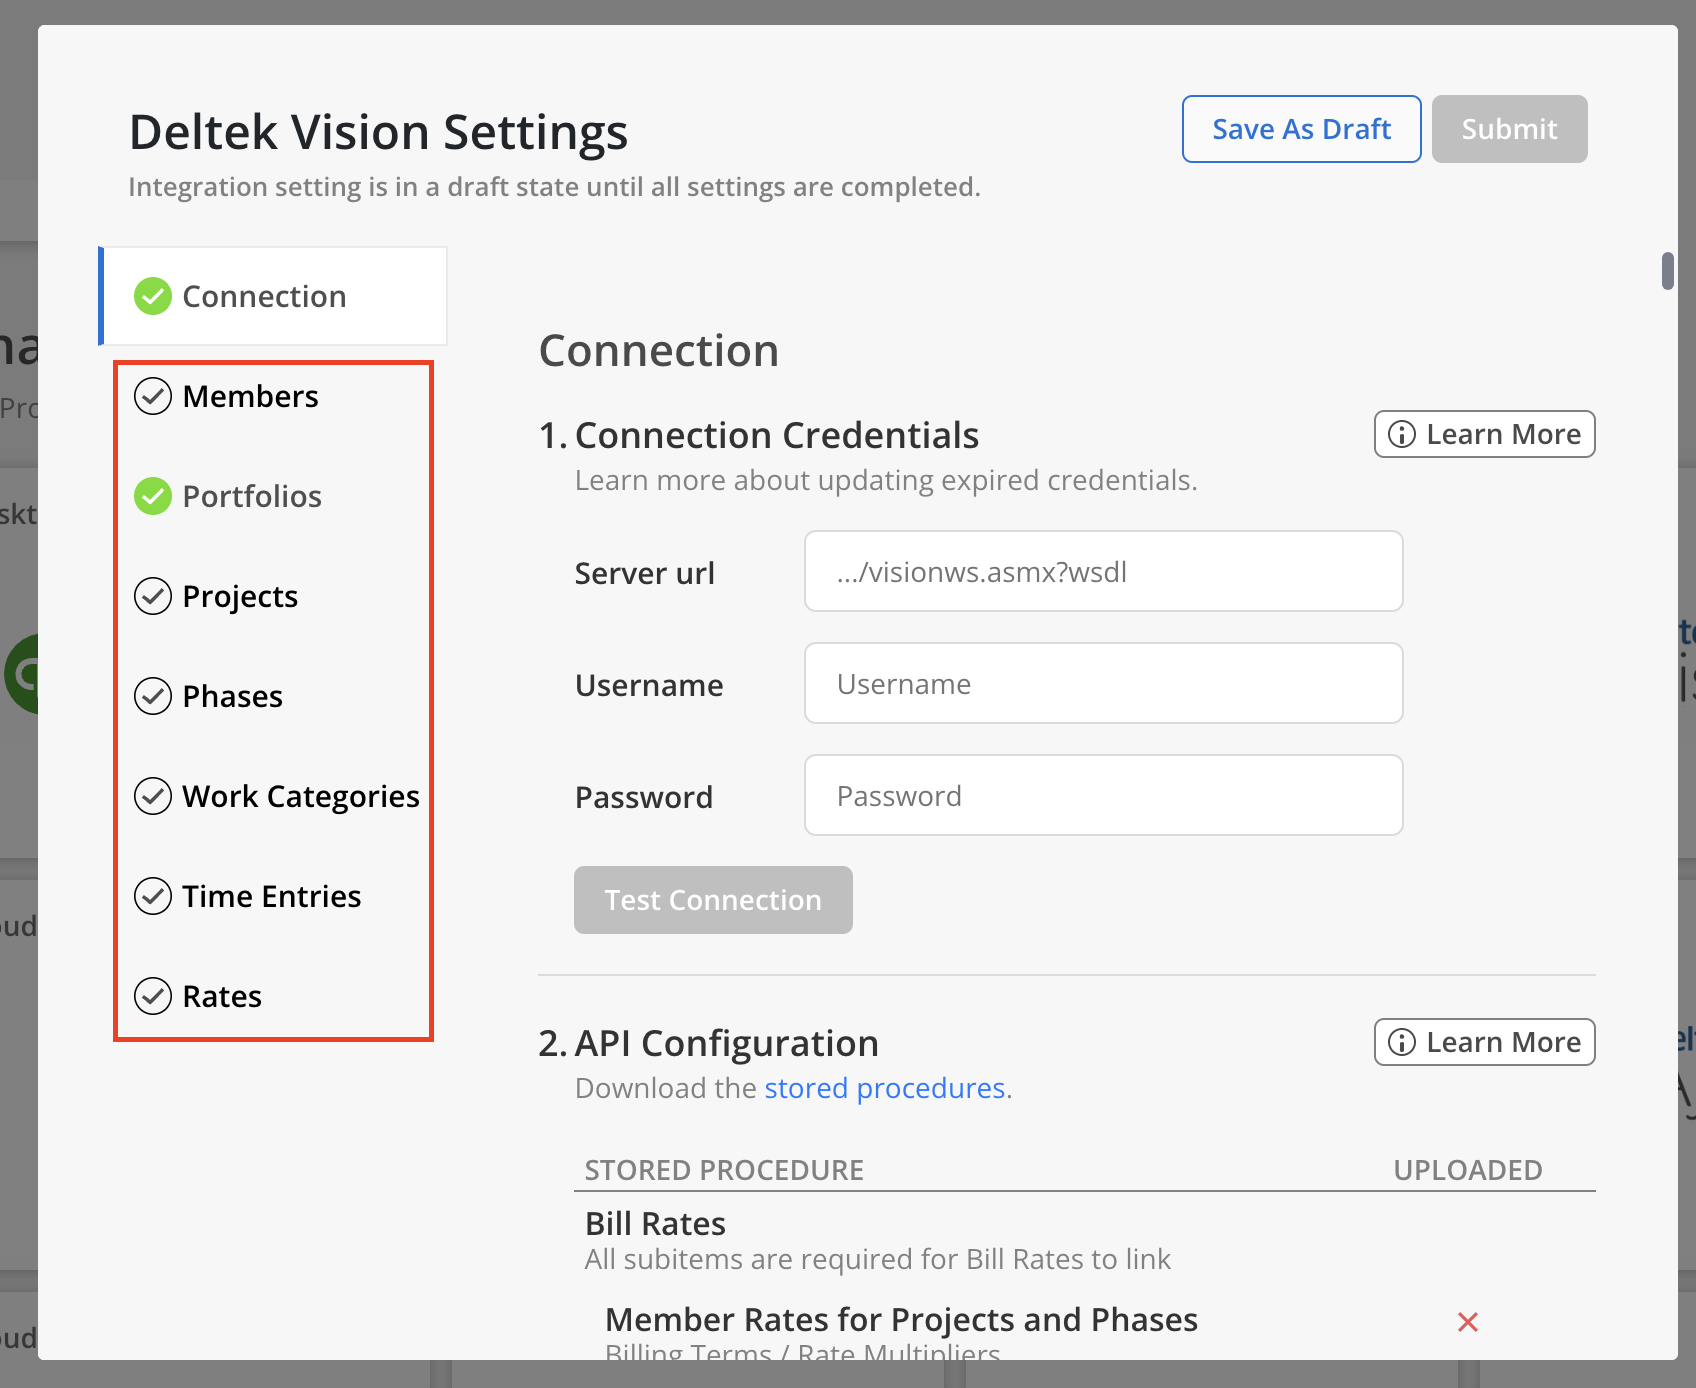
- Select Deltek Vision Cloud from the financial options

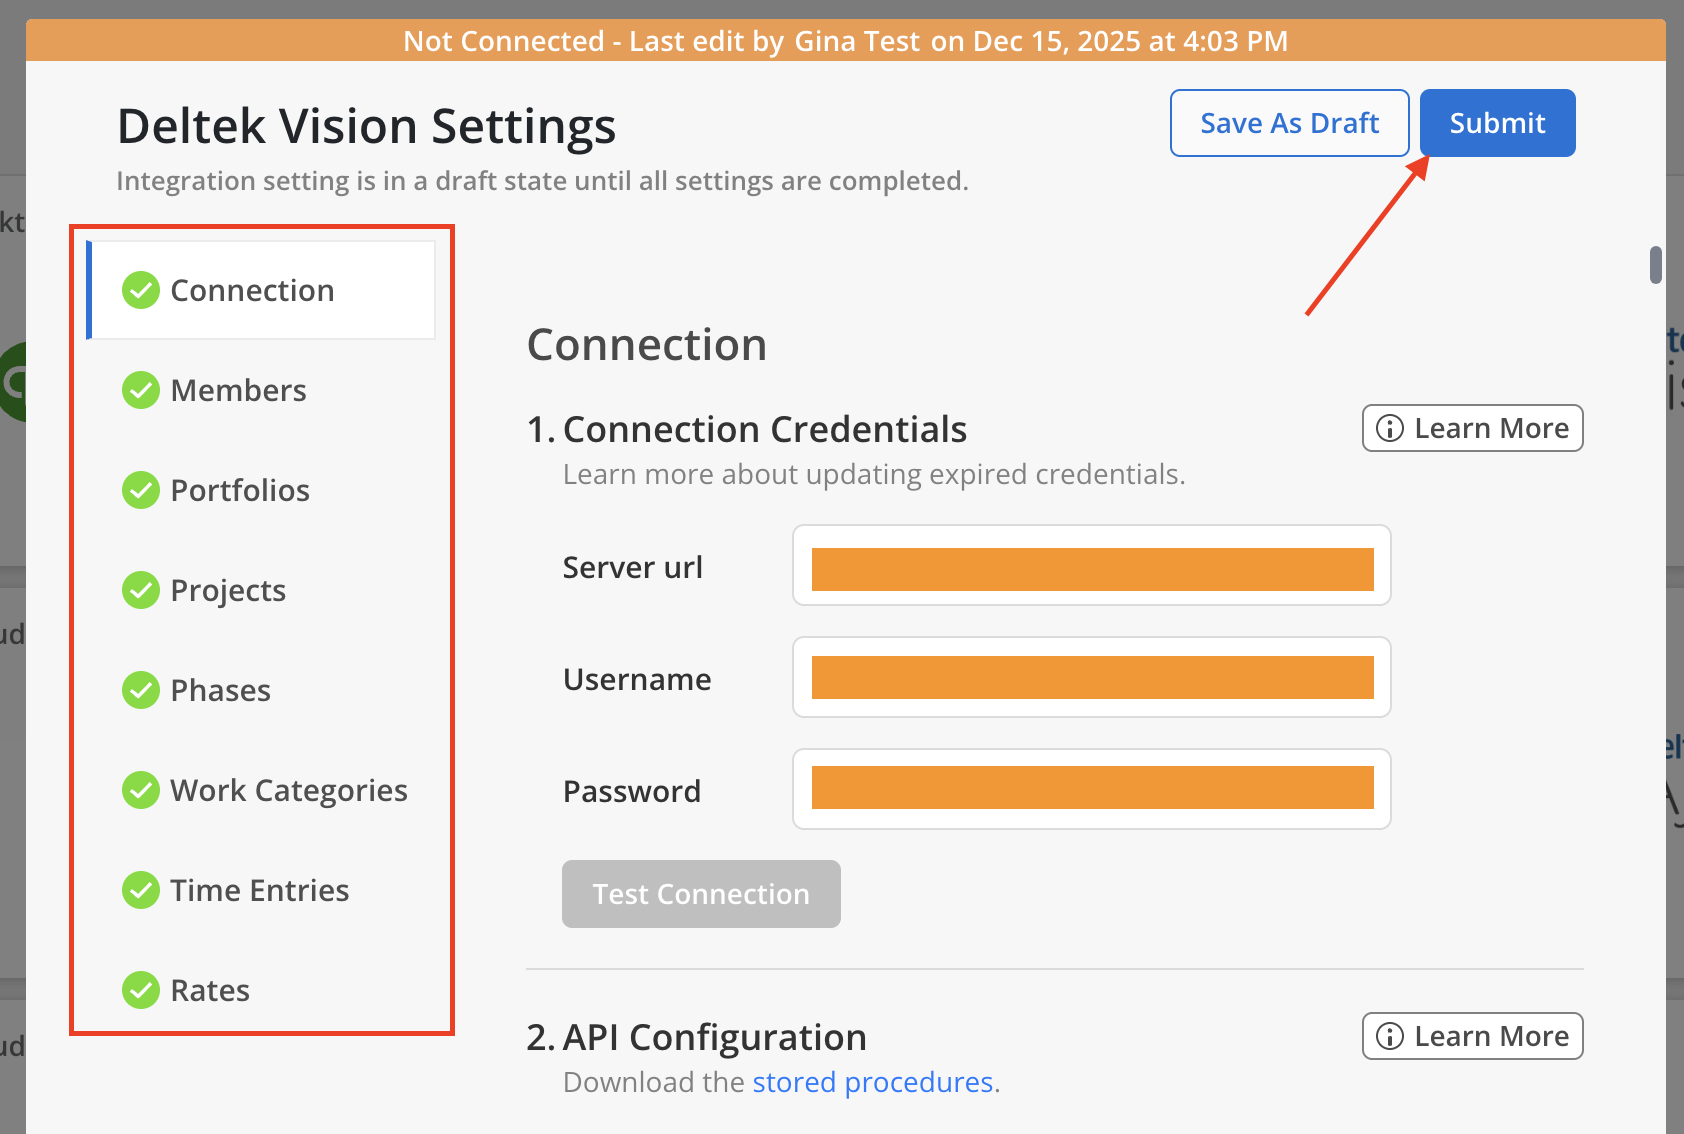
- Complete the settings for each data type section. A green checkmark will appear next to the section header once all required fields have been completed. Use the
Save As Draftbutton to save progress and return to complete the settings later if needed.
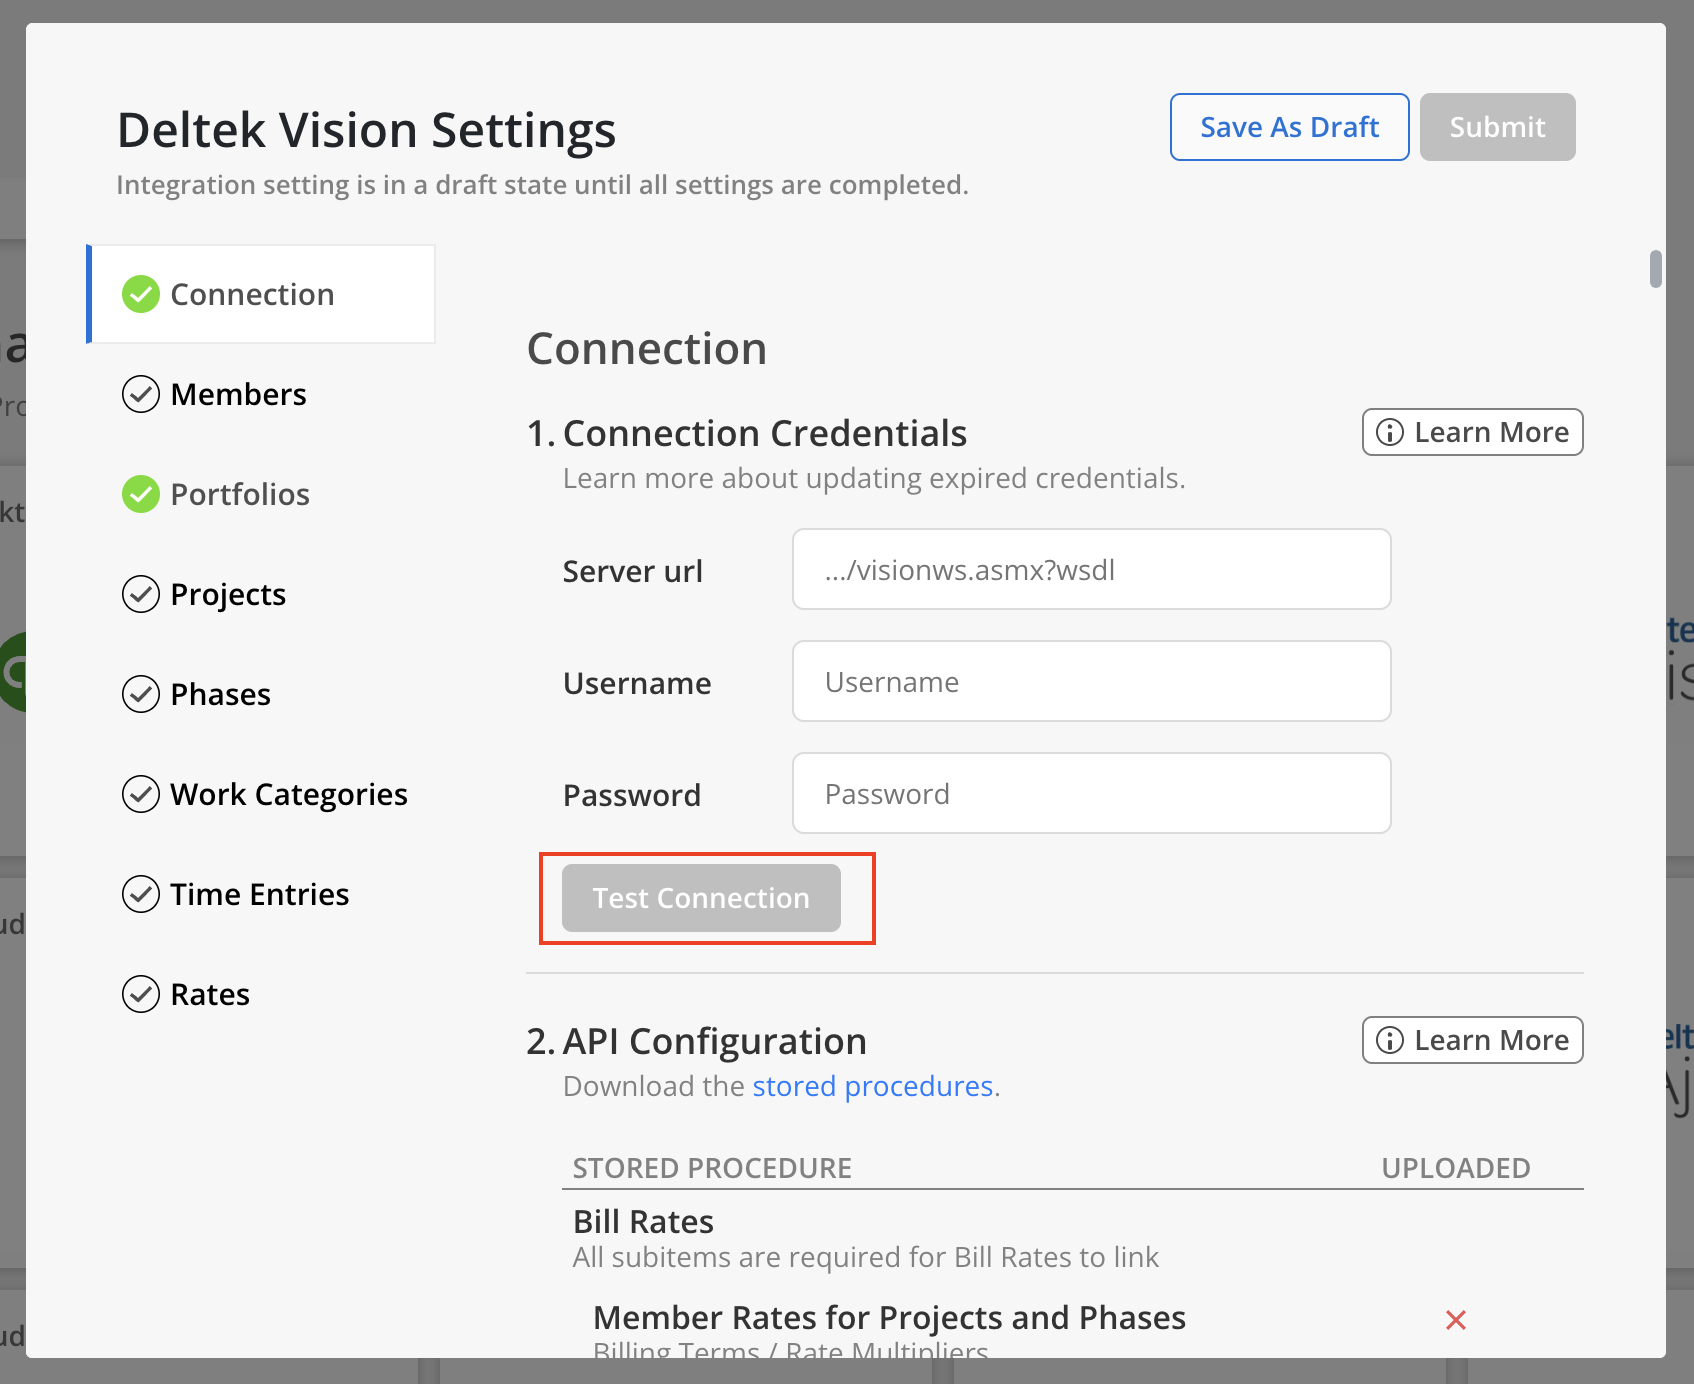
Credentials
Connection Credentials won't be saved when click
Save As Draft. Credentials will only be saved if the Test Connection is successful.
- Enter the following information and click
Test Connect-
The URL that you use to access your Deltek Vision web application (this usually looks like https://mycompany.deltekfirst.com/MyCompany/visionws.asmx?wsdl).
-
The Username and Password of the Mosaic API User you’ve created in Deltek Vision.
-
Any connection errors will show below the button.
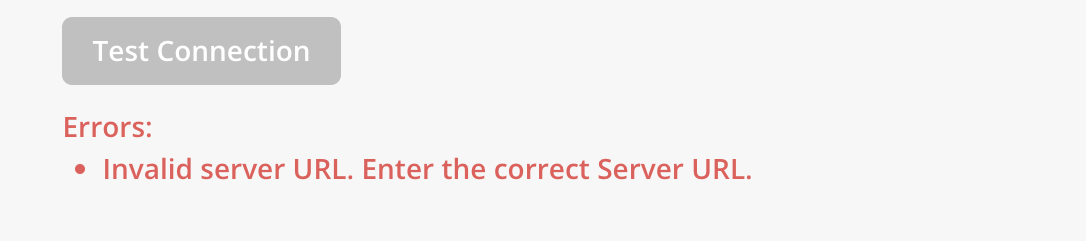
If all the information is correct, Connection Saved text will show after clicking on Test Connection button.

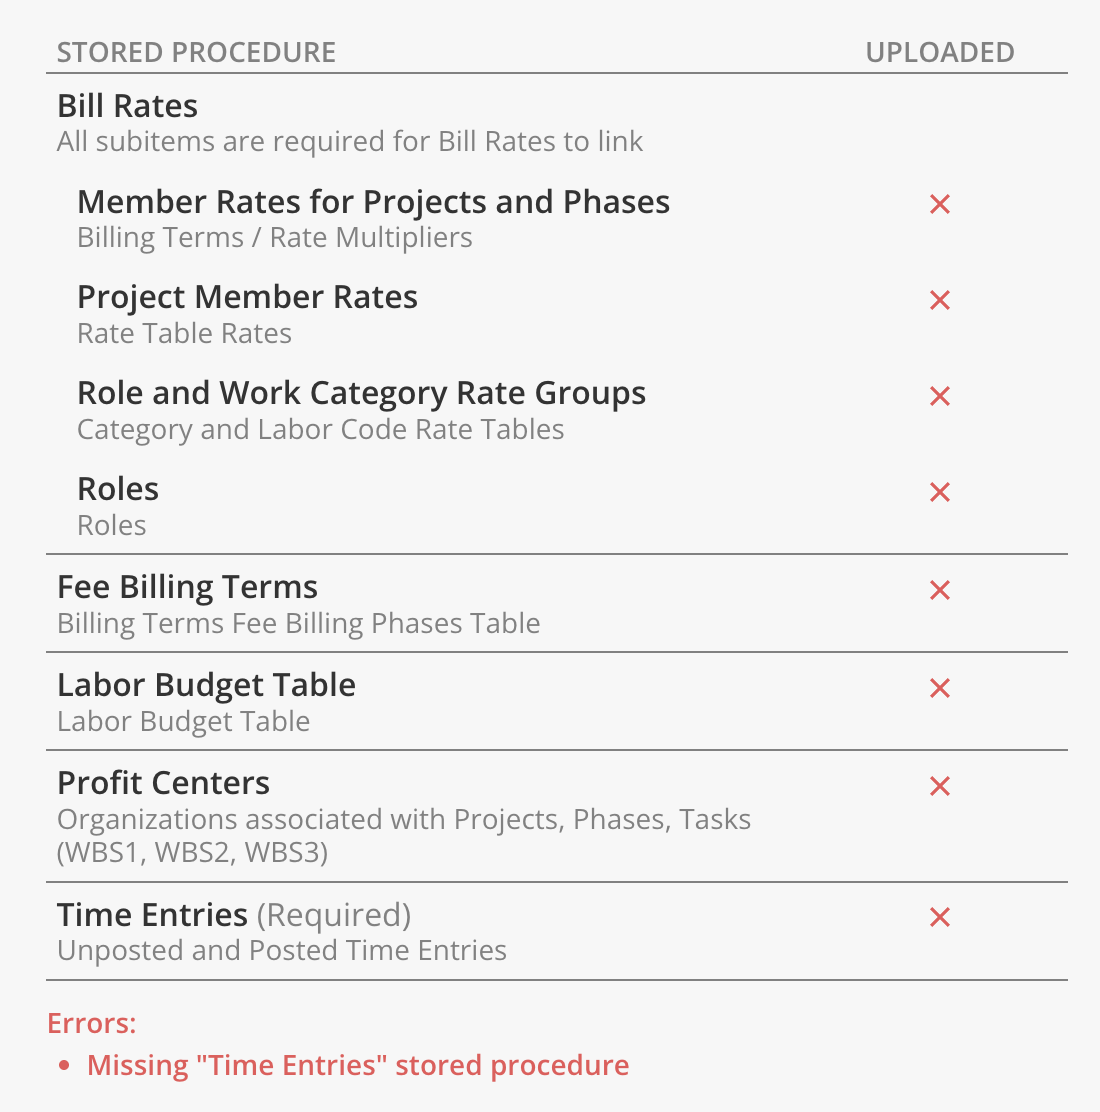
- Once the connection is successful, you will see a stored procedure table in API Configuration section. When a stored procedure is uploaded successfully, a green checkmark will be displayed. If the upload fails, a red X will be shown, accompanied by error messages in red text beneath the table detailing the issue.
- After all data types display a green checkmark, select the
Submitbutton at the top to finalize the connection to the integration.
Integration Settings
Fees
You can configure Mosaic to show your fees using your Direct Labor Fee + Direct Consultant Fee, or just the Direct Labor Fee. In Vision, these fields are located in the Projects > Budget & Revenue tab.

Use just Direct Labor (blue) as your Direct Labor Fee in Mosaic, or the Direct Labor (blue) + Direct Consultant (green) as your Fee in Mosaic