QuickBooks Online Troubleshooting
QuickBooks Online FAQs
Q: I use QuickBooks Time and am not seeing my time entries in Mosaic, where are they?
- QuickBooks Online requires that QuickBooks Time time entries be approved within QuickBooks Online before they are made available for integration. Ensure that any time entries missing in Mosaic have been properly approved in QuickBooks Online. In addition to approval, it is also necessary to perform exports after approval by following the instructions outlined in the following guide: Export QuickBooks Time timesheet data to QuickBooks Online.
Q: How do I reset my Mosaic connection to QuickBooks?
- Disconnect your Mosaic app from QuickBooks
- Open your QuickBooks Online and go to > Apps > My Apps
- Find the Mosaic app in the list
- Open the dropdown for the Mosaic app and select
Disconnect
- Disconnect your QuickBooks integration from Mosaic
- Open your Mosaic instance and go to your company's Settings > Integrations
- If you have multiple integrations, select QuickBooks Online under Current Integrations
- Click the Settings icon

- Click
Disconnect QuickBooksfrom the Integration Settings page
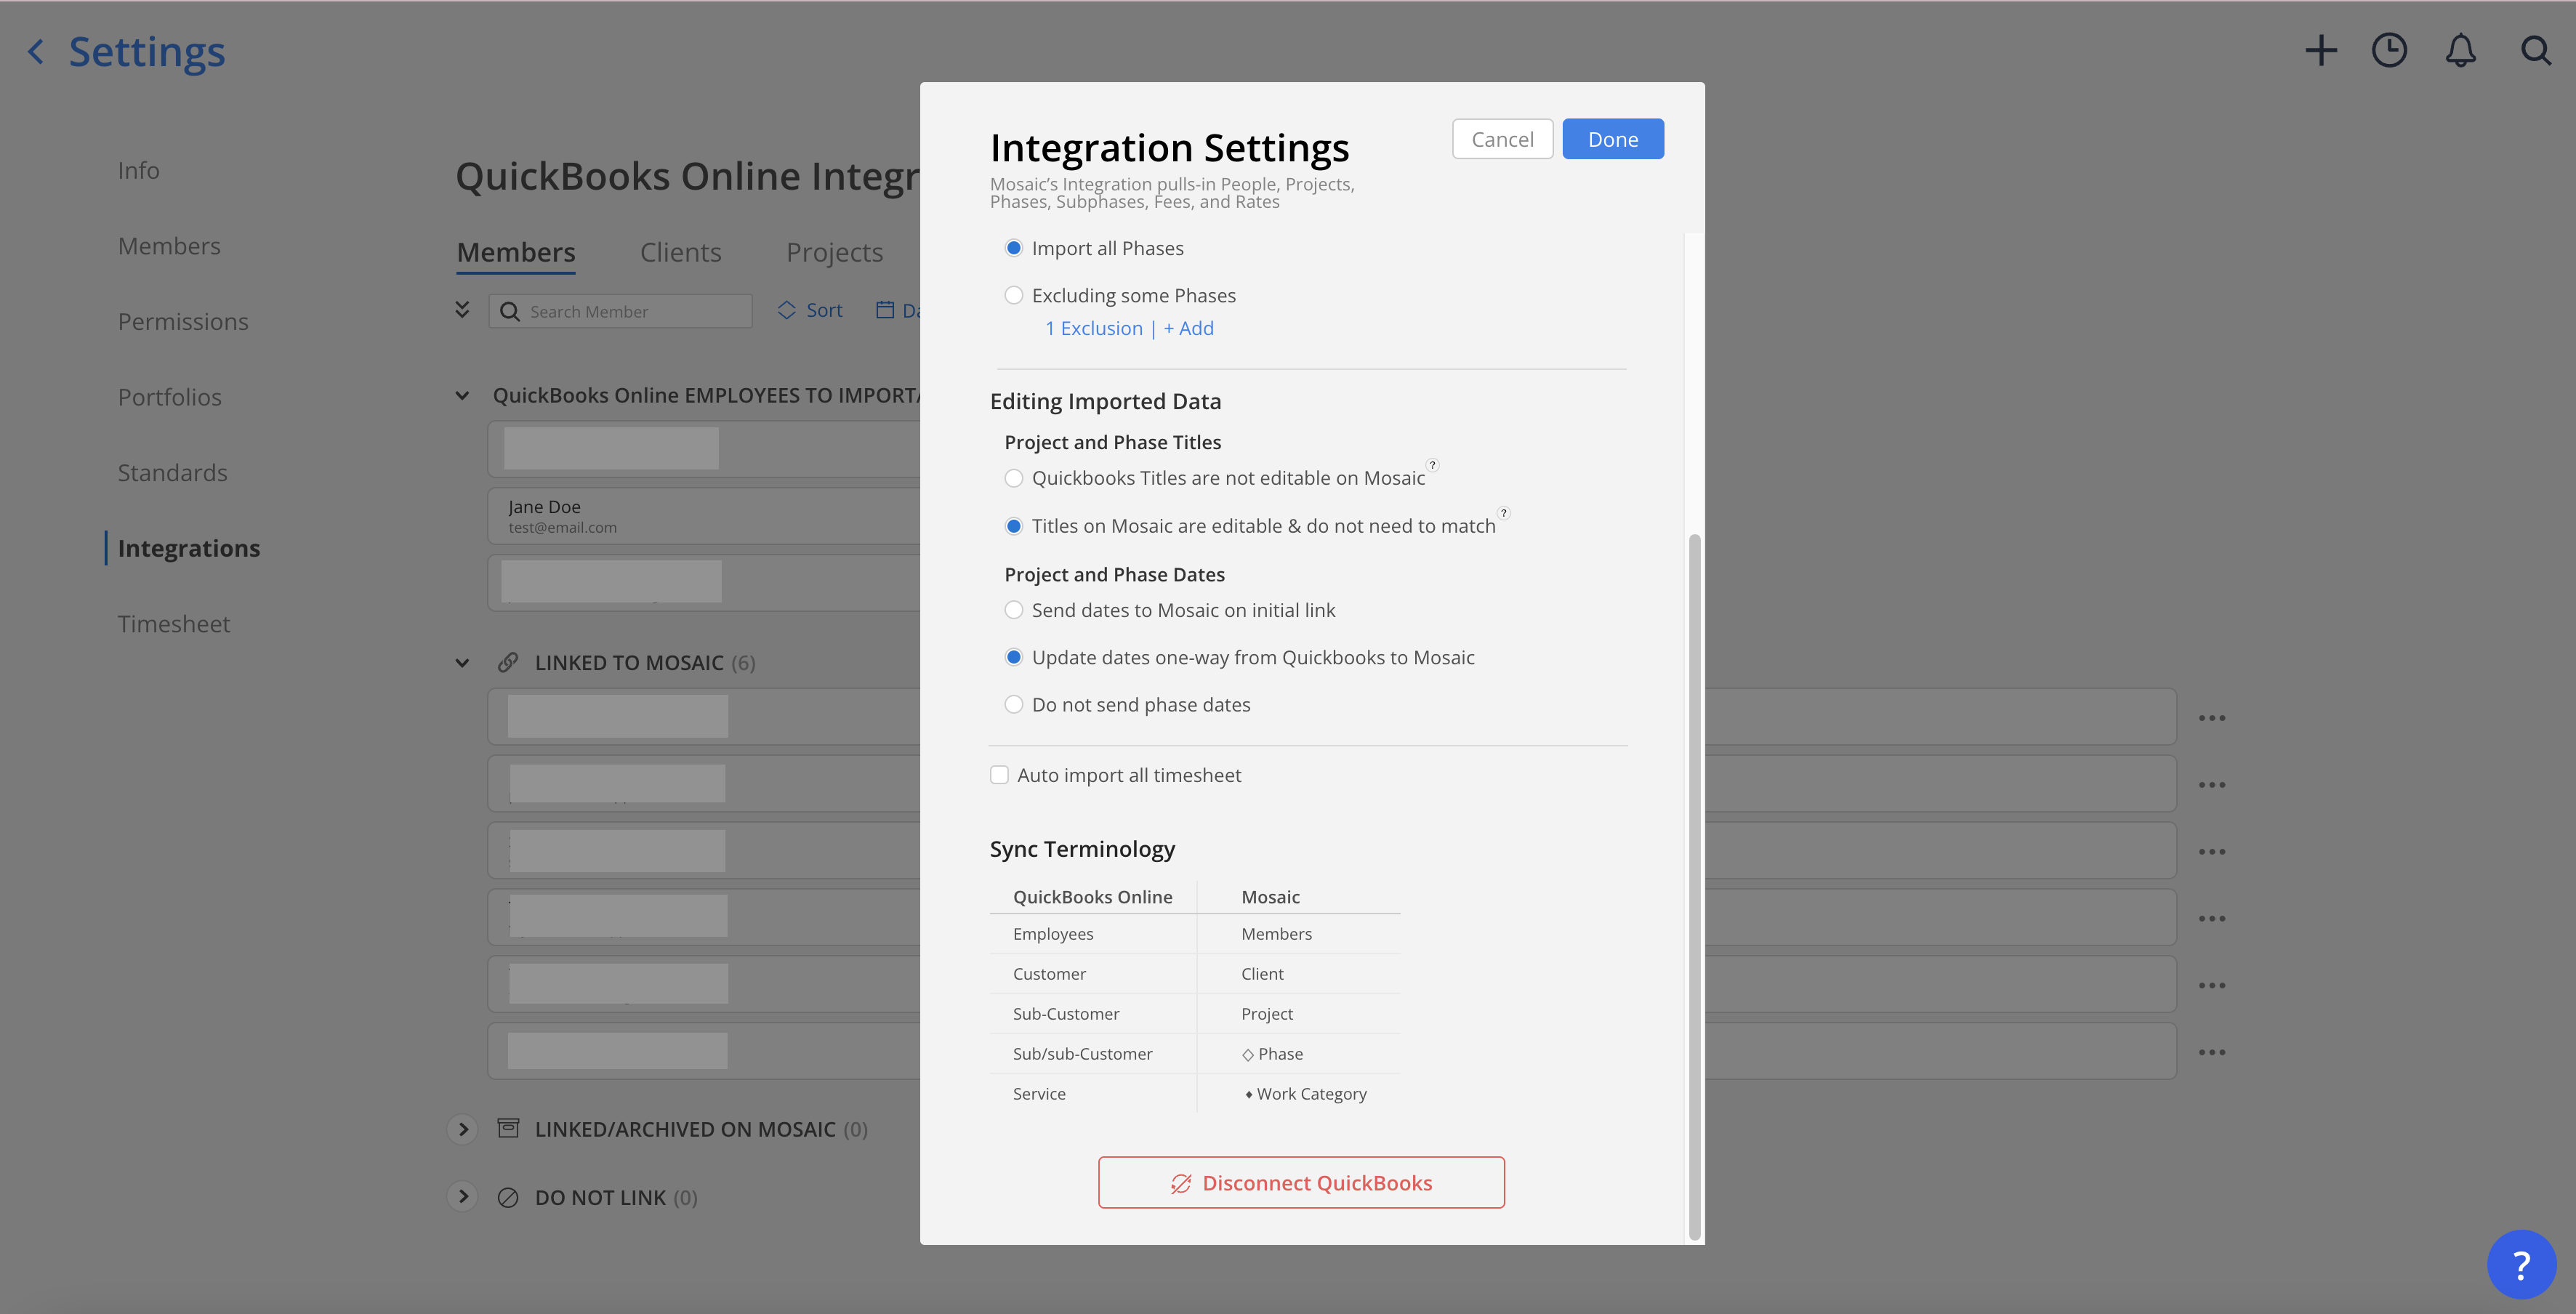
- Once you are disconnected, you can reconnect to QuickBooks Online by selecting QuickBooks Online from the Financial section of the Integrations page
- Follow the prompts on the screen and click
Connect - Ensure that the integration is reconnected by going back to QuickBooks and checking to see if Mosaic is listed under Apps > My Apps
Q: How do I export timesheet data from QuickBooks?
- Select the Settings gear icon from the tool bar
- Under Tools, select Export data
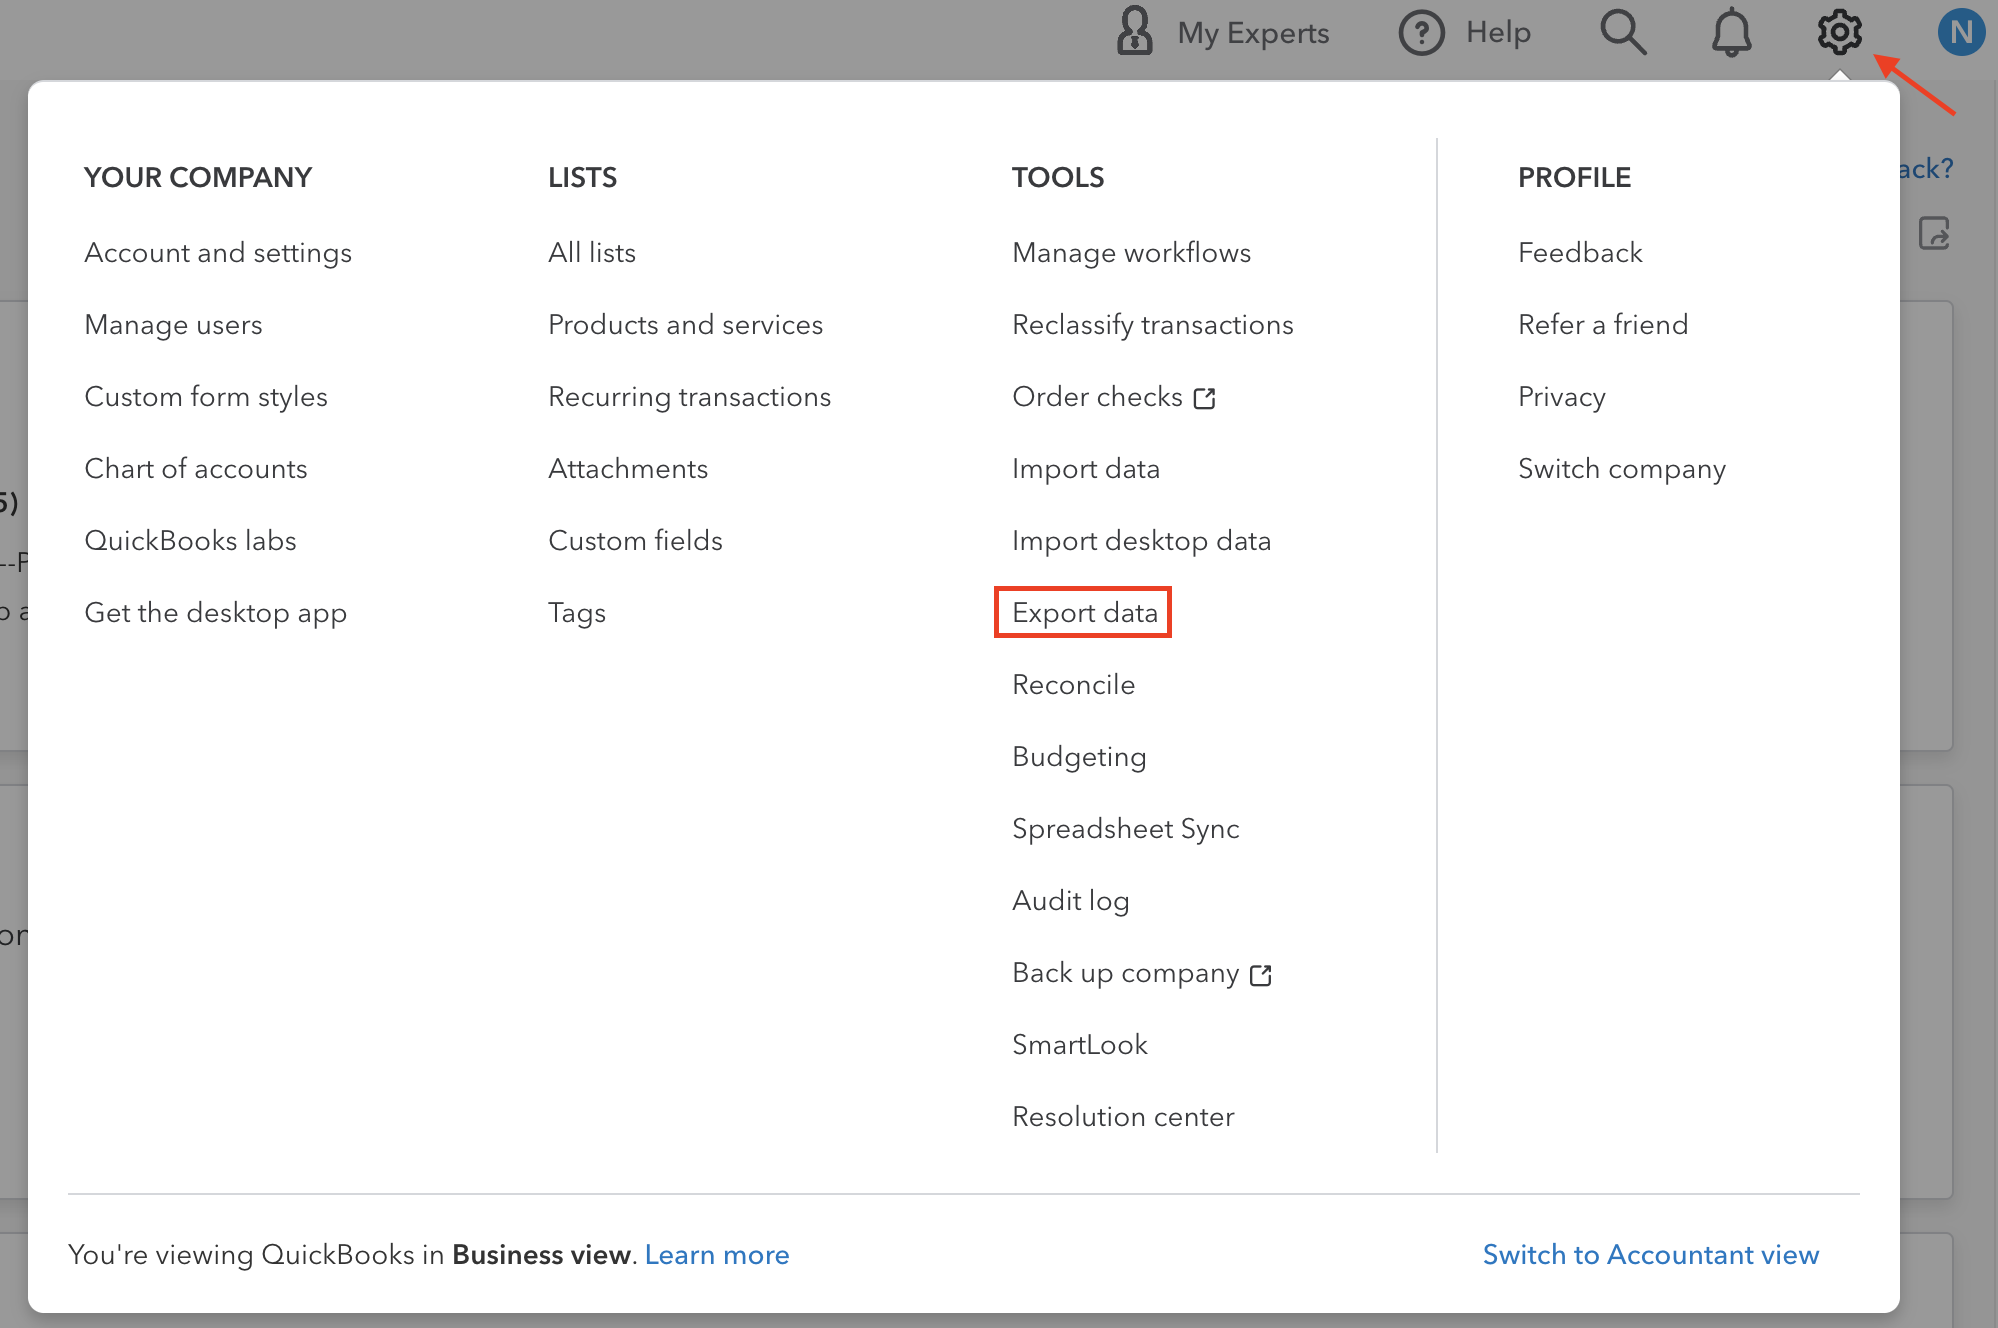
- On the Reports tab, select visit the reports page

- Under Employees, select Time Activities by Employee Detail

- Select Customize
- Select All Dates and Group by None
- Unselect all fields under Header/Footer and select Run report
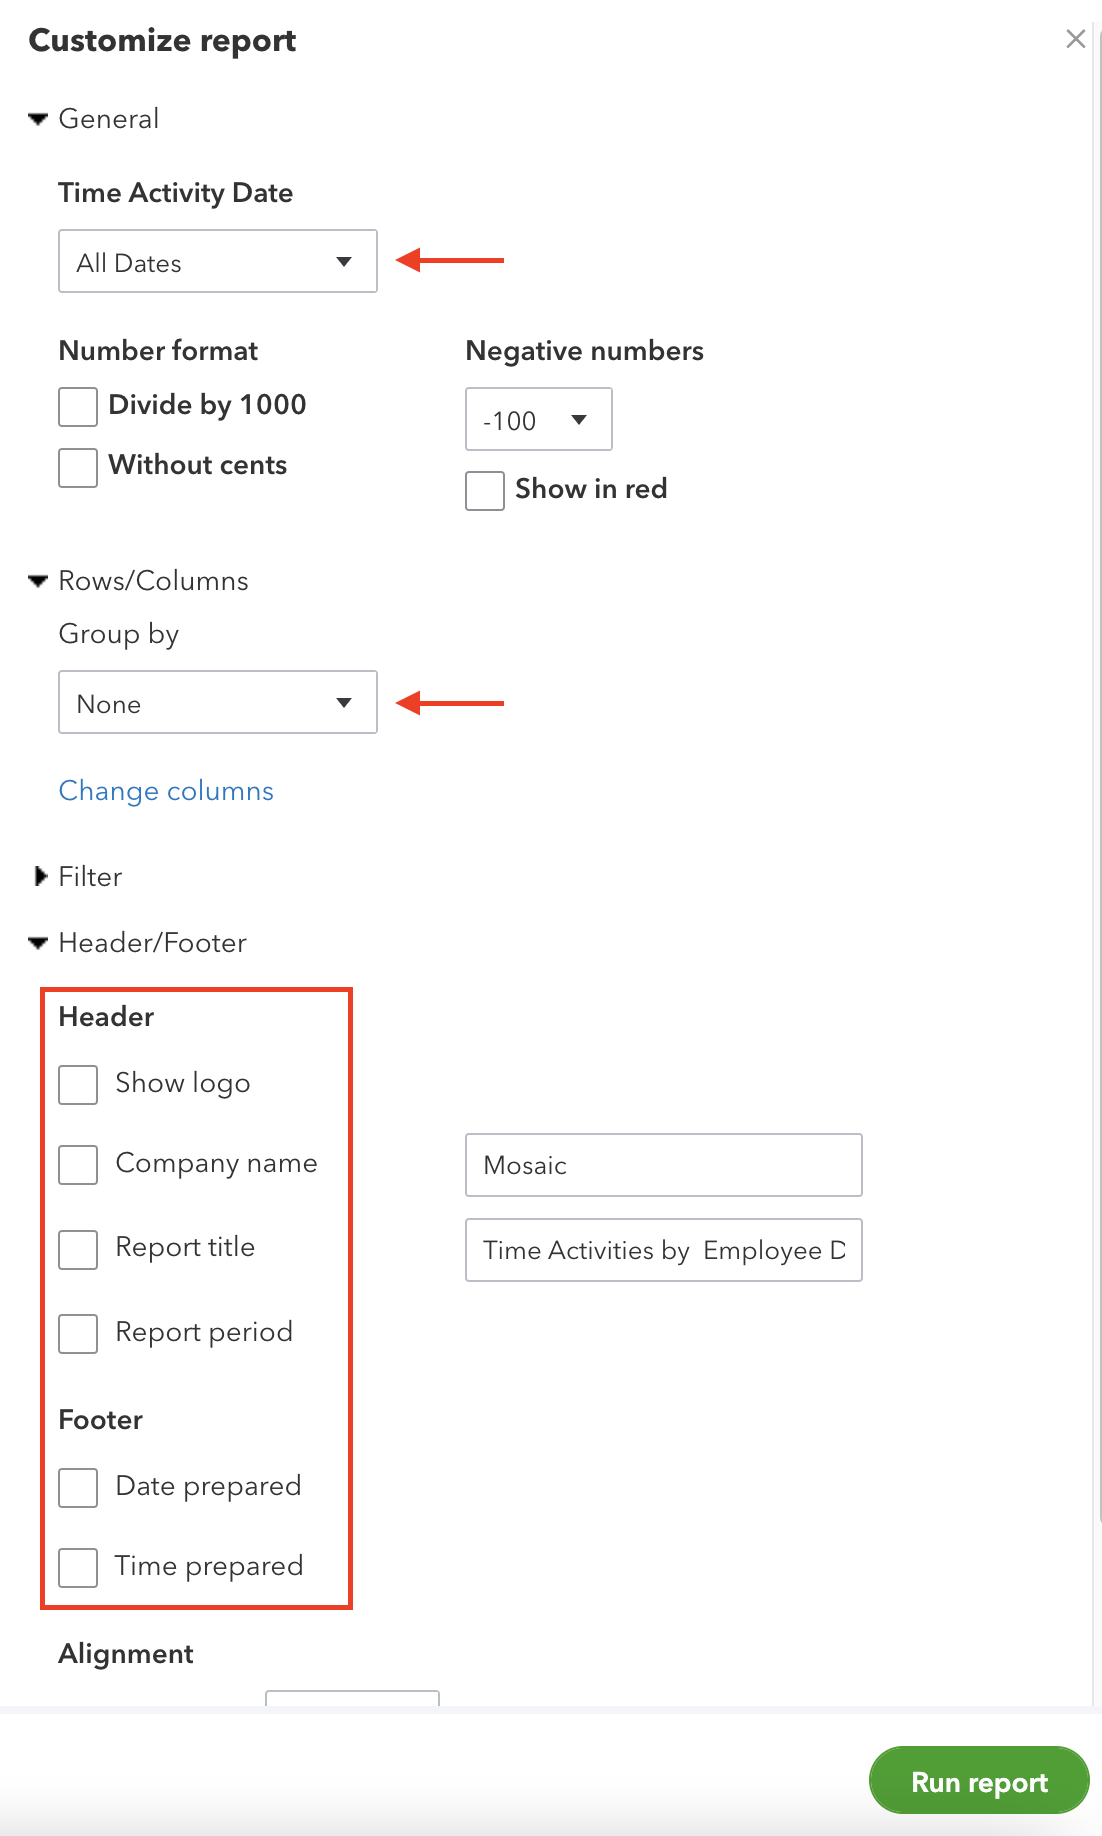
- Select the Export icon above your report and select Export to Excel

- Open the Excel file and select File > Save As... > File Format: .csv to save the file in .csv format
Q: How to close books on QuickBooks?
Before closing the book, review your accounts and make sure everything looks good.
- Go to settings, then select Accounts and settings.
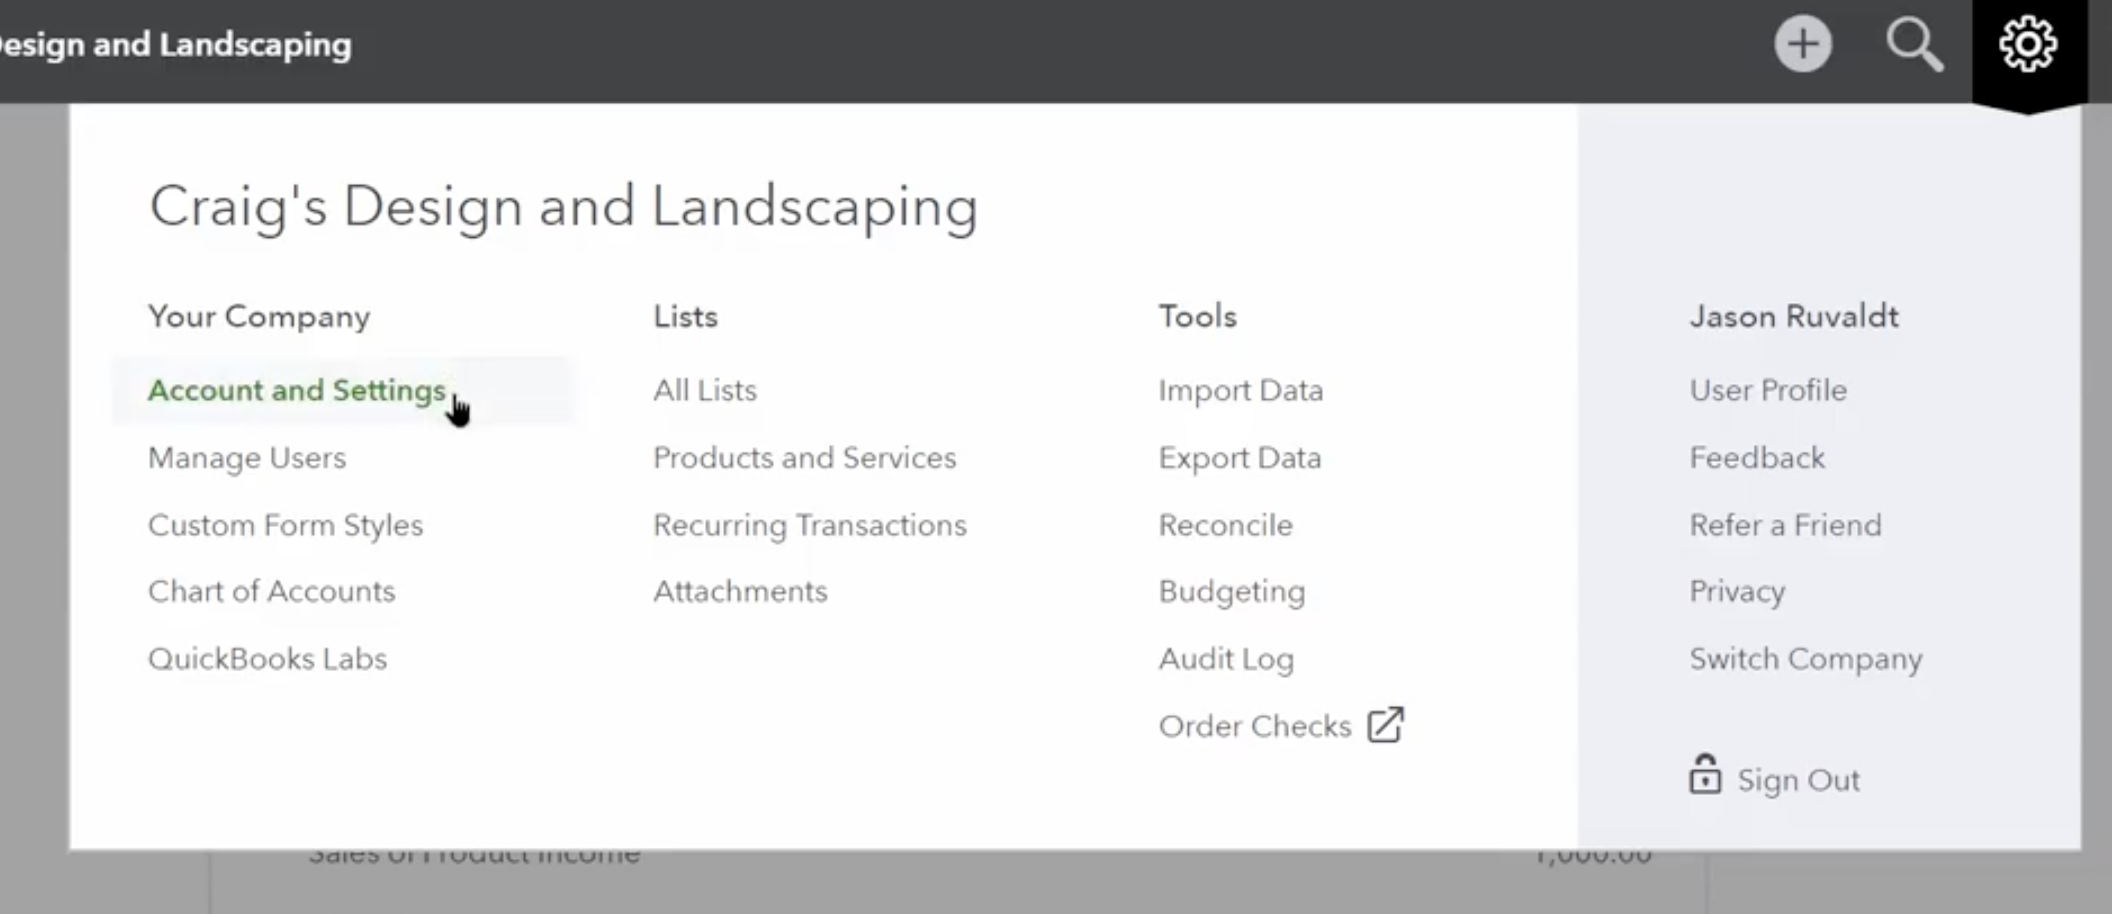
- Select the Advanced tab.
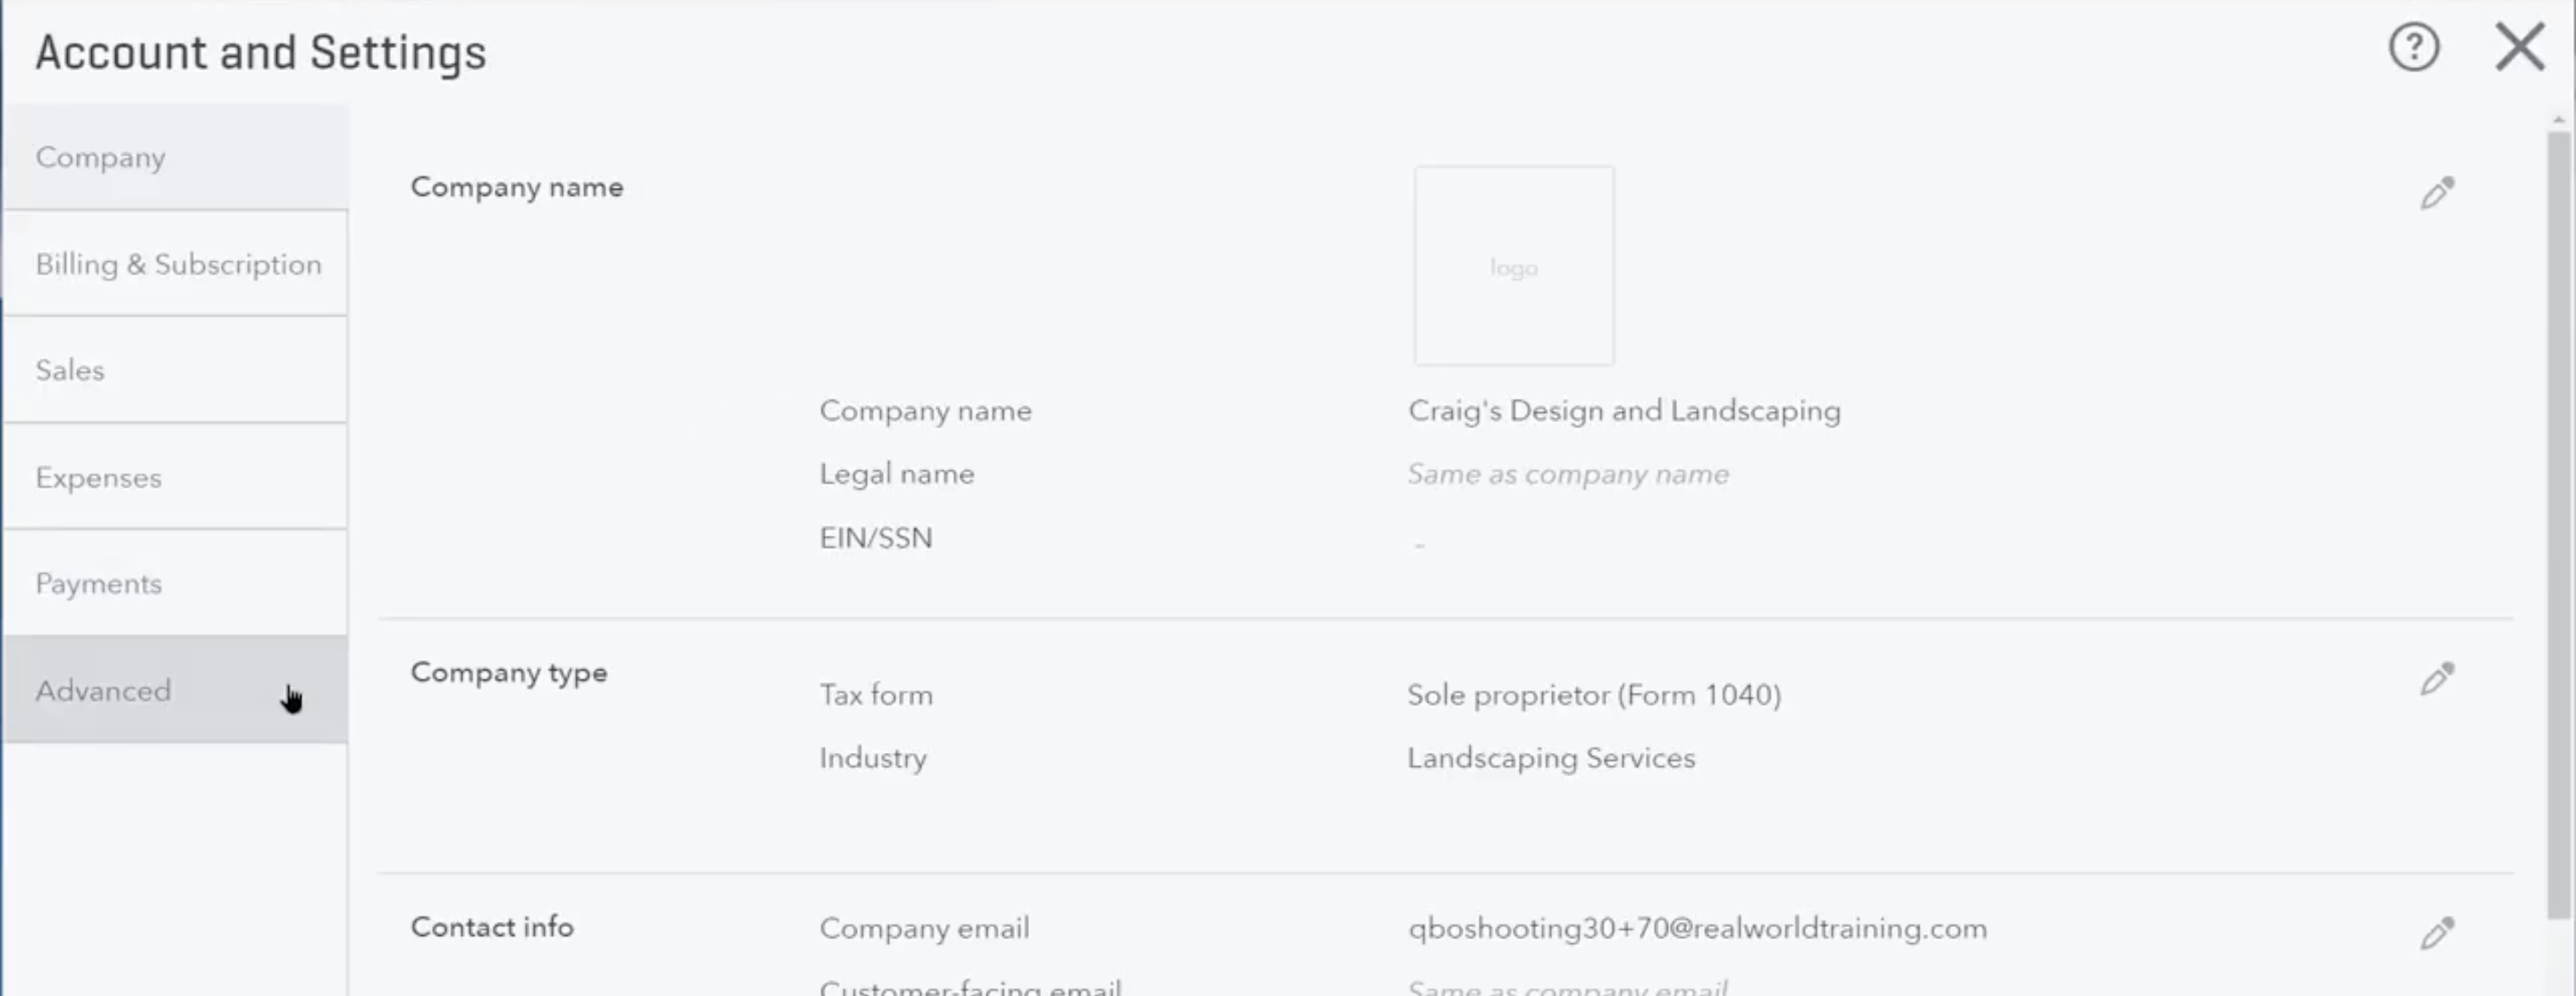
- Select the edit icon on the top right or click the accounting area to edit.
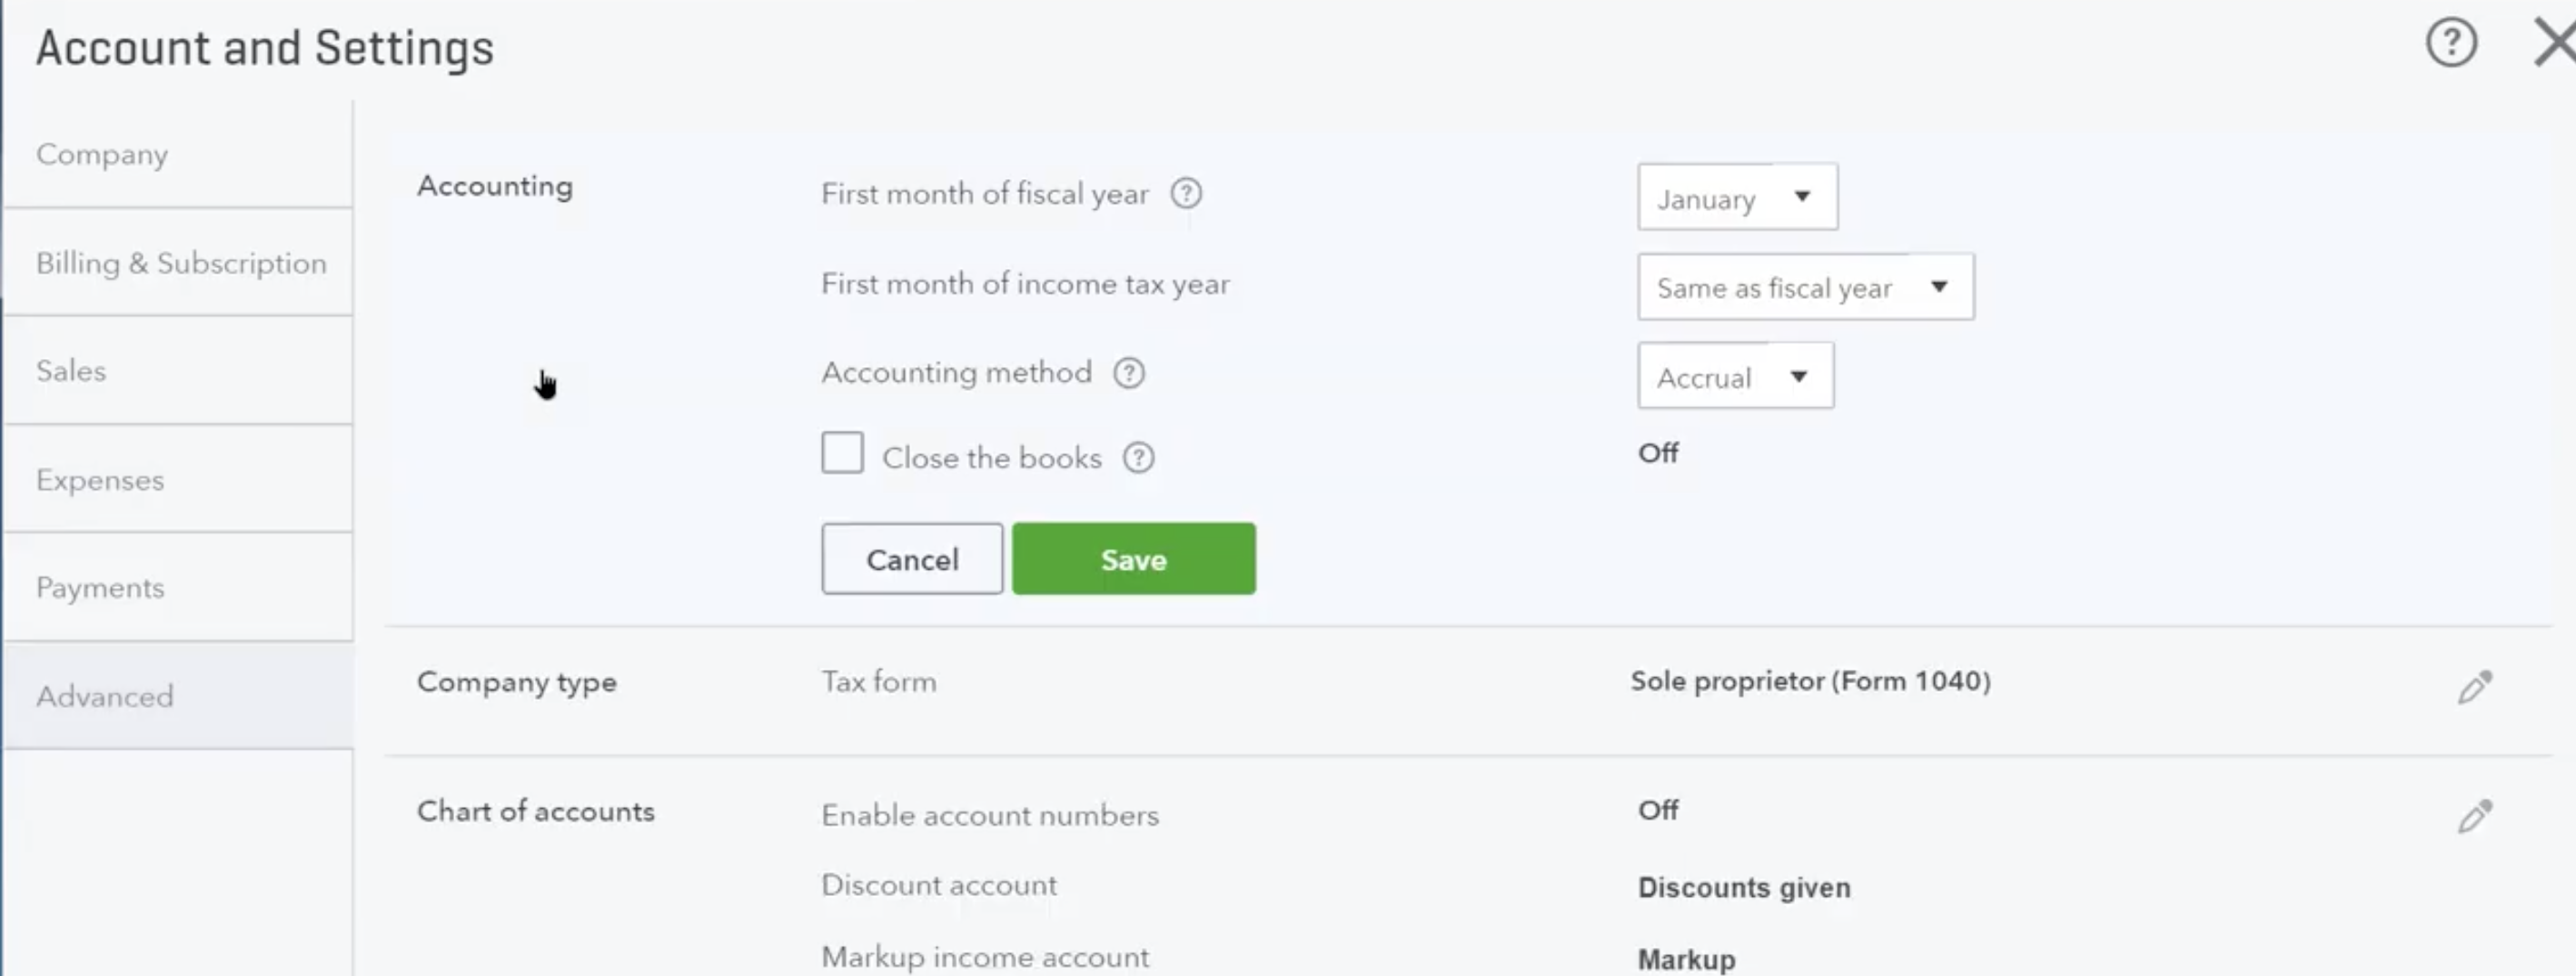
- Click the checkbox of "Close the books".

- Enter a closing date.
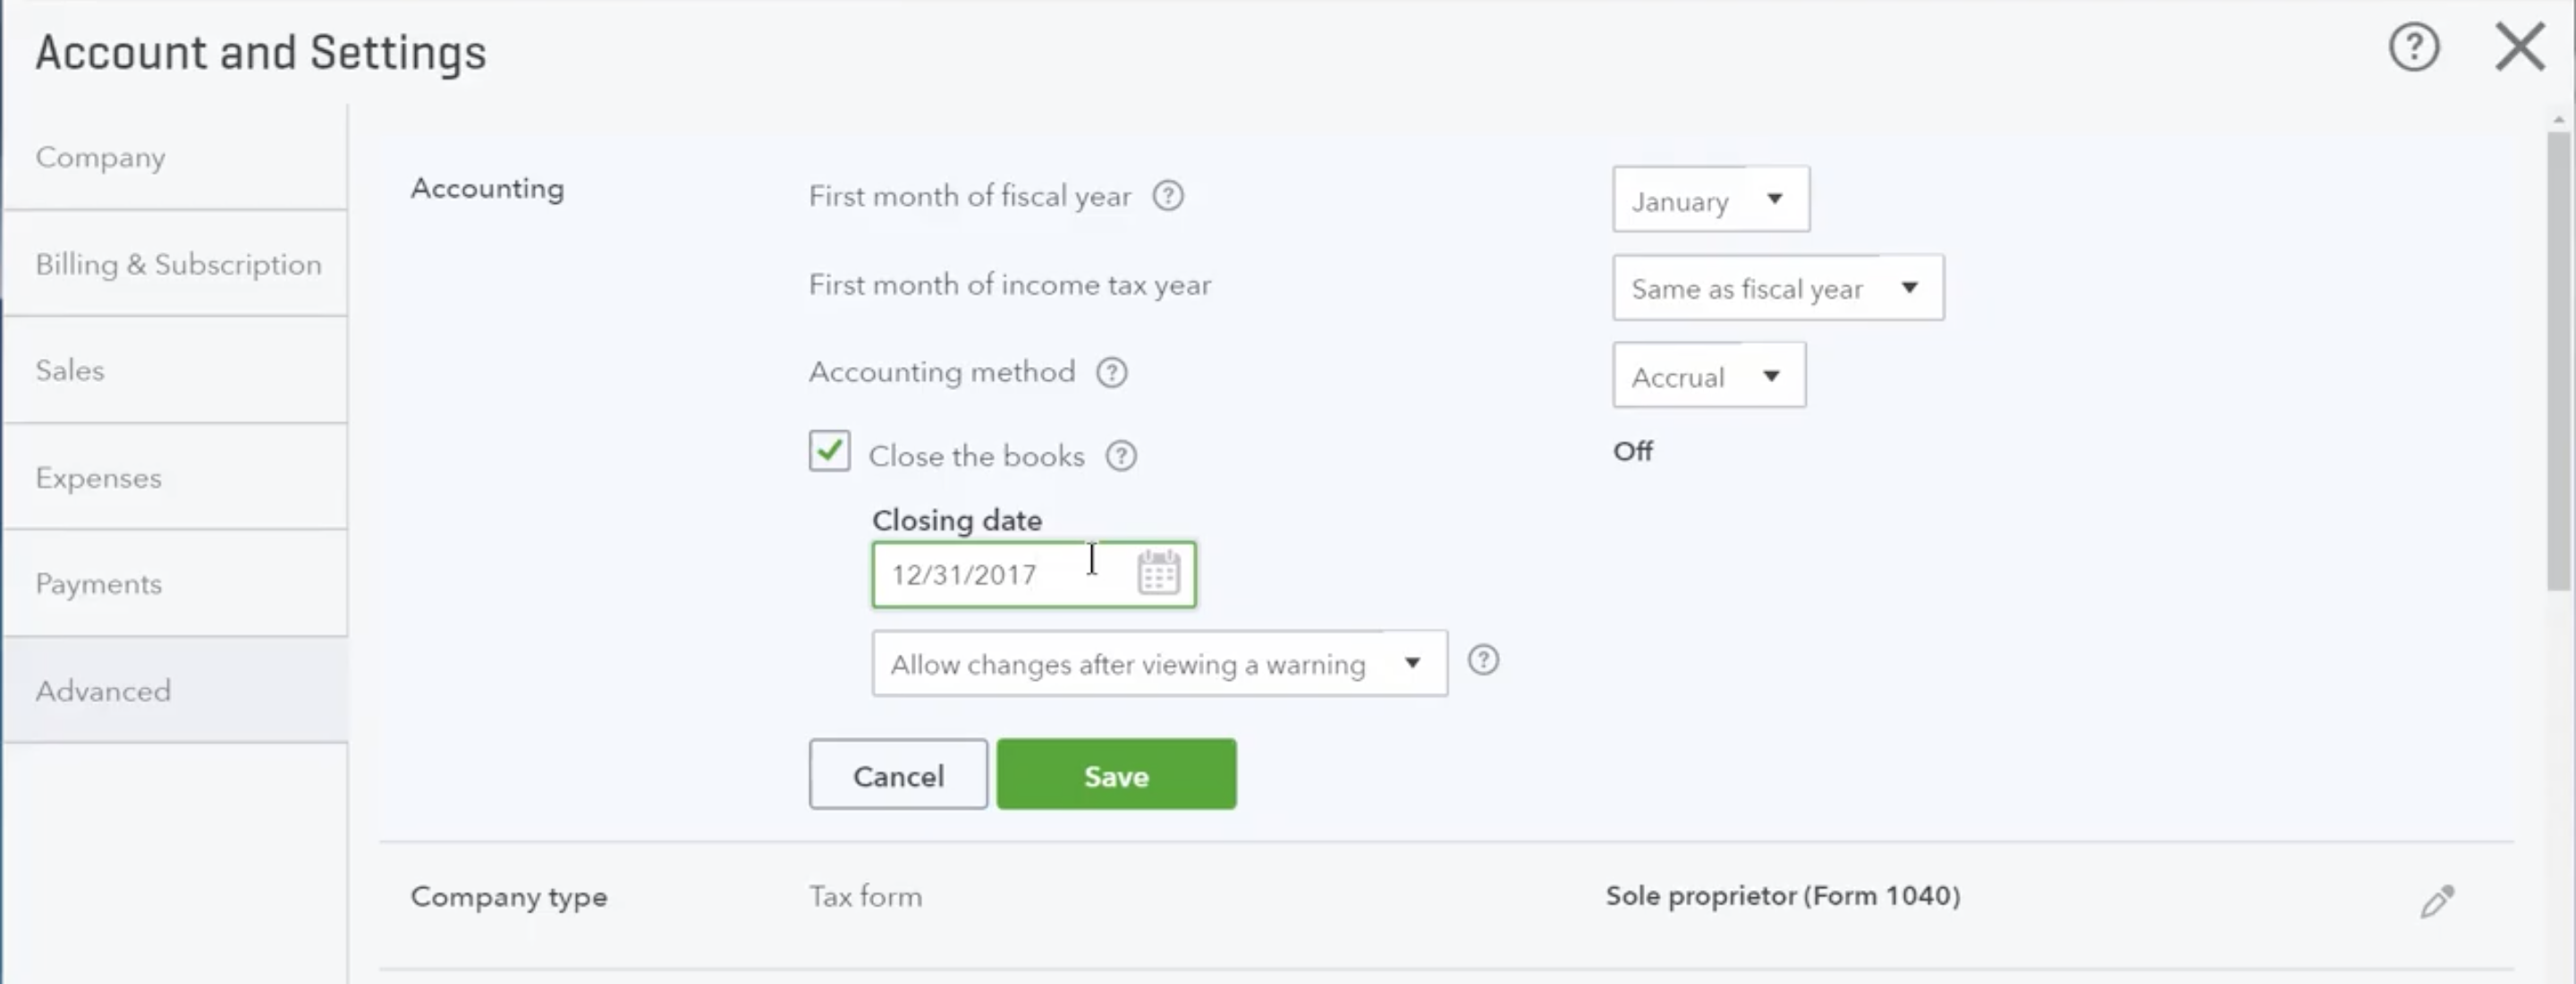
- Click Save and close the settings menu. The closing date should be effected immediately.
Q: Can I change my closed books on QuickBooks?
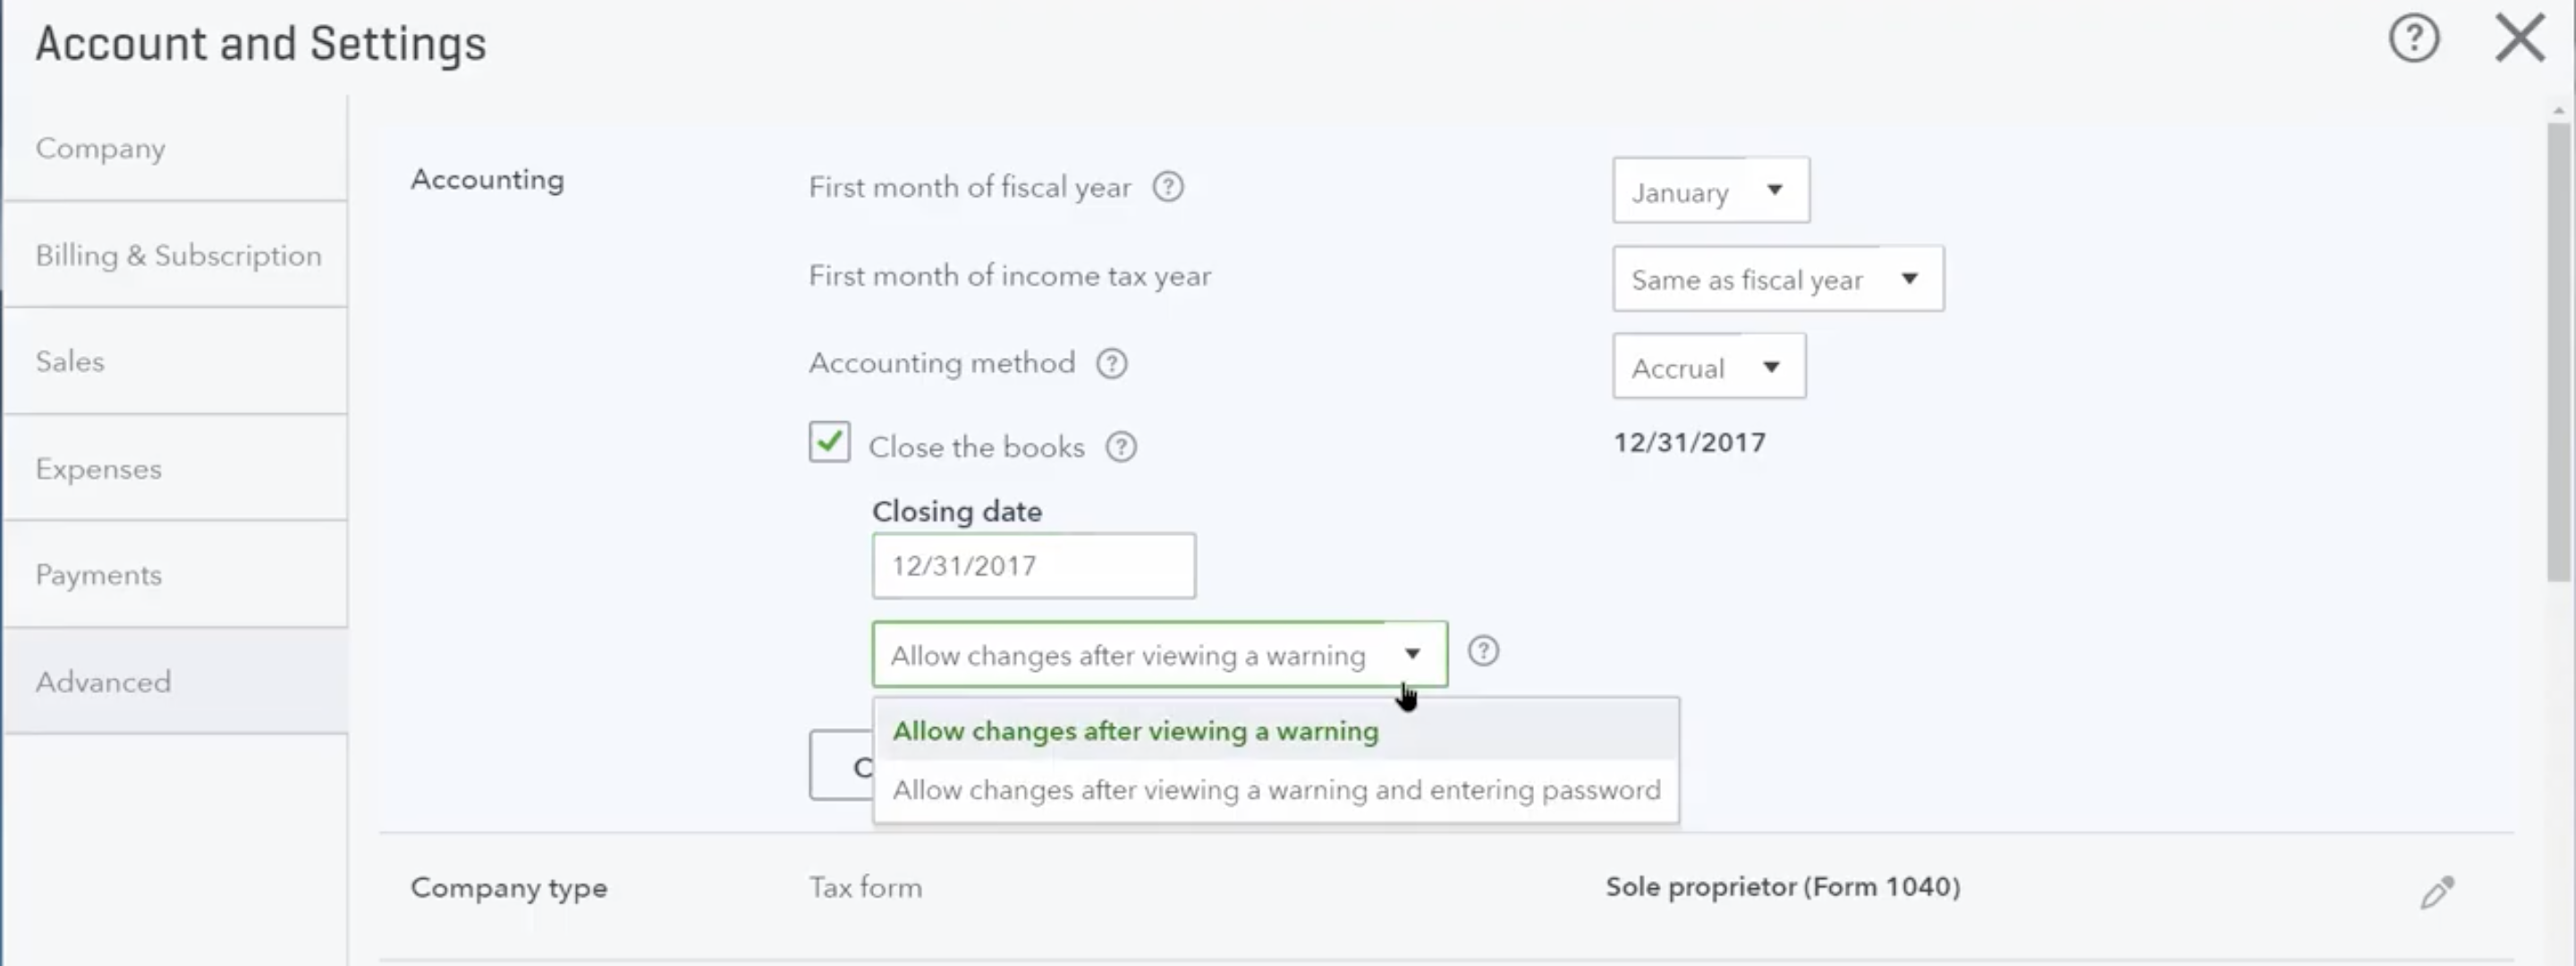
Yes, you can still change the book after you closed it. By default you will receive a warning when you change anything on or before the set closing date. You can also assign a password to ensure extra security by following these steps. (Only admins can make these changes.)
- Go to Settings, then select Accounts and settings.
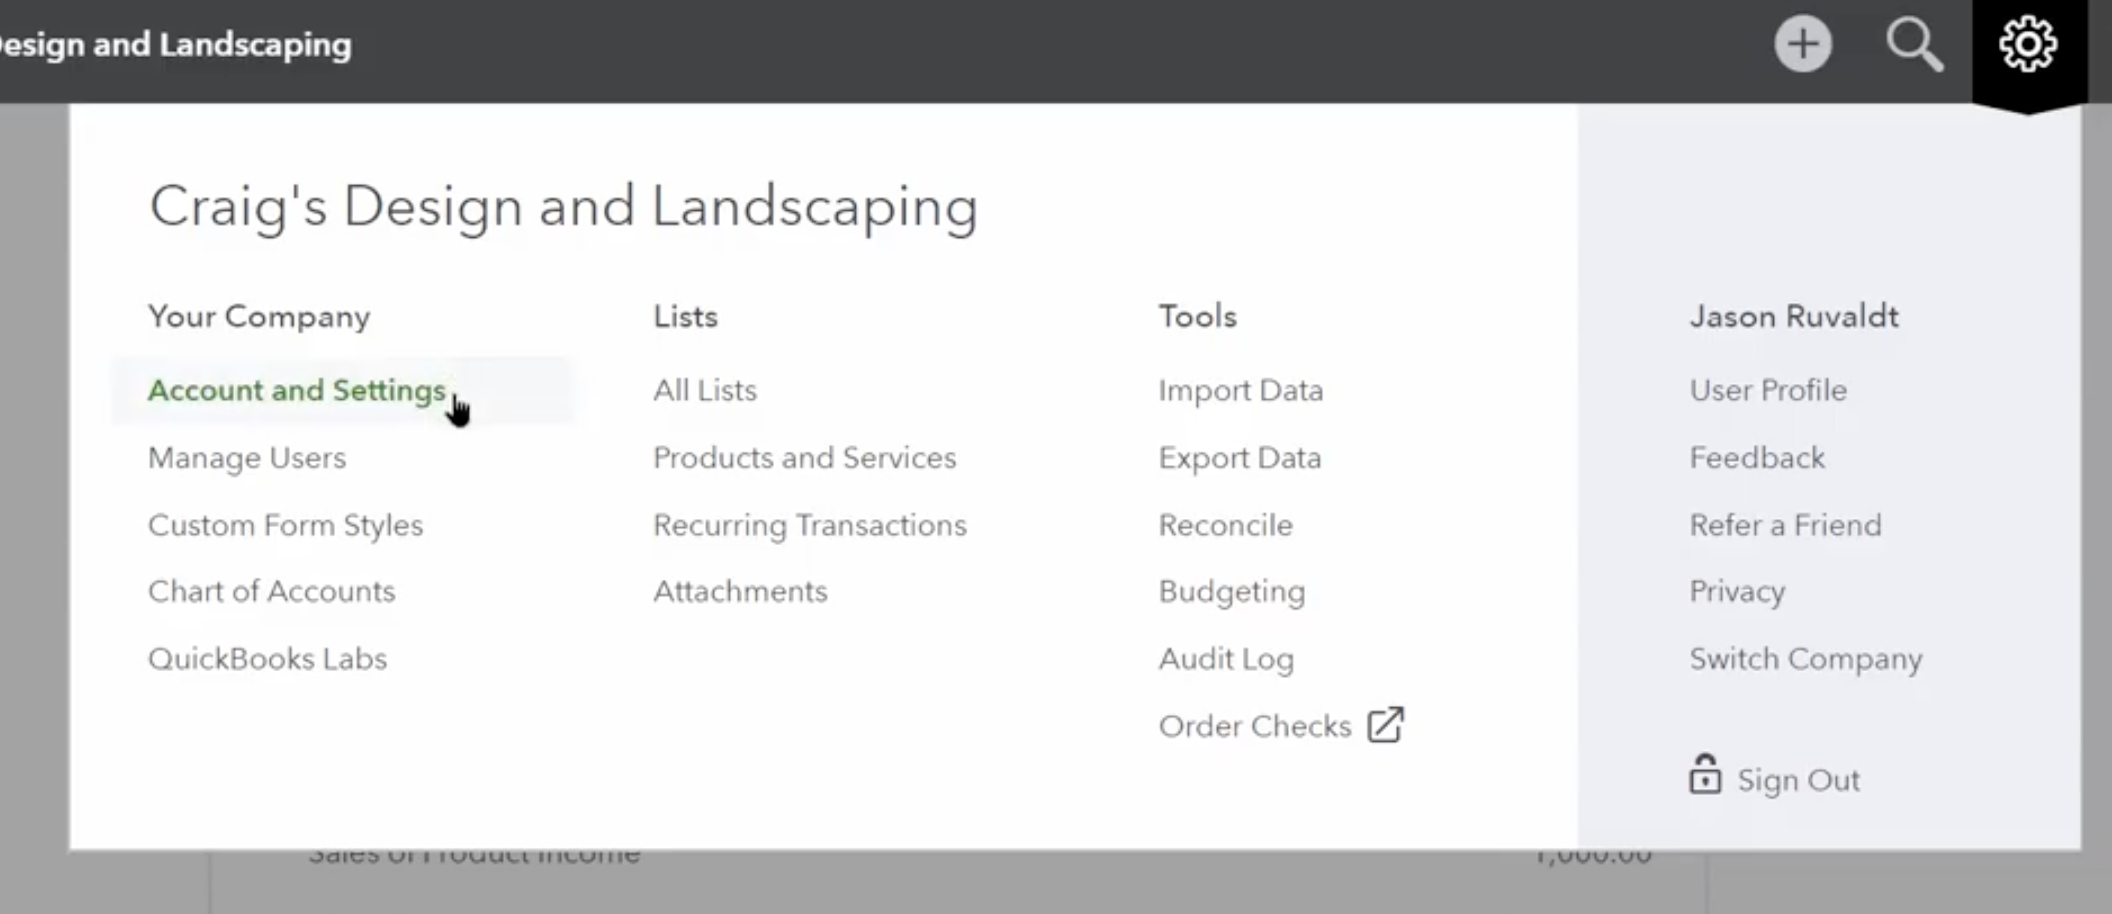
- Select the Advanced tab.
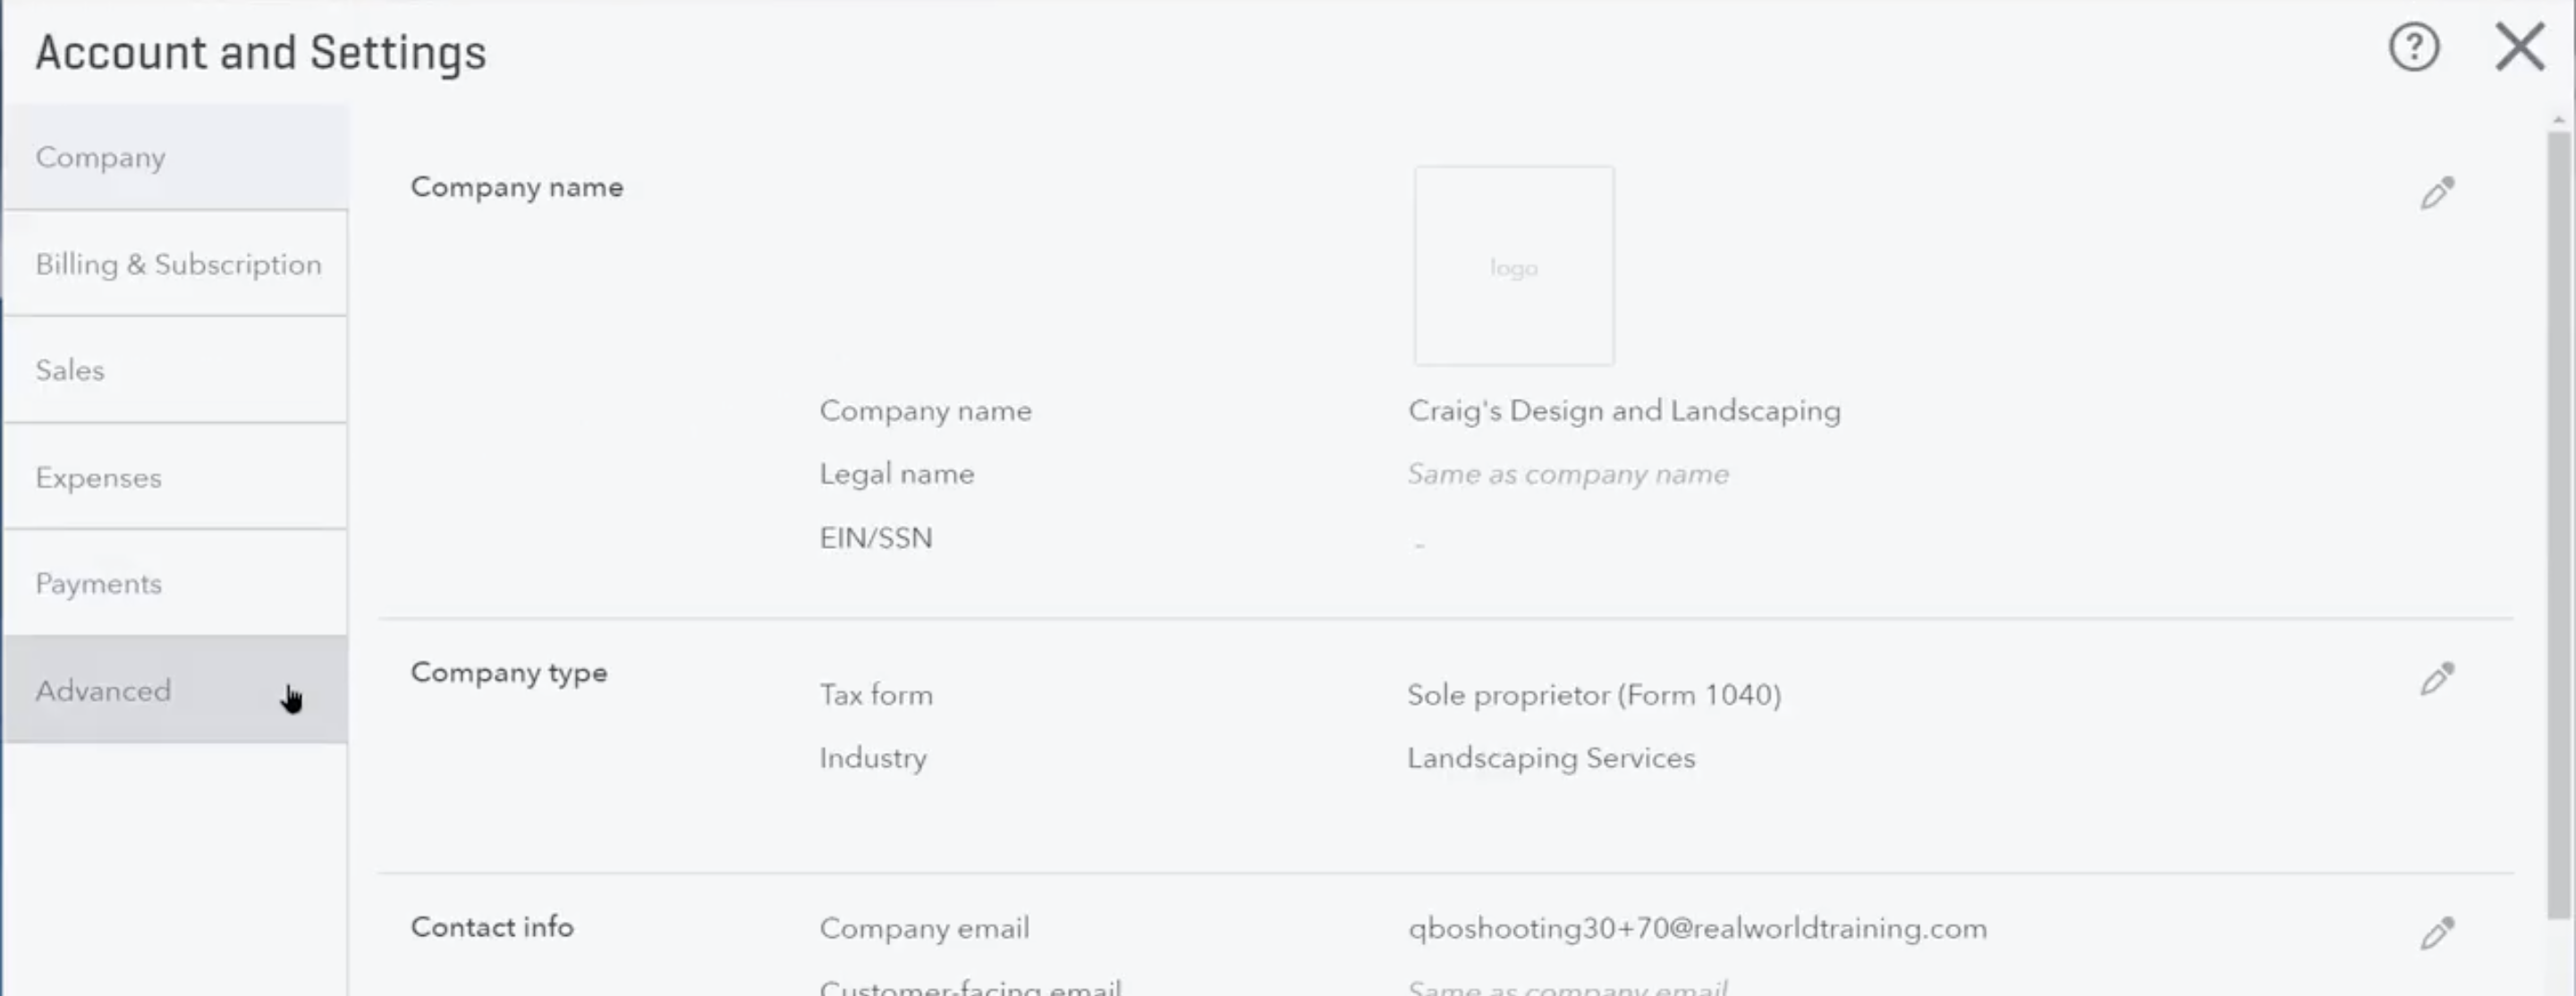
- Select the edit icon on the top right or click the accounting area to edit.
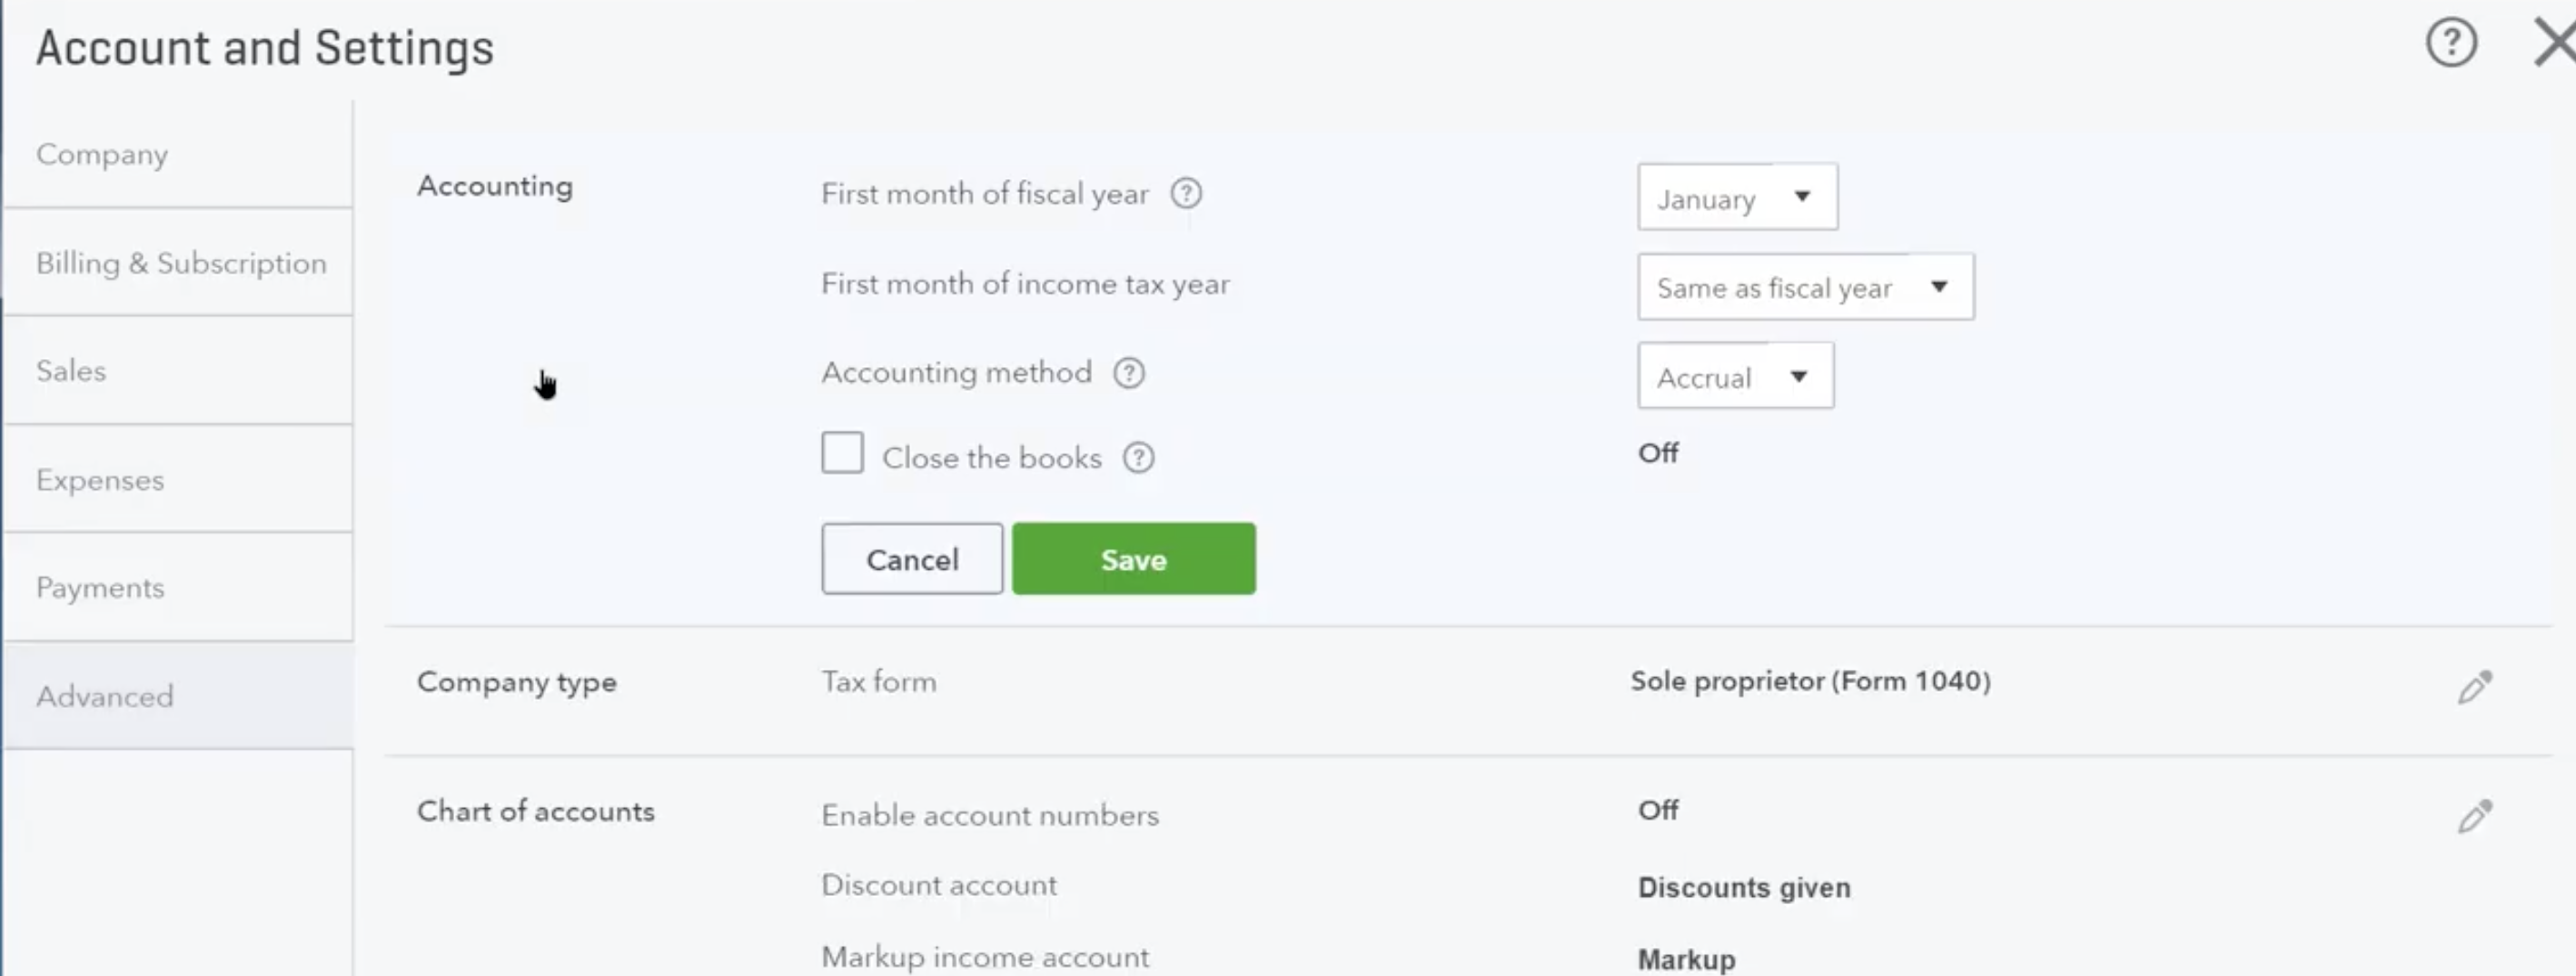
- You can change the closing date here as well as set a password for any changes after the closing date. Select "Allow changes after viewing a warning and entering password" in the drop down.
- Enter your password and confirm it again.
NoteTo change your password, just enter a new password in the password field and confirm it.
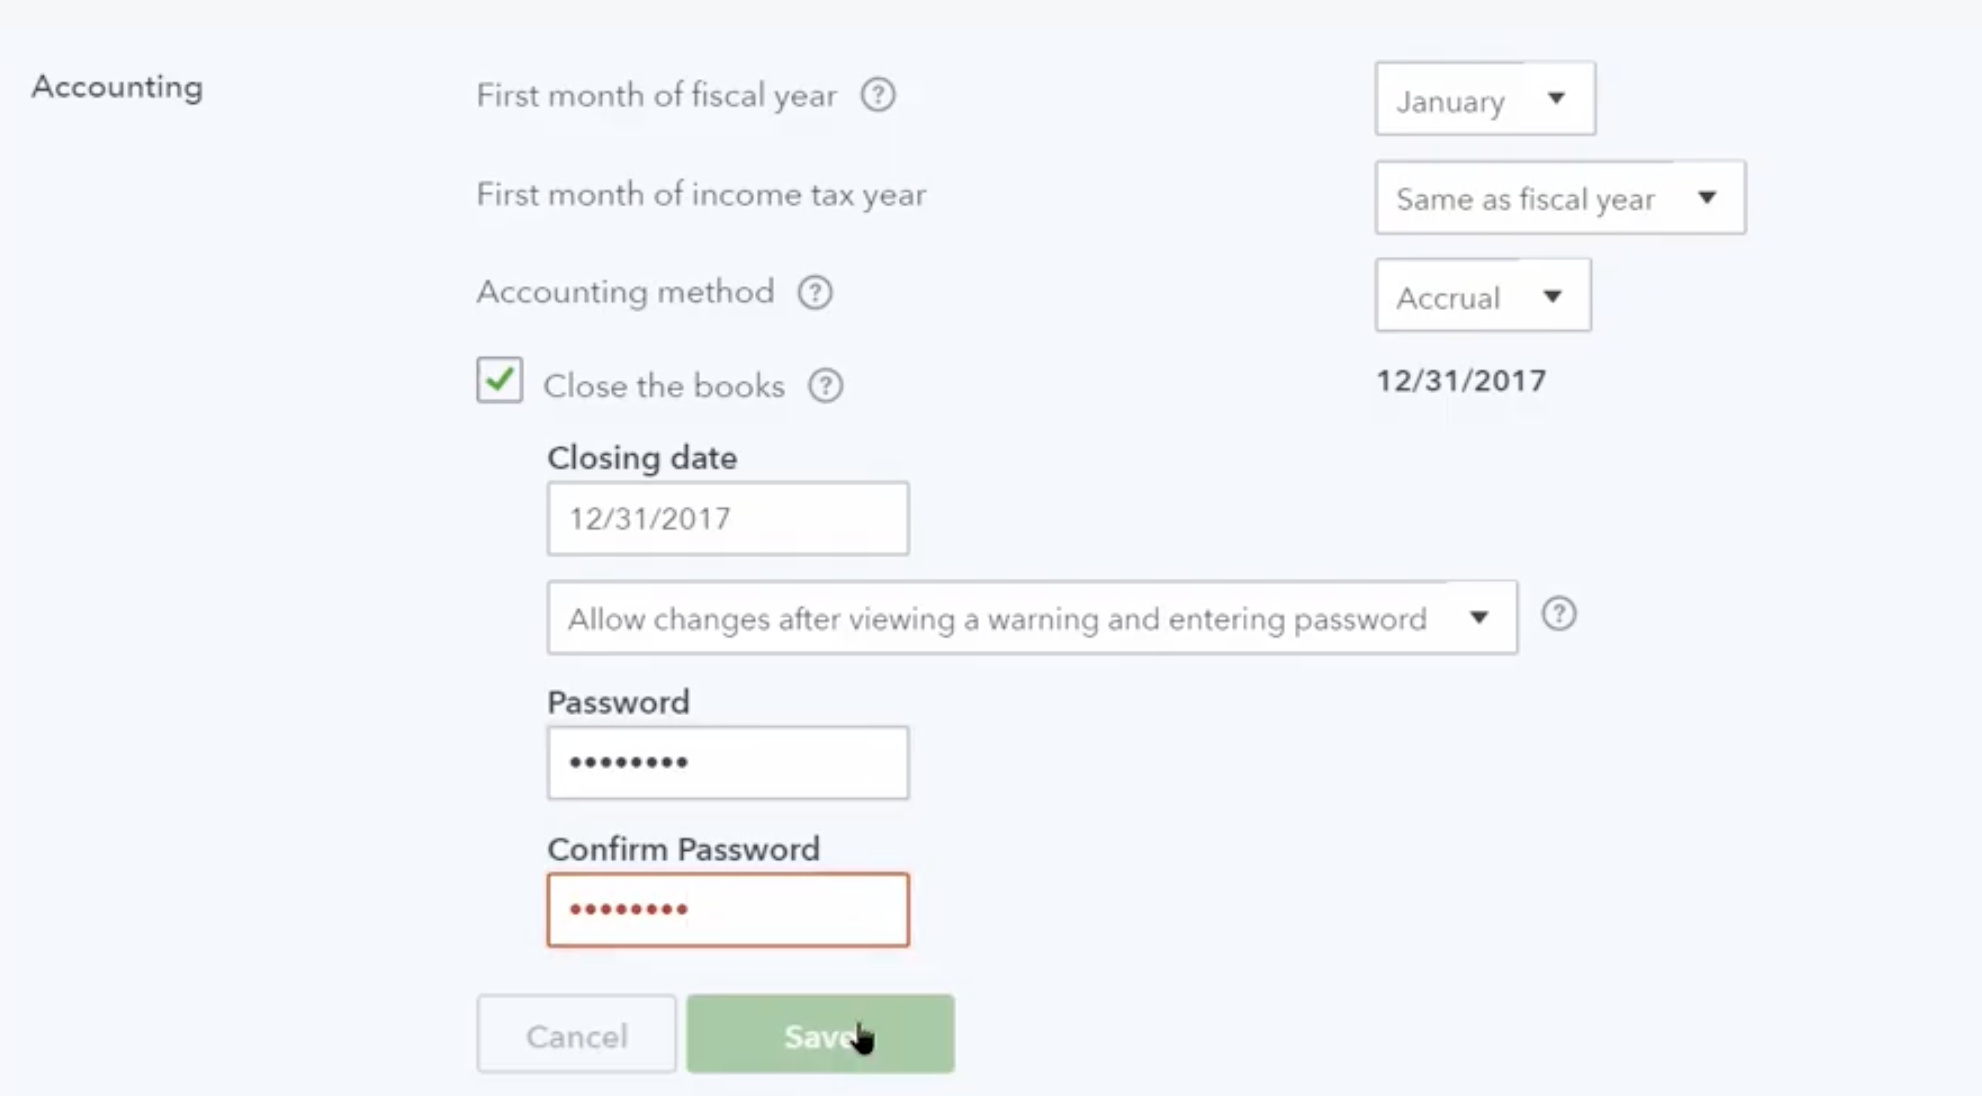
- Select Save and then close the settings menu. This should take effect immediately.
Q: How to add timesheet entries to existing invoices on QuickBooks?
- Click on Sales from the left menu.
- Go to the Invoices tab.
- Choose the invoice you'd like to add the billable time on to.
- On the right-hand side, you'll see an arrow, click on this to expand the list of open timesheets, billable expenses, or estimates.
- Click Add on the timesheet you want to add to the invoice.
- Fill in the appropriate Sales Tax Code.
- Click Save and Close
Q: How to remove timesheet entries from invoices on QuickBooks?
- Click the Sales tab, then select Invoices.
- Locate your invoice from the list and click to open it.
- Click the small link icon on the far right side of the line item for your hours.
- Simply click Remove, or to view the exact details of the timesheet, click the blue link that says Billable time.
Updated 4 months ago
