Uploading Time Entries with Subphases
Prerequisite for Importing SubphasesEnsure you have Subphases enabled in your Mosaic account. For more information on Subphases, see this Help Doc.
Legacy Time Entries (without Subphases) ImportDocumentation for the Legacy Time Entries (without Subphases) Importer can be found here.
While Mosaic can be used to input Time Entries, Time Entries can also be uploaded from other tools to Mosaic for complete budgets and details on the progress of your Projects.
Download the Sample FileBefore uploading, download the import template to ensure a smooth upload process.
To upload Time Entries:
-
Confirm either Mosaic Support or your Customer Success Manager have enabled the Time Entries upload tool on your account. To request this tool be added to your account, reach out to our team via [email protected]
-
Next, fill out the Time Entries information with Subphases on the template file. download here
Here is an overview of the details needed for each column:
Field | Guide | Example | Required |
|---|---|---|---|
Date | Date of Time Entry.
| 2022-01-05 | Yes |
Employee Name | Full Employee Name.
| John Smith | Yes |
Employee Email | Employee's Email Address.
| Yes | |
Portfolio | Name of the Portfolio that the Project is in. Only required if there are multiple Projects with the same Title and Ref# in various Portfolios. | 2023 Projects with Subphases | Yes |
Project | Title of Project. | Central Park | Yes |
Project Ref# | Project Reference Number. | 1234.1 | Yes |
Phase | Title of Phase.
| Preliminary Design | Yes |
Phase Ref# | Phase Reference Number.
| 100 | Yes |
Subphase 1 | Title of 1st Subphase Level. | Concept Development | No |
Subphase Ref#1 | Reference Number of 1st Subphase Level. | 120 | No |
Subphase 2 | Title of 2nd Subphase Level. | Construction Documents | No |
Subphase Ref# 2 | Reference Number of 2nd Subphase Level. | 300 | No |
... | ... | ... | ... |
Subphase 9 | Title of 9th Subphase Level. | Blueprint Drafting | No |
Subphase Ref# 9 | Reference Number of 9th Subphase Level. | 14 | No |
Work Category | Title of Work Category. Type of work being completed.
| Planning | No |
Work Category Ref# | Work Category Reference Number. | B50 | No |
Description | Details on the work being completed for the time entry. | Survey planning for south park entrance | No |
Billable | Are the hours billable/non-billable?
Overridden by Project, Phase, Work Category.
The default value will be "true" if the Project, Phase and Work Category are all billable. If either Project, Phase or Work Category are non-billable, the default value will be "false". You can override the default value by providing a different value for this field. | true | No |
Hourly Rate | Billable Rate. | 250 | No |
Hours | Number of Hours. | 3 | Yes |
Invoice Hours | Hours for billing (if different from the entered number of hours) | 2 | No |
Every Line Denotes a New EntryFor each individual in the Time Entry, create a separate line. If a person has time entries under multiple phases or work categories, each time entry should also have its own line. For example, if you're adding two time entries to a project with two phases, but only one person has time on both phases, the spreadsheet should display three data lines.
Please review this carefully before uploading a data file to get imported
Please Note:Ensure your data is accurate and has unique values in the fields below as duplicate time entries in an import will be skipped.
The following fields are used to determine the uniqueness of a time entry for importing:
- Project Title
- Project Number
- Date
- Phase
- Phase Ref#
- Subphase(s)
- Subphase Ref#
- Work Category
- Work Category Ref#
- Employee Name
- Employee Email
- Description
Tip: Provide a unique description for your time entry if all the above fields are identical.
Importing Phases Reference Numbers with Leading ZerosBoth Excel and CSV formats are supported for import. However, if your phase number includes a leading zero (e.g., "01"), we recommend using the CSV format. Excel may automatically remove leading zeros when displaying values in the formula, which can cause unexpected errors.
- Export your completed timesheet import file to the .csv format. Date fields work best in .csv formats.
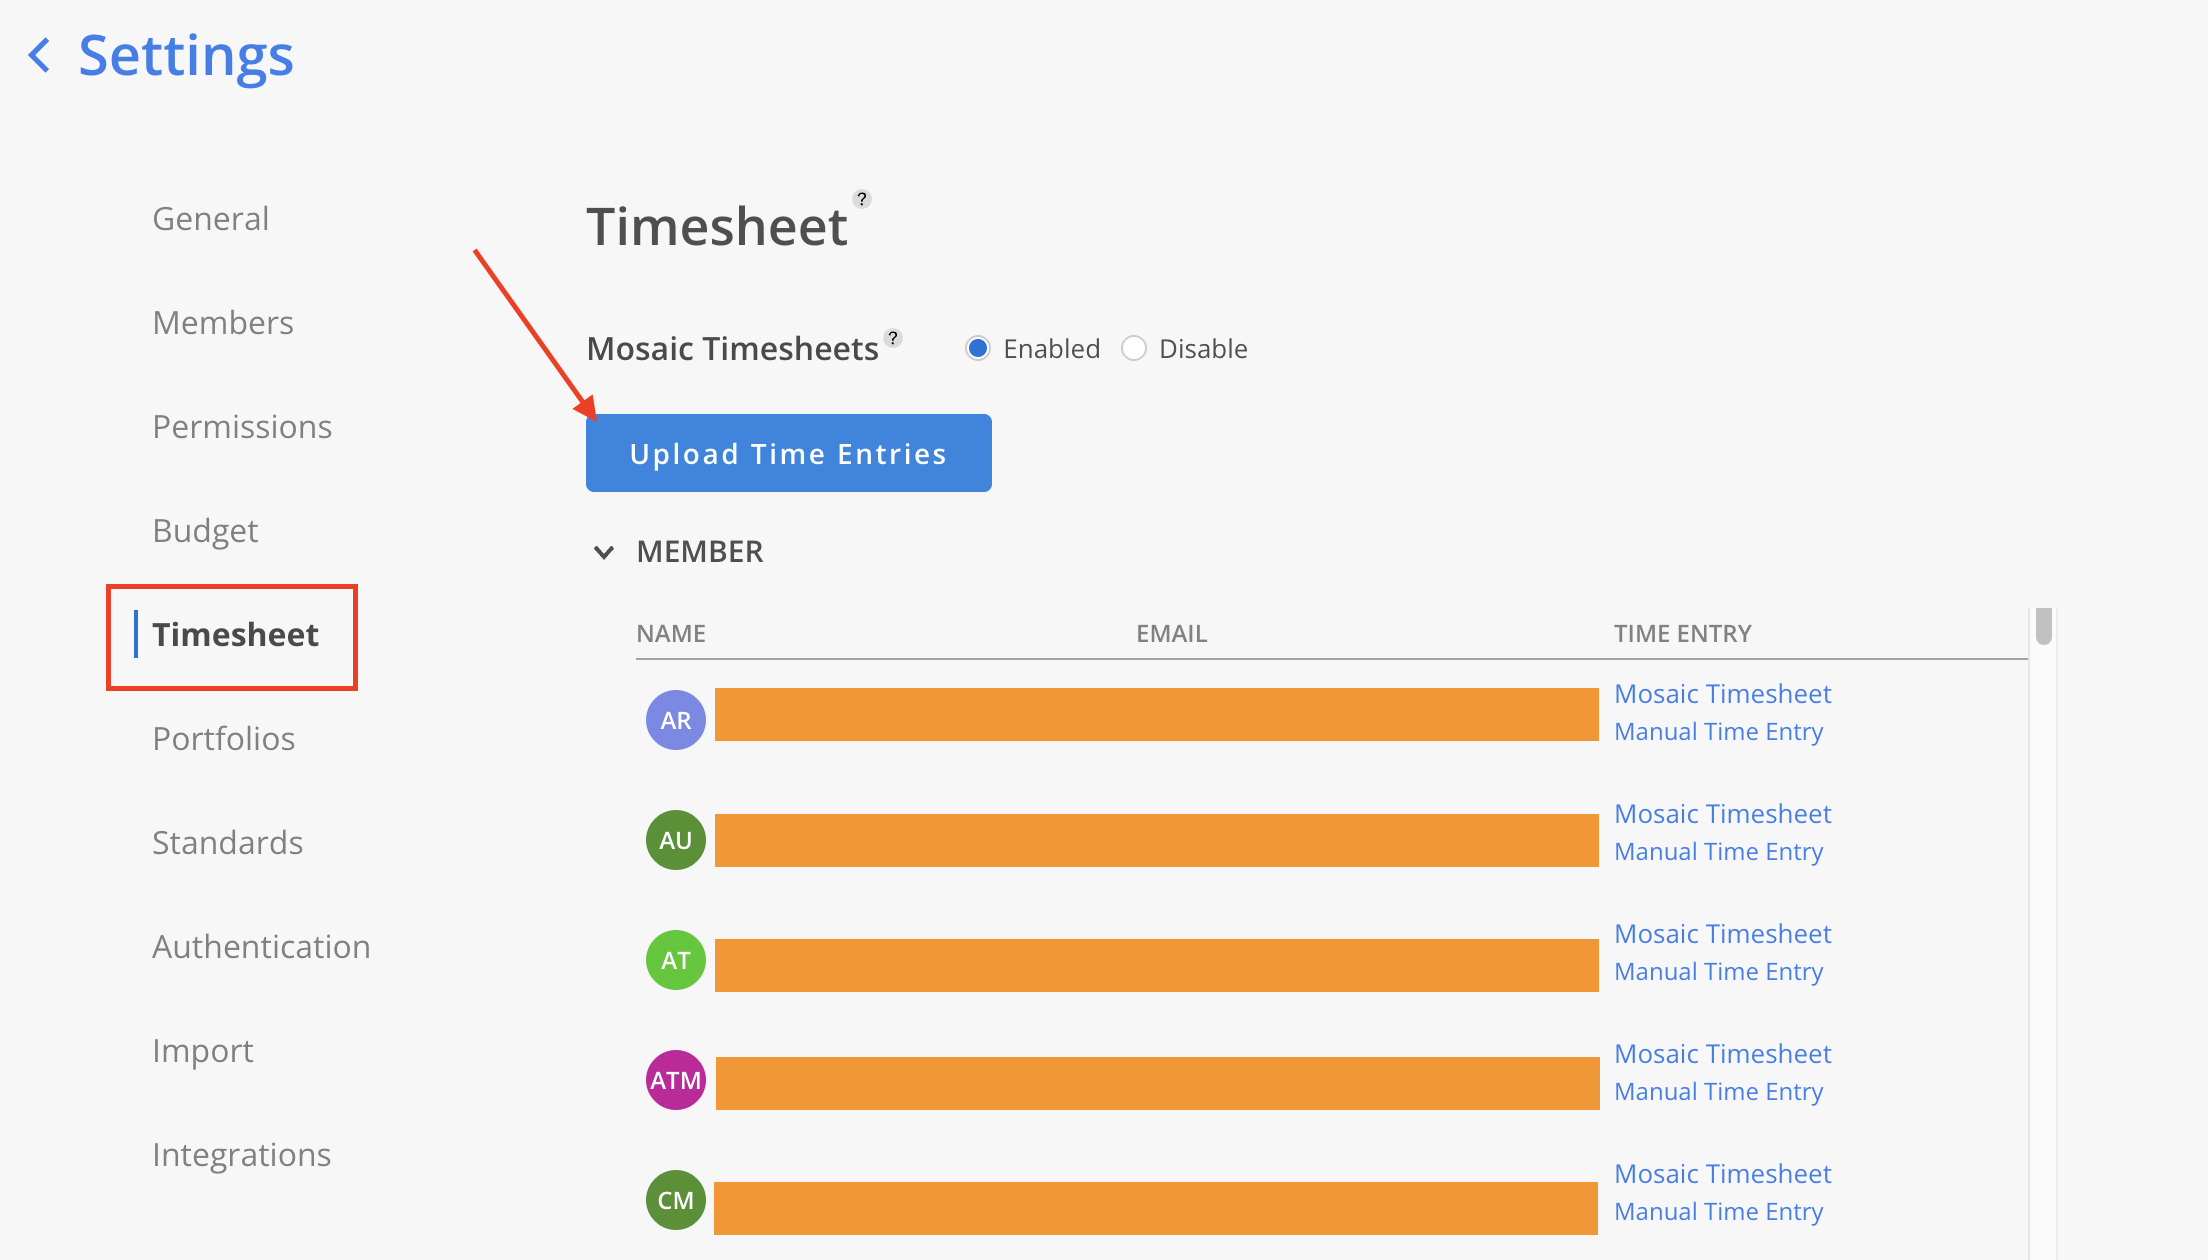
- Navigate to Company Settings > Timesheet, and click the
Upload Time Entriesbutton to upload your .csv file.
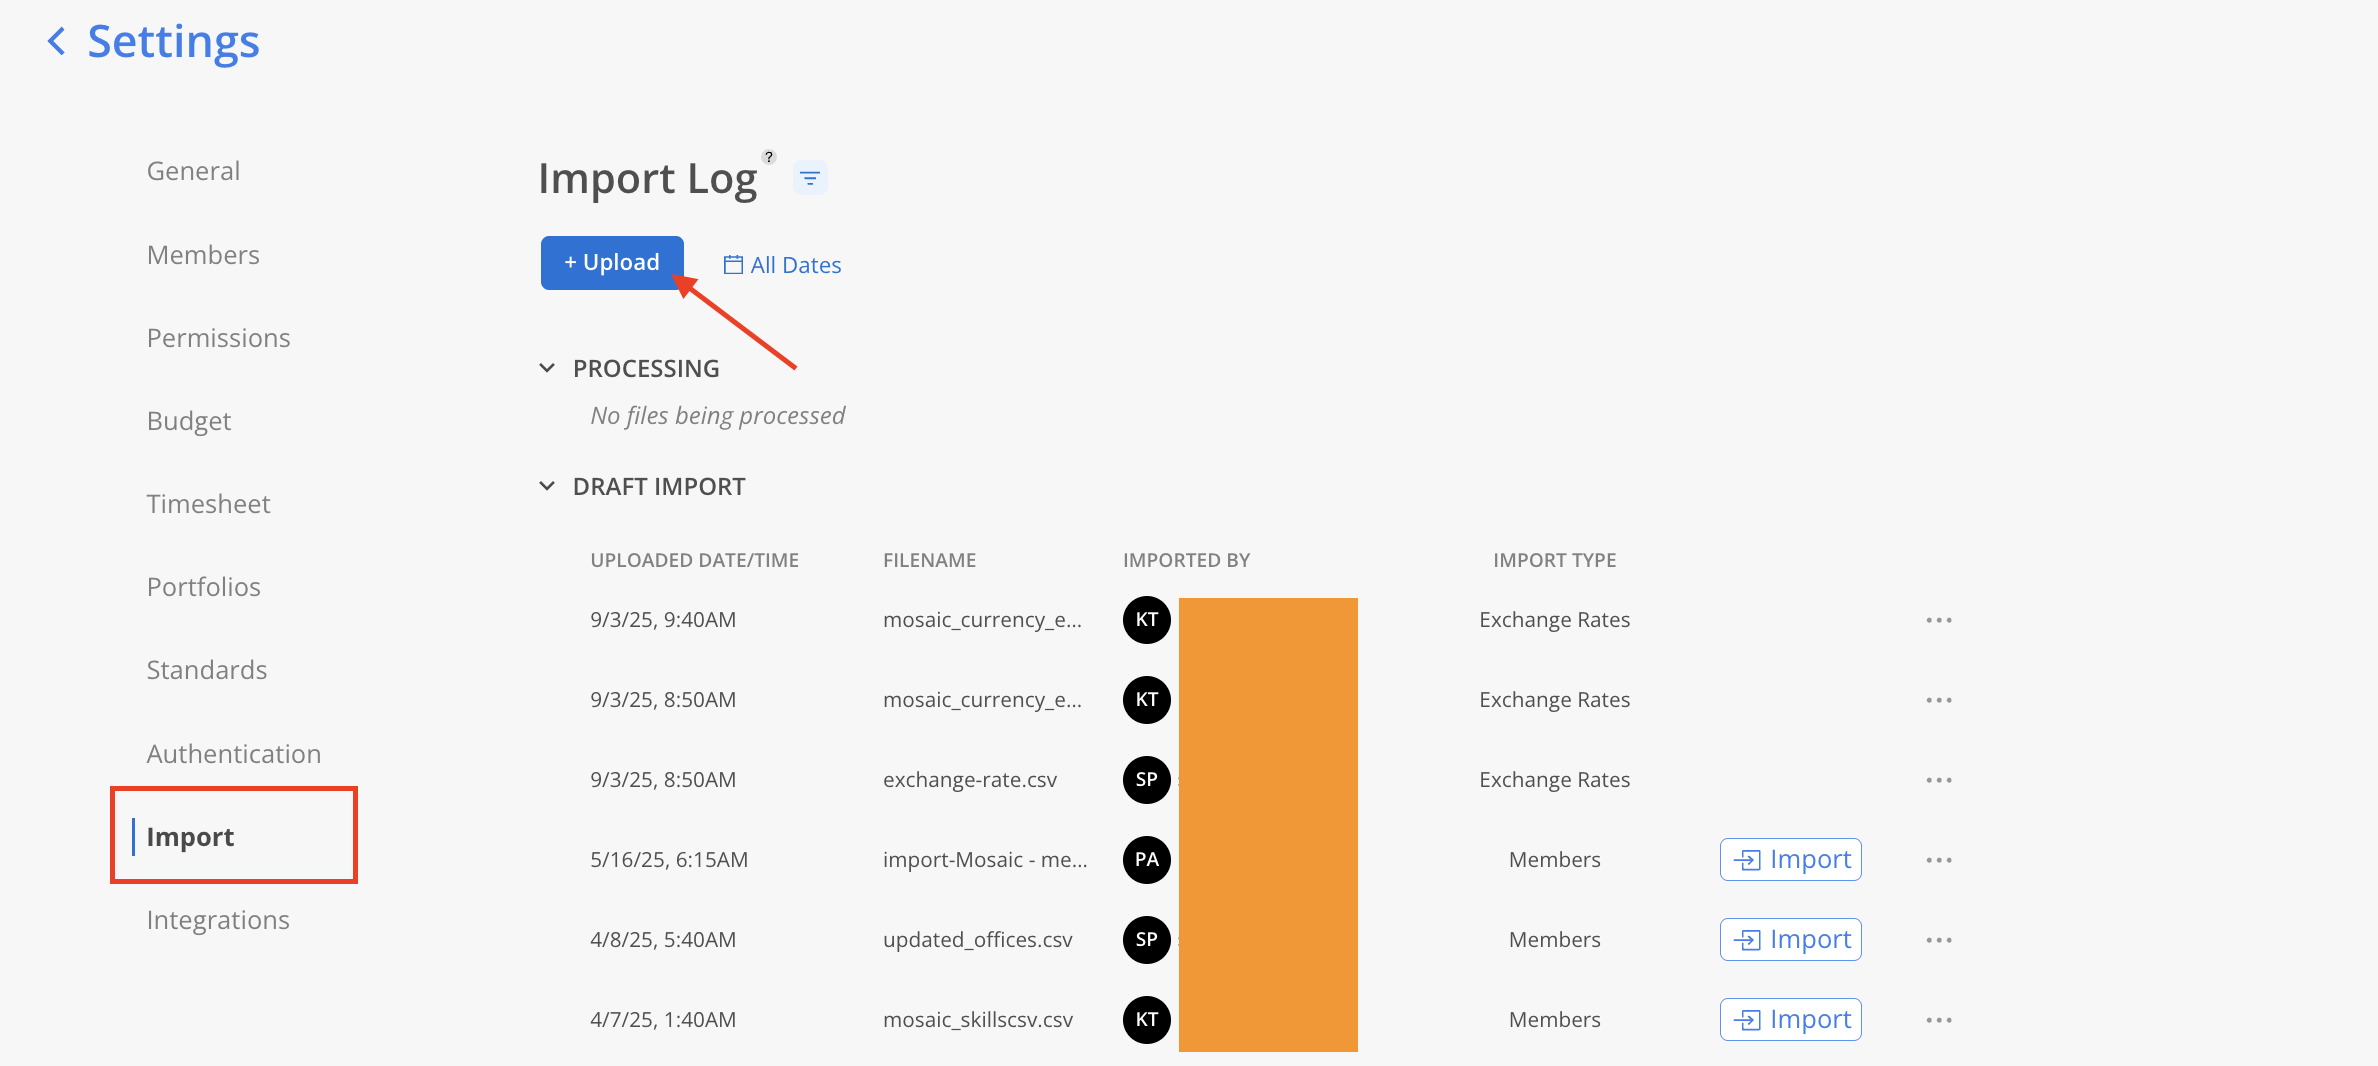
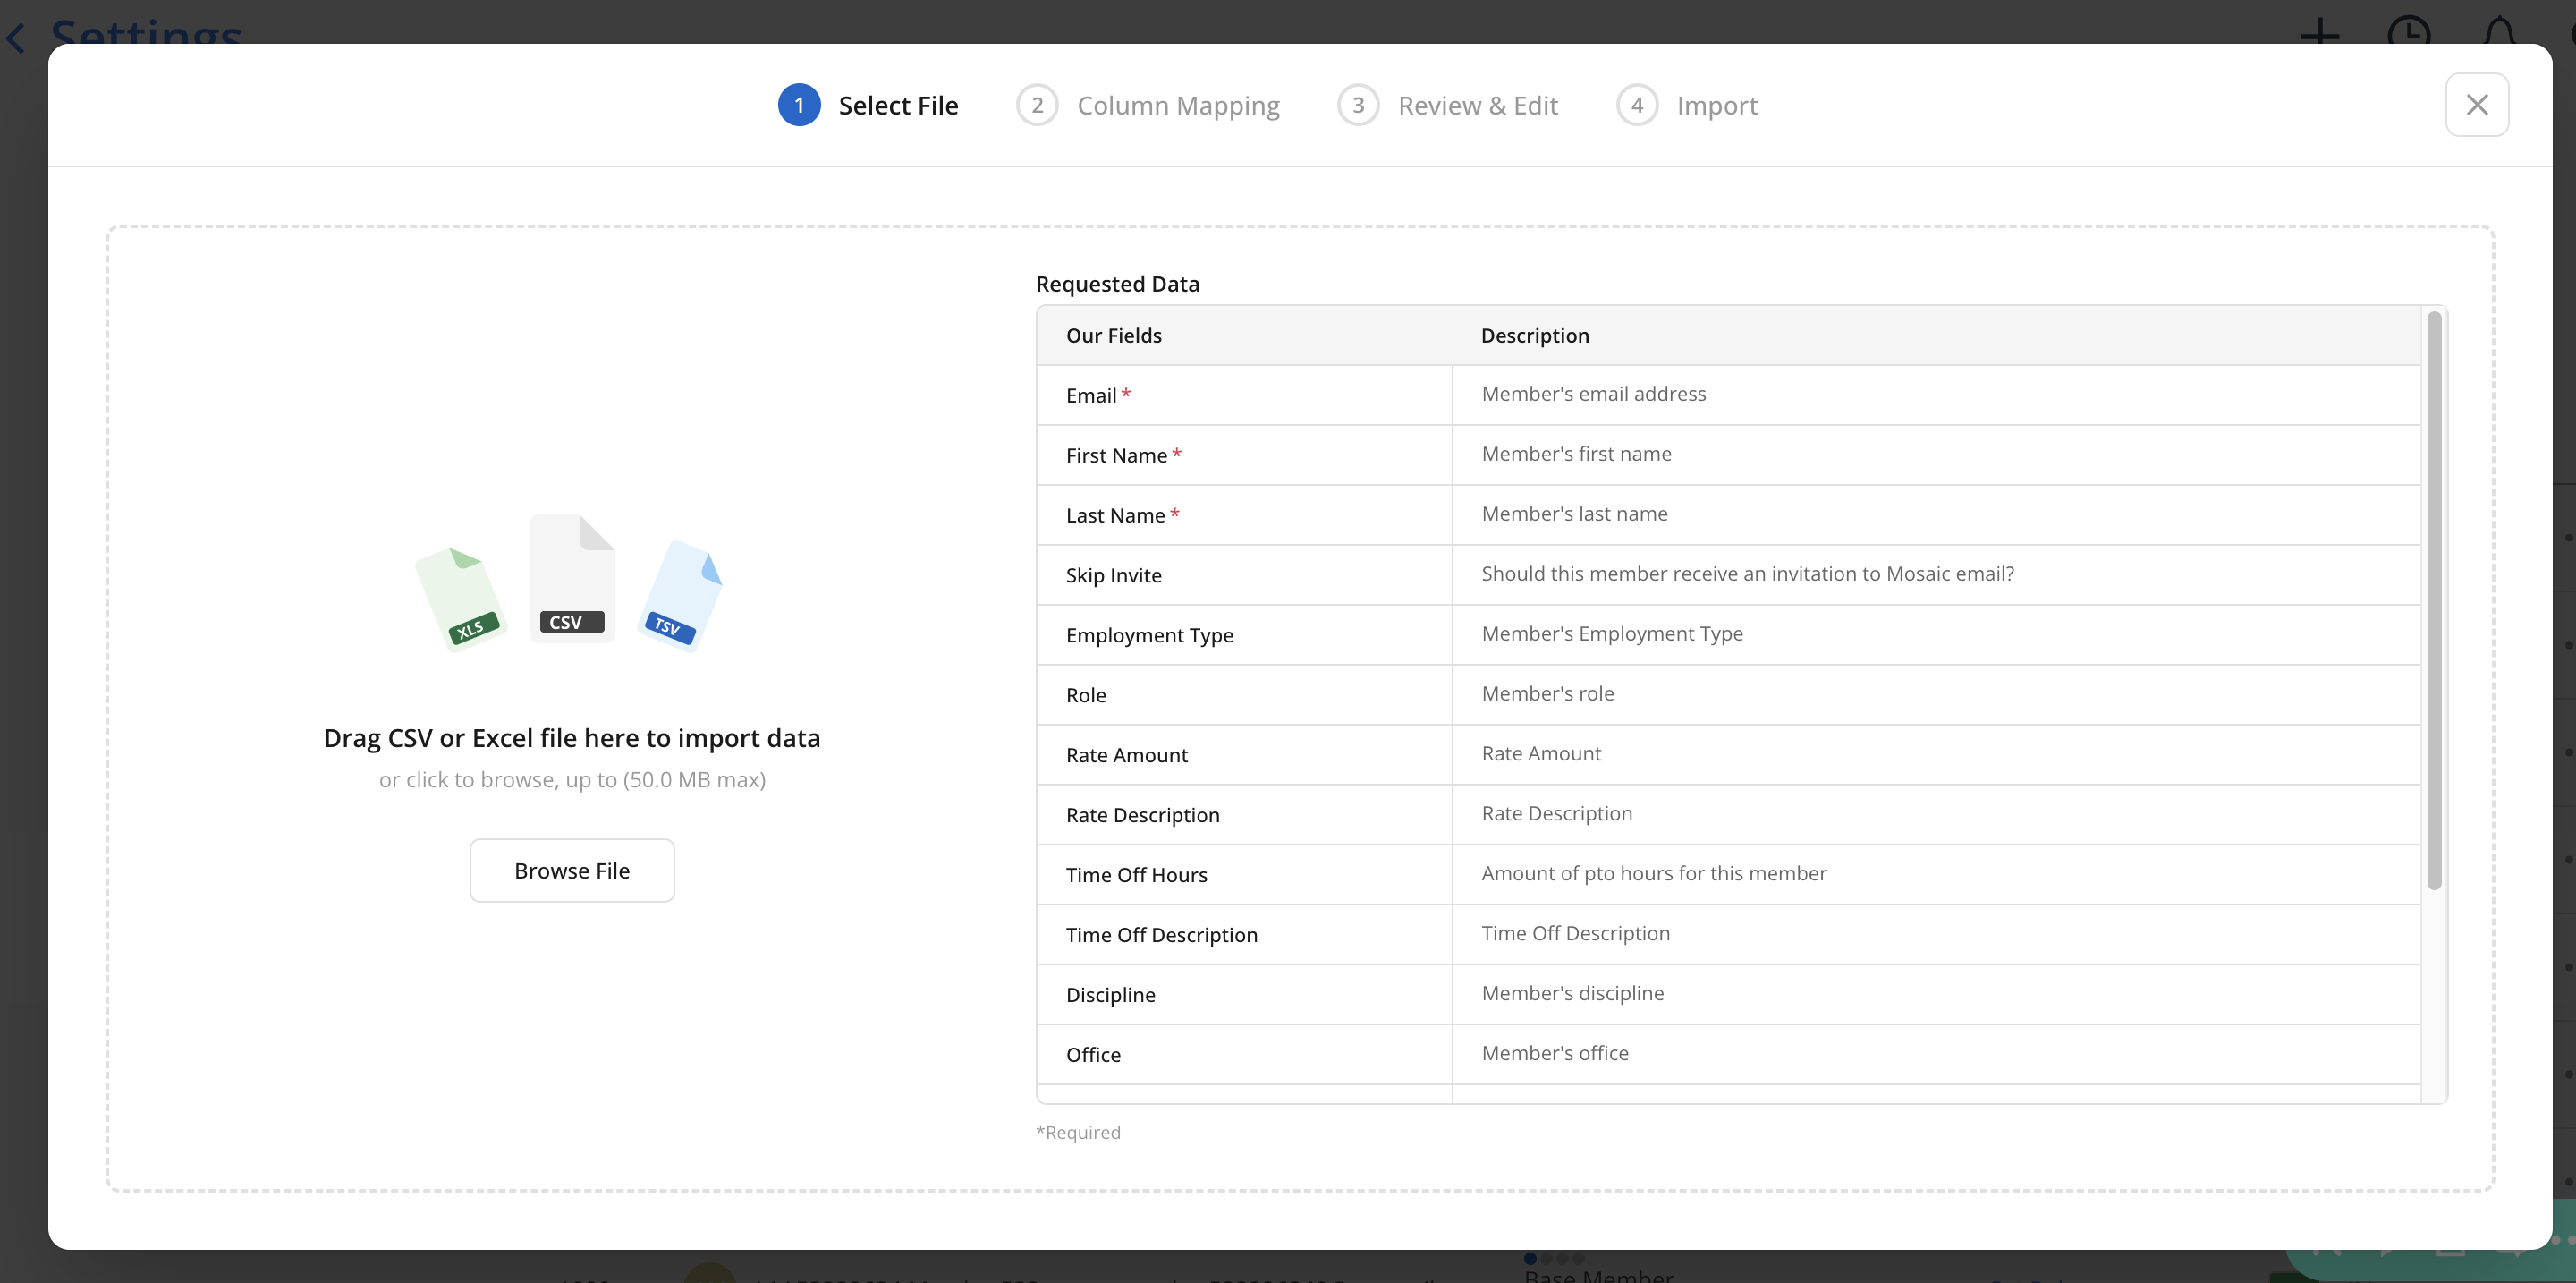
You can also import time entries from Company Settings > Import page, and click on the + Upload button.
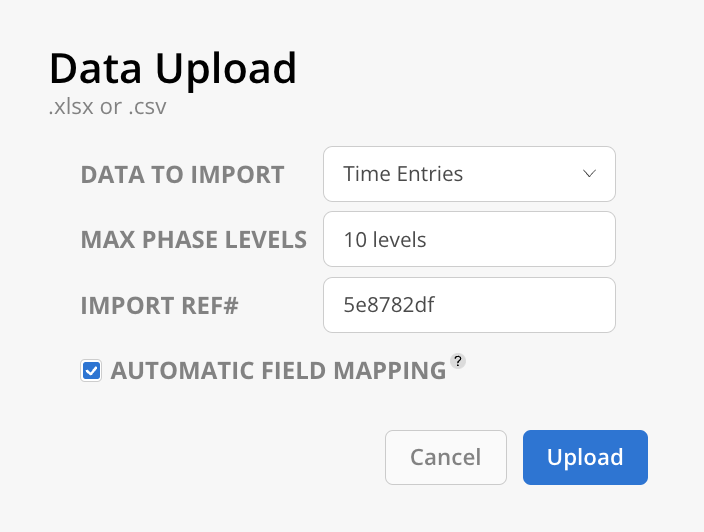
Select Time Entries as the Data to Import. Deselect the Automatic Field Mapping option to prevent columns from automatically mapping, thereby avoiding potential improper data imports.
-
Select the max levels of Phases you have and to include Work Category or not. The default max level is 10; the default is to not show Work Categories.
Note: If Include Work Categories is not selected, the column will not show in the uploader.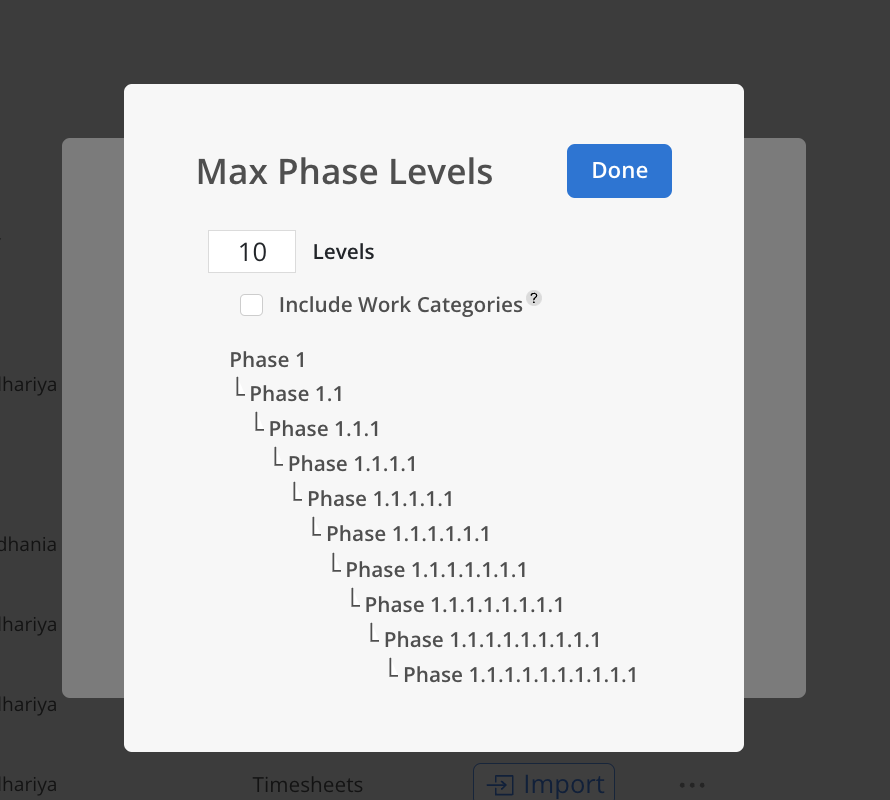
-
Select the file you would like to import using the file selector or drag and drop the file here.
-
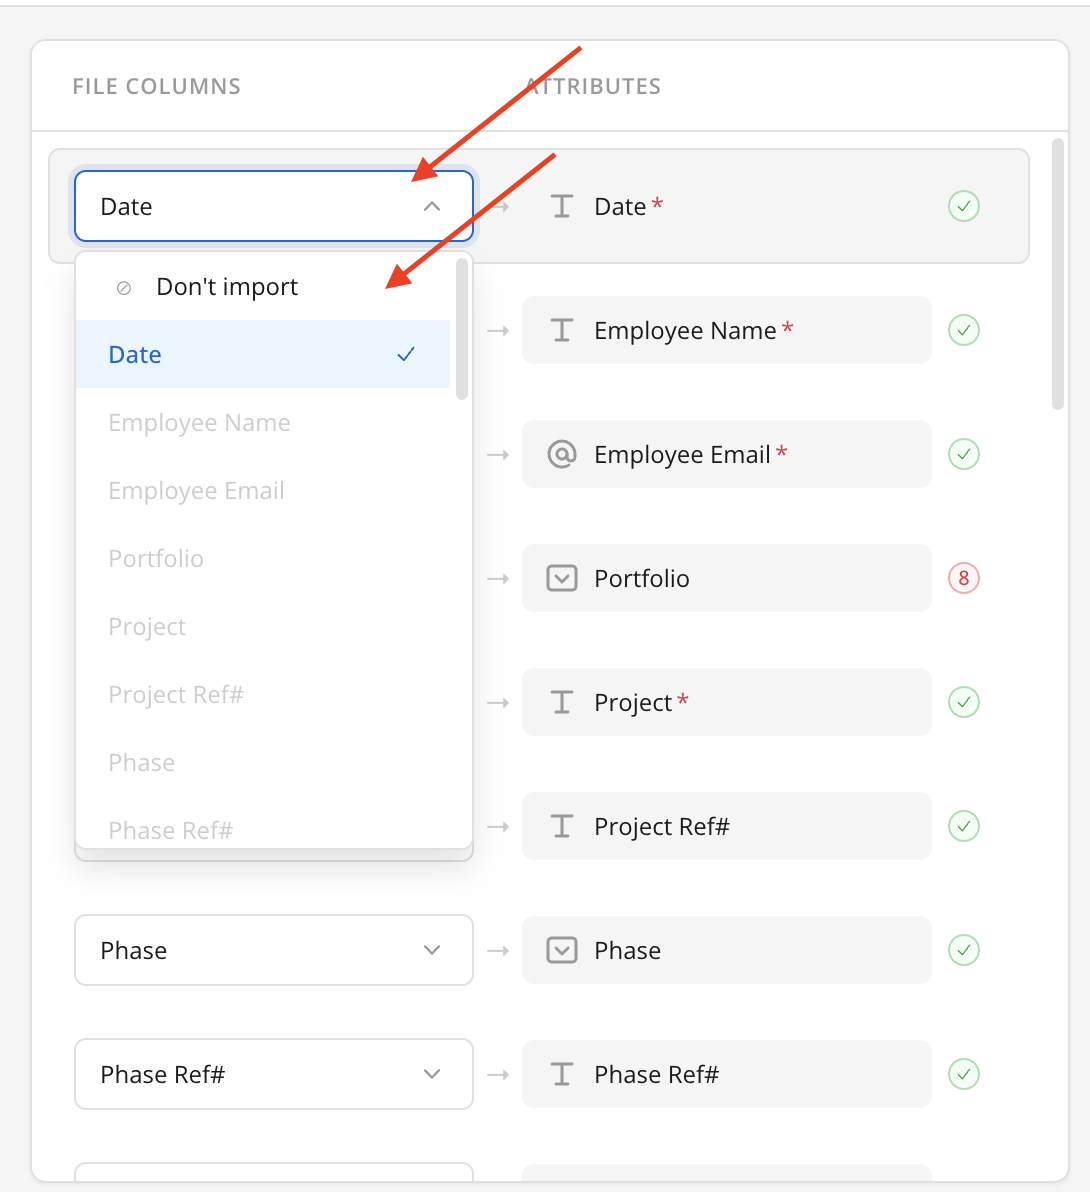
After the file is uploaded, the system attempts to automatically map the required information. Mapped columns can be adjusted by selecting a different option from the dropdown. To exclude a column from the import, select
Don’t importto unmap it. Auto-population of data into the system fields may take a few moments to complete.
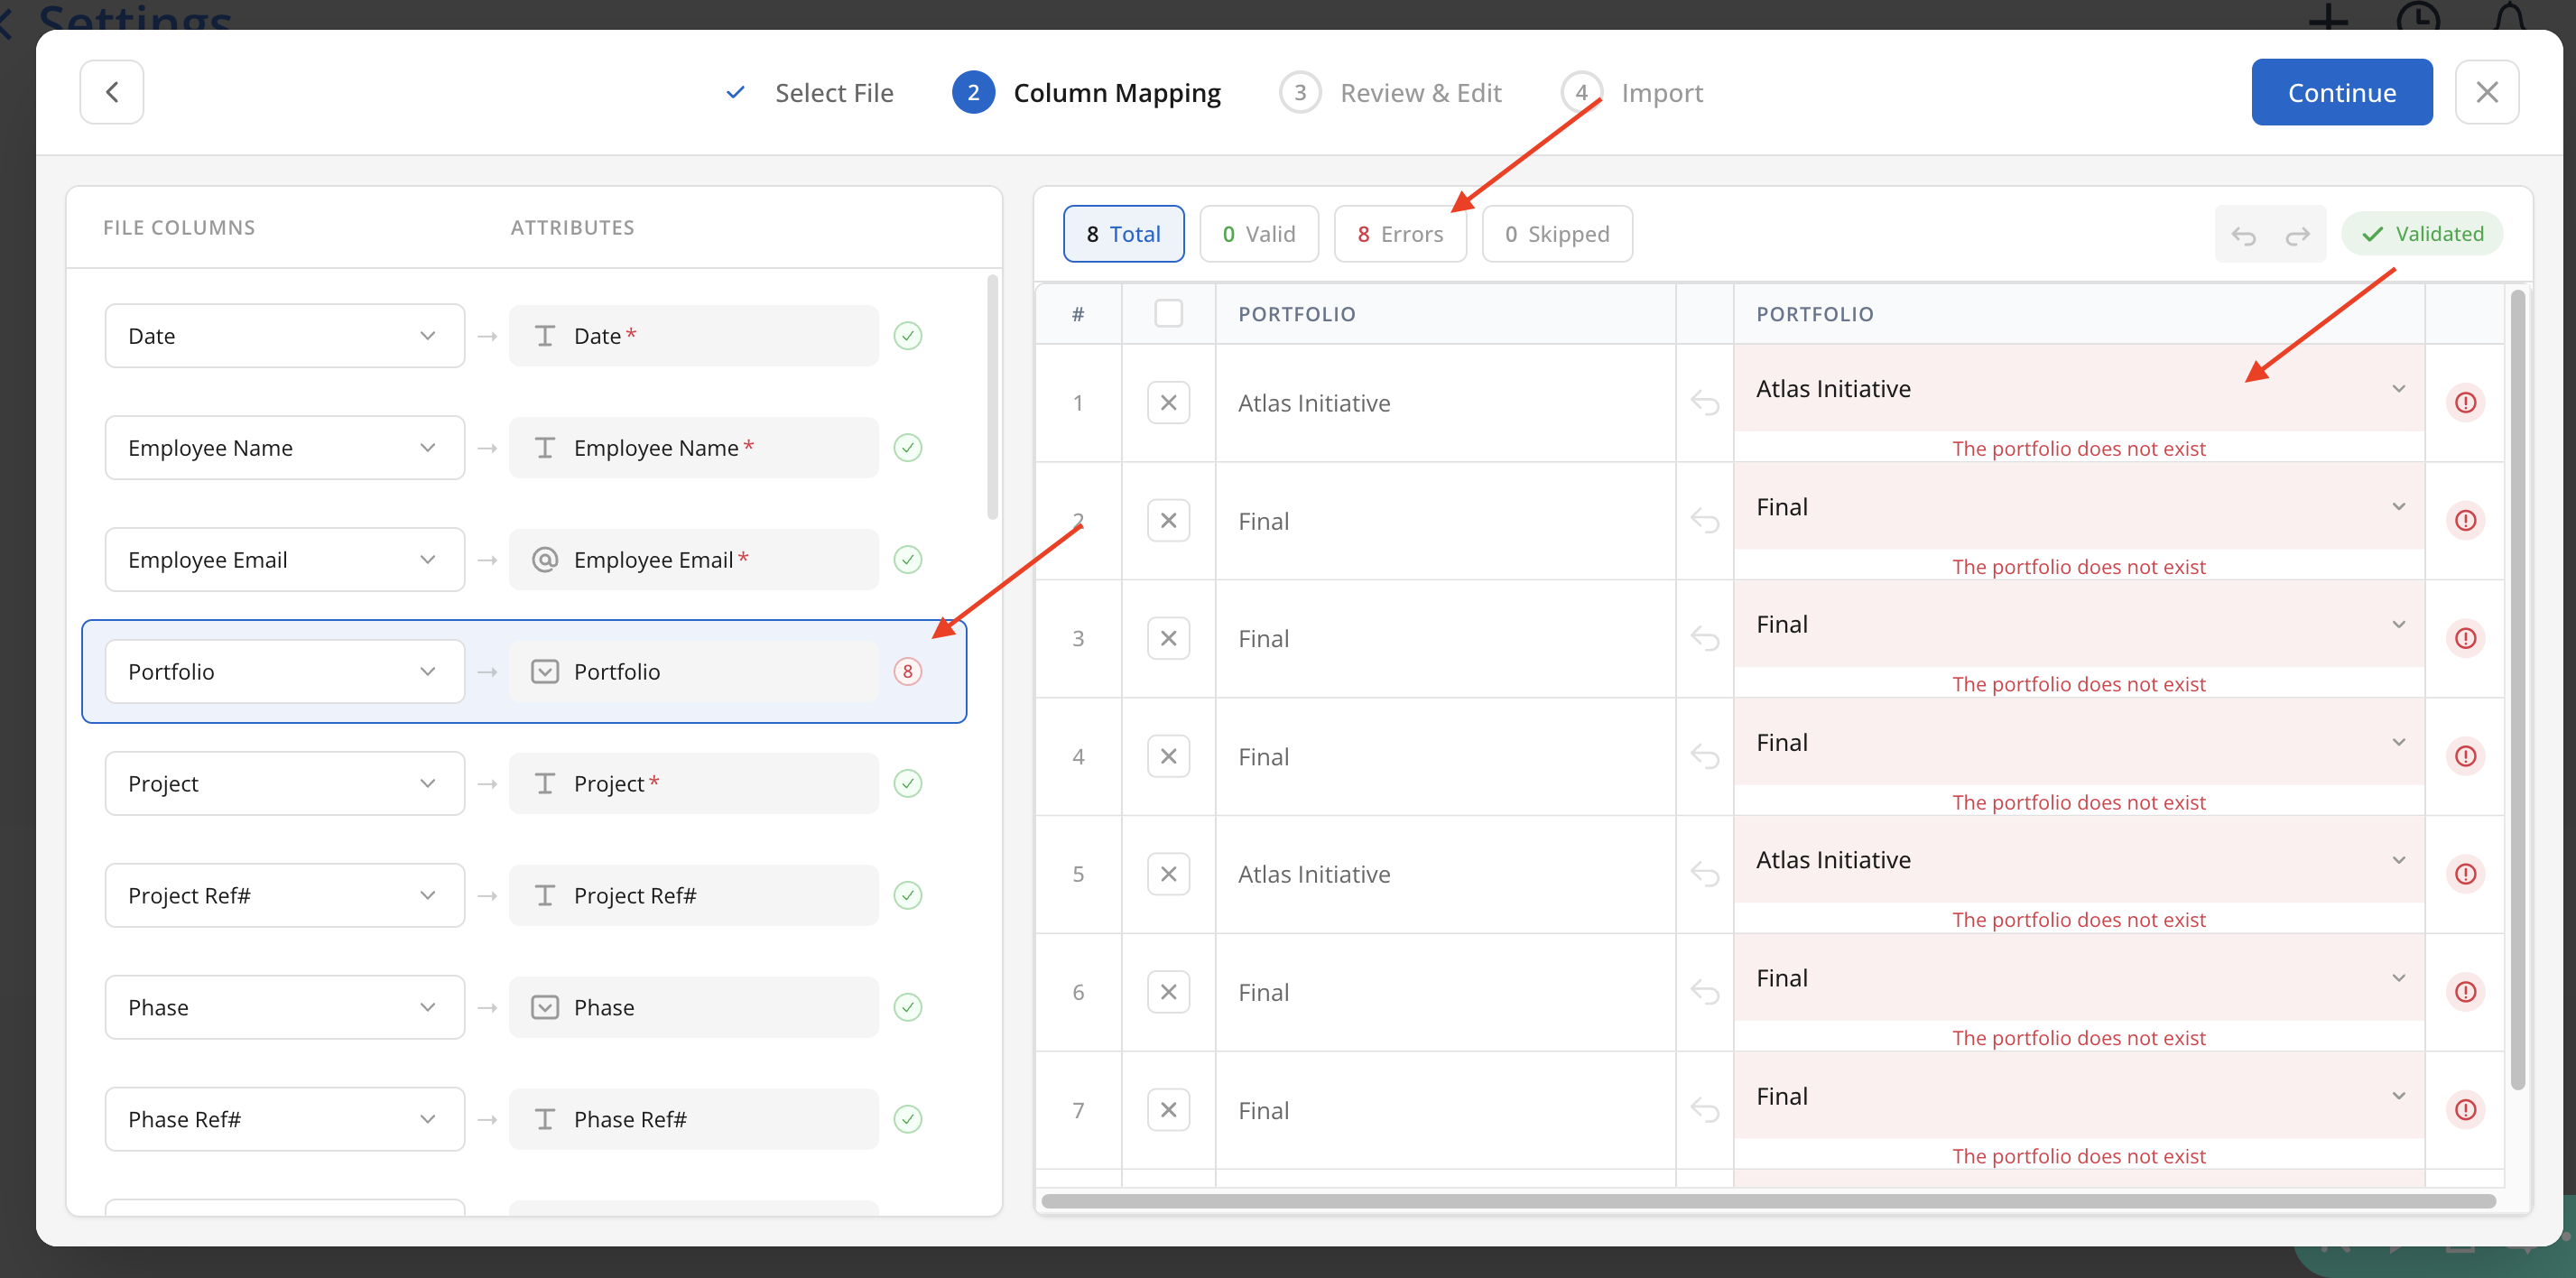
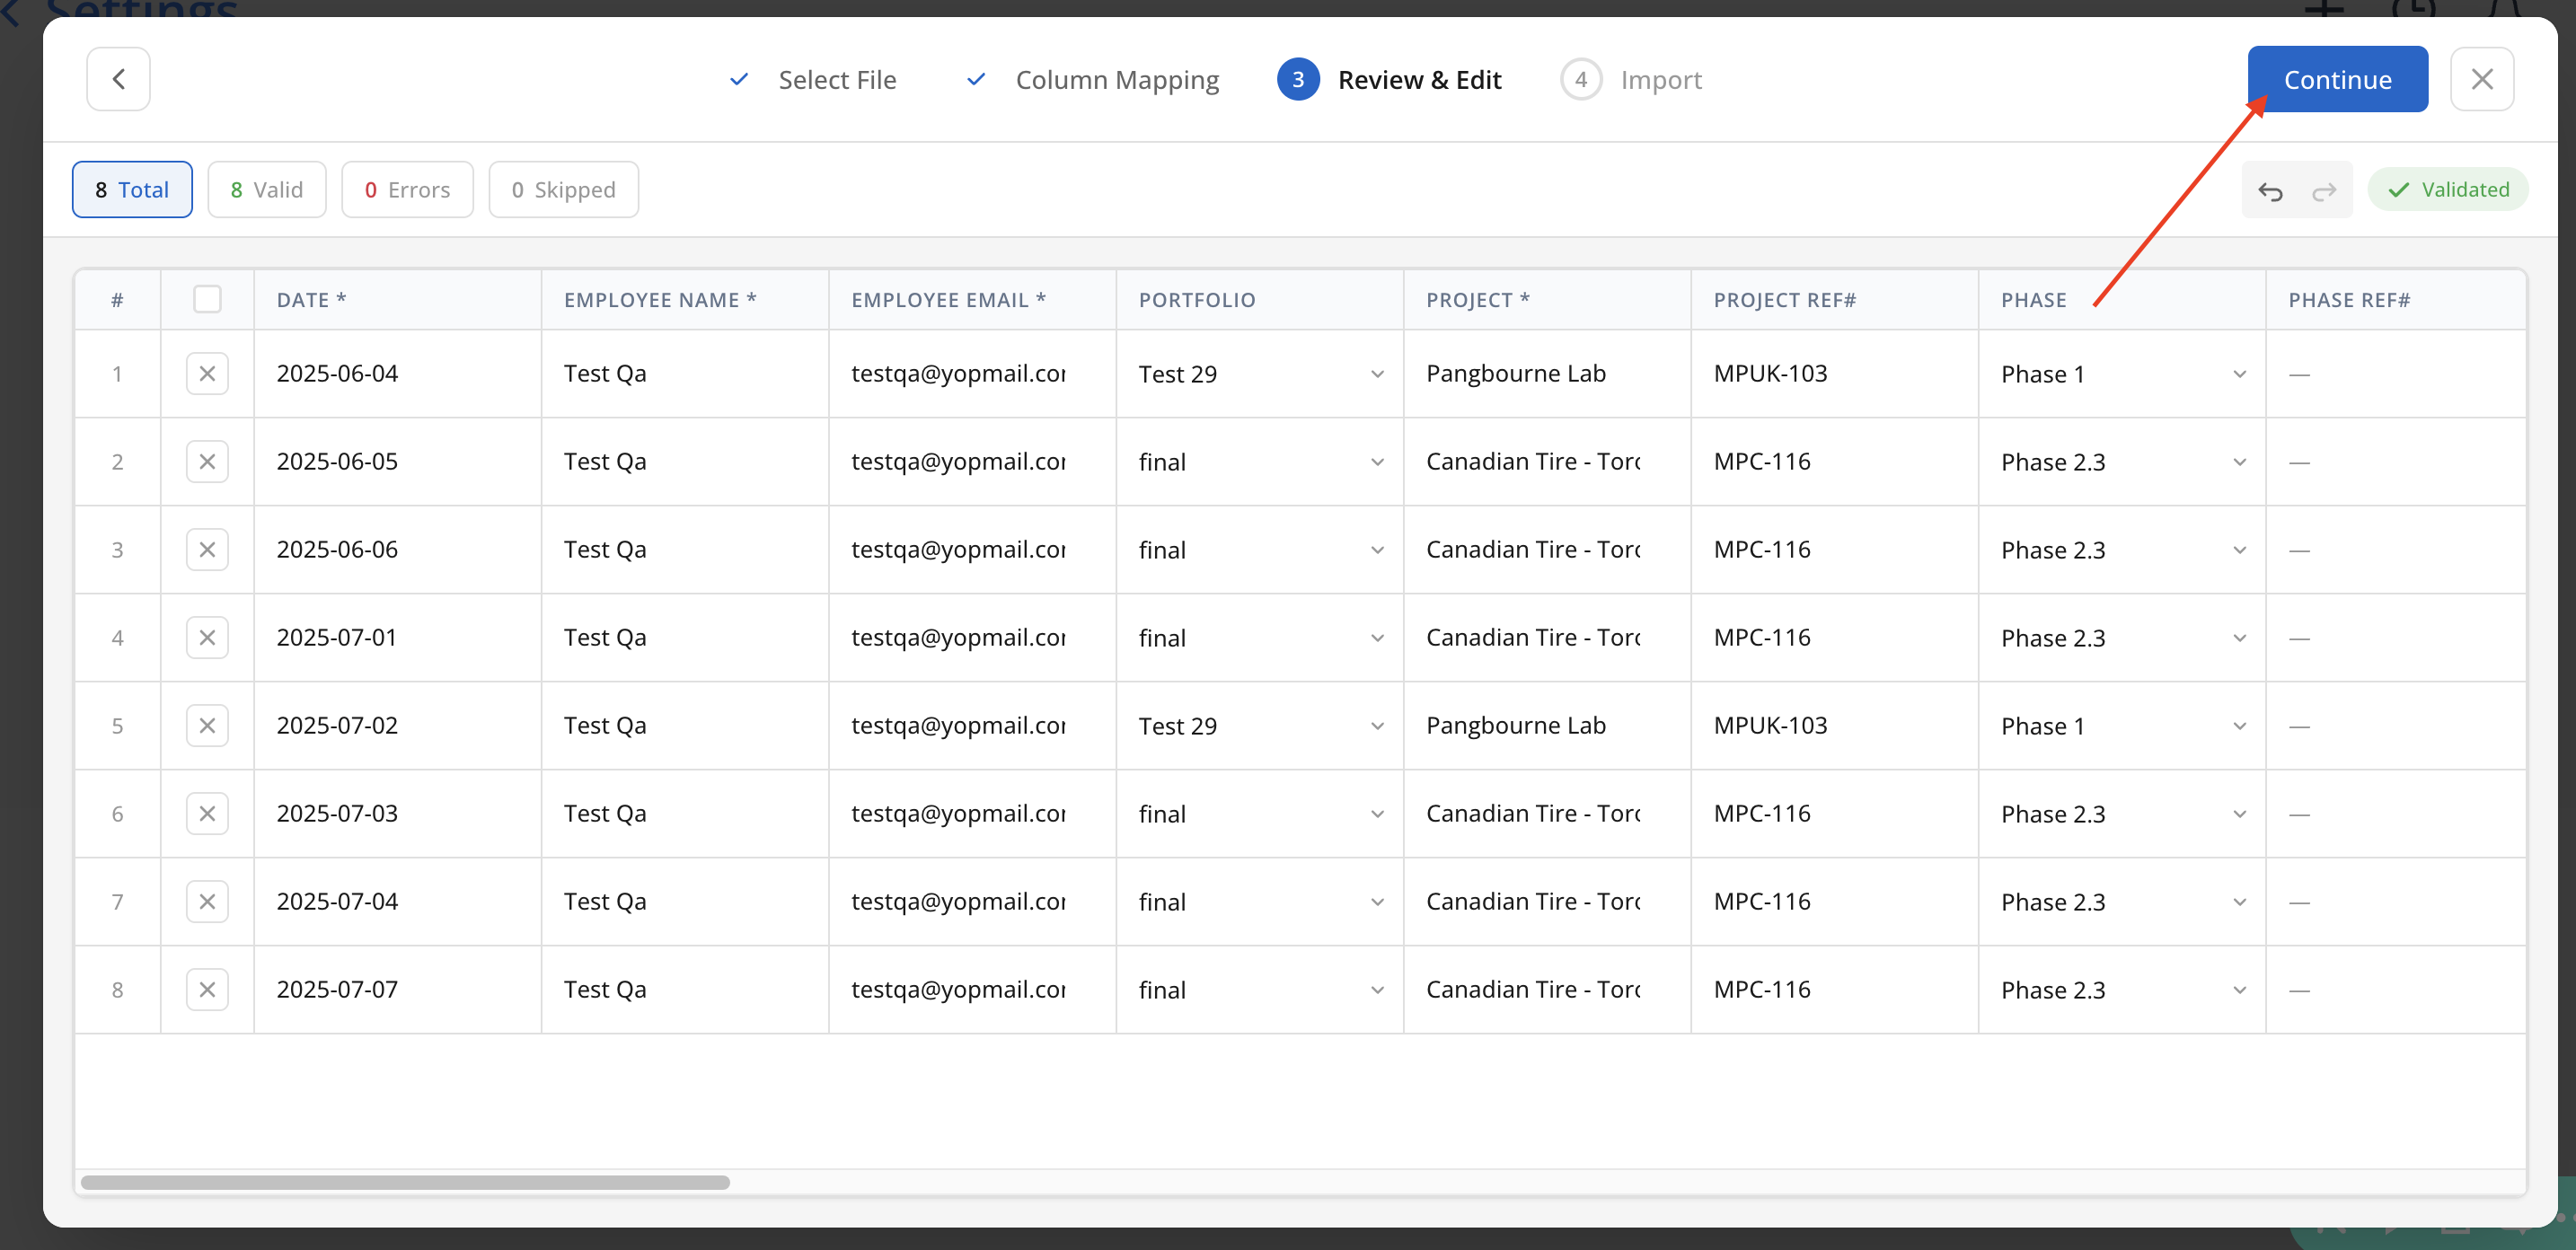
Red Highlighted RowsRed highlighted rows indicate errors, which might be due to missing required fields, no matching values on Mosaic, or a typo. The number of errors is displayed next to the corresponding column name. Selecting a column shows all rows, with error rows highlighted in red and an error message displayed directly on the affected row. Please confirm if there is a typo, or if the value does not exist on Mosaic.
To view only rows with errors, select the Errors button at the top of the table.
If this is a typo, you can update the value in the uploader in the right side.
Grayed Out Rows
For more information regarding grayed out rows, please refer to the Data Import FAQs.
-
Once all errors are fixed, click
Continueon the top to the Review & Edit step. If all data looks good, clickContinueto the Import step.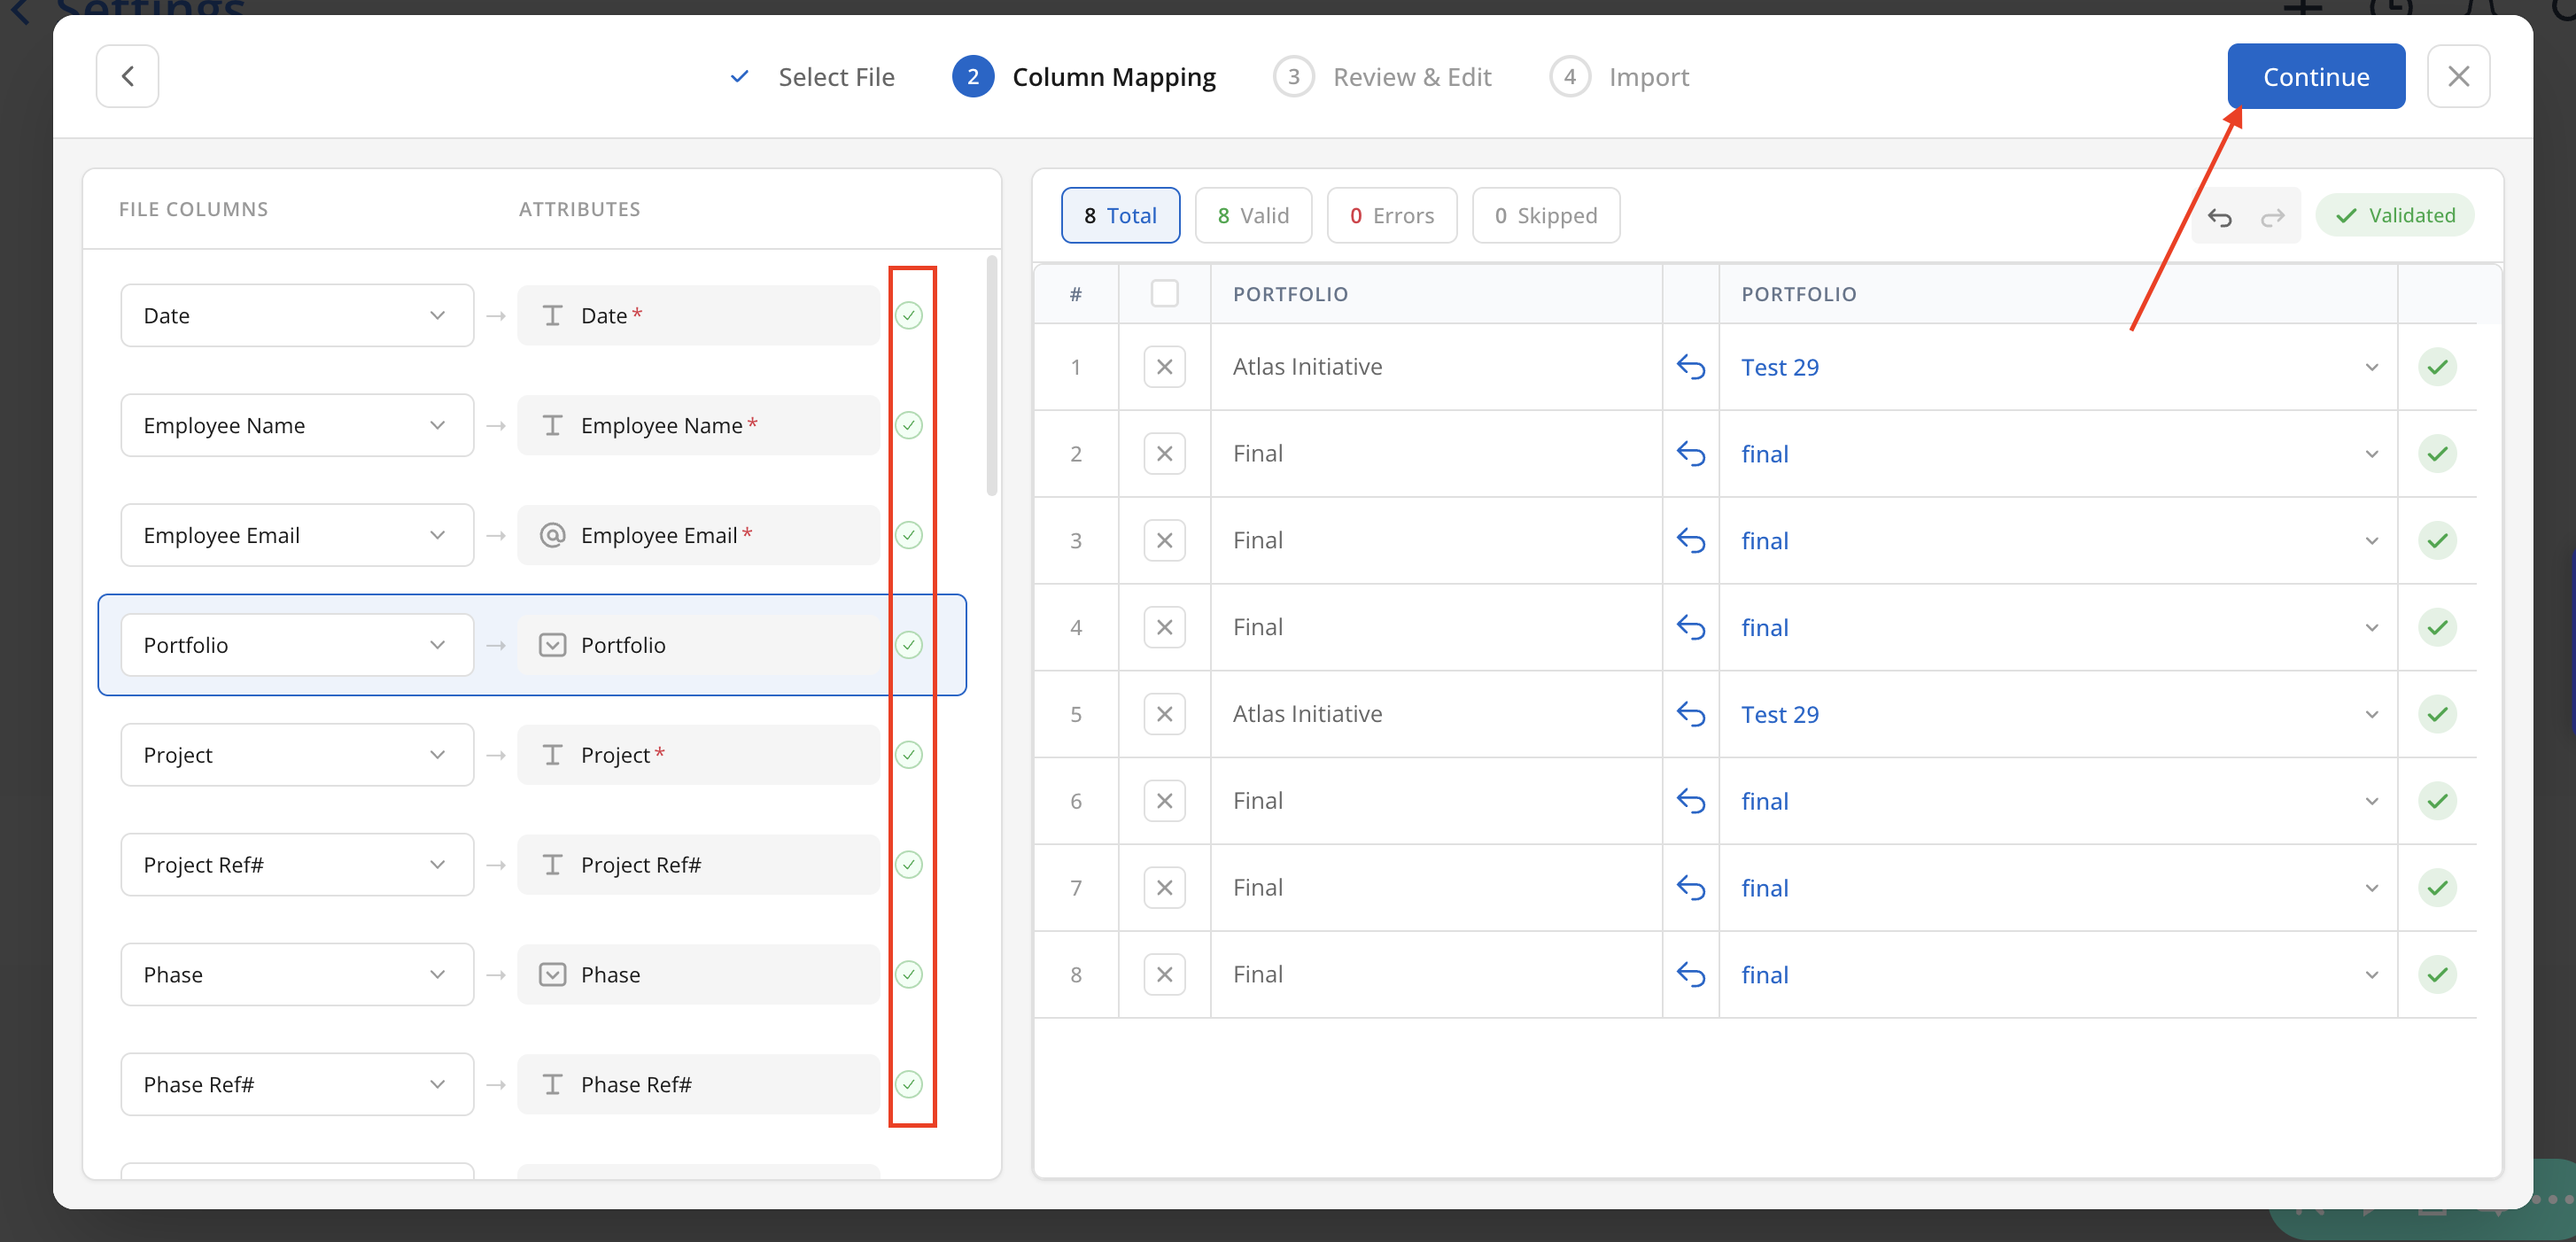
-
Click
Confirm Importin the Import step to submit data.
Note: You should see this message when it's successfully uploaded

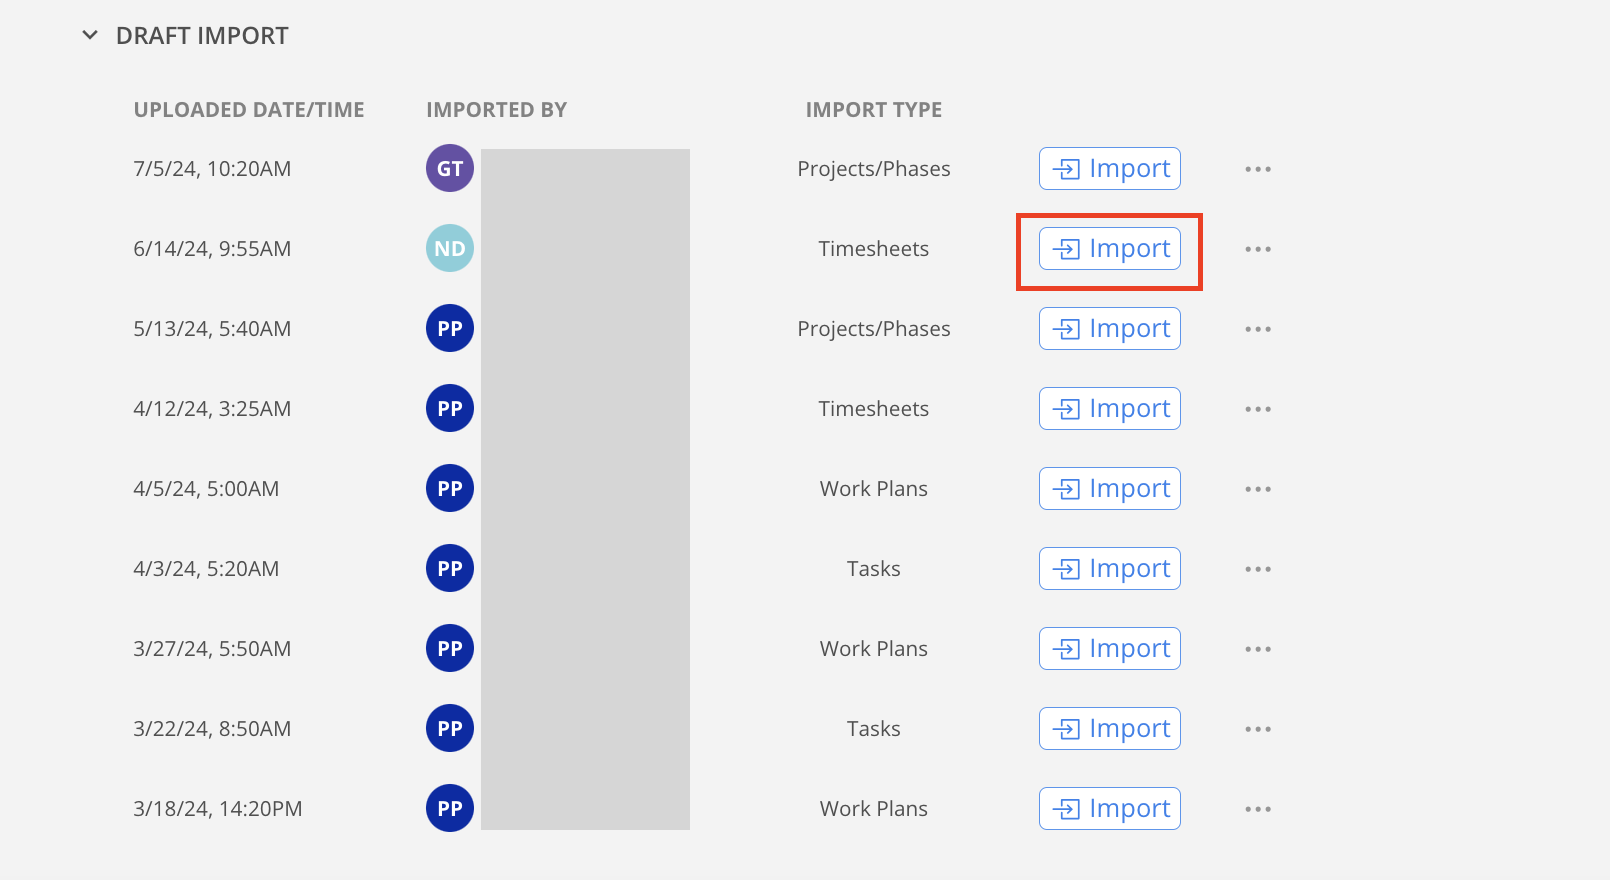
- Click done to close the modal. Under the Draft Import section, click on the
Importbutton for the file that was just uploaded to review the import.
- New employees on the file will show on here. You can change their role by clicking on the dropdown.

- Change to All Members Imported View to see members linked with the existing members in Mosaic.
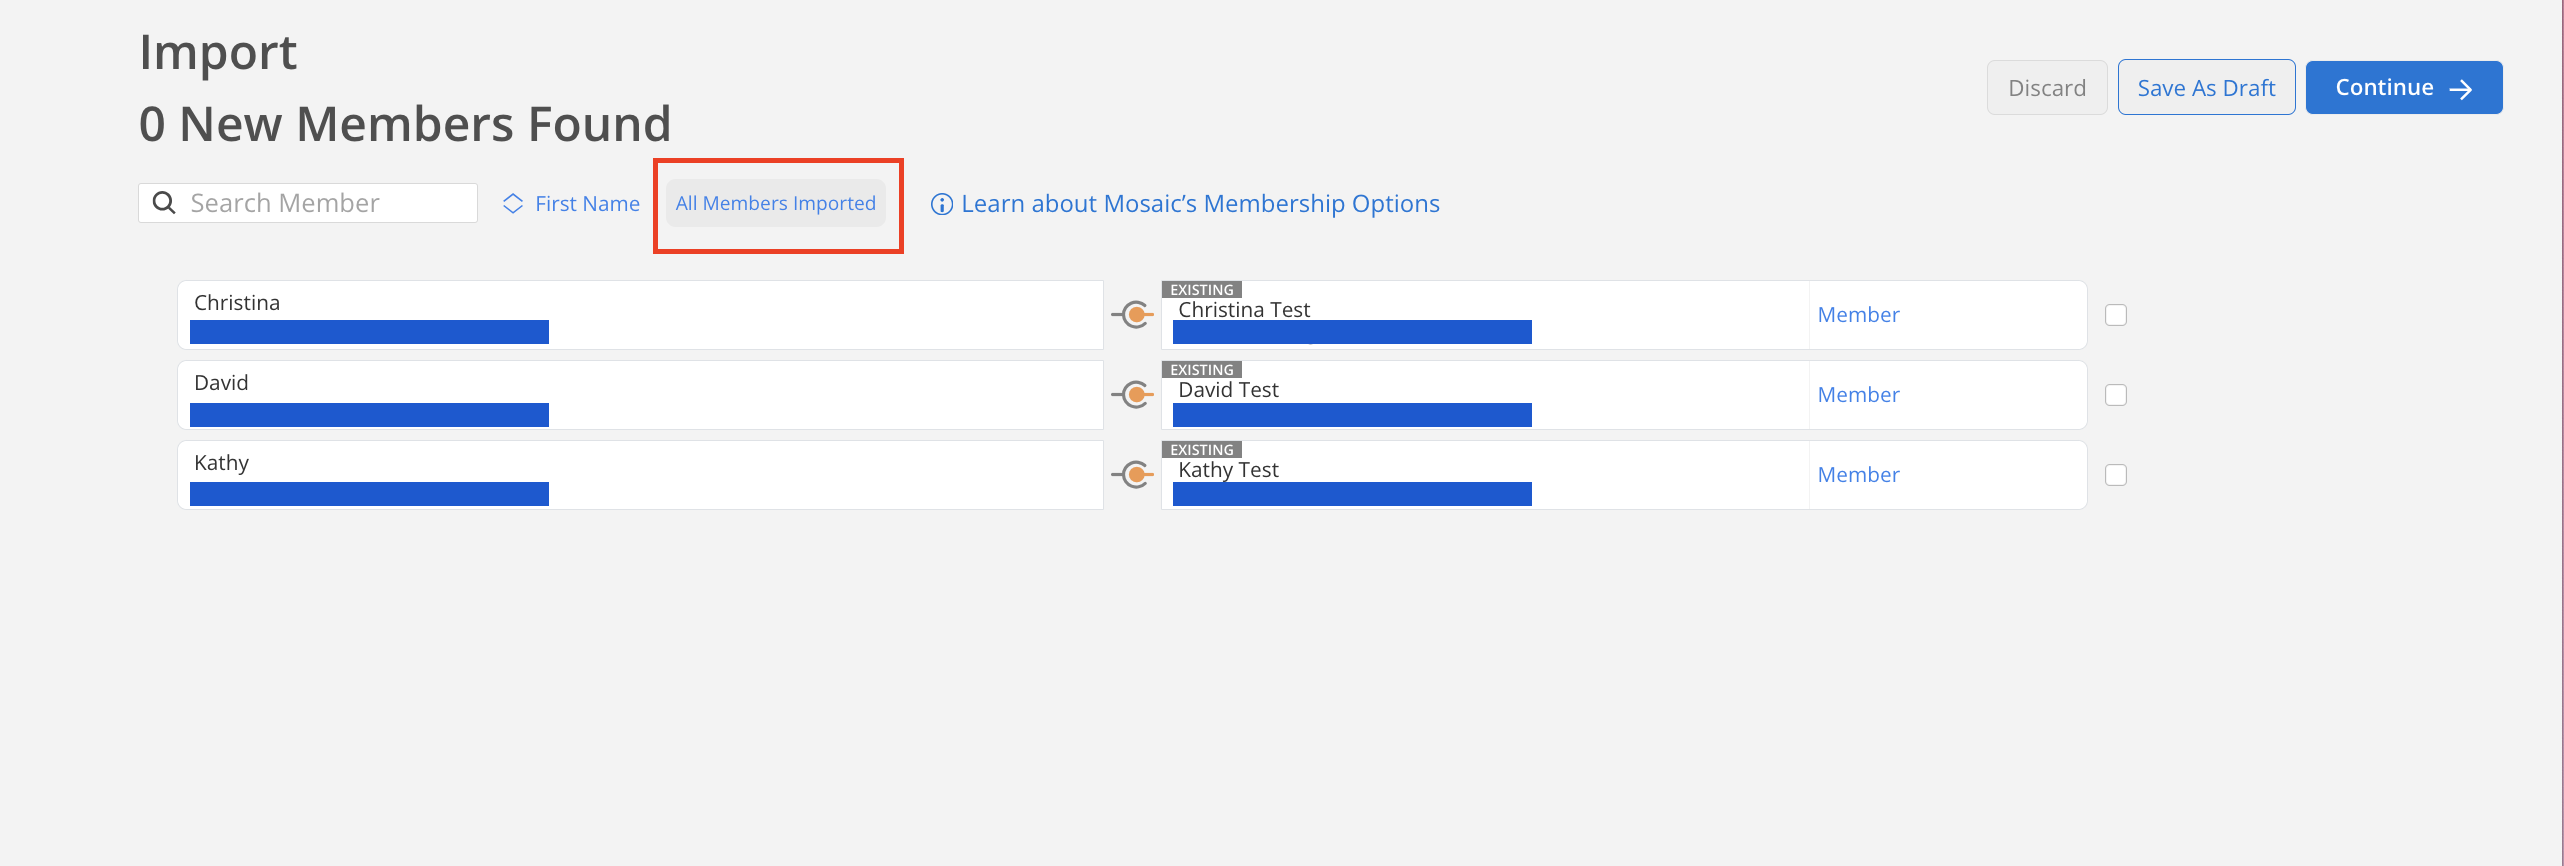
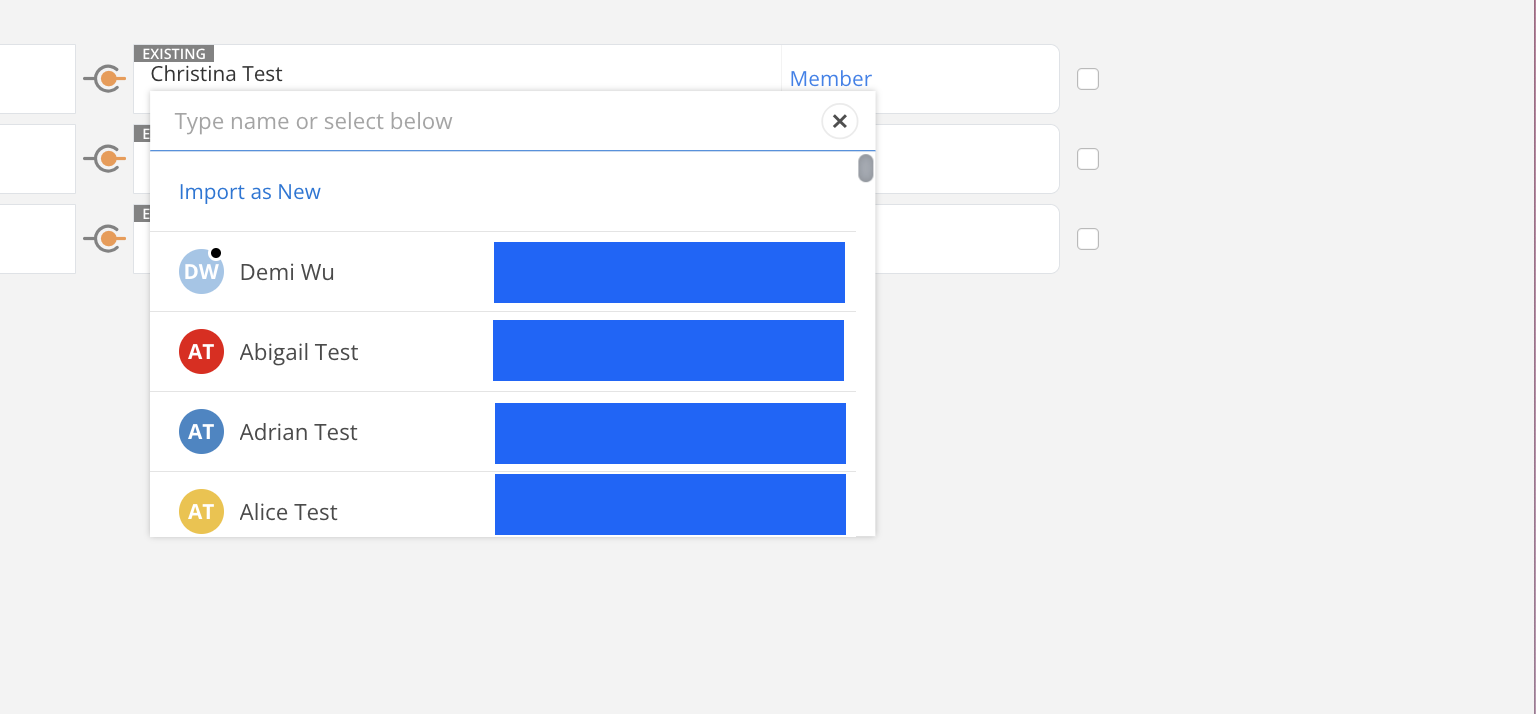
If you want to modify the member linked with existing, click on the member name and click select Alternate. Then select the member that you want to link or Import as New.
Once you are finished reviewing your Employees, click Continue.

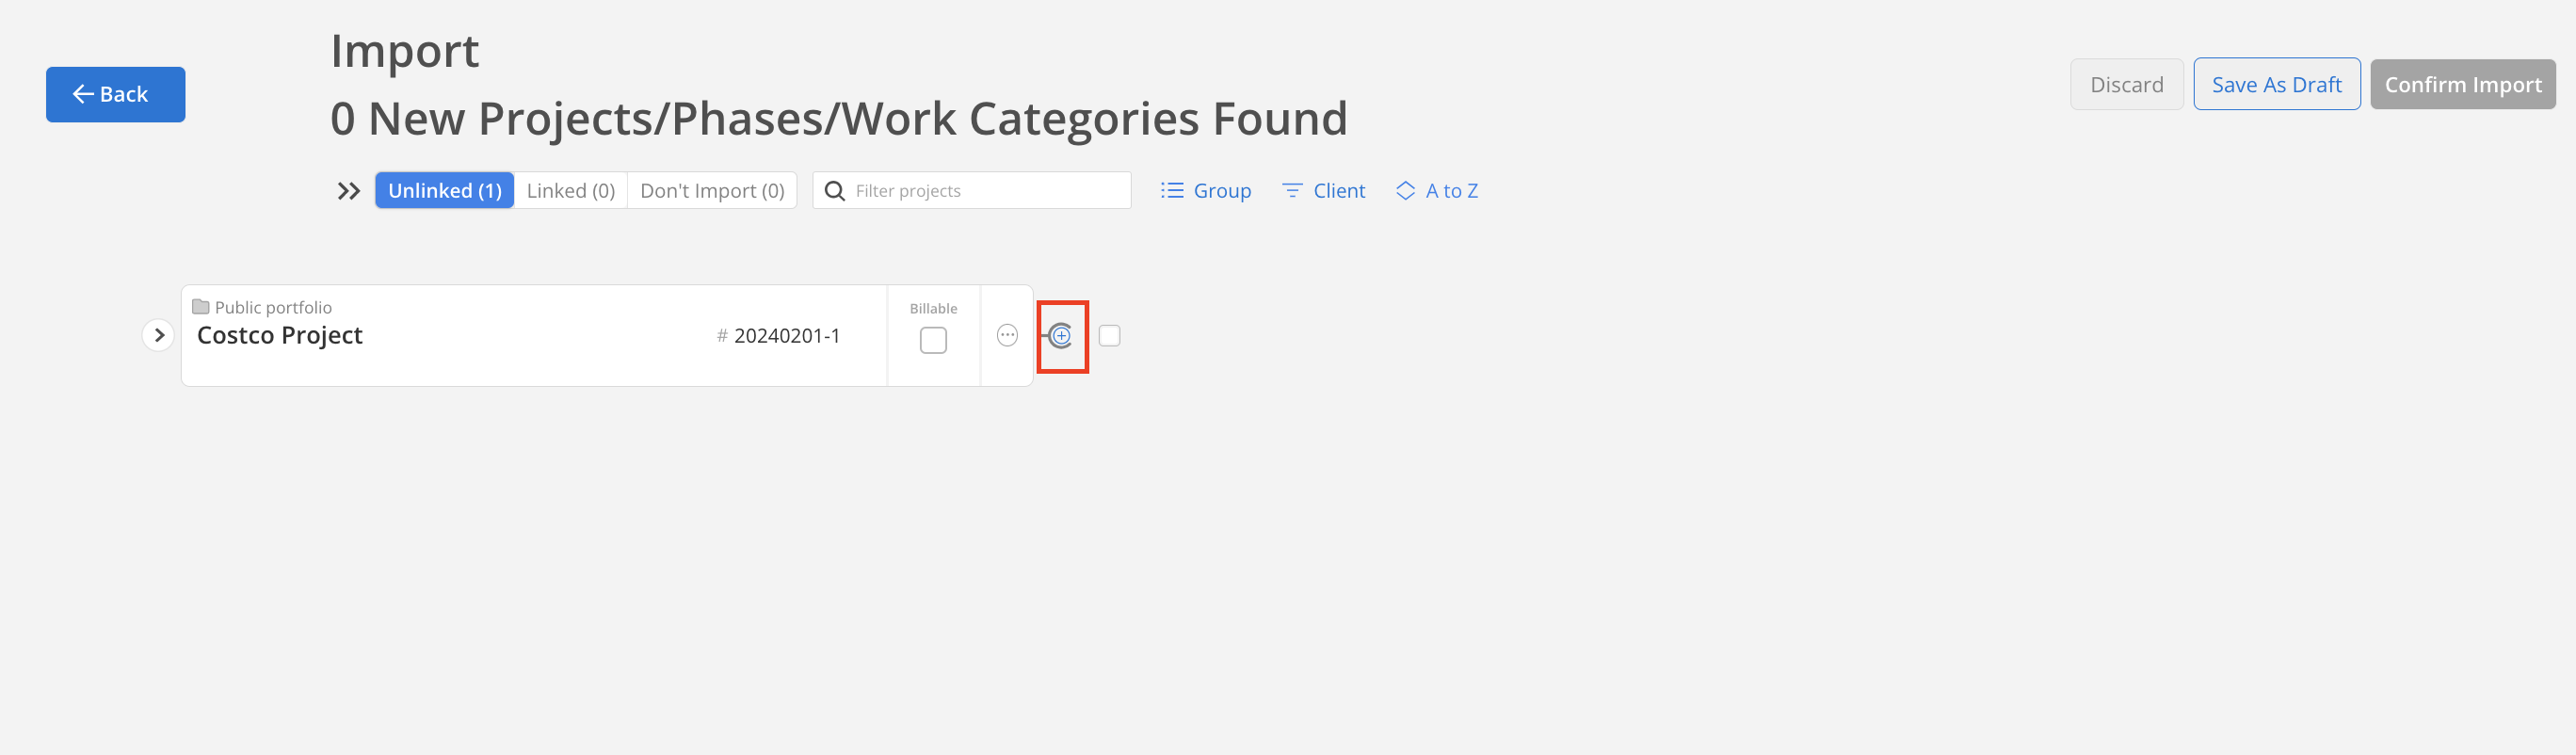
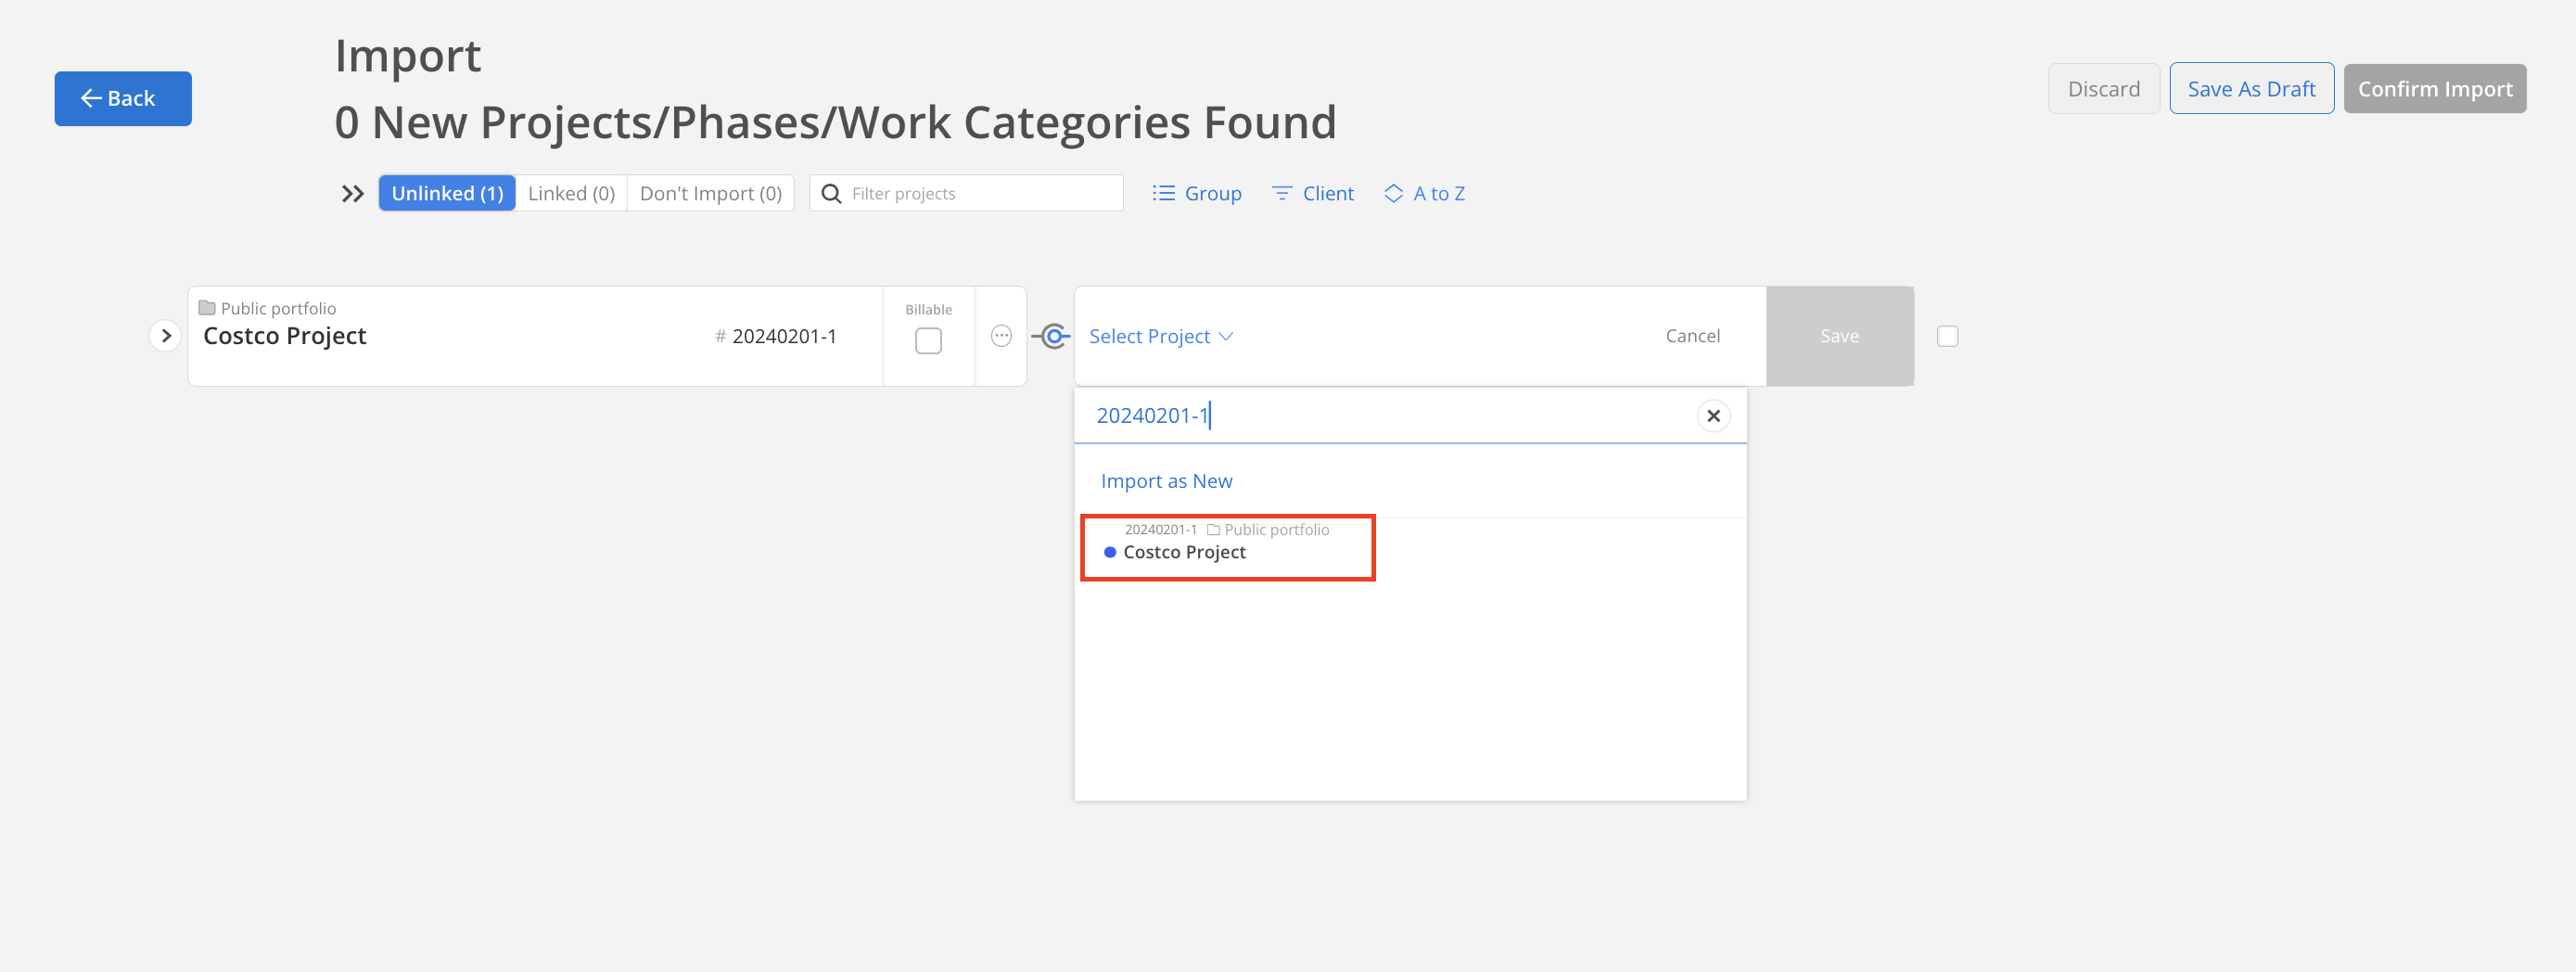
- In the next page, Projects and Phases can either be linked with existing or imported as new.
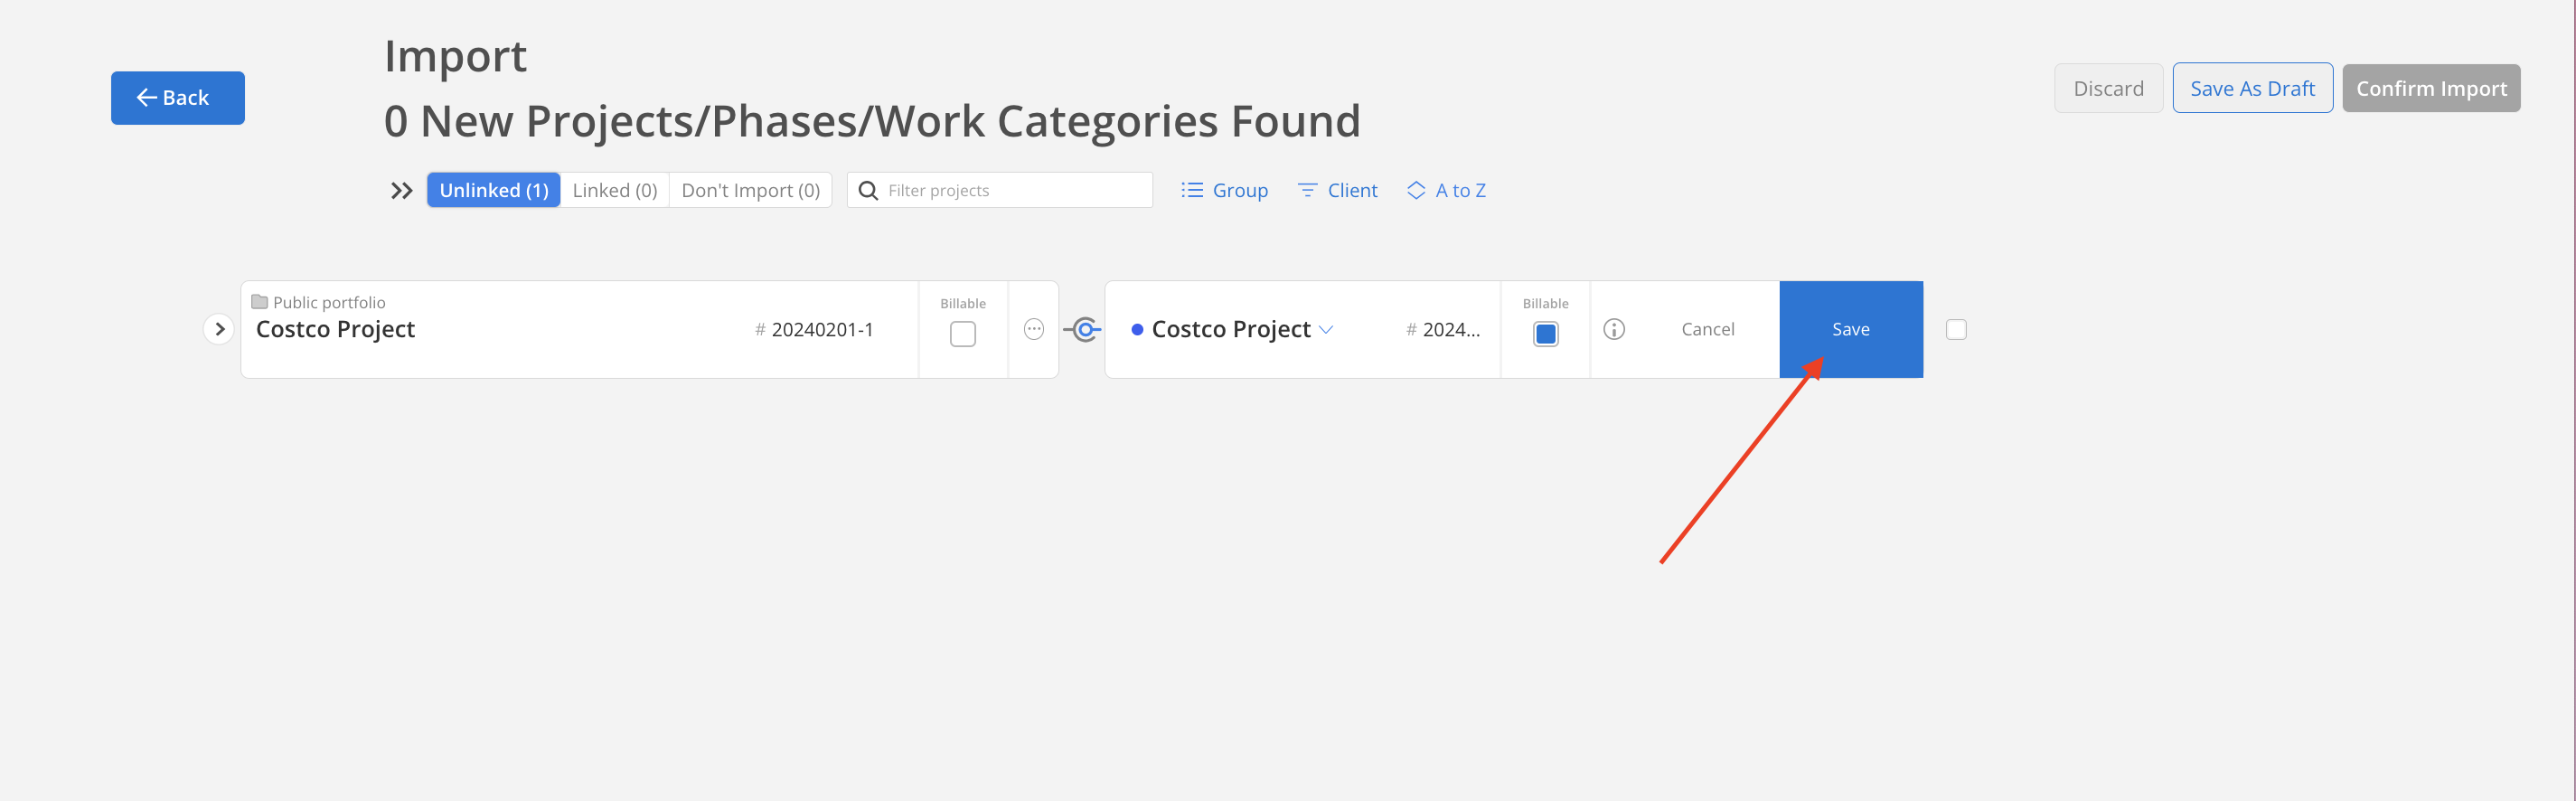
- To link a project with existing, click the plus icon on the right side and select an existing project to link. Click Save.
Archived ProjectsArchived projects will not show i the menu. To link to an archived project, unarchive the project first.
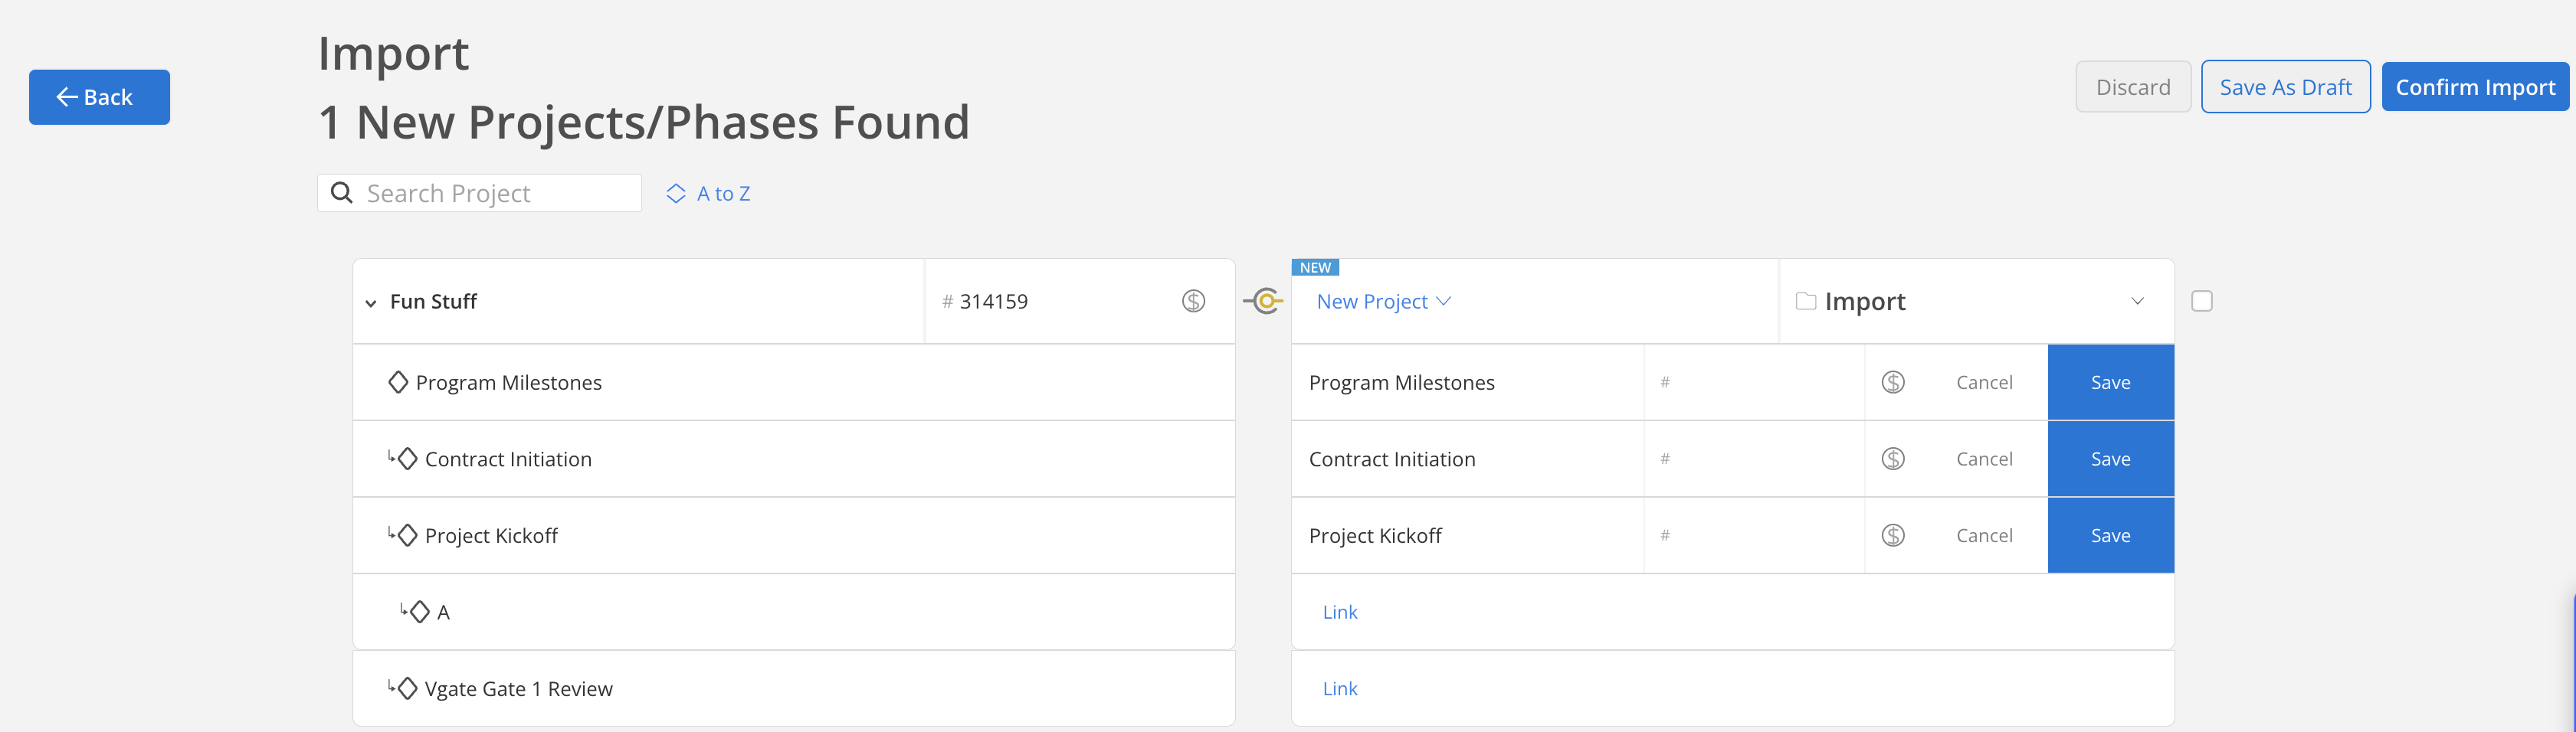
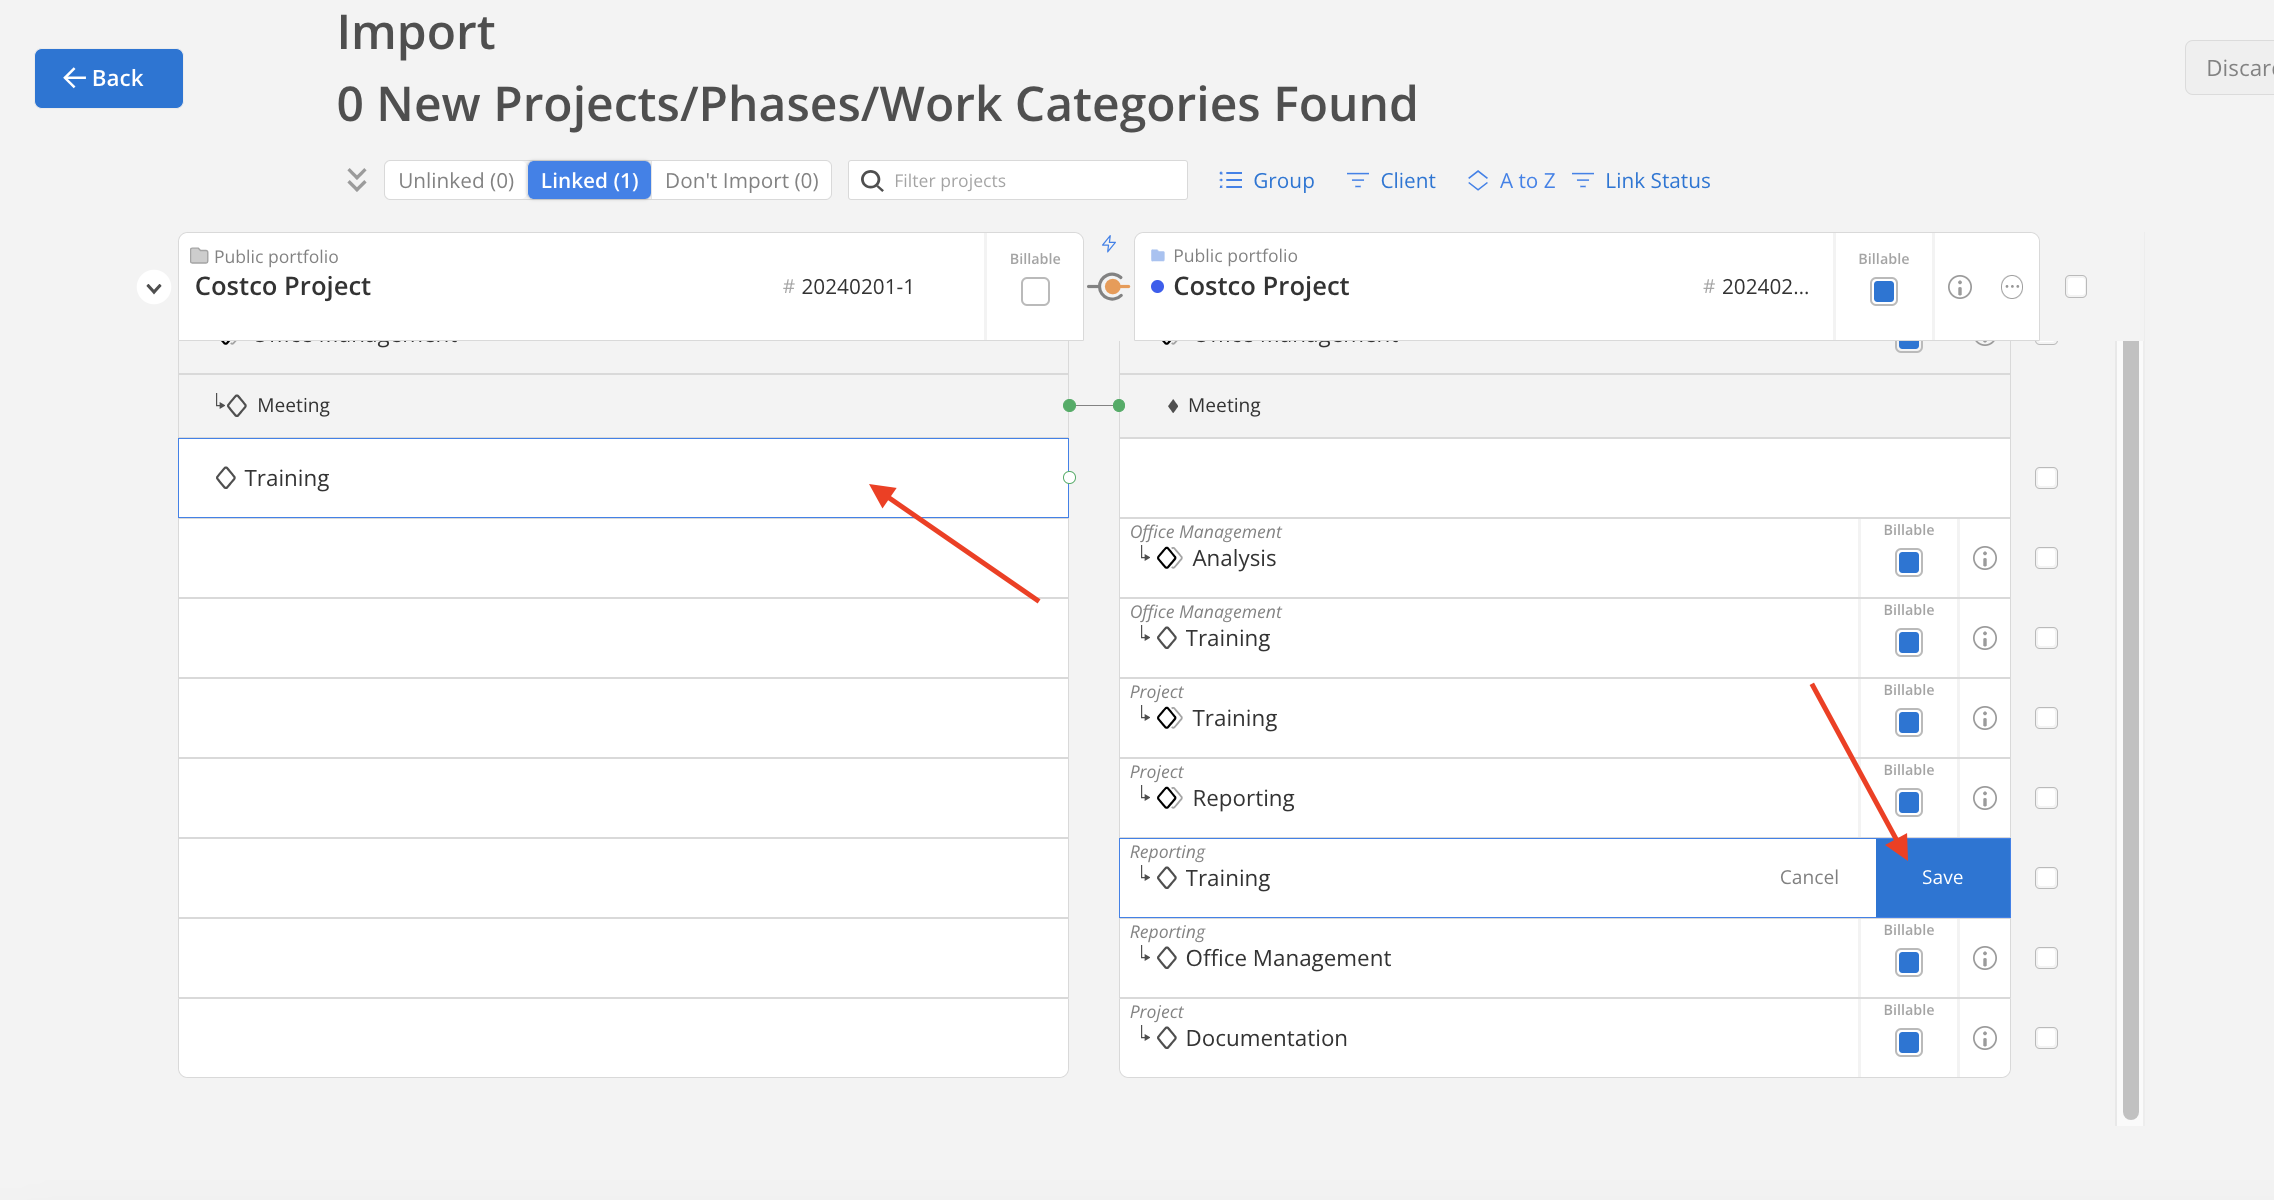
- To manually link a phase with existing, click three dot on the mosaic phase, click link with existing phase. Click the lightning bolt icon on the top to automatically map all Phases.
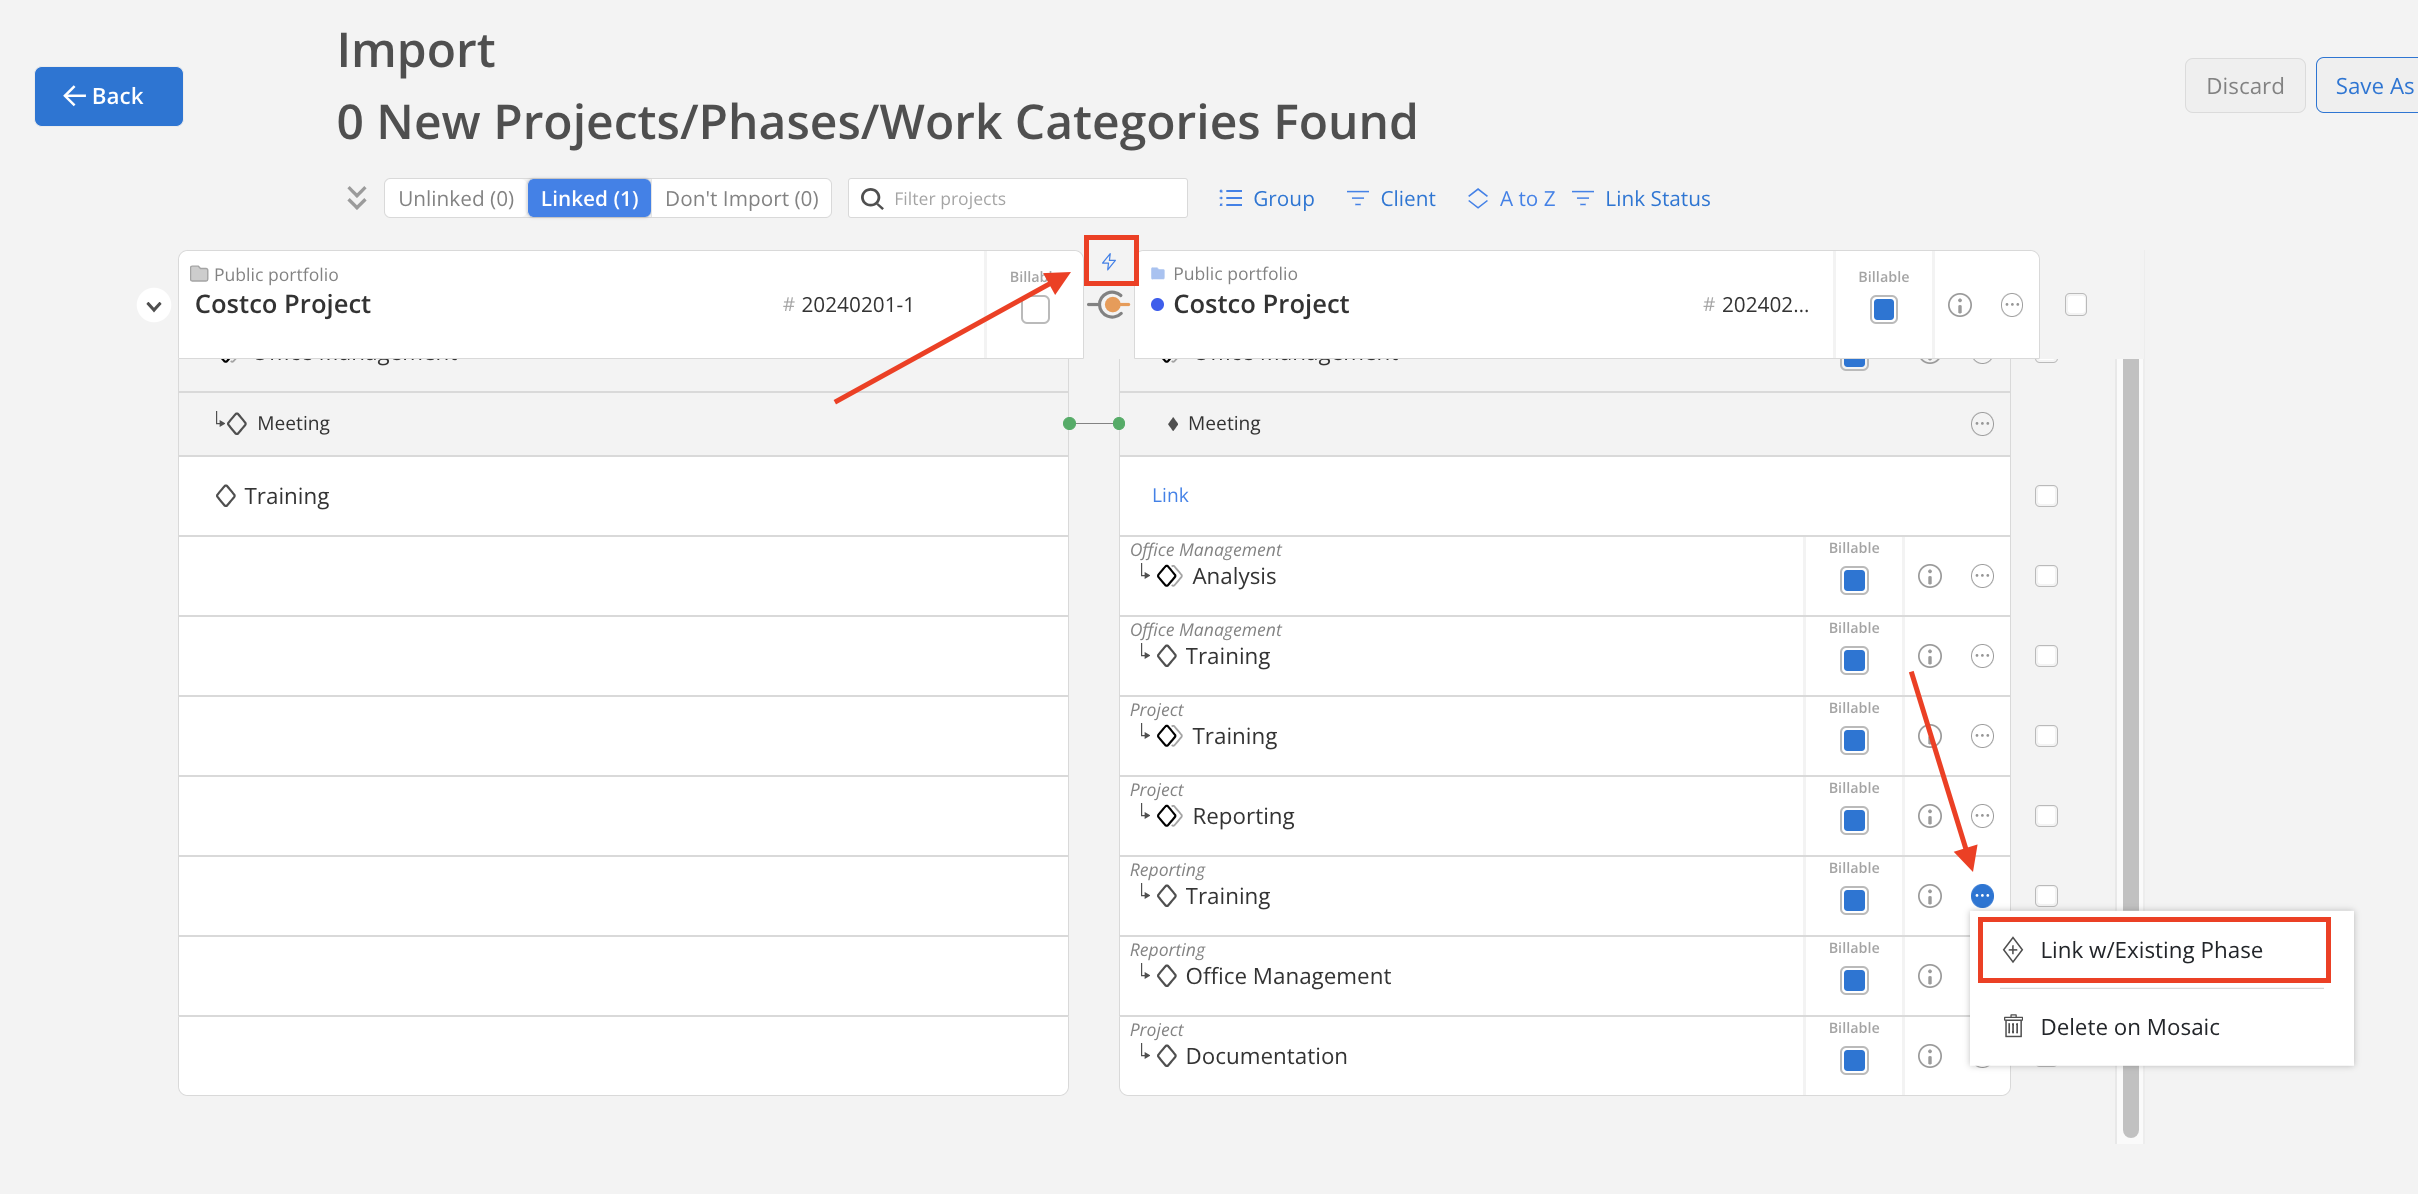
Select the phase on the left side to link, click save.
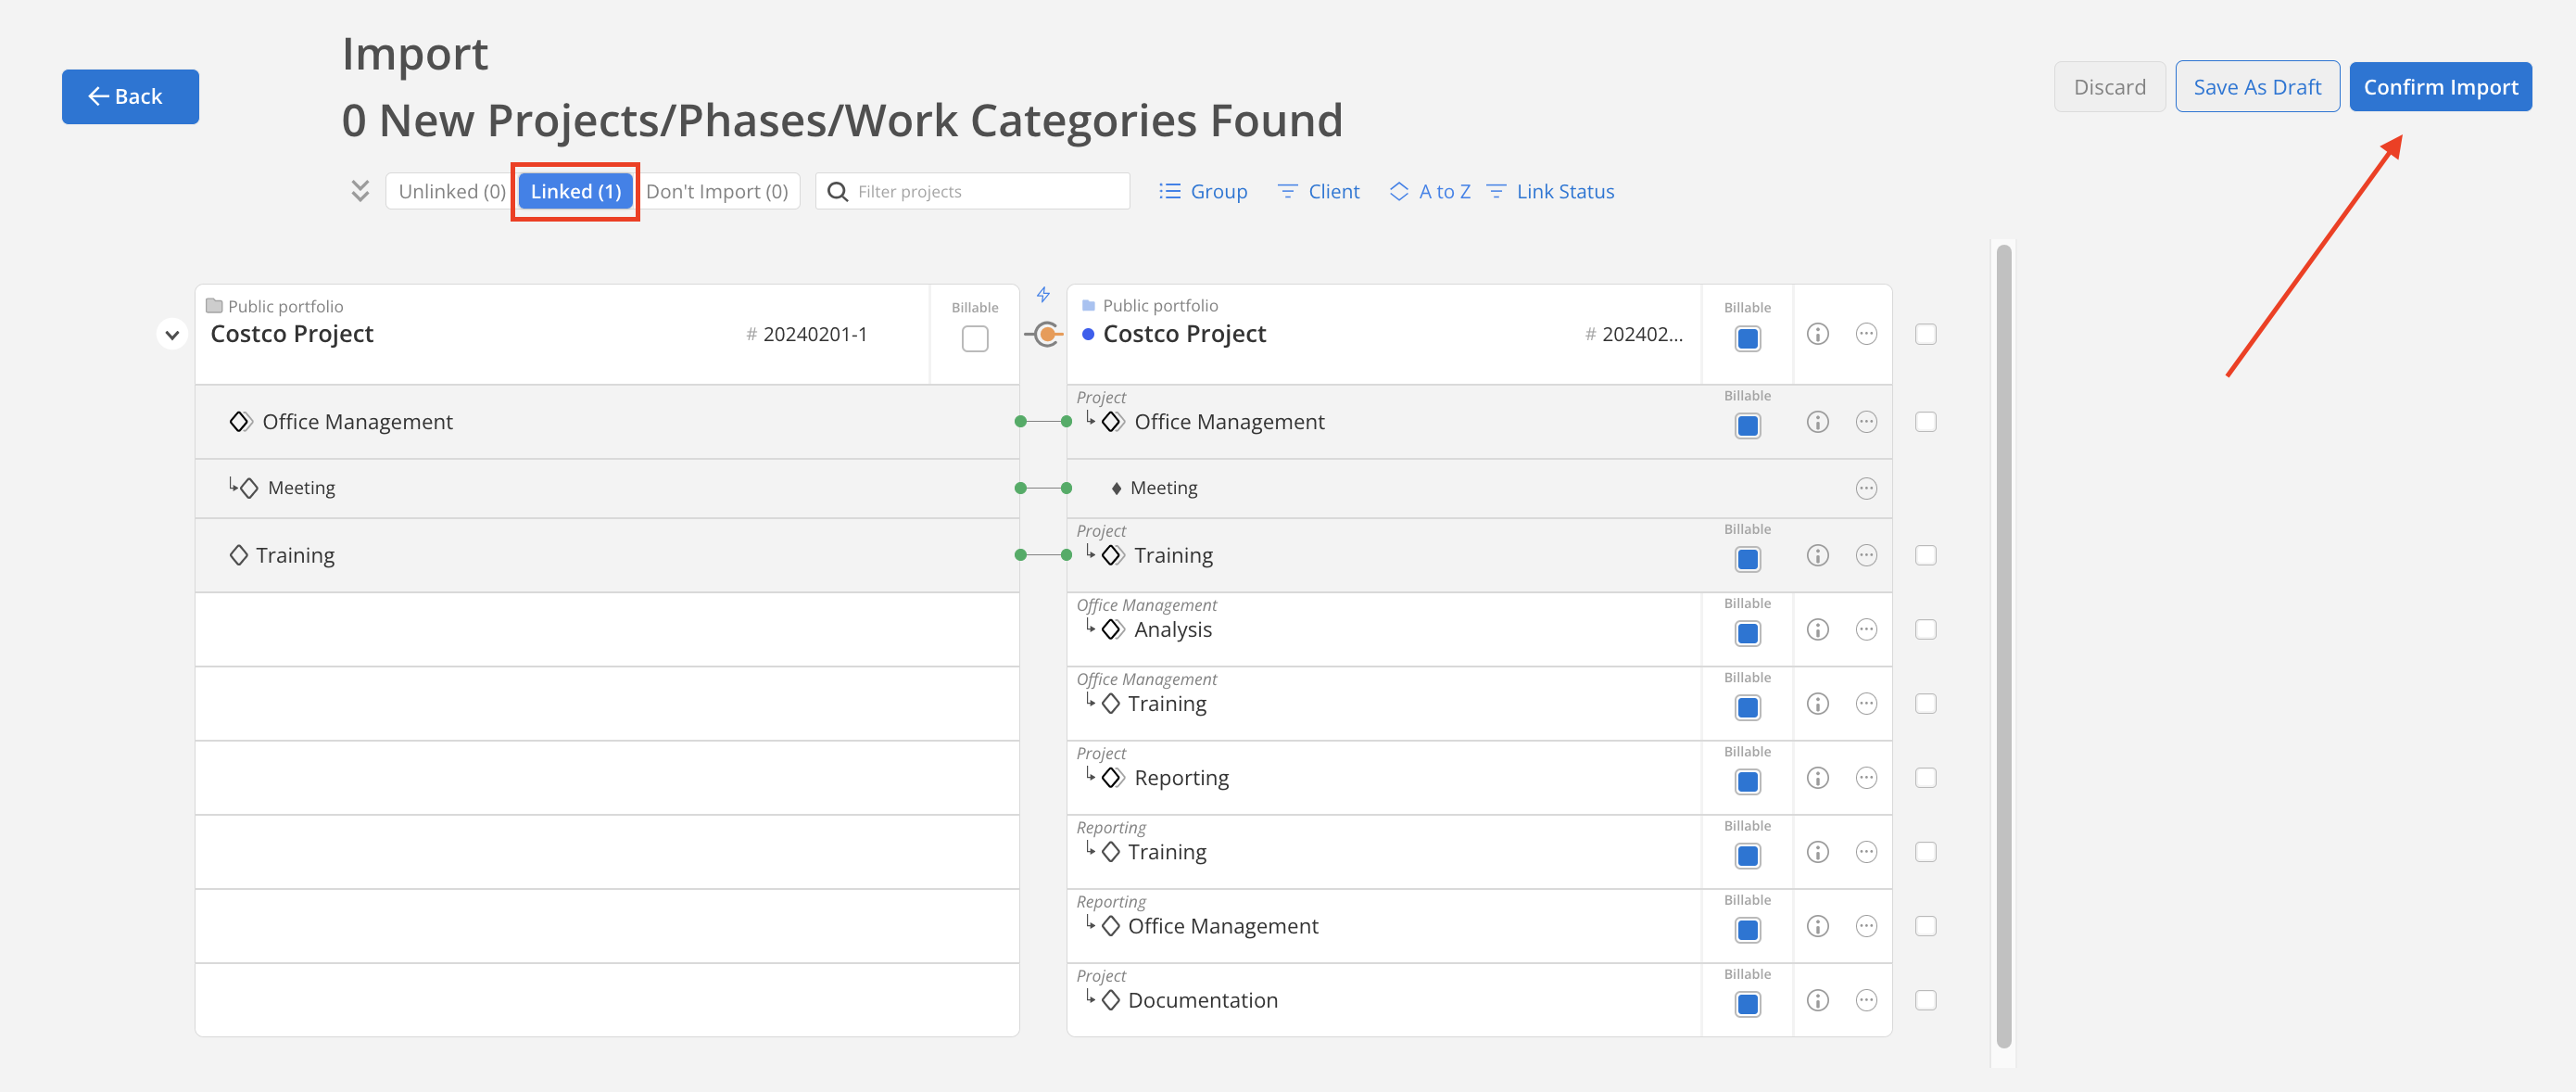
- All linked projects will show in linked section. Once you finish reviewing, click
Confirm Importon the top.Please allow up to 24 hours for all imports to finish populating on Mosaic.
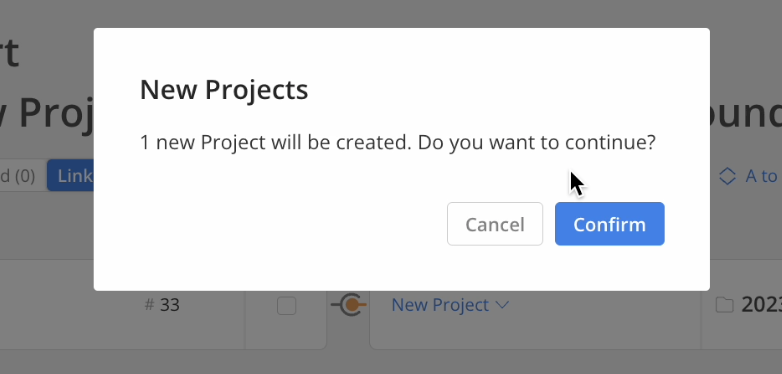
New Project ConfirmationA confirmation modal will appear, displaying the total number of newly imported projects. If the number seems incorrect, click cancel and verify that all projects are mapped properly.
Note:Ensure that Members are given at least Team Member Access Level to allow timesheet entries to be submitted by that member (Settings > Members > Access Level). Guests cannot have time entries.
Time Off Timesheets ImportMosaic supports the uploading of Time Off timesheets. Project number is required for the upload, so make sure to add a project number before uploading. Follow the steps to add a project number.
Legacy Time Entries Import (without Subphases)
Overview
If you do not have Subphases enabled in your account, you can still use the Legacy Time Entries Import (without Subphases).
Mosaic currently provides imports for the following:
- Time Entries (without Subphases)
For other data types please see the guides for uploading into Mosaic, or get in touch with your Customer Success Manager for help.
Links to download Time Entries (without Subphases) import template:
Please review this carefully before uploading a data import file
Here is an overview of the details needed for each column:
Field | Guide | Example | Required |
|---|---|---|---|
Portfolio | Name of the Portfolio that the Project is in. | 2022 Projects | No |
Project Title | Name of the Project. | Central Park | Yes |
Project Number | Identifying Project #. | 1234.1 | Yes |
Phase Name | Phase Name within the project.
| Surveying | No |
Phase Number | The Phase Number if the Project/ Phase is imported from an integration.
| 200 | No |
Work Category | Type of work being completed.
| Planning | No |
Employee Name | The Employee's Full Name.
| John Smith | Yes |
Employee Email | The Employee's Email Address.
| Yes | |
Date | Date of Time Entry.
| 2022-01-05 | Yes |
Hours | Number of Hours. | 3 | Yes |
Hourly Rate | Billable Rate. | 250 | No |
Description | Details on the work being completed for the time entry. | Survey planning for south park entrance | No |
Billable | Are the hours billable/non-billable?
The default value will be "true" if the Project, phase and work category are all billable. If either Project, Phase or Work Category are non-billable, the default value will be "false". You can override the default value by providing a different value for this field. | true | No |
Every Line Denotes a New EntryFor each individual in the Time Entry, create a separate line. If a person has time entries under multiple phases or work categories, each time entry should also have its own line. For example, if you're adding two time entries to a project with two phases, but only one person has time on both phases, the spreadsheet should display three data lines.
Please review this carefully before uploading a data file to get imported
Please Note:Ensure your data is accurate and has unique values in the fields below as duplicate time entries in an import will be skipped.
The following fields are used to determine the uniqueness of a time entry for importing:
- Project Title
- Project Number
- Date
- Phase
- Work Category
- Employee Name
- Employee Email
- Hours
- Description
Tip: Provide a unique description for your time entry if all the above fields are identical.