MS Dynamics 365 Business Central (Coming Soon)
| Direction | Est. Data Transfer Time | Vendor | Vendor Docs |
|---|---|---|---|
| 1-way from MS Dynamics 365 to Mosaic. | Up to 4 hours. | Business Central Product Website | Business Central Resources |
Creating your app in Azure AD
Prerequisite:Make sure you have set up an Azure AD tenant before proceeding. If you need to set up an Azure AD tenant, please refer to this Guide to Set up a tenant.
Part 1: Create new app registration for Business Central in Azure AD
- Sign in to the Azure Portal.
Please Note:You must have an Azure account with permissions to manage applications in Azure Active Directory (Azure AD), such as one of the following Azure AD roles:
- Application administrator
- Application developer
- Cloud application administrator
- If you have access to multiple tenants, switch to the tenant in which you want to register the application (using the Directories + subscriptions filter on the top menu).

-
Navigate to Azure Active Directory.
-
Under Manage > Properties and take note of your Tenant ID.
-
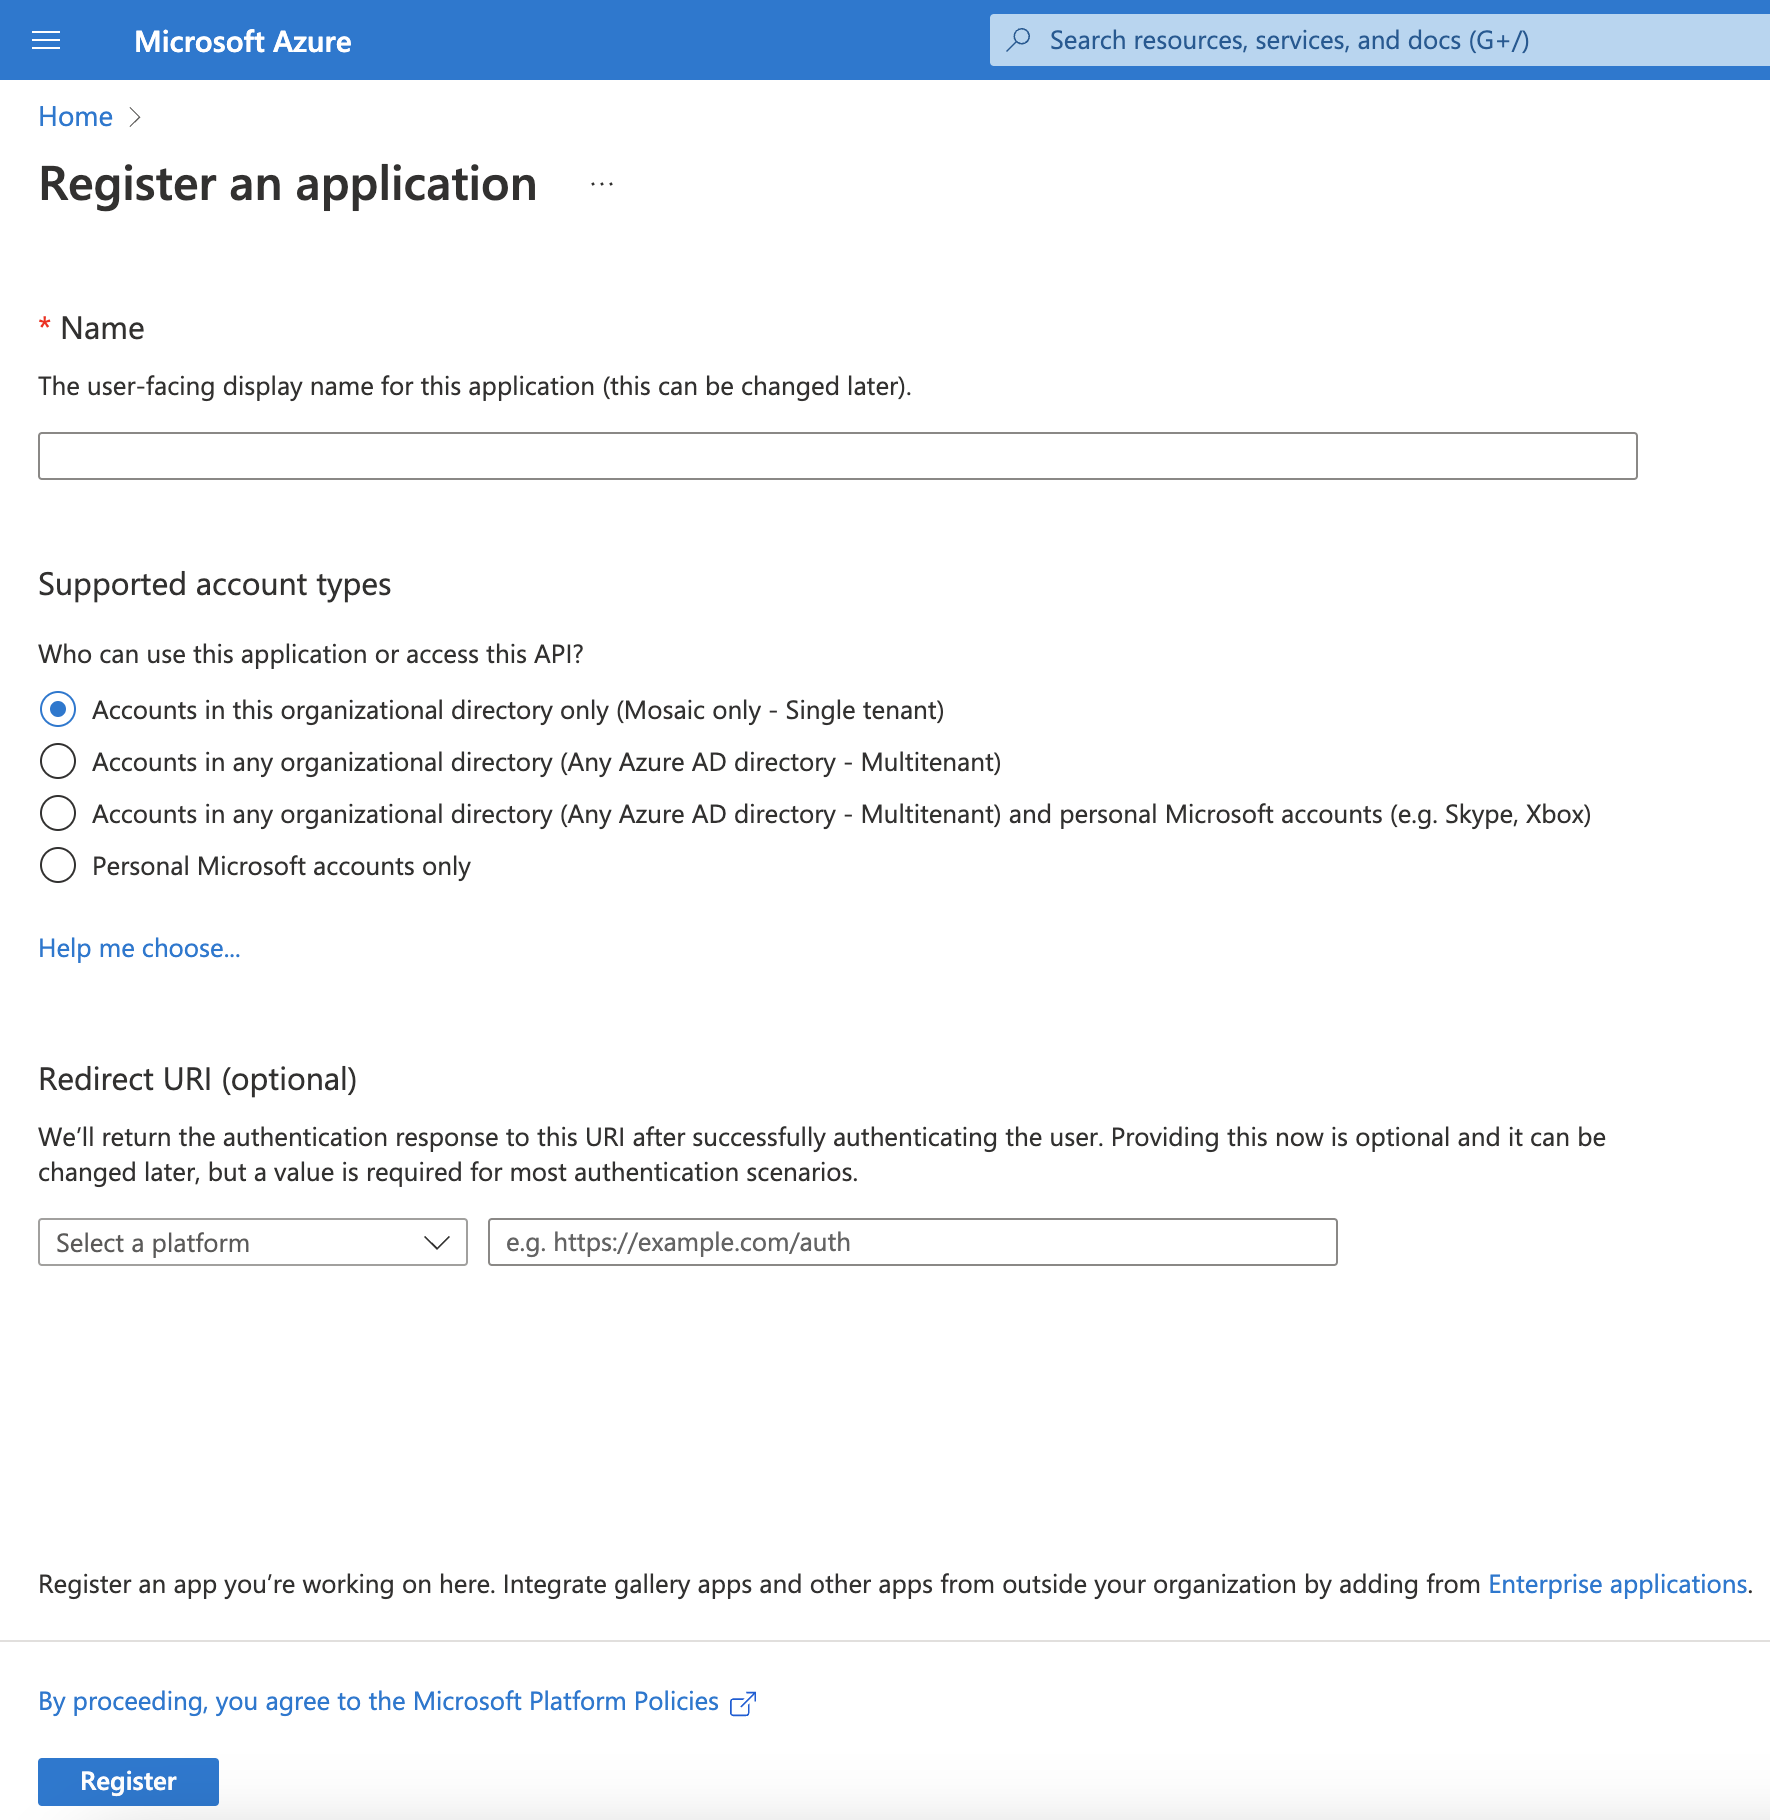
In the Overview page, click on + Add, select App registration.

-
Enter a name for the application (e.g., Mosaic Business Central).
-
Under Supported account types, select Accounts in this organizational directory only.
-
Make sure to skip the Redirect URI (optional) section.

-
Select Register.
-
After the registration is complete, take note of the Application (client) ID in the Application Overview Page.
-
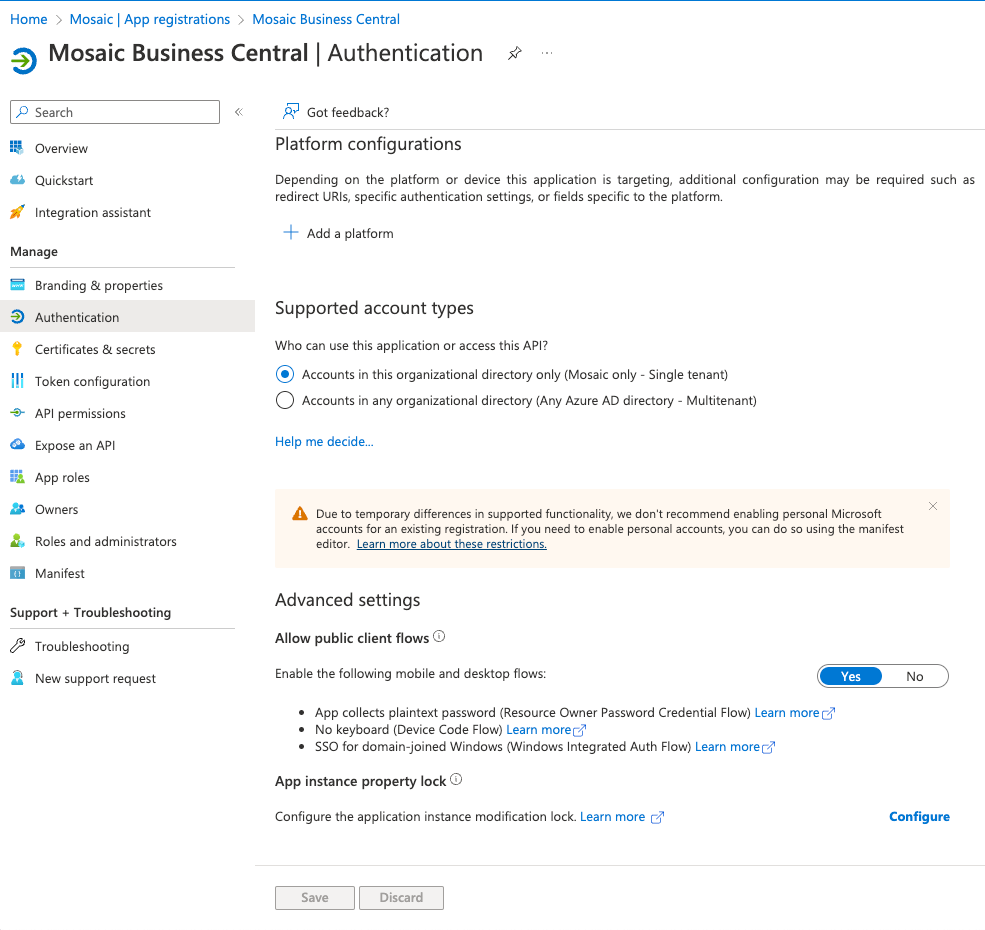
Navigate to Manage > Authentication and turn on Allow public client flows.

-
Navigate to Manage > Certificates & secrets, and select New client secret. Enter a Description (e.g.,
ClientSecretForMosaicBusinessCentralApp) and Expiration policy (e.g., 1 year from today) and select Add. Take note of your Client Secret Value. -
Provide the Tenant ID (from Step #4), Client ID (from Step #10) and Client Secret Value (from Step #12) to Mosaic.
Part 2: Add permissions to your Registered Application (Mosaic Business Central)
-
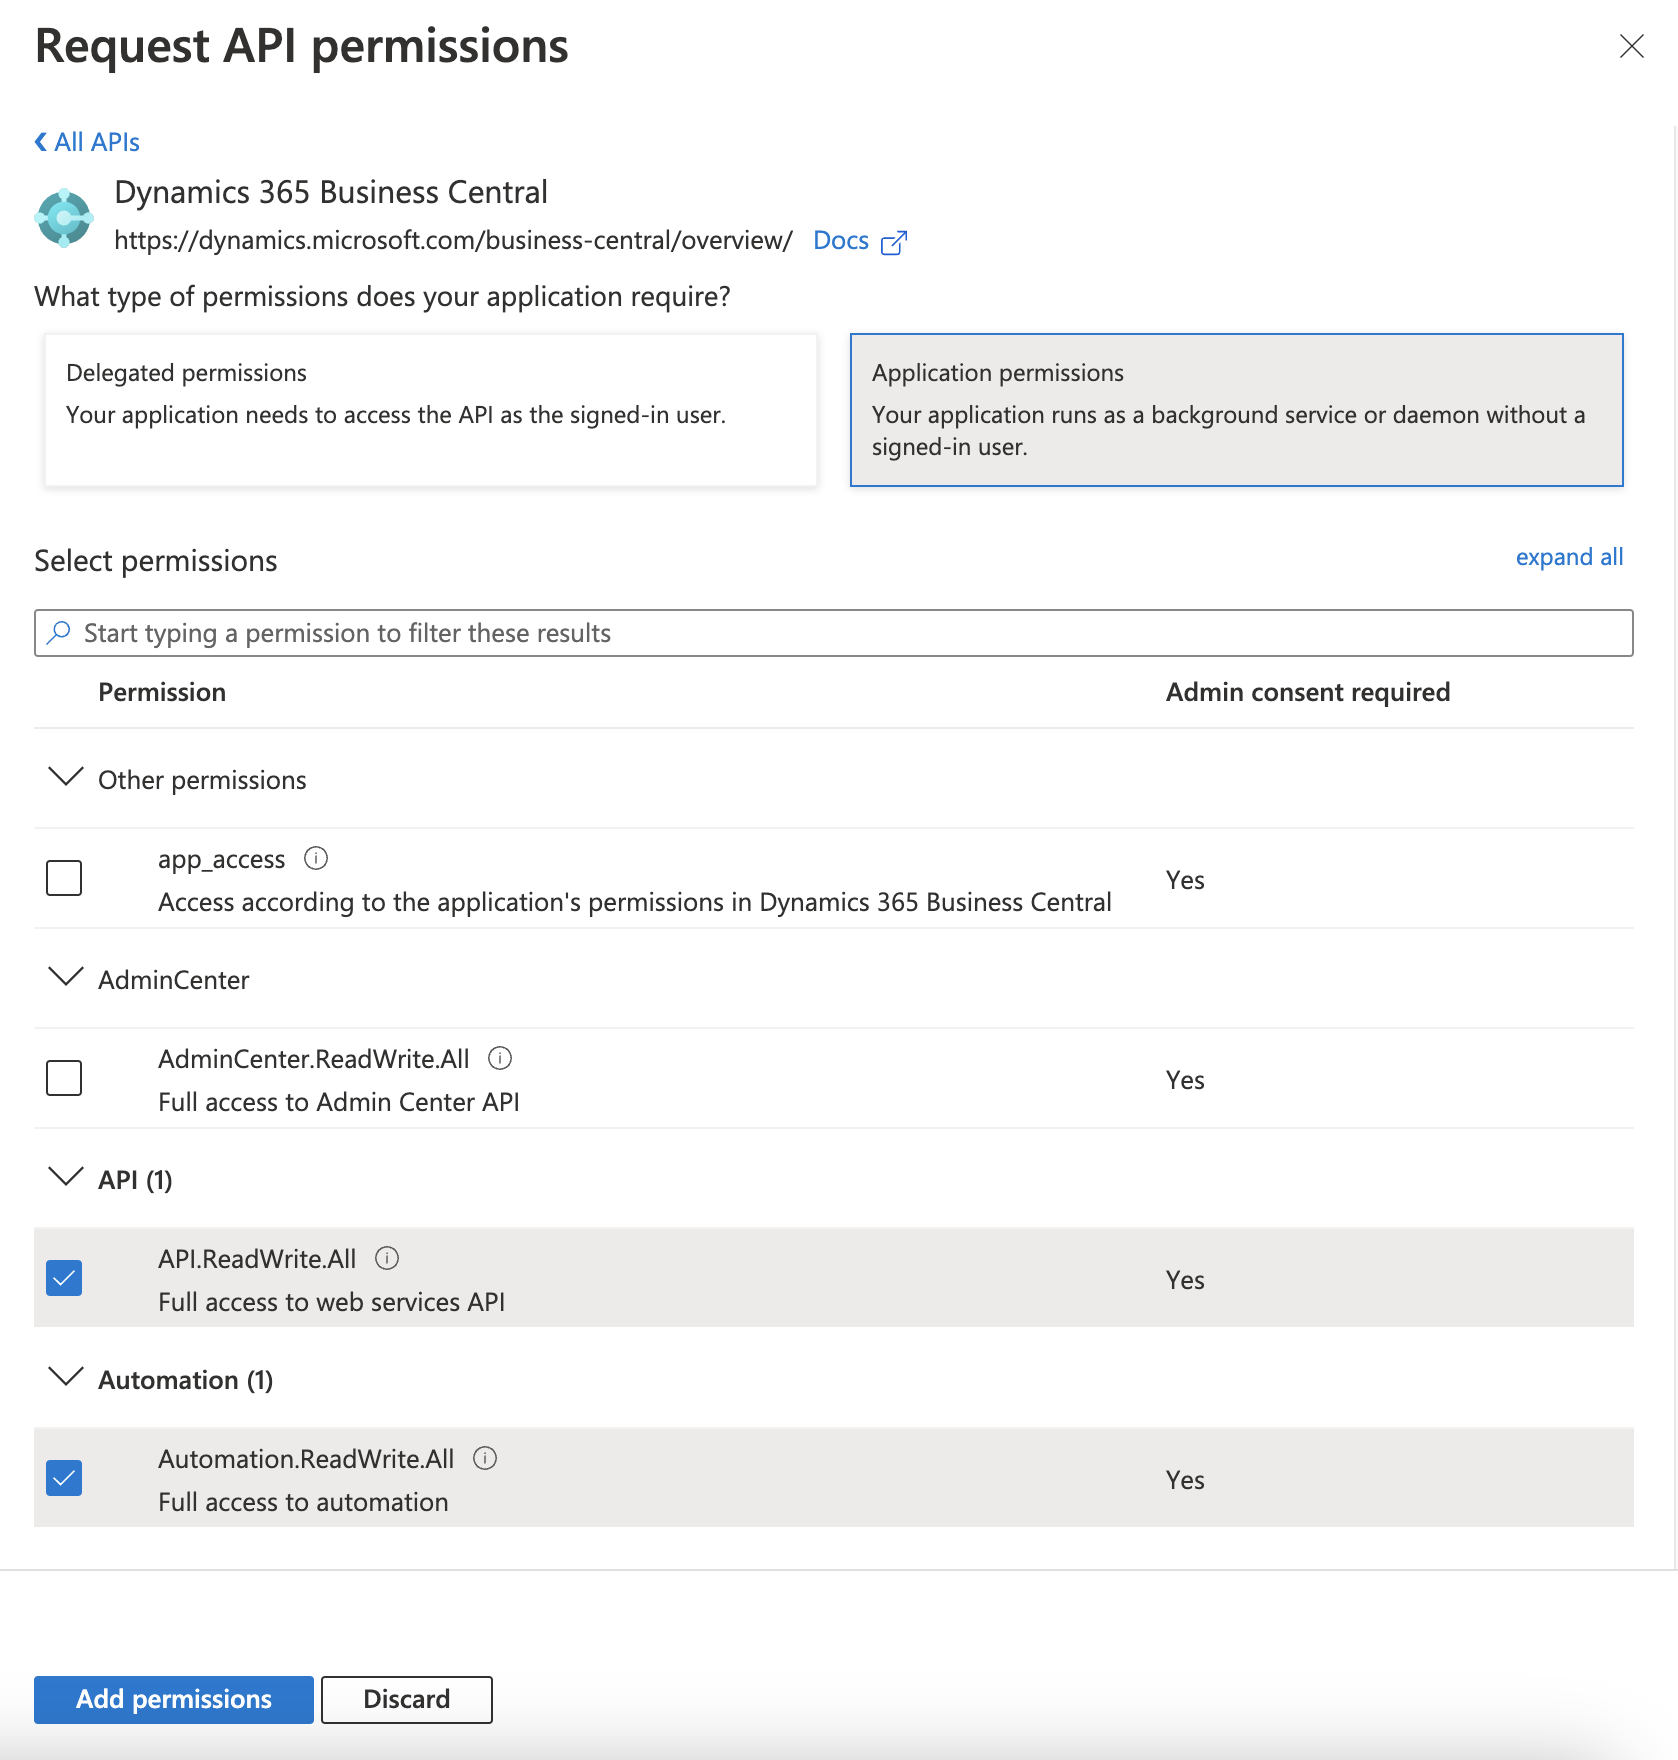
Navigate to Manage > API permissions > Add a permission.
-
Select Dynamics 365 Business Central.
-
Click on Application permissions and select API.ReadWrite.All and Automation.ReadWrite.All and then click on Add permissions.

- Grant admin consent on each permission by selecting the permission in the list, then clicking on Grant admin consent for
<tenant name>.

Part 3: Set up the Azure AD application in Business Central
-
In your Business Central client, search for and click on Azure Active Directory Applications.
-
Click on + New.
-
In the Azure Active Directory Application Card, enter the Application (Client) ID for the registered application in Azure AD from Part 1.
-
Fill in the Description field.
-
Assign the permissions to Users and Groups as needed.
- Under User Groups, enter D365 AUTOMATION
- Under User Permission Sets, enter D365 AUTOMATION, LOCAL and LOGIN for your Company.
- Set the State to Enabled.
Step 4: Provide the Registered Application information to Mosaic
Once you have completed Parts 1-3 above, please provide the following information to your Customer Success Manager at Mosaic:
- Tenant ID (from Part 1: Step #4)
- Client ID (from Part 1: Step #10)
- Client Secret Value (from Part 1: Step #12)
Updated 4 months ago
