Connecting Mosaic with Microsoft Entra ID (Azure AD)
Microsoft Entra ID is the new name for Azure Active Directory (Azure AD). Mosaic’s SAML SSO integration fully supports Microsoft Entra ID using the same setup steps described below.
Initial Setup with Microsoft Entra ID (formerly Azure Active Directory) using SAML
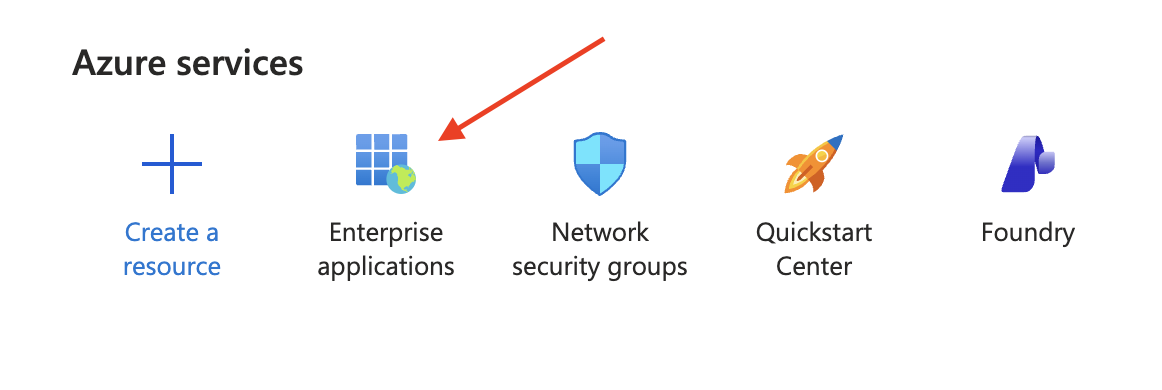
- On the Welcome to Azure! page or Microsoft Entra admin center, click the Enterprise applications option.
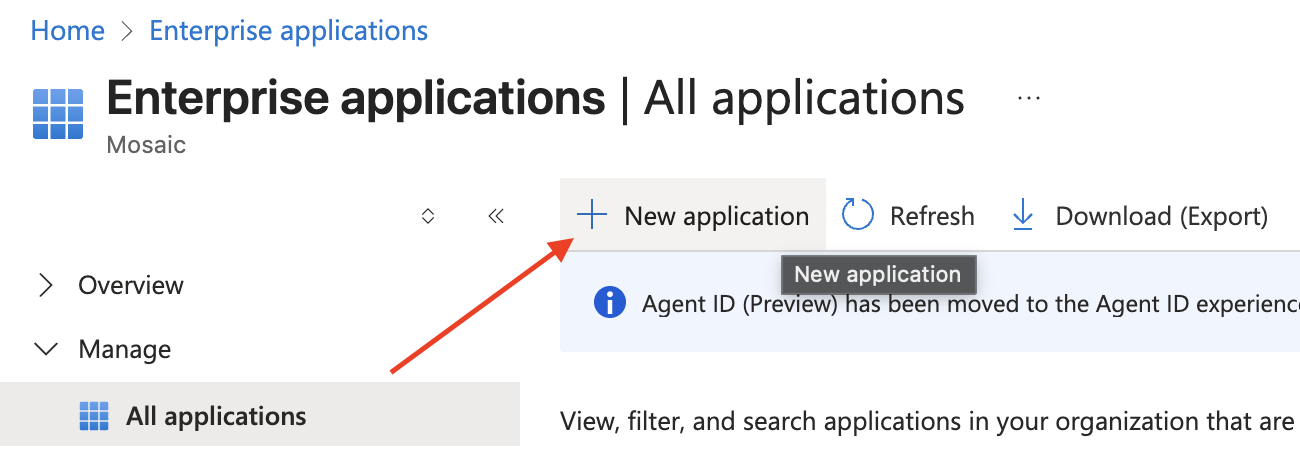
- Click on New application on the Enterprise applications page.
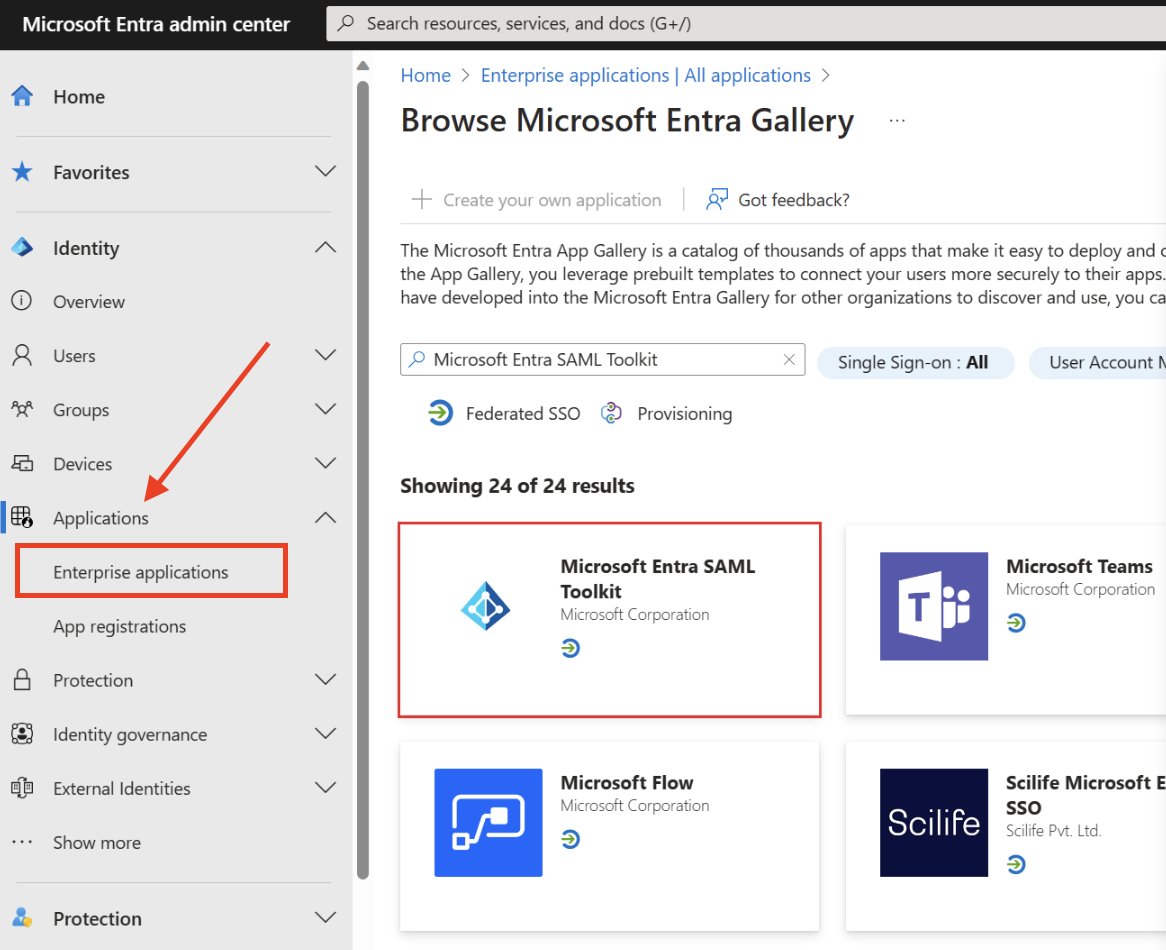
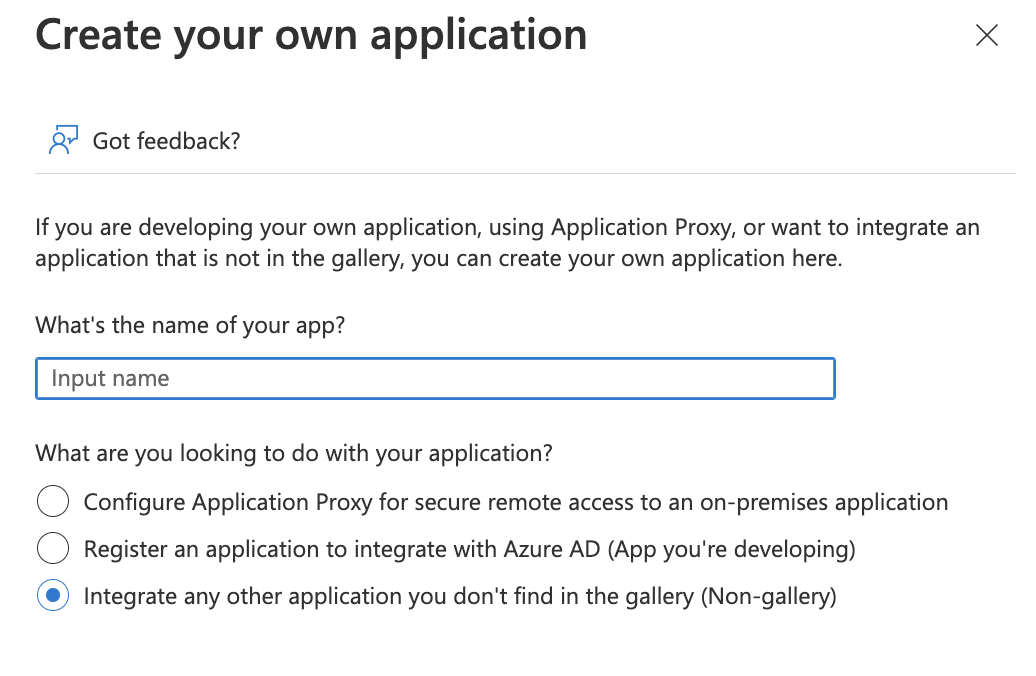
- Click on the Create your own application button.

- Input a name that is easily identifiable and select Integrate any other application you don't find in the gallery (Non-gallery).
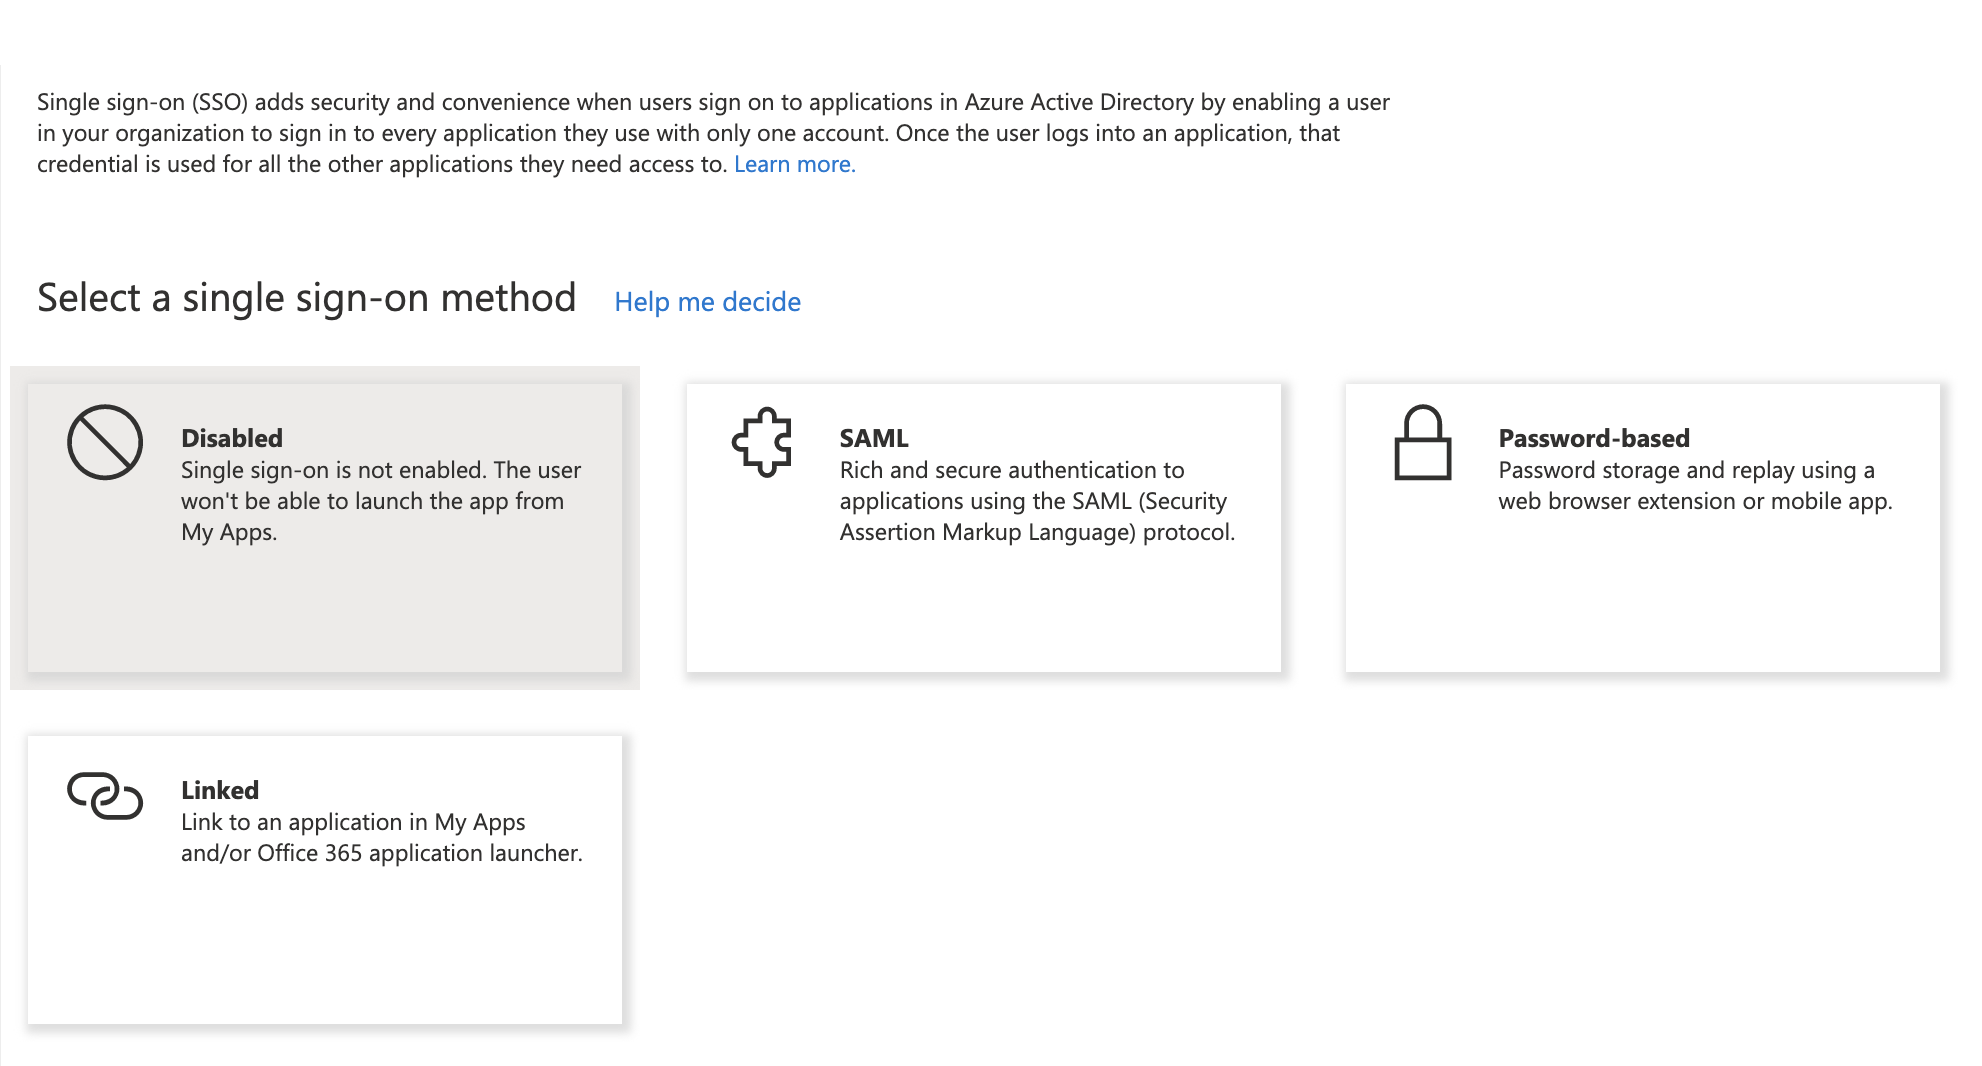
- Once the app has been created by Azure, navigate to the Single sign-on menu and select SAML.
Add and Verify Domain on Mosaic
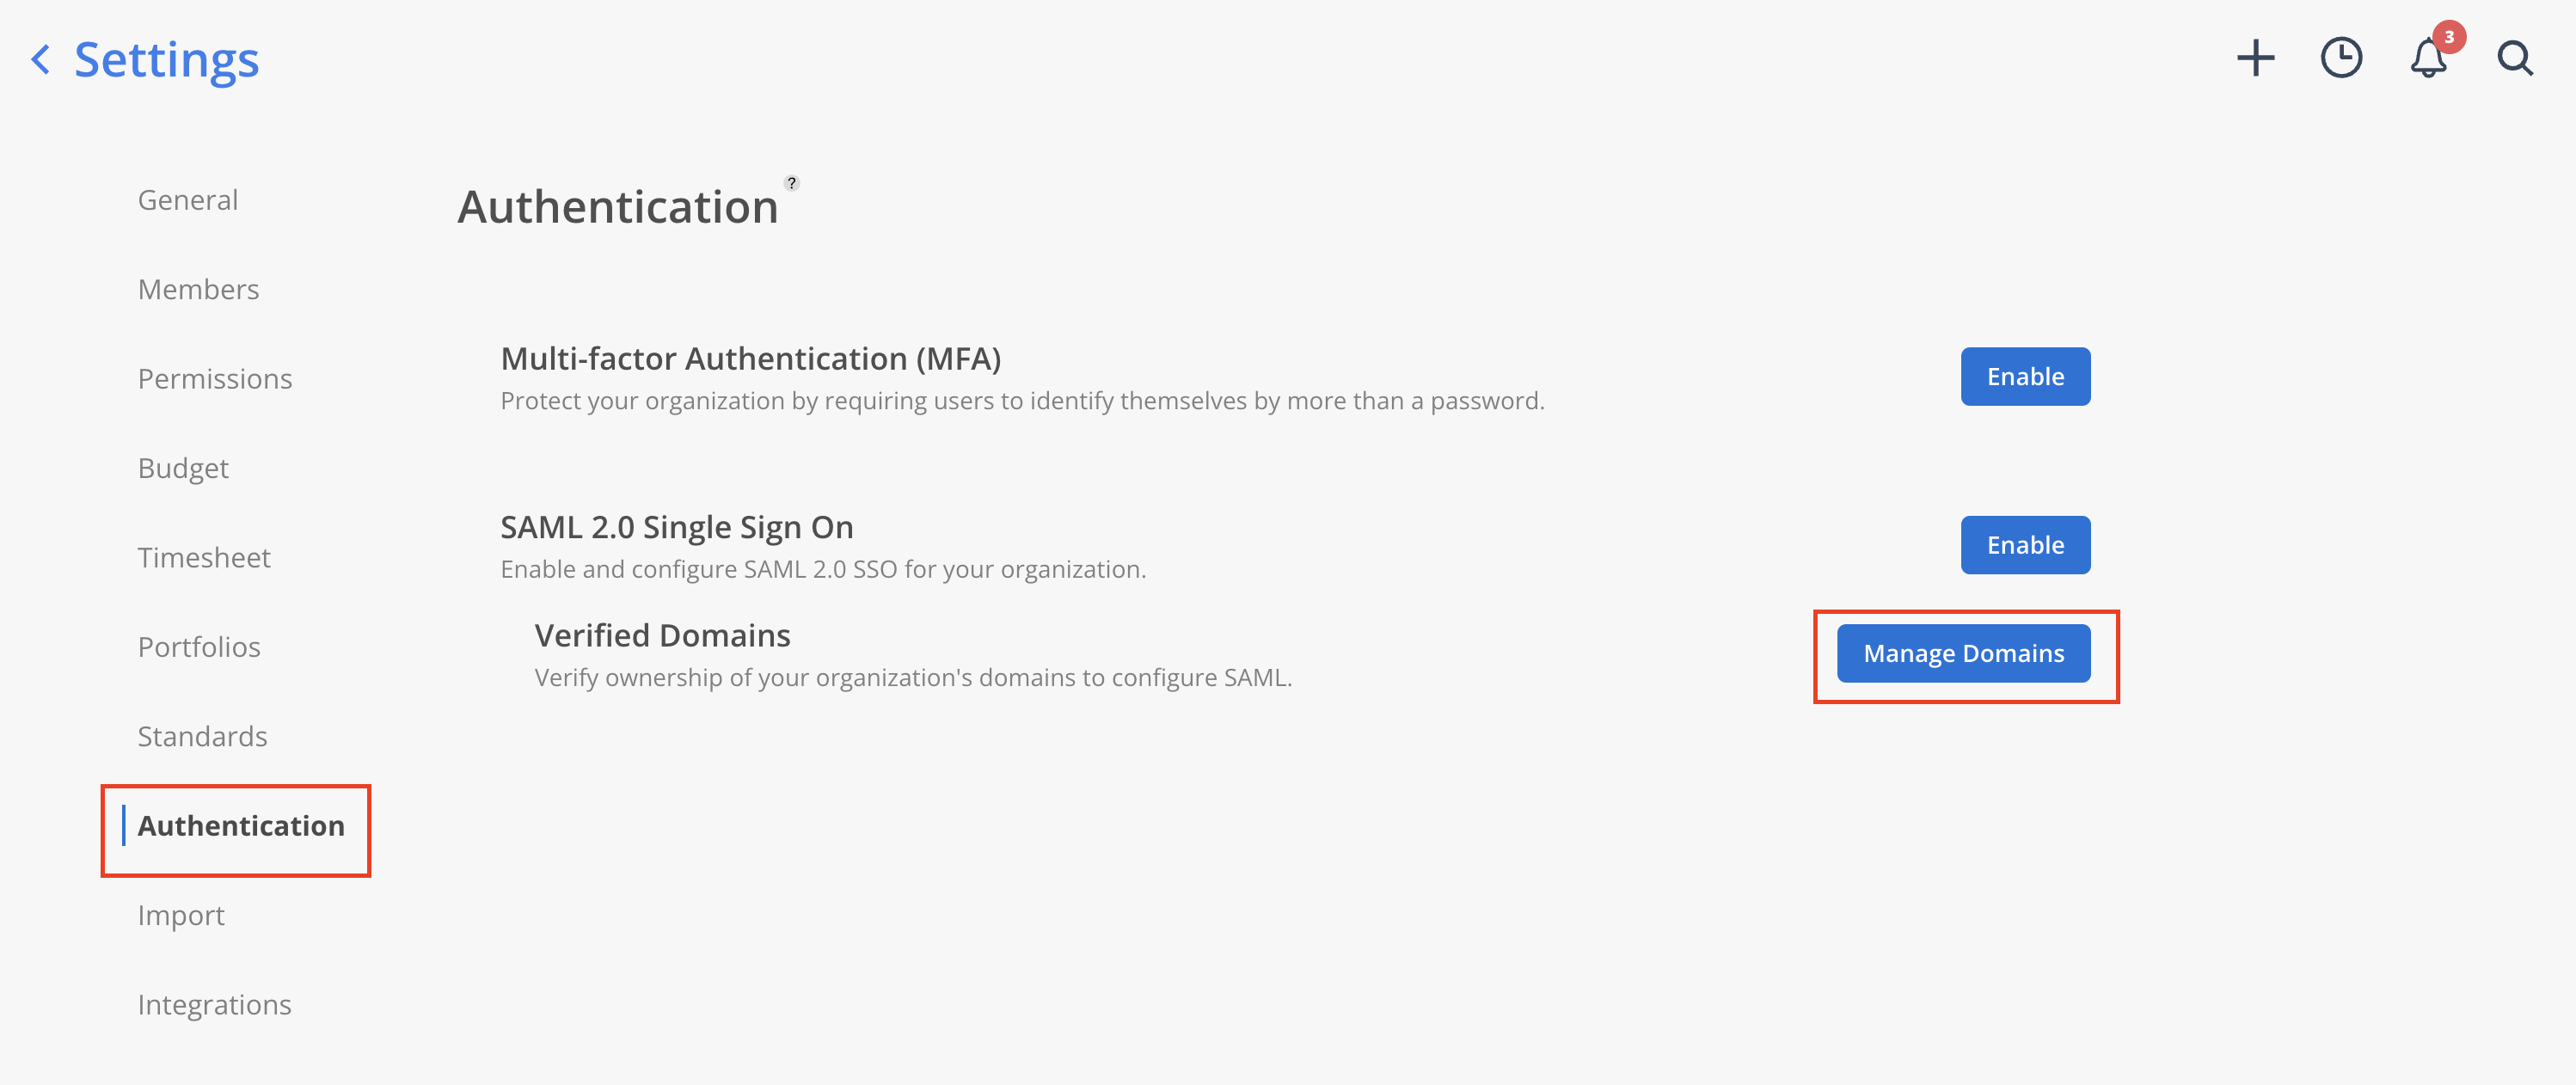
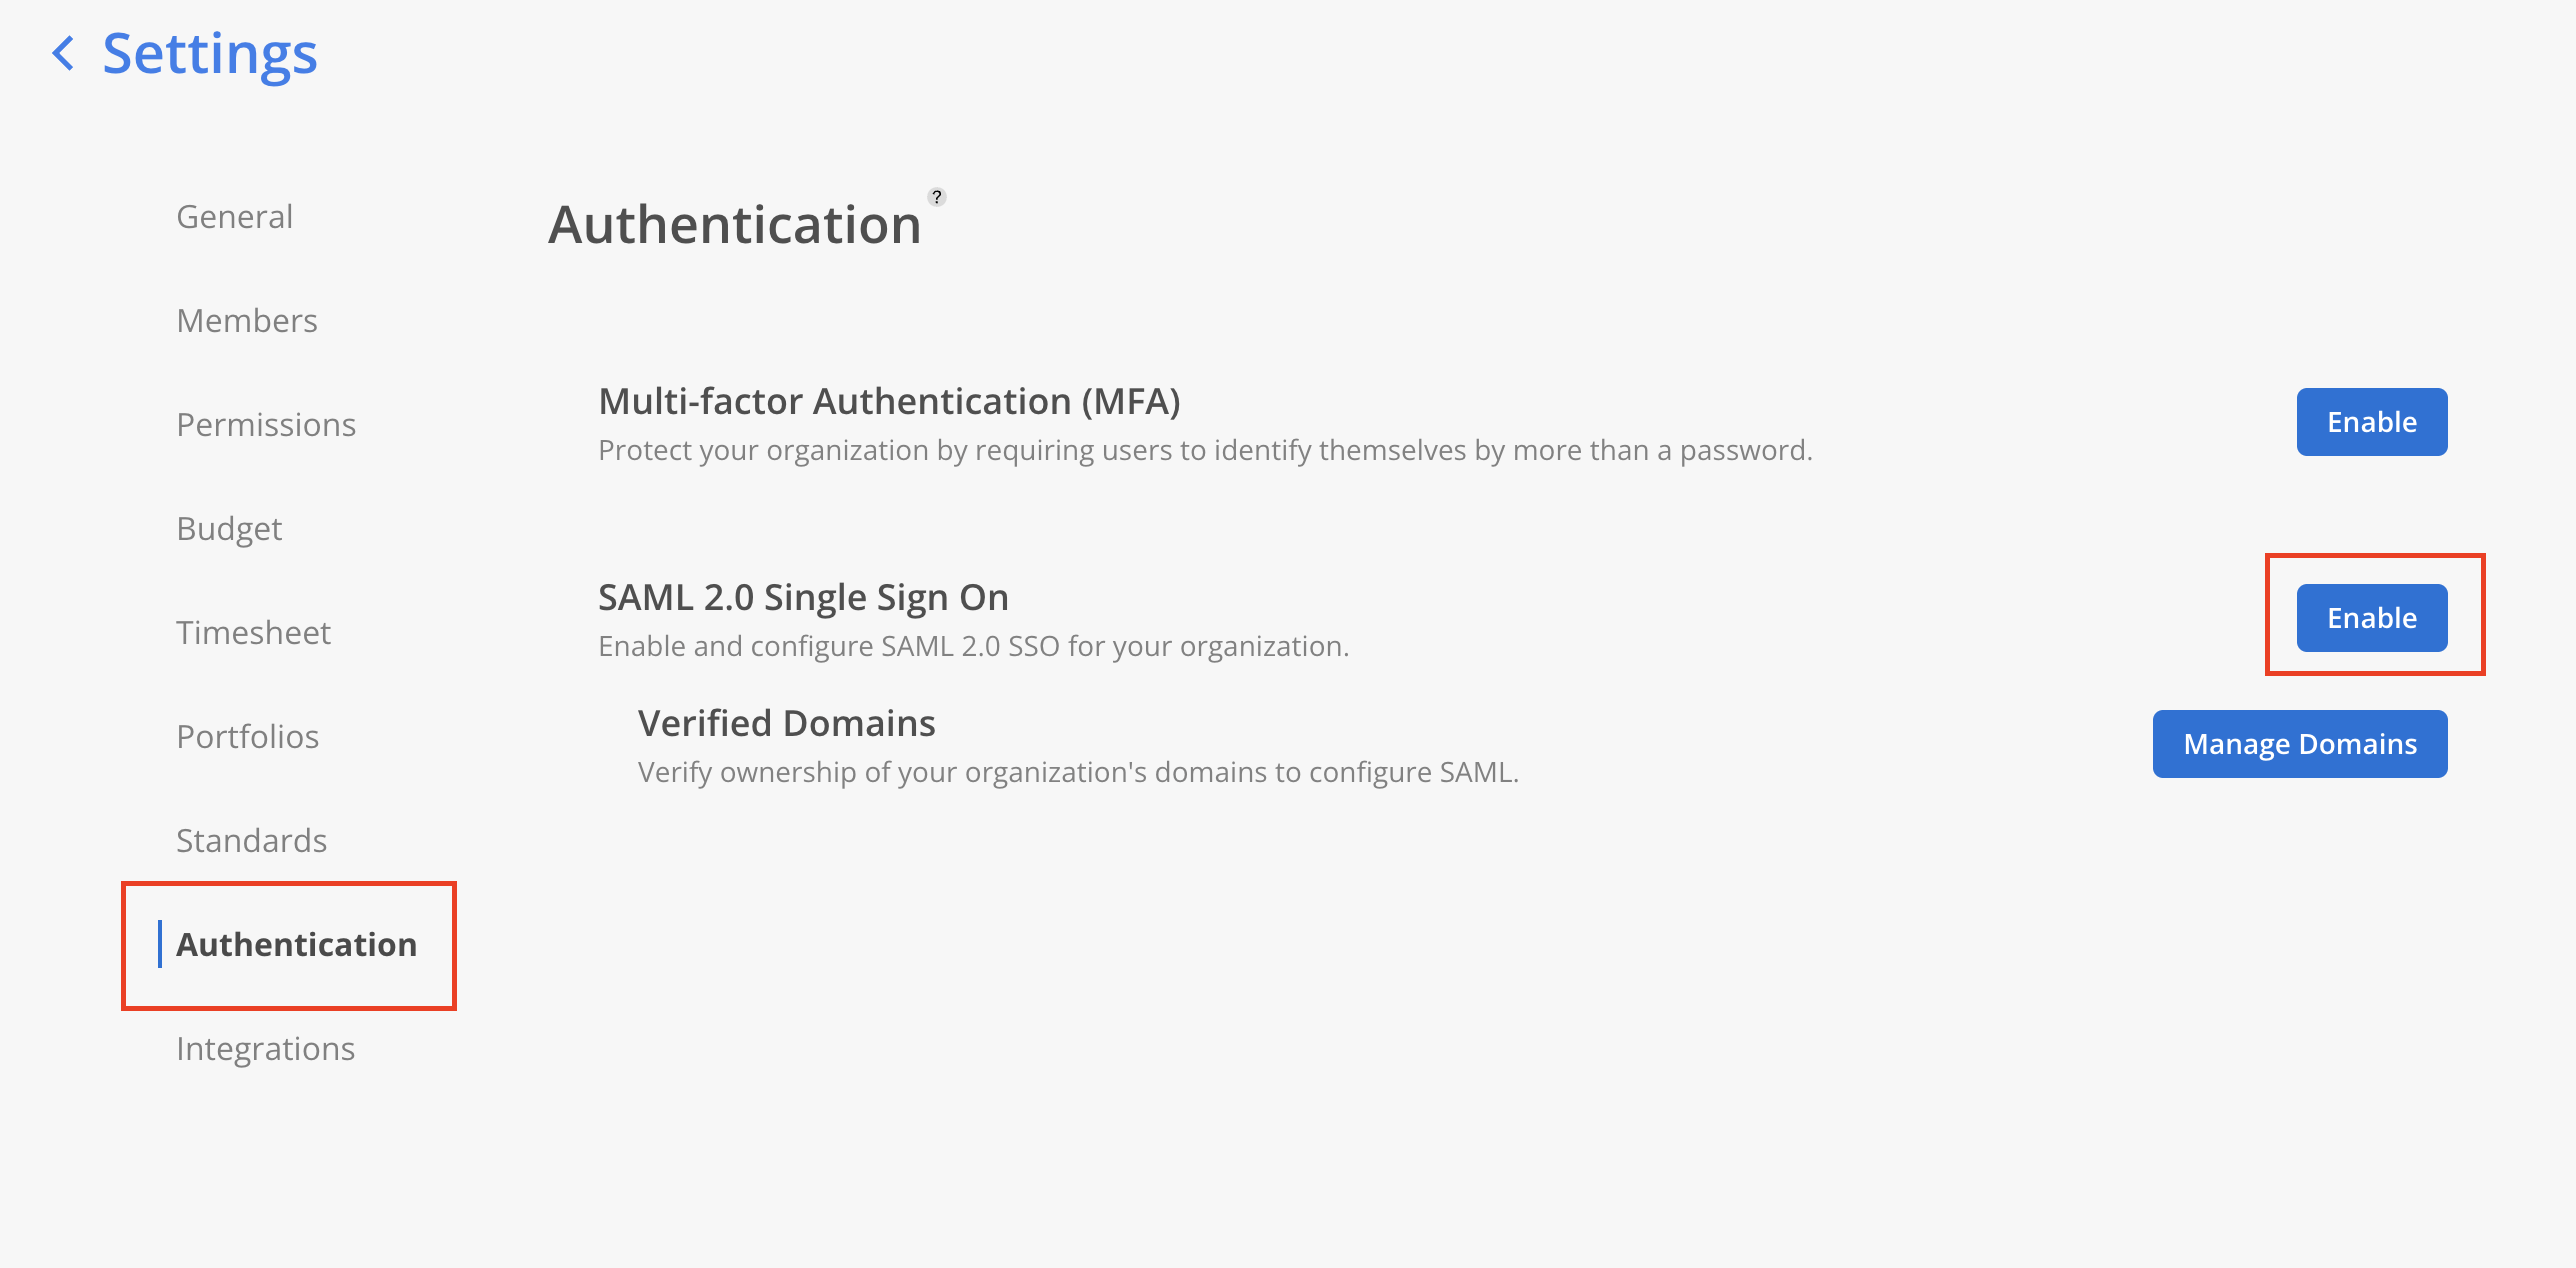
- Go to Mosaic Settings → Authentication page. Under SAML 2.0 Single Sign On, click
Manage Domains.
Please Note:Only admins are able to access the Authentication tab on Mosaic settings.
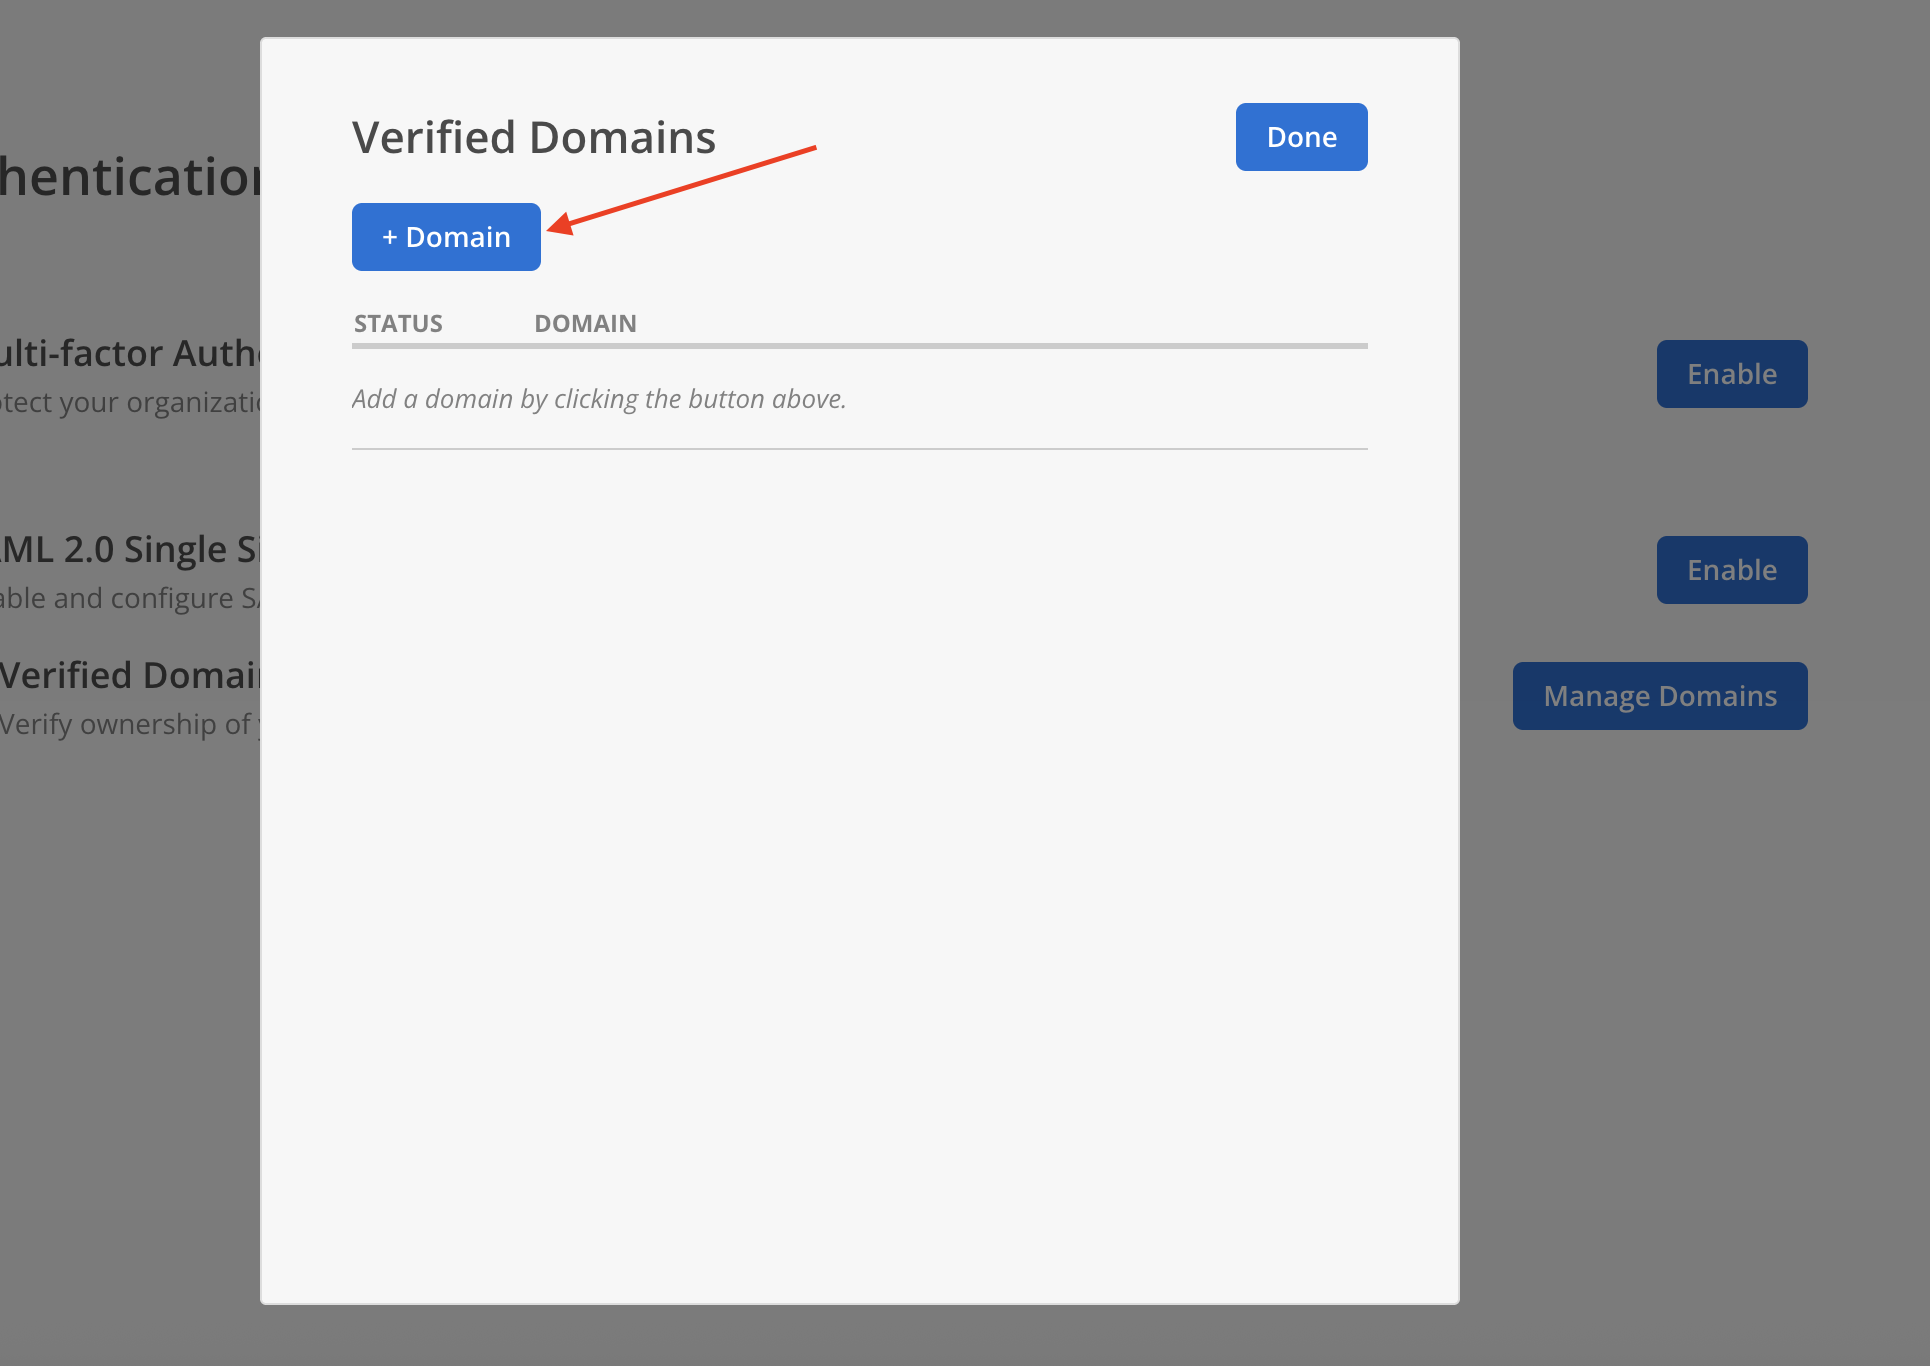
- Select
+ Domainon the Verified Domains Modal.
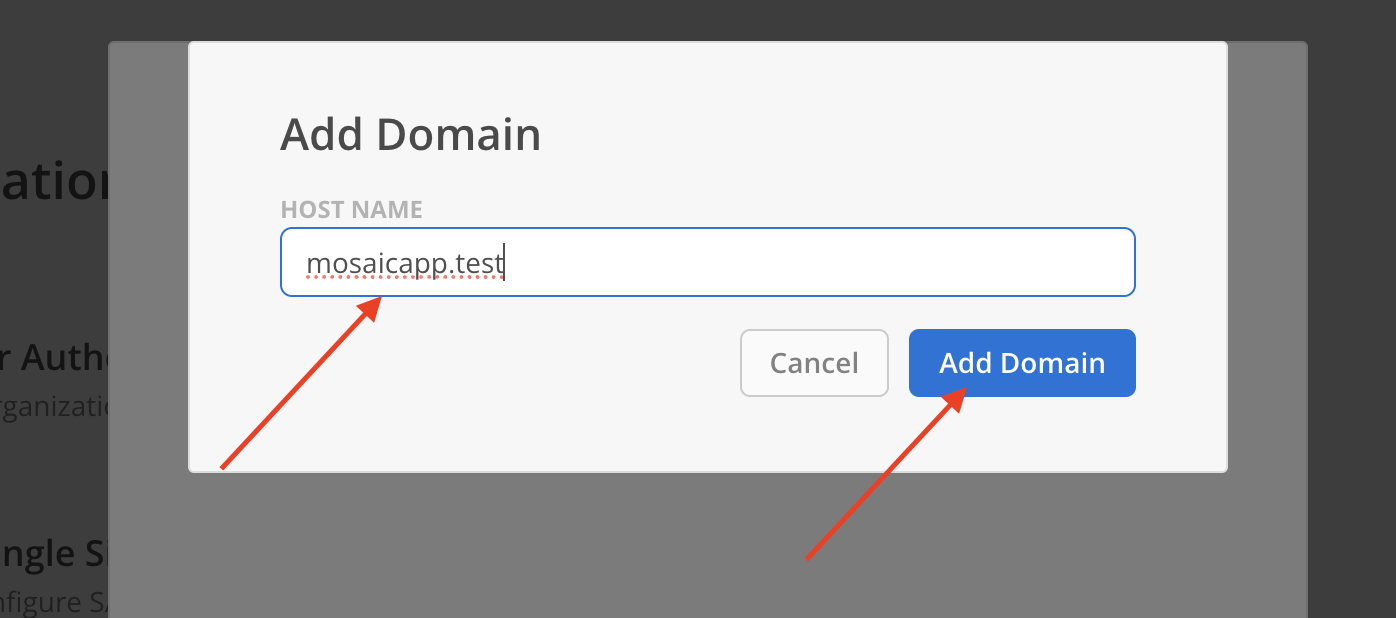
- Enter a your email domain in the host name field. Click
Add Domain.
- Newly added domain will appear on the modal with status Not Verified.
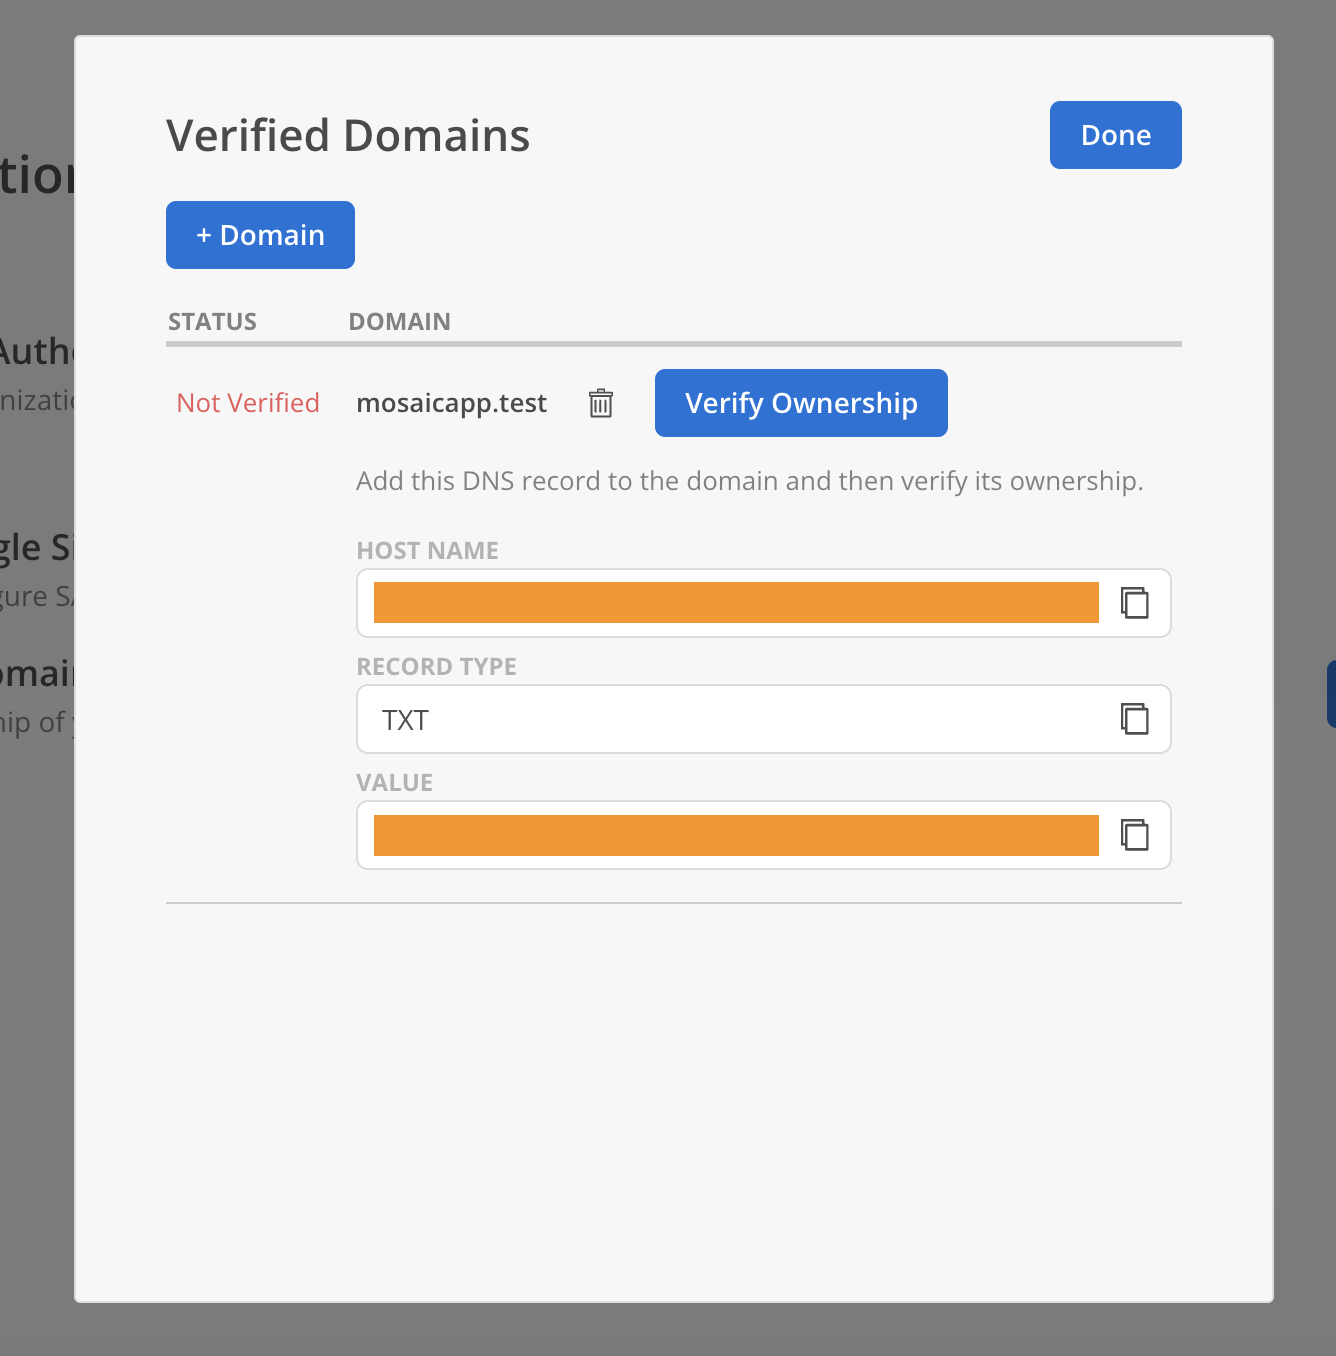
- Share the Hostname, Record Type (TXT), and Record Value with your DevOps team to update the domain’s DNS settings. Click
Verify Ownershipafter completing the DNS configuration.
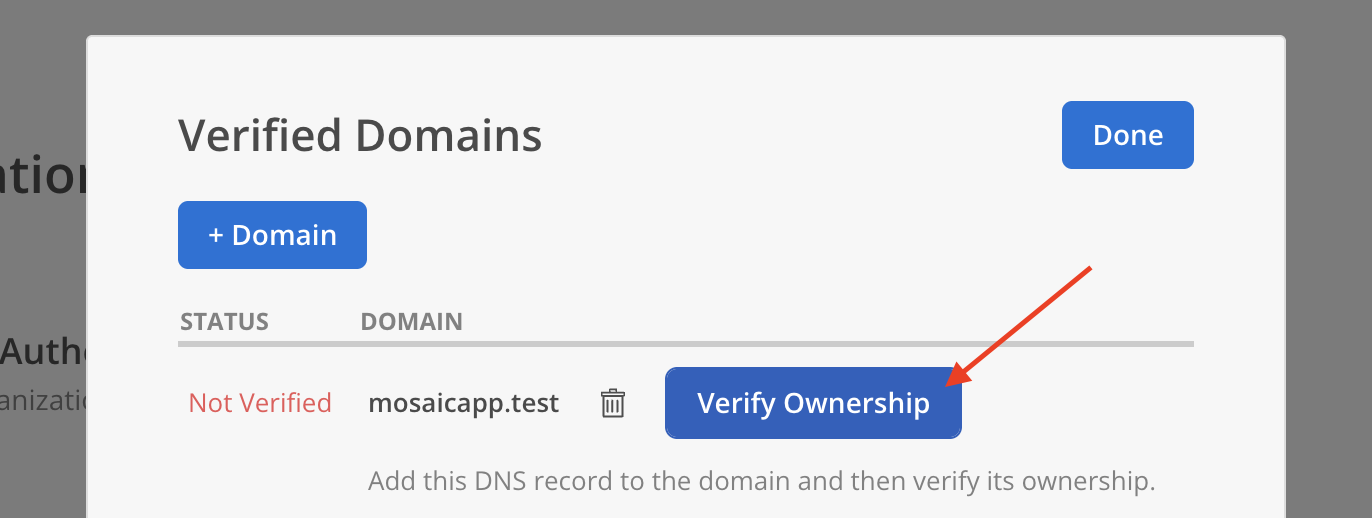
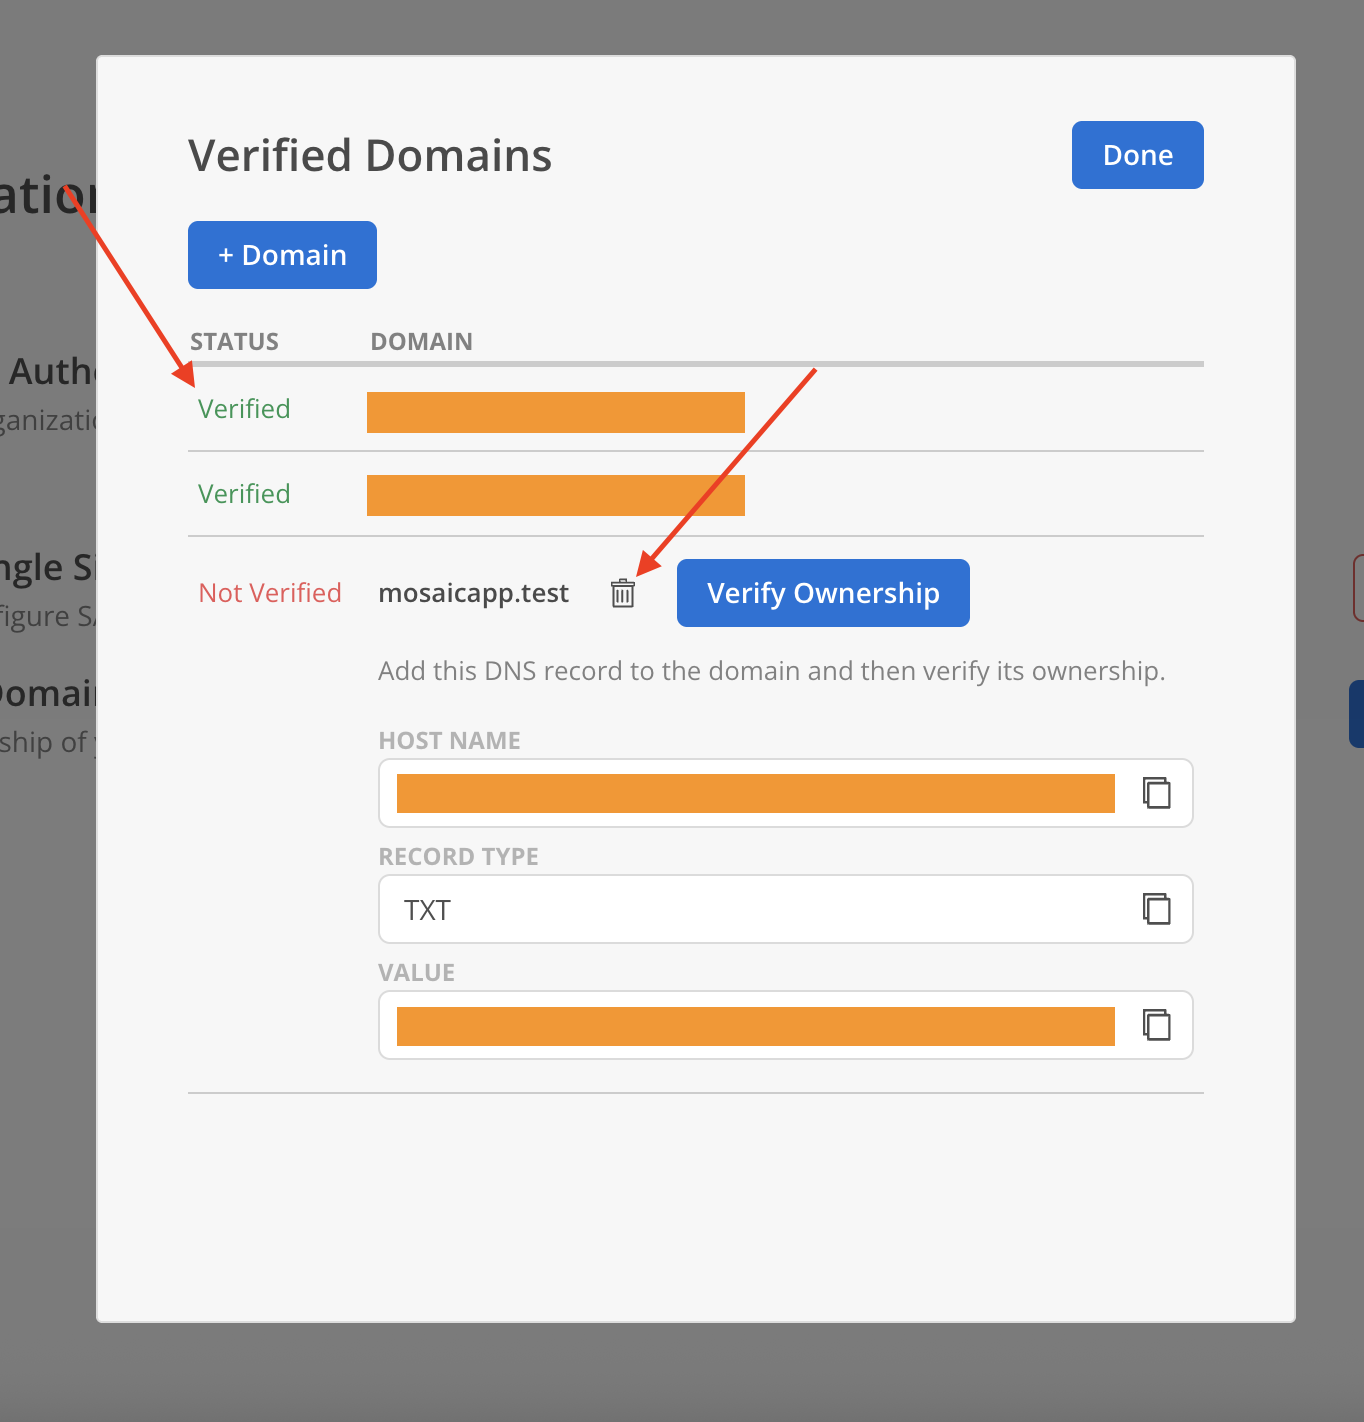
- The domain’s status will update to Verified.
Domains with status Not Verified display a Delete option and can be removed. Once a domain is marked as Verified, the Delete option is no longer available.
Setup SAML
- Click
EnableSAML 2.0 Single Sign On on Authentication page.
- On Mosaic’s SAML 2.0 Single Sign On menu, fill in:
- SSO URL:
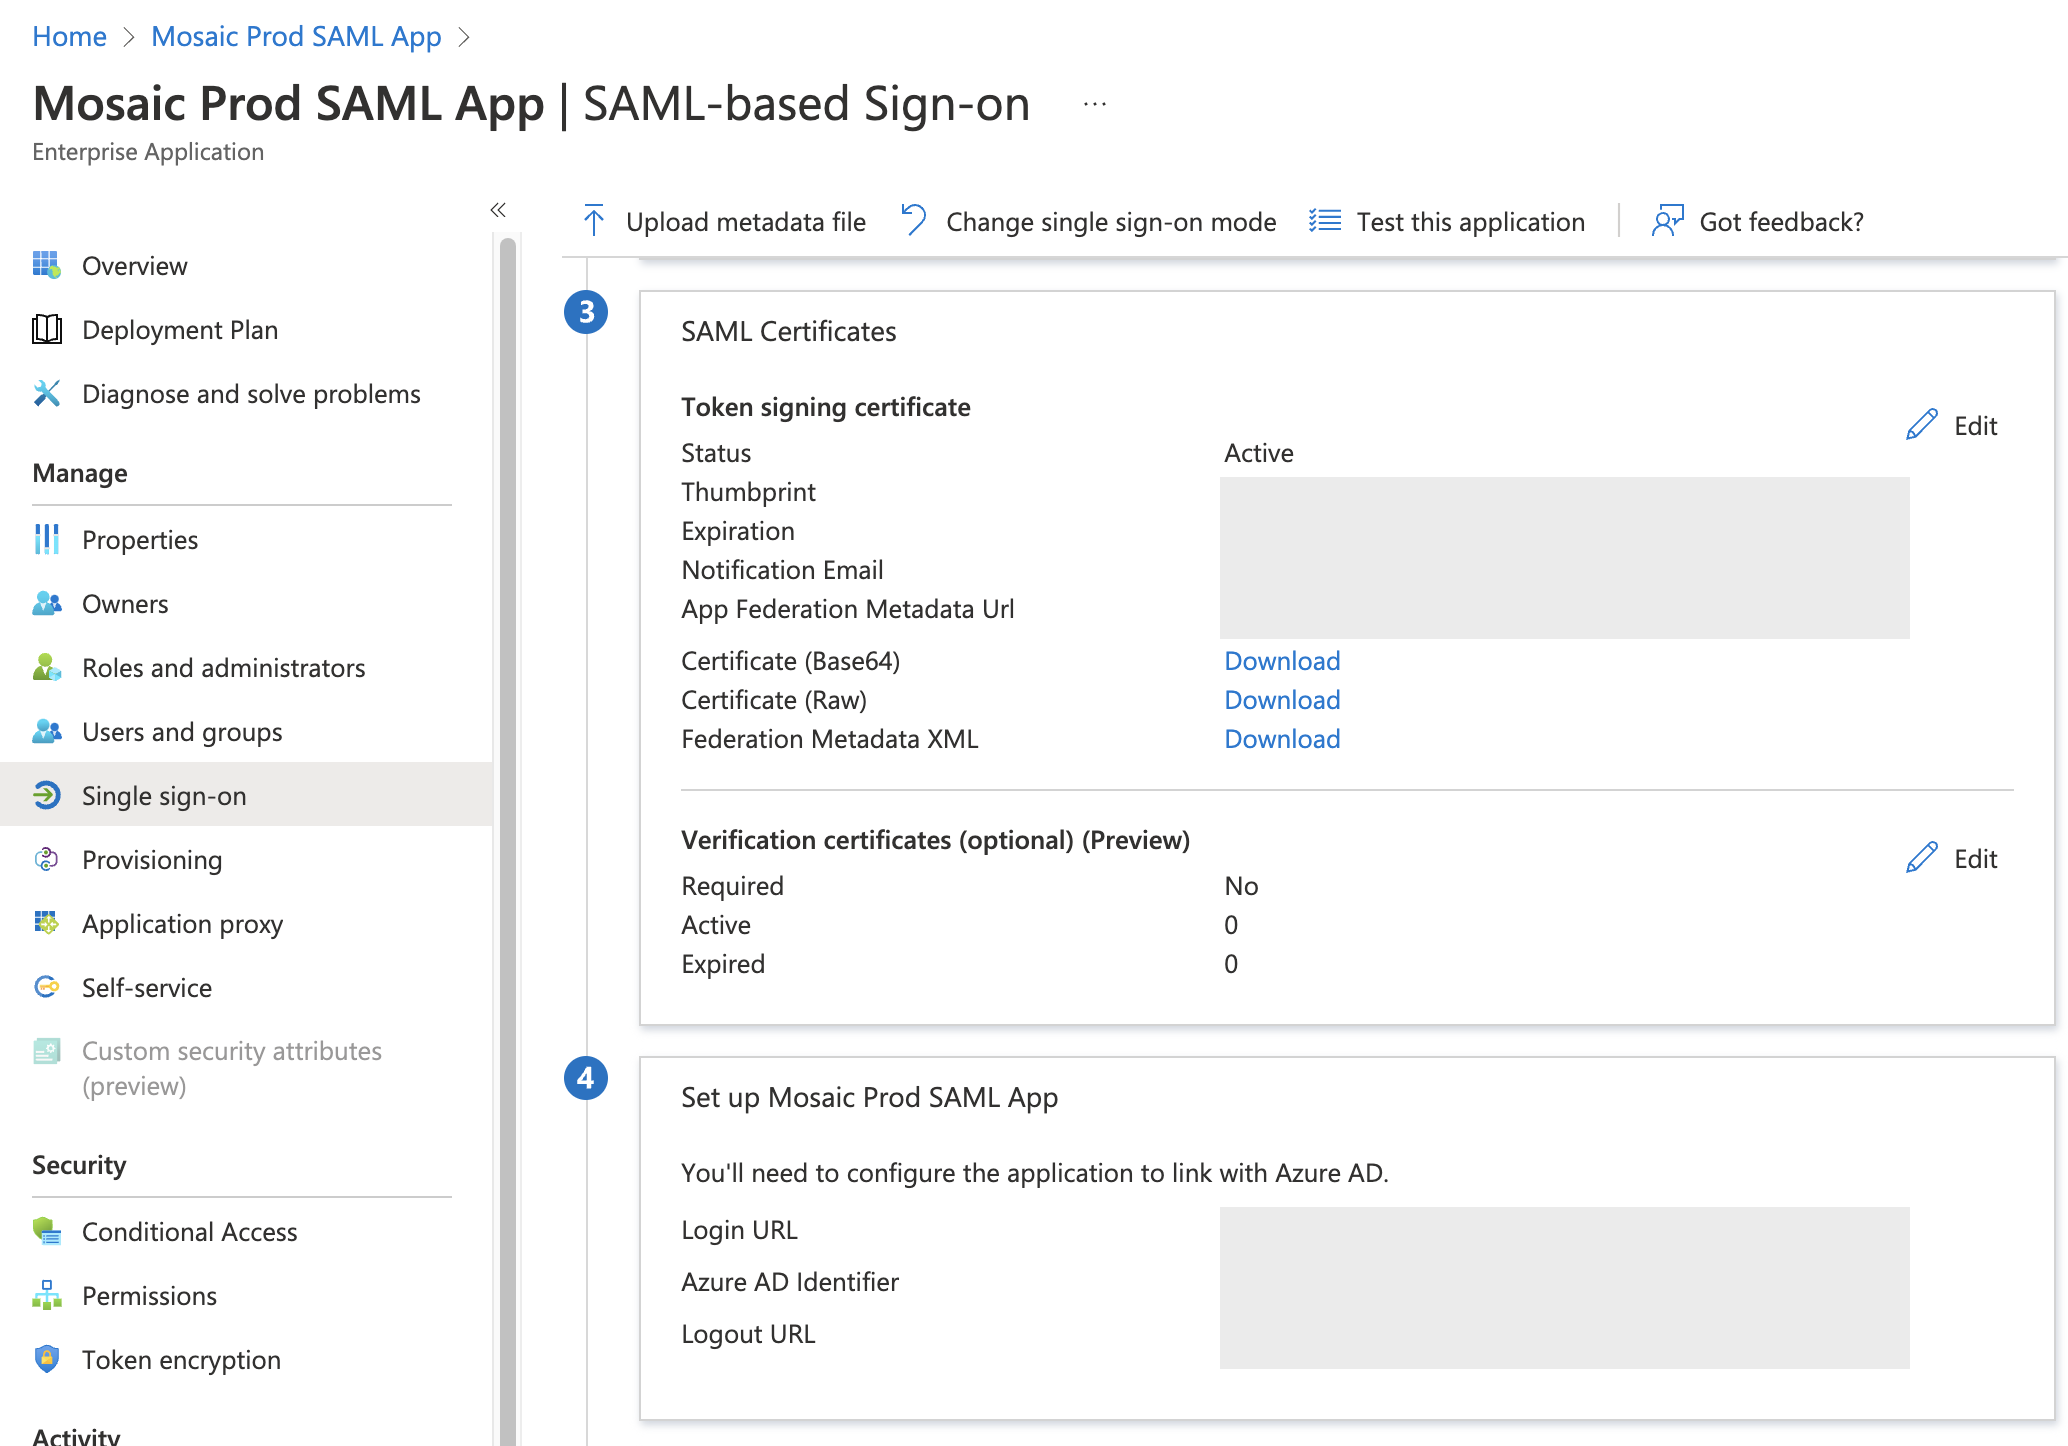
- Copy the Login URL under Set up[name of the application] App from Step #4 of the Azure Single sign-on menu.
- Certificate:
- Download Certificate (Base64) under SAML Signing Certificate in Step #3 of the Azure Single sign-on menu.
- Open downloaded certificate with a text editor of choice.
- Copy the full content of the certificate.
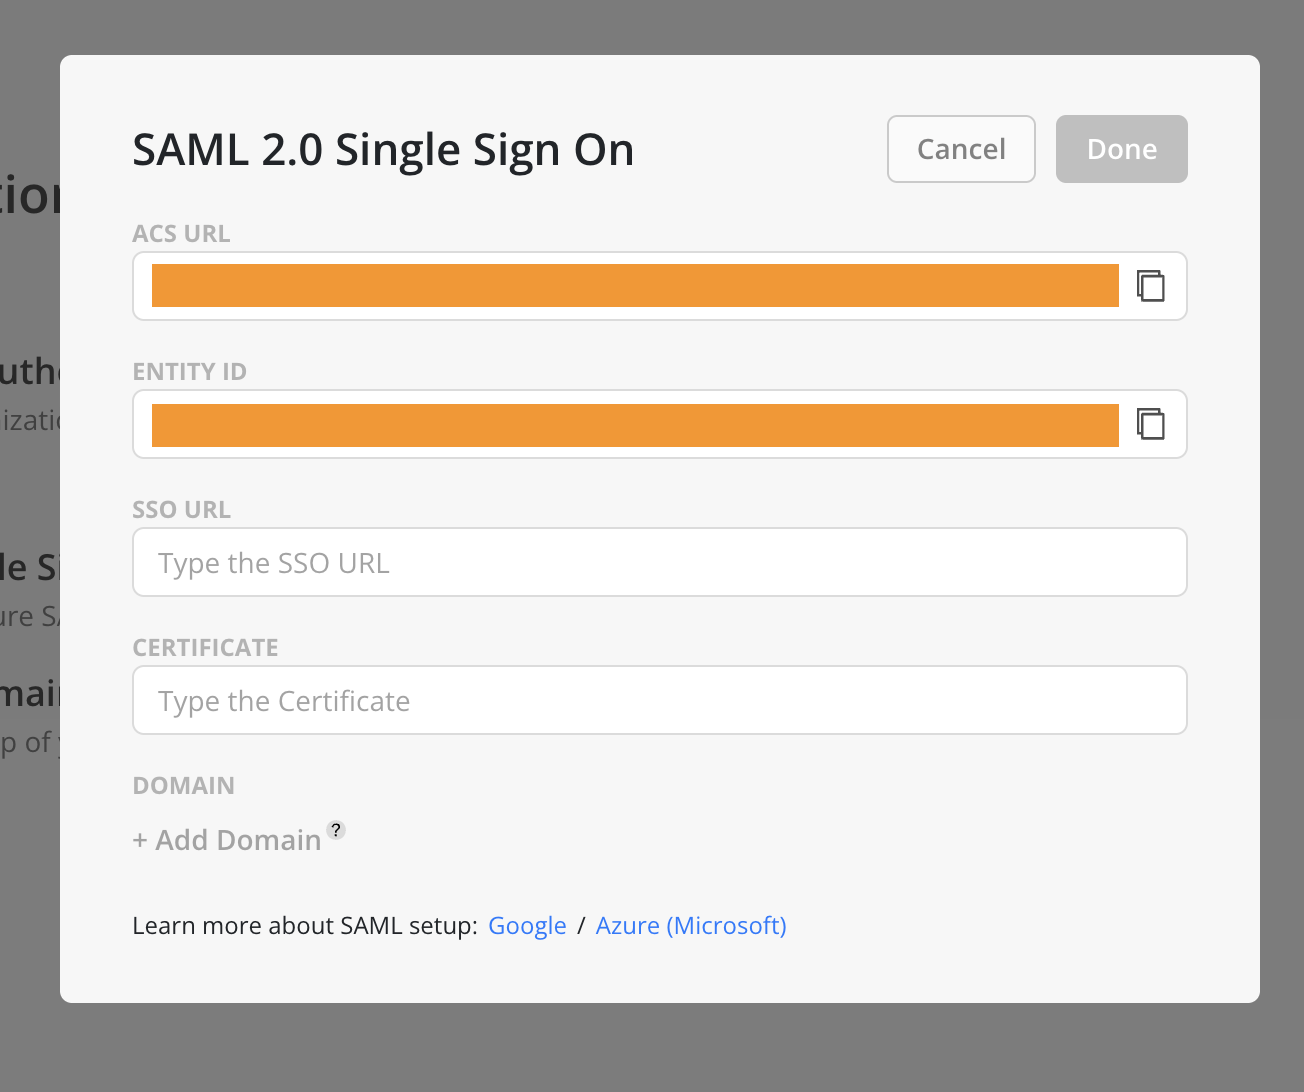
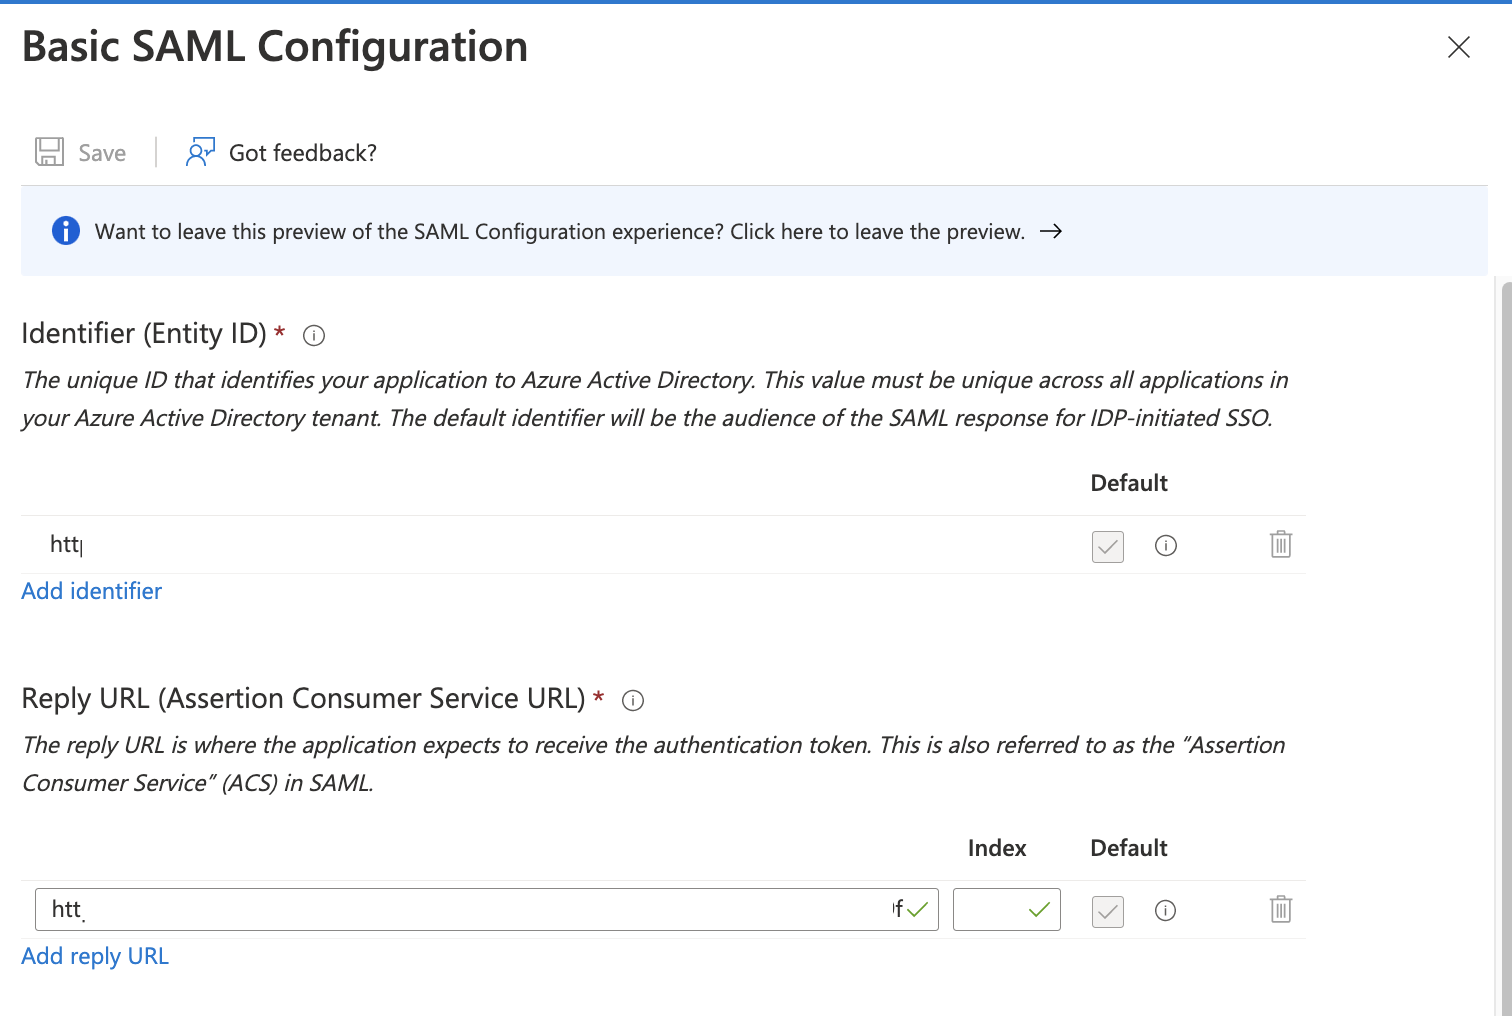
- Copy and paste ACS URL and Entity ID from Mosaic’s SAML 2.0 Single Sign On menu to Microsoft Azure’s Basic SAML Configuration section; all other fields can remain untouched.
- Add a group to the SAML app through the Users and groups menu.
- Create a group on Azure
- Search for Groups
- Create a new Group

- Ensure the Group Type is
Security, then fill out theGroup Name
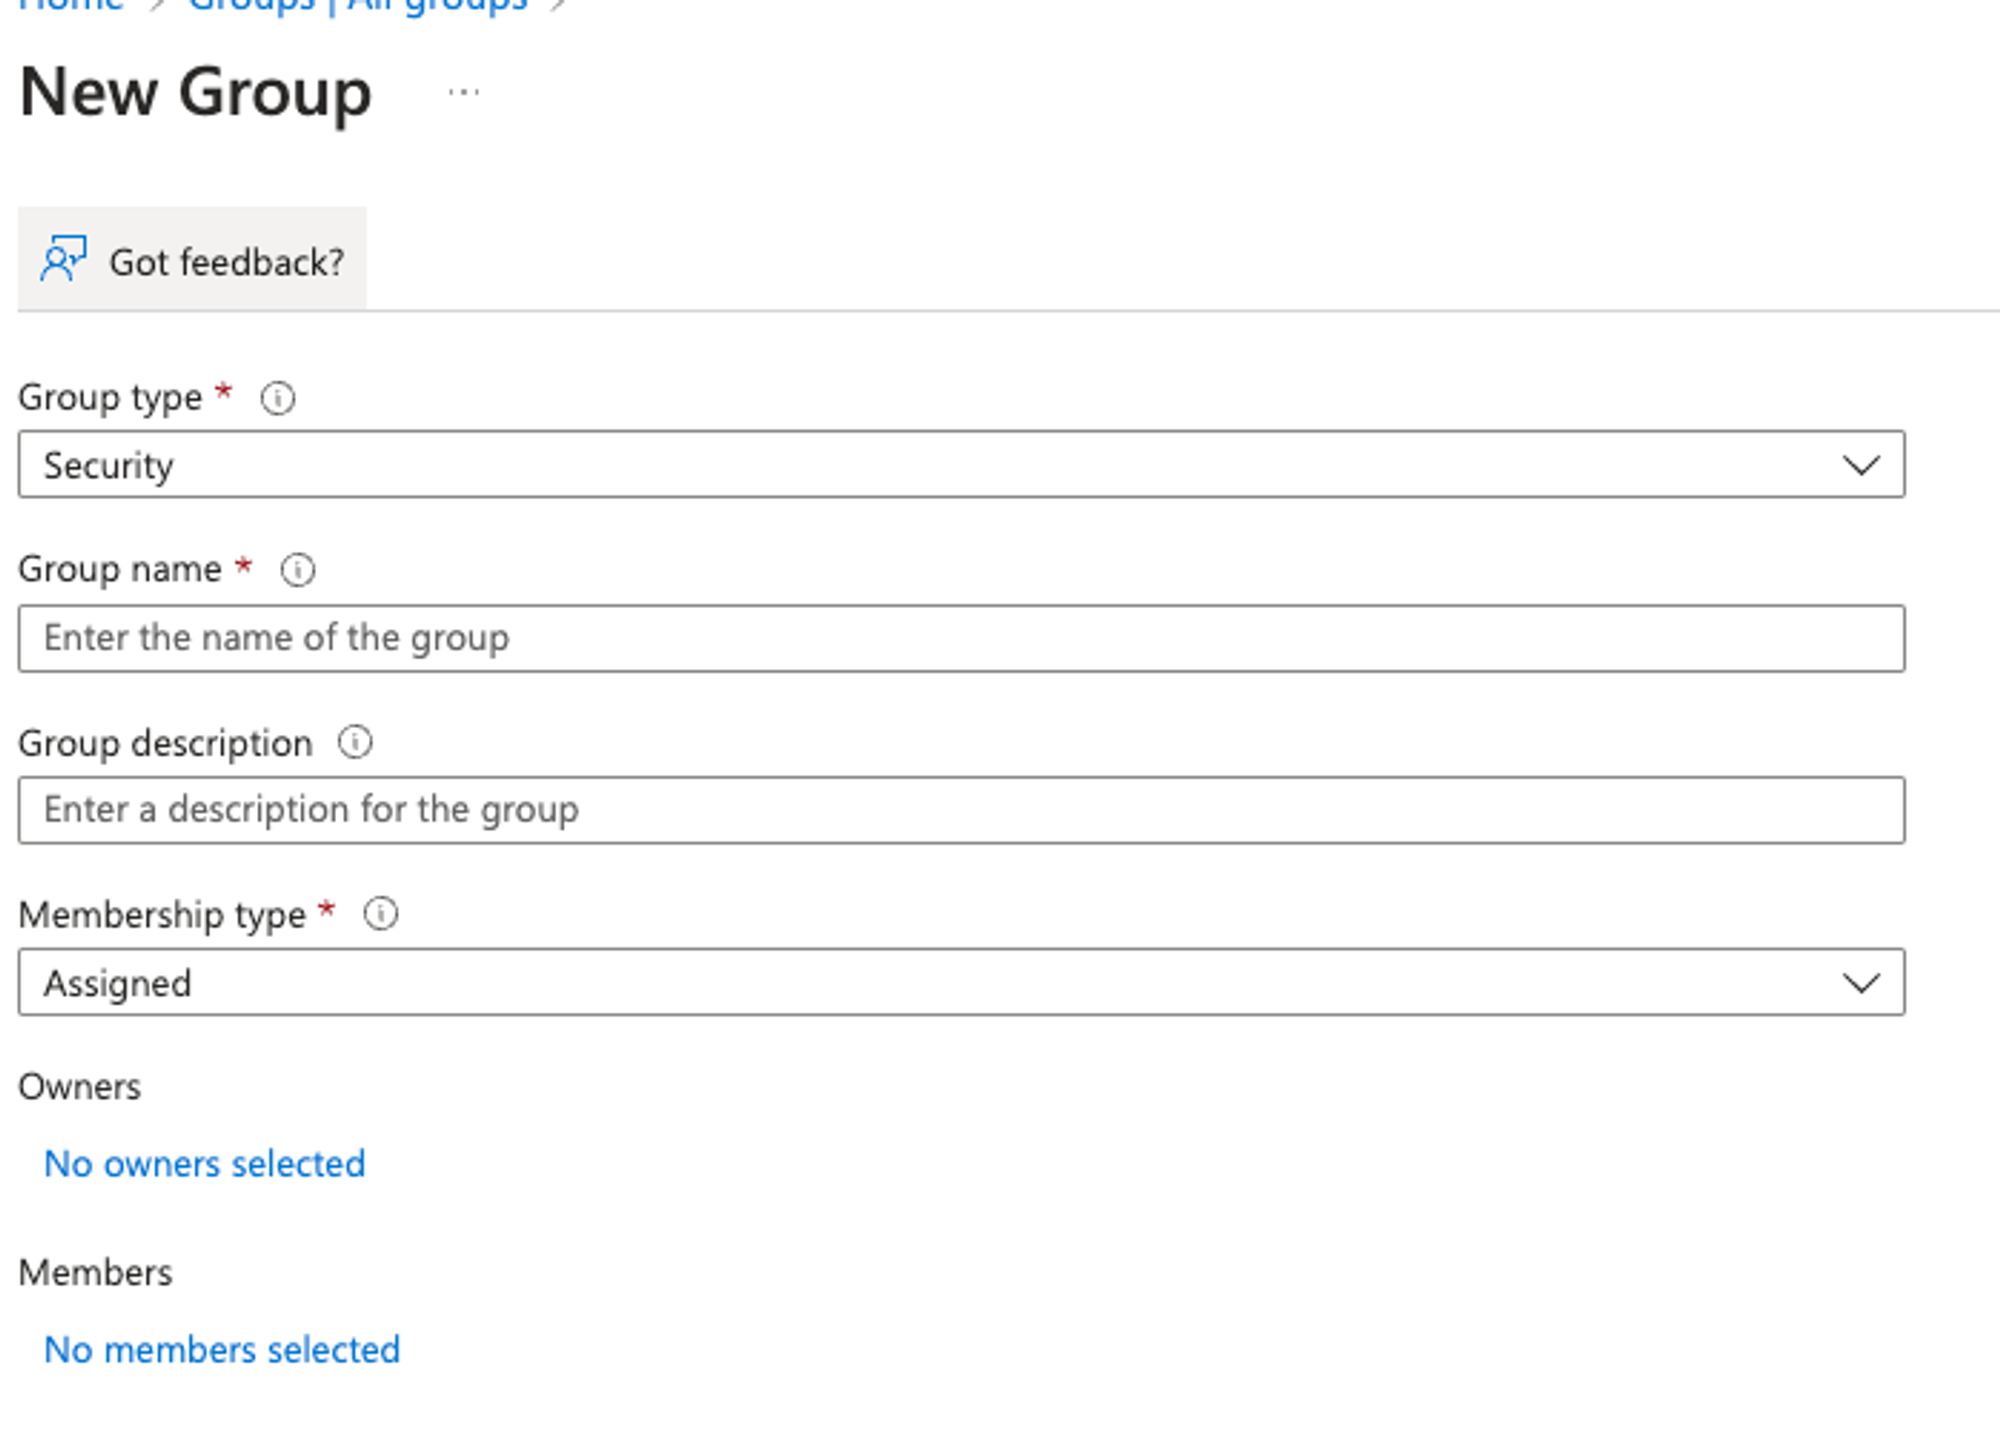
- Assign
Membersyou want to be authorized for the Mosaic Team- Note down the
Object IDof the newGroupyou just created. This will be entered into Mosaic in a new field forSecurity Group IDin this step
- Note down the
Then go back to the SAML app and add the Group through the Users and Groups Menu.

- You no longer need to add
Users, instead you should add aGroup, and theUsersto theGroupyou added in the SAML app.
-
Next, click on Attributes & Claims and then Add new claim.
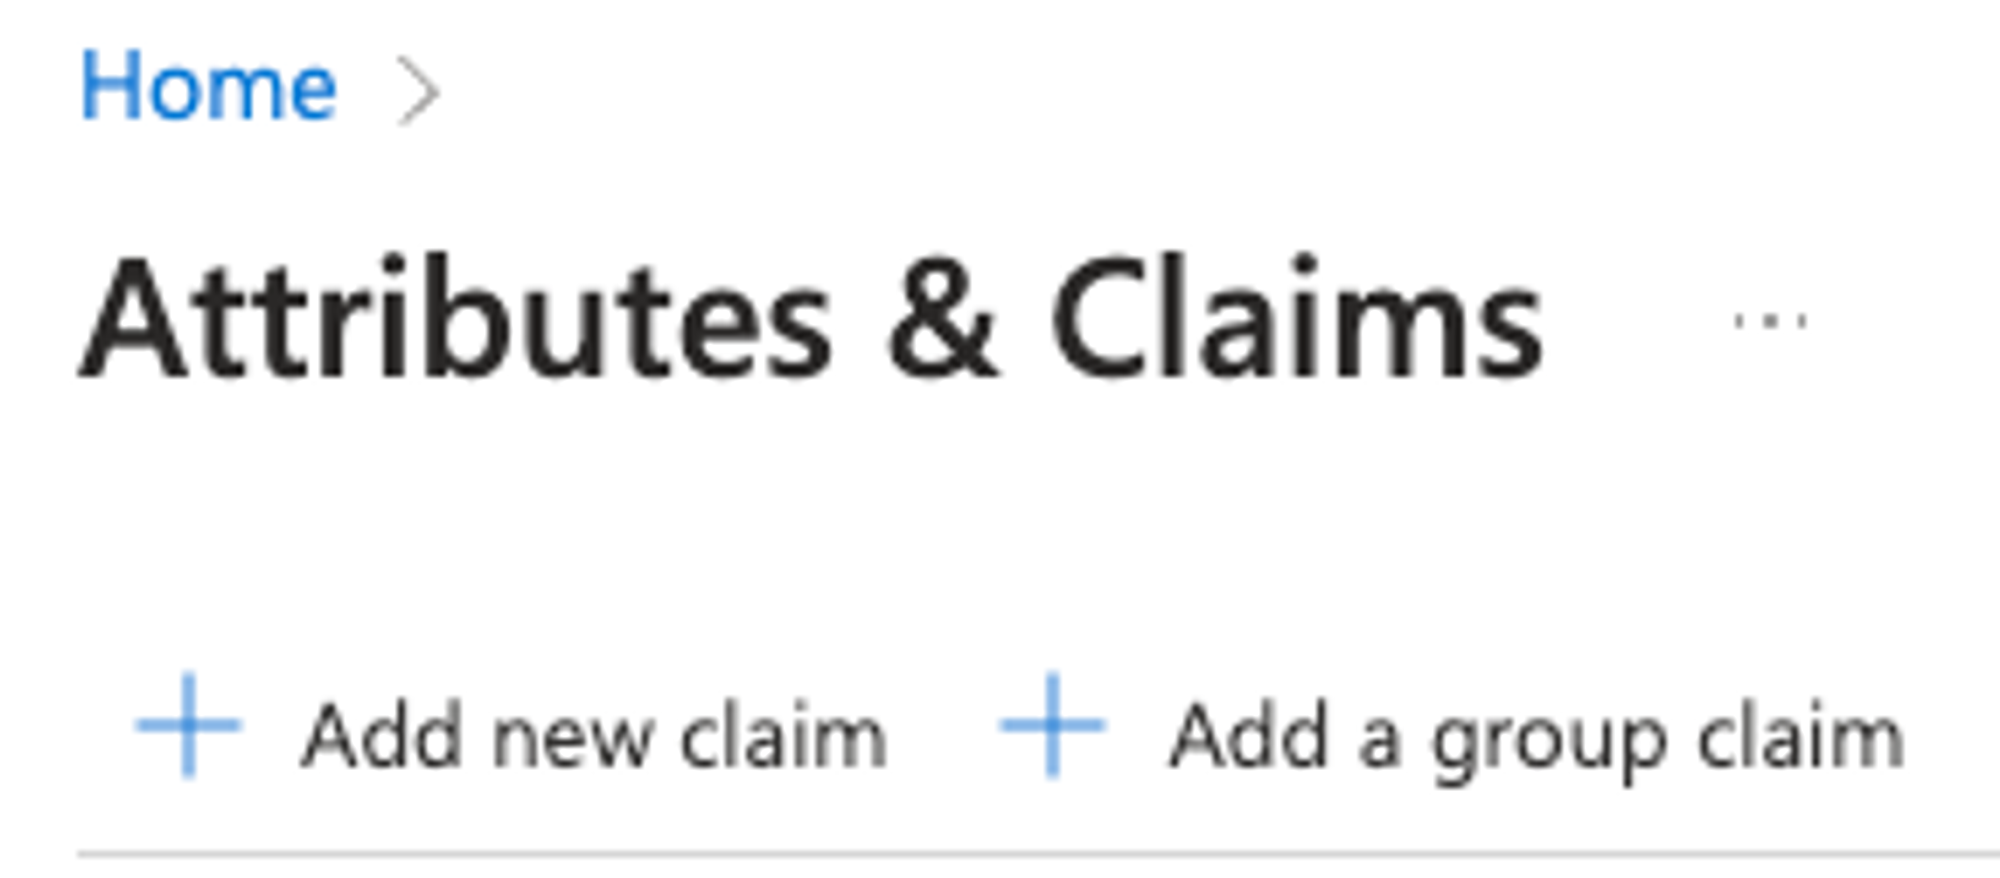
- Add the following additional attributes:
a. email
Mapping Source AttributesConfiguring Source Attribute Mapping for Email AliasesTo ensure seamless integration with Single Sign-On (SSO) systems, it's crucial to correctly configure the mapping of source attributes. This configuration allows the use of an email alias instead of the actual mailbox address for SSO authentication.
For instance, consider you're employing [email protected] as the alias and [email protected] as the primary mailbox address. In this scenario, the configuration on the Azure platform should map the source attribute to the alias ([email protected]), not to the mailbox ([email protected]).
For a full list of user profile attributes in Azure Active Directory B2C, refer to the Microsoft documentation here.
This setup is vital for aligning with Azure's user profile configuration requirements for aliases and mailbox addresses.
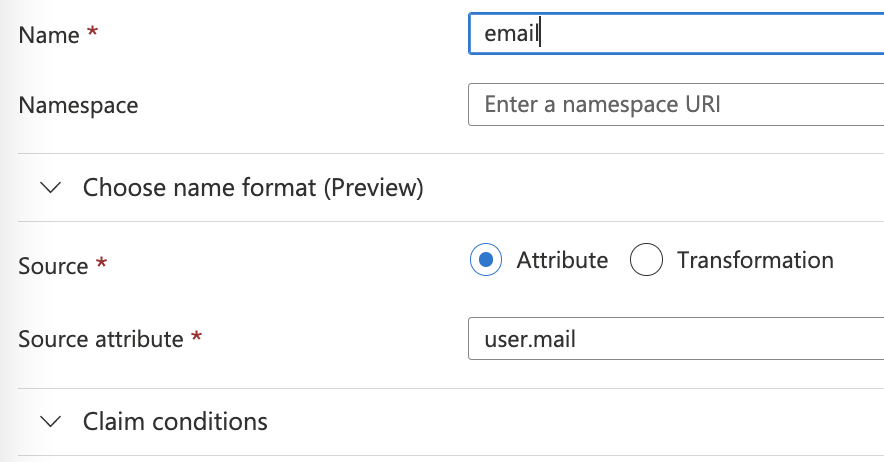
b. first_name
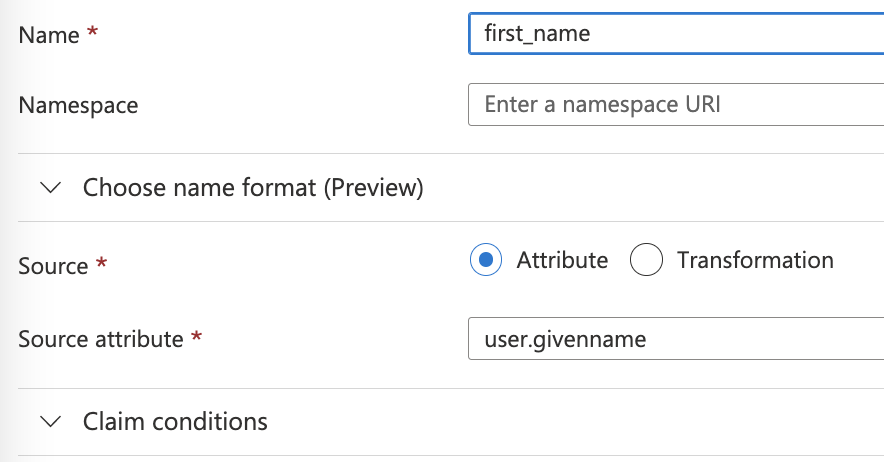
c. last_name
- Add the following additional attributes:
- Go back to Attributes & Claims and also Add a group claim.
- Select
Groups assigned to the applicationand enter a Custom Name likesecurity_group.

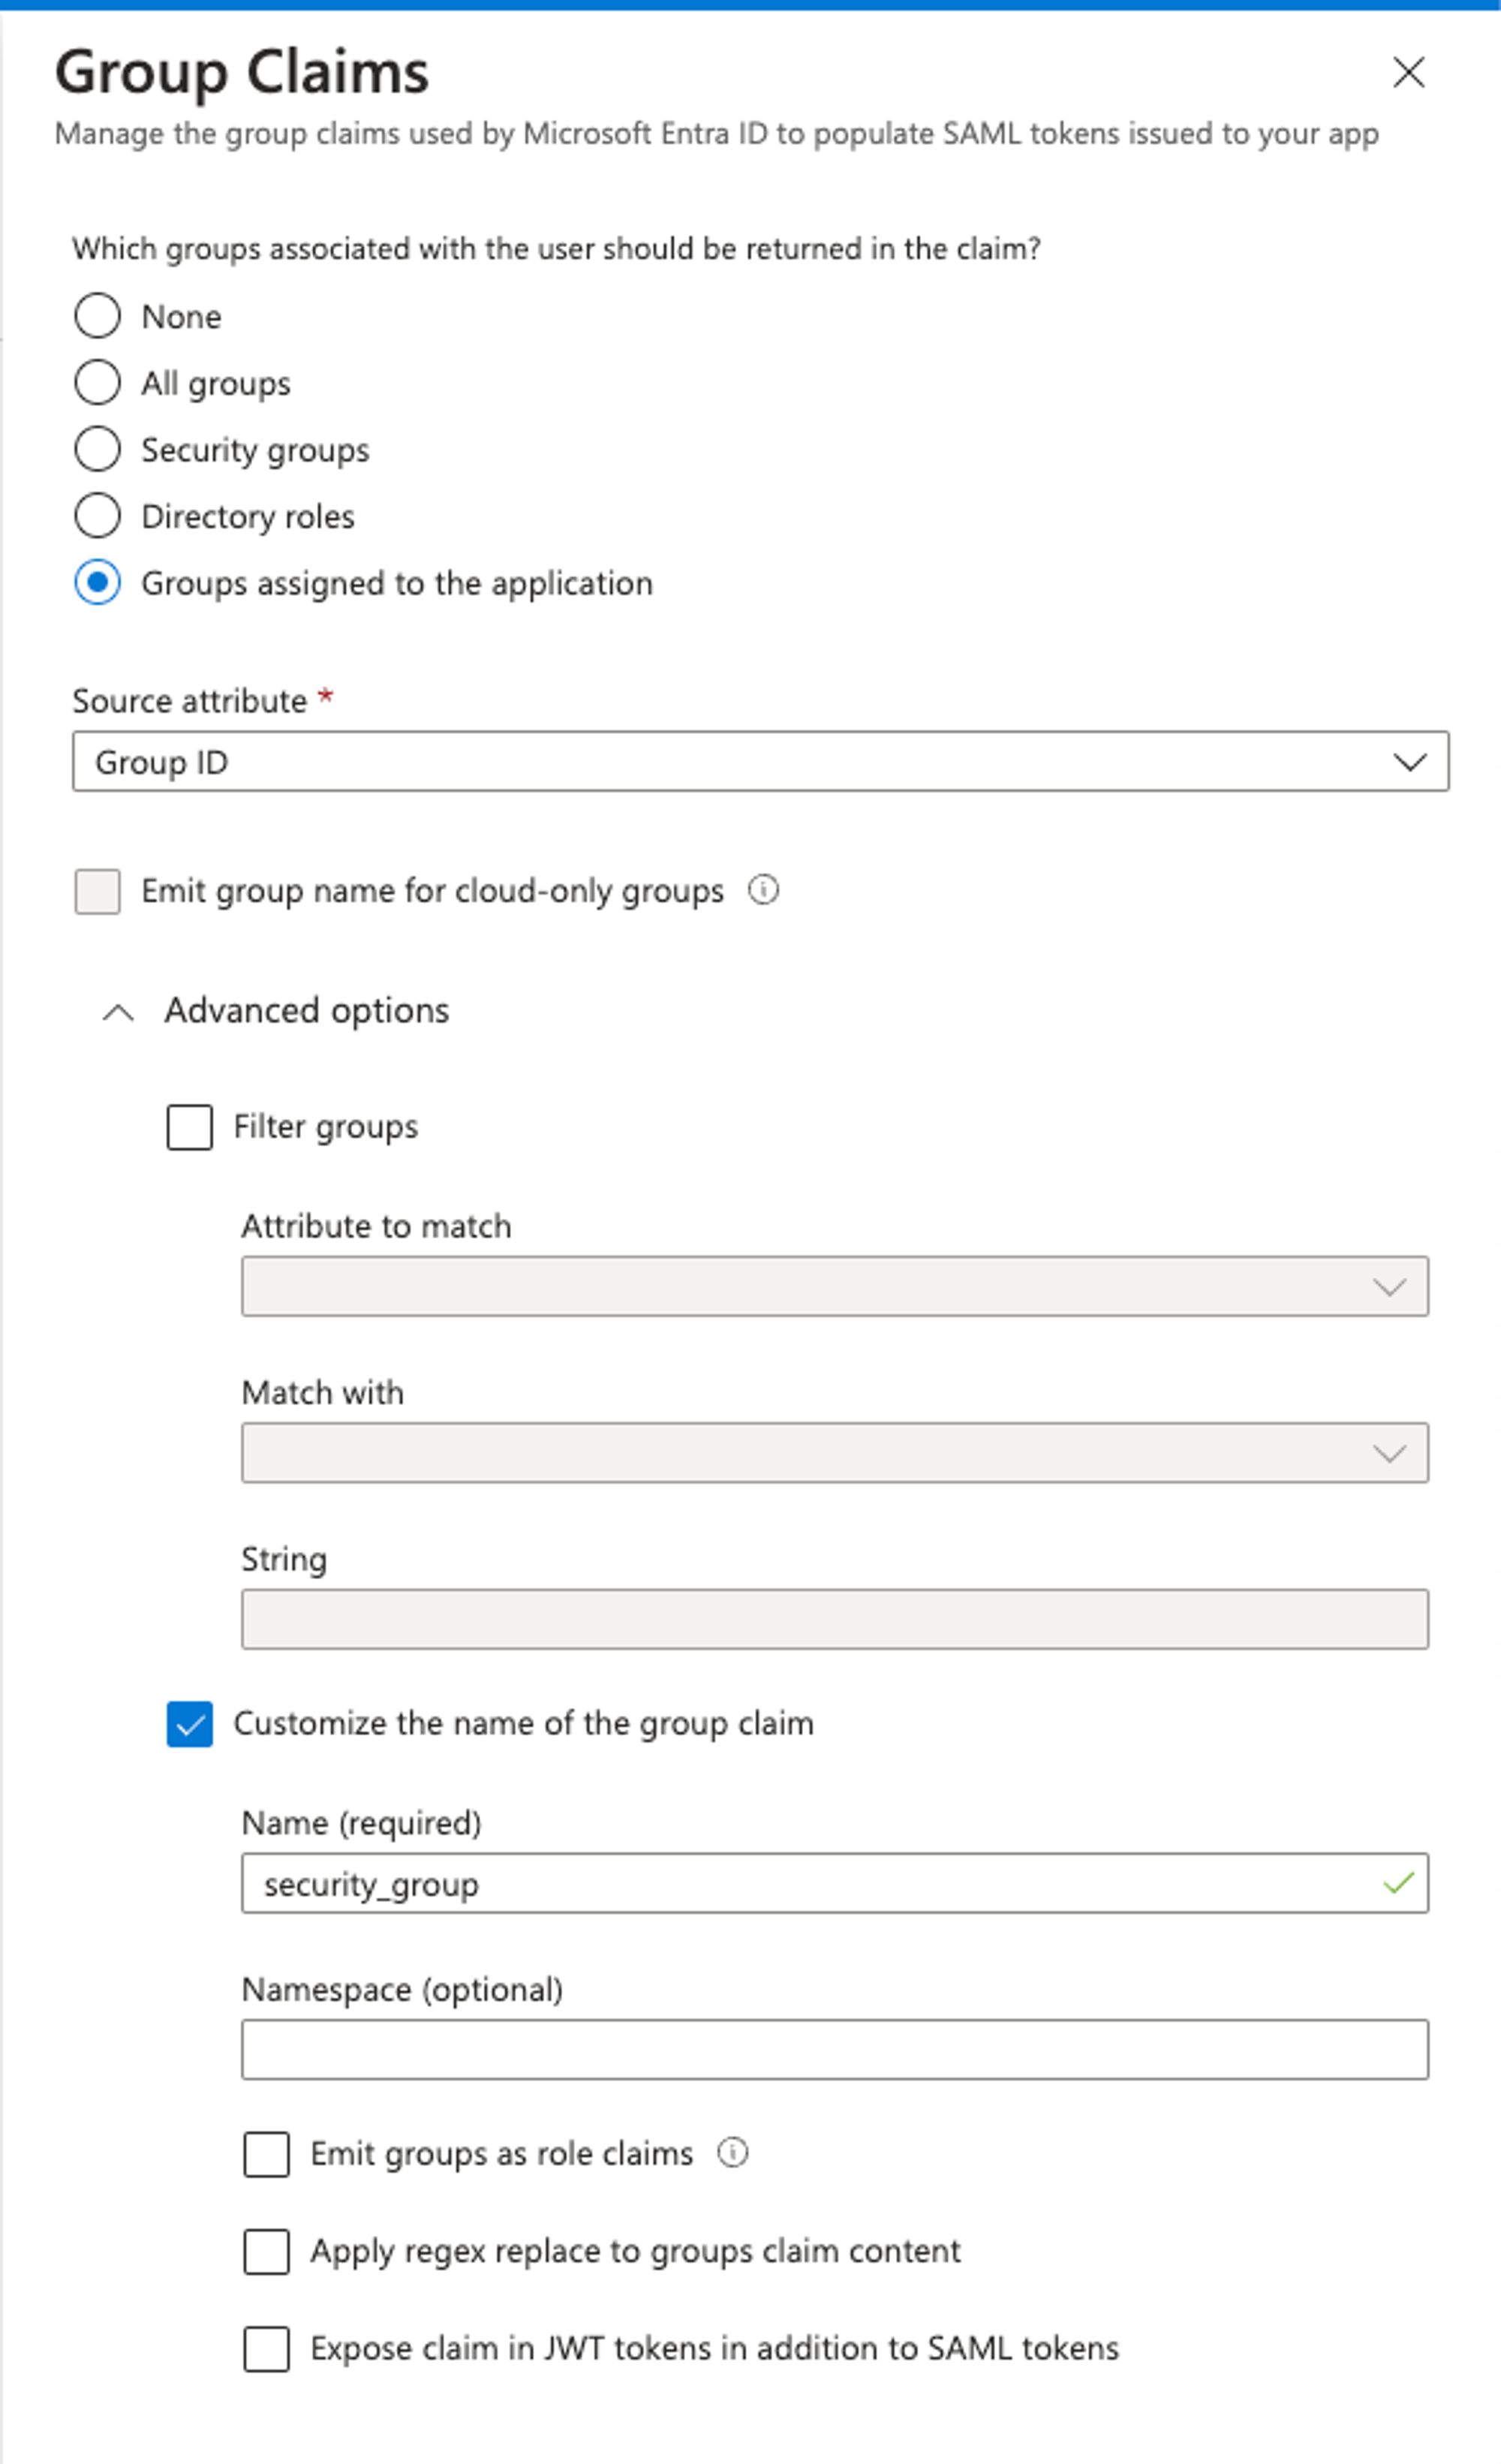
- Hit save and then SAML will be all set.
Setting up Multiple Teams with SAML:
- To set up multiple teams with SAML simply create another group and add users to that group. (Users can only be in 1 group!)
- When setting up SAML on the new Mosaic team. Skip the step to copy the
ACS URLand theEntity ID.- Then copy the new
Object IDof the newGroupand paste it into theSecurity Group IDbox when setting up SAML on the new Mosaic team.
Add Domain and Security Group on Mosaic page
- Click
+Add Domainto select Domain for SAML set up. This will be the Domain associated with Google Workspace. For example,[email protected]has a domain ofthisisdomain.com.
Please Note:The email associated with the admin (who is setting up the SAML) must have the same domain as the one being inputted.
- For example, if the admin uses an email
[email protected], the only domain the admin could input isthisisdomain.com.
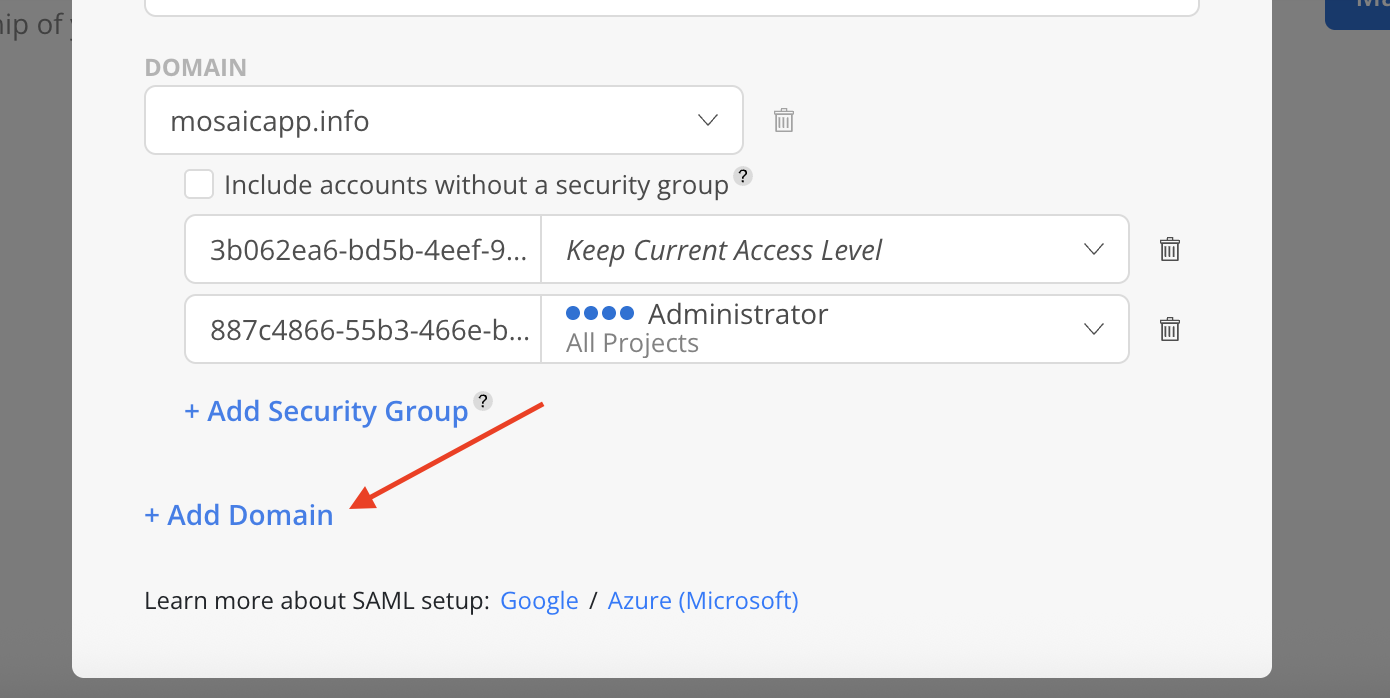
Both Verified and Unverified domains are displayed in the list. However, only Verified domains can be selected. Domains that are already added will appear greyed out.

- Configure the Security Group under the domain. Enter the security group ID. Choose the desired access level from the dropdown menu. Optional: Select
Include accounts without a security groupto allow accounts not assigned to any Security Group to log in while retaining their current access level.
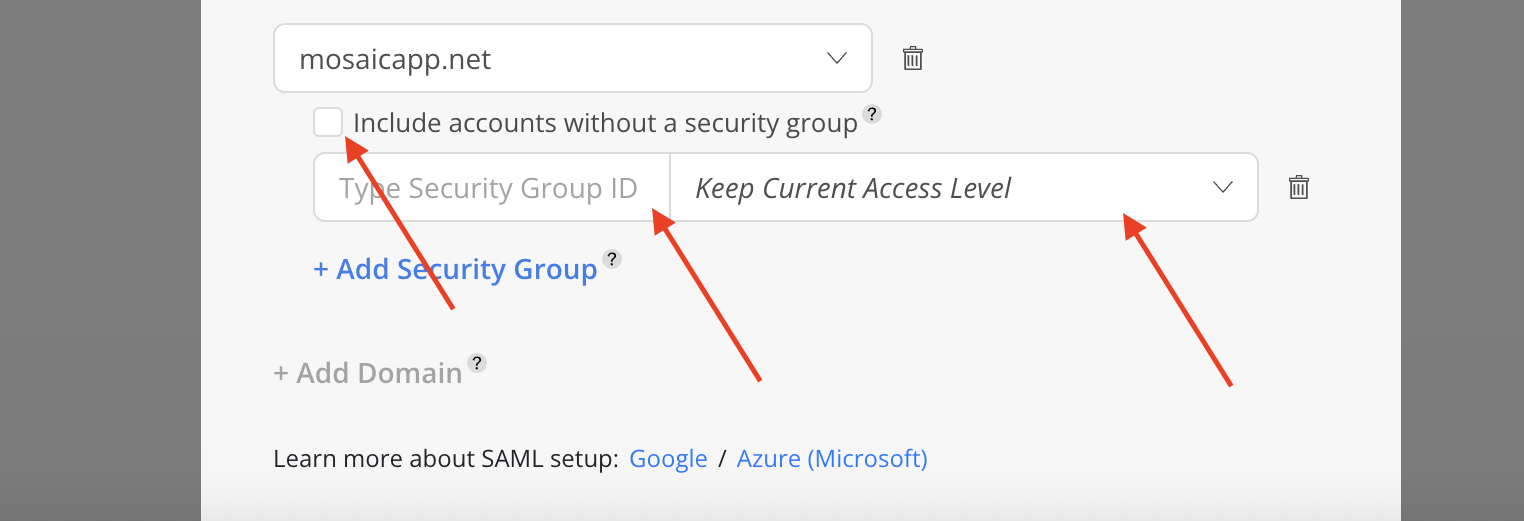
- Click Done on the top once all configuration is completed.
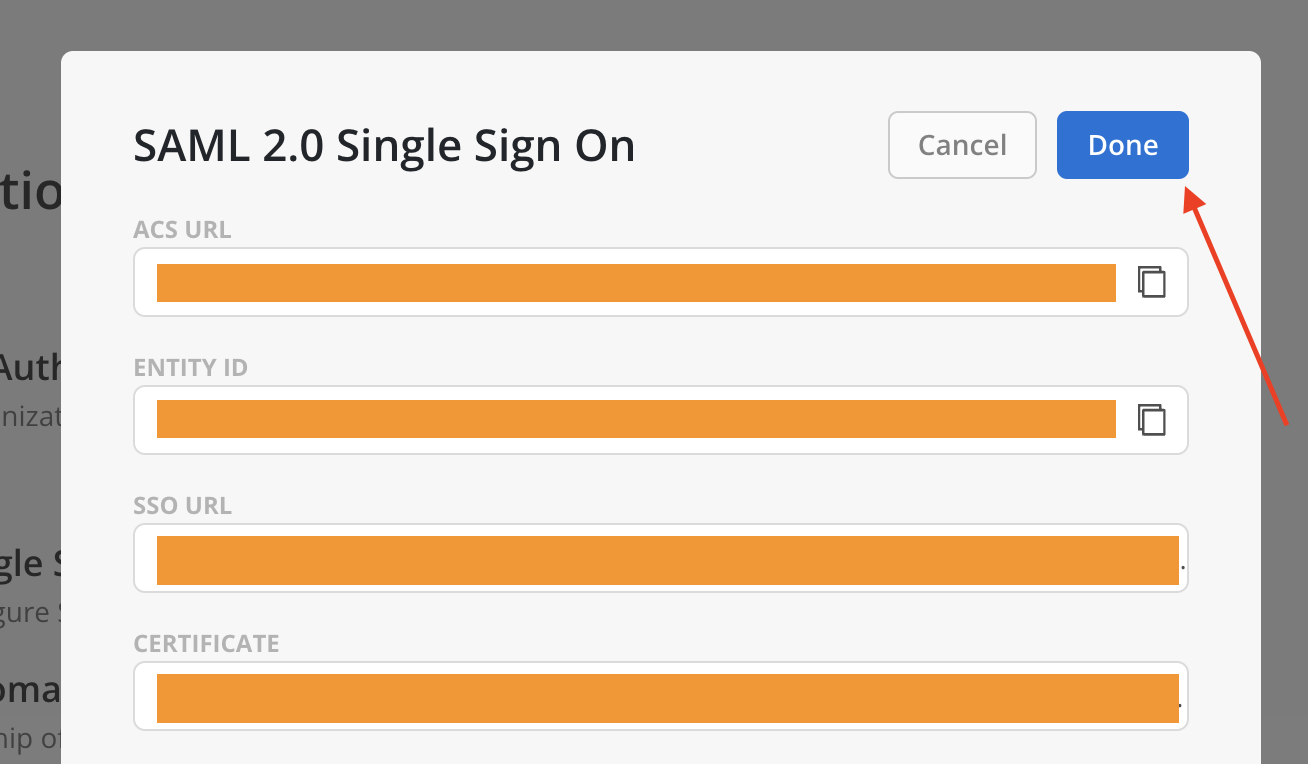
- Upon successful activation, SAML 2.0 Single Sign On will have the following options:

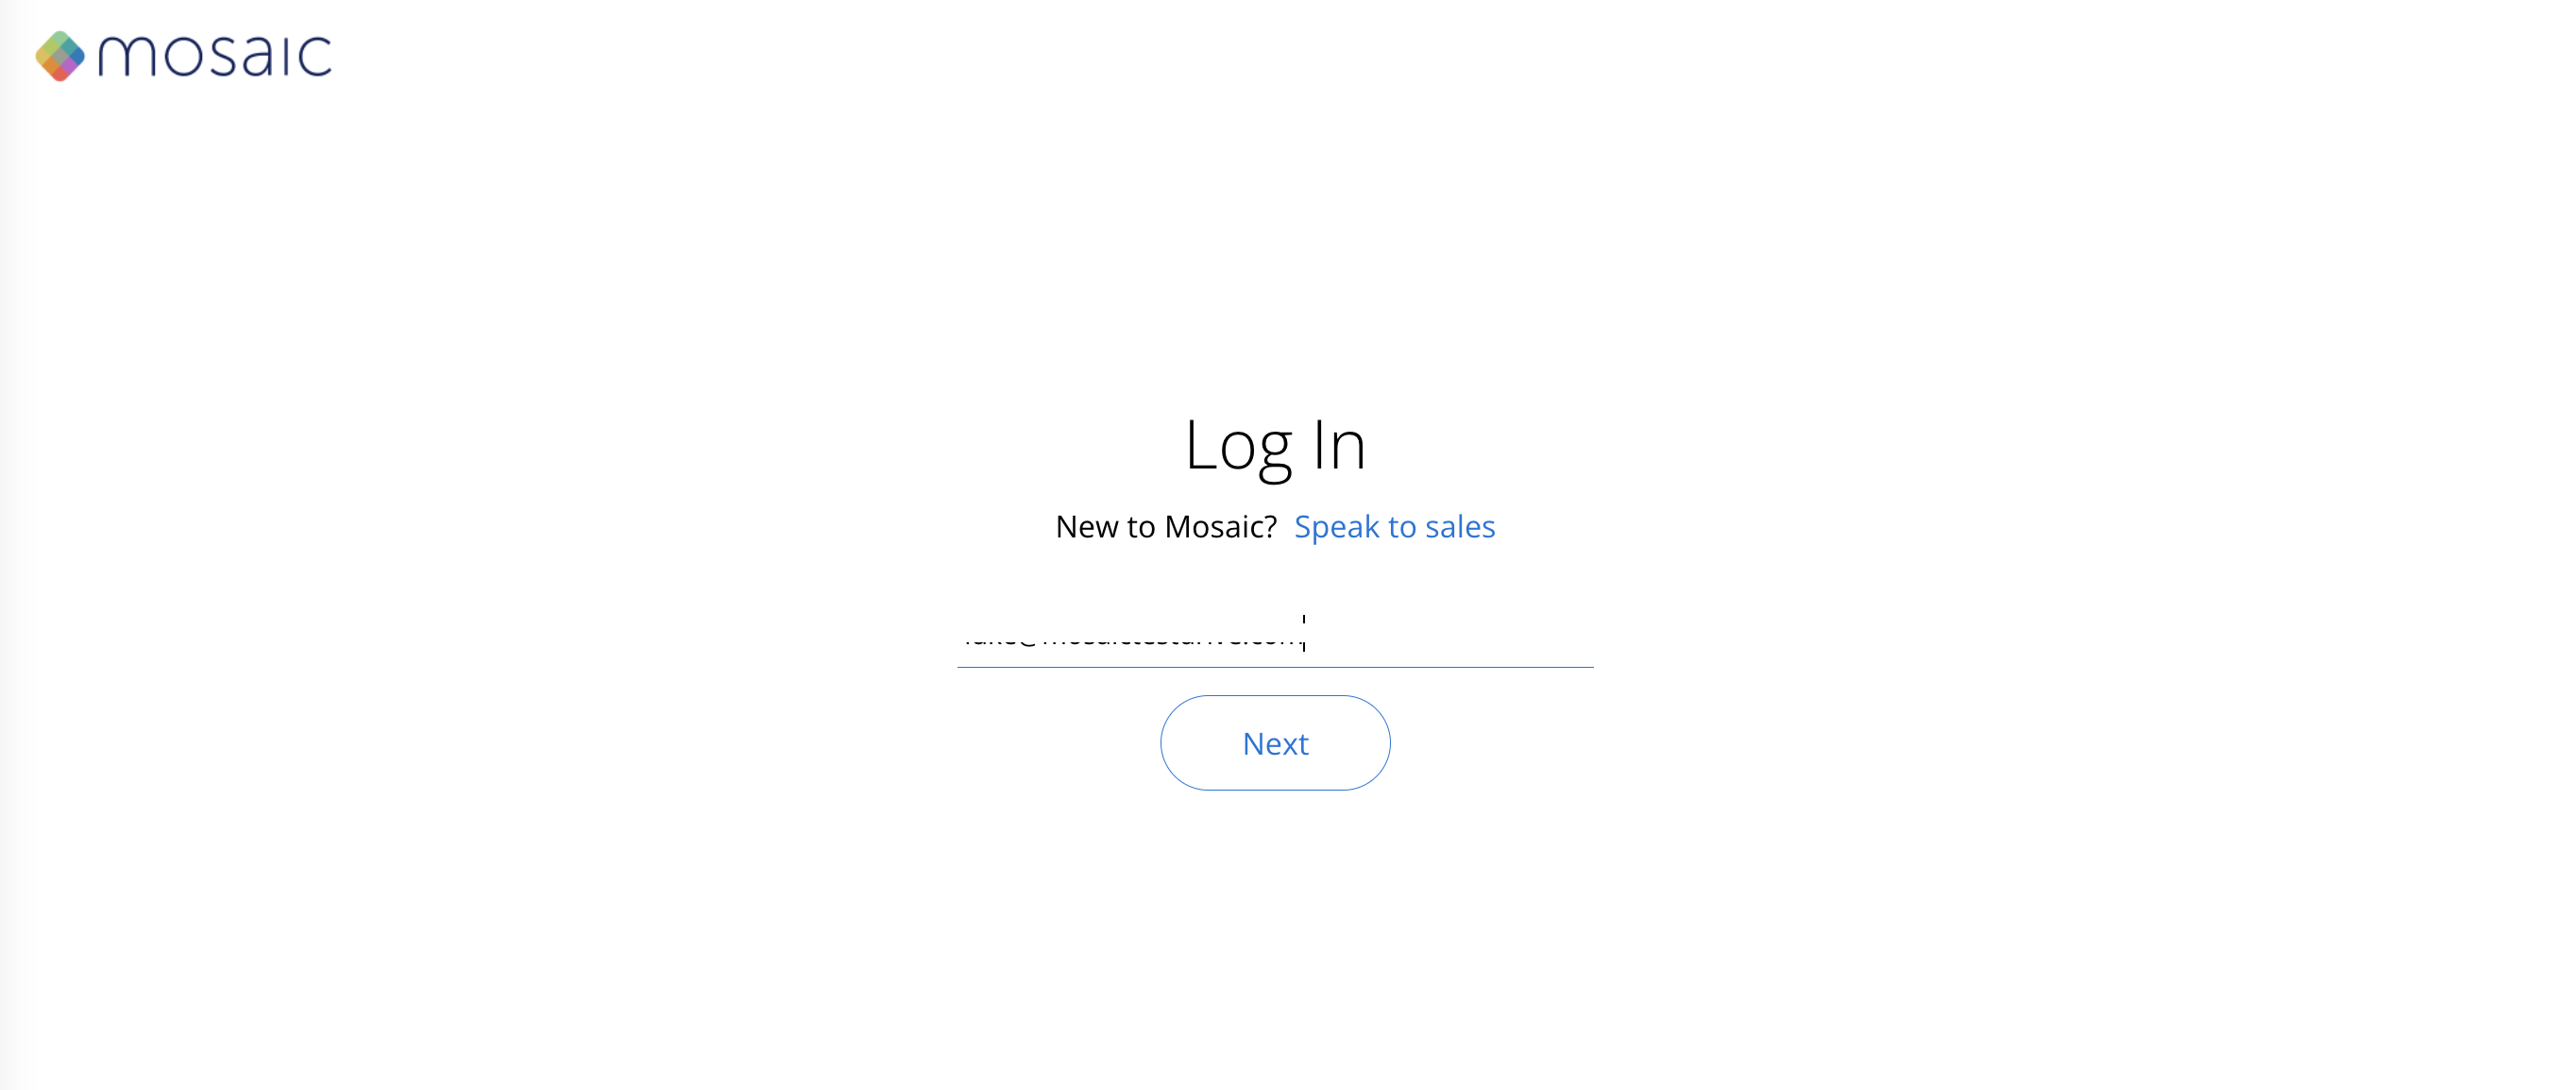
Next time a user with an email address belonging to the specified domain logs into Mosaic, they will be redirected to authenticate with Microsoft Azure the moment they click Next after inputting their email.
Ensure Azure User Activation Before Creating Mosaic AccountIt is recommended to ensure that a new Azure user is fully active (or wait a few days) before creating a new user on Mosaic. If the Azure account is not fully active, the Welcome Email may hard bounce with the 550 5.4.1 error code (The recipient's address doesn't exist). Unfortunately, AWS, which sends the invitation email, places the email address on a blacklist if the email hard bounces, and no further emails will be sent out.
Updated 17 days ago
