QuickBooks Best Practices
QuickBooks Best Practices
Time Entries
Add a rate to your time entries
- Go to the Sales or Invoicing menu.
- Select Product and Services.
- Look for the service item you want to modify.
- Select the Edit button.
- Enter an amount in the Sale price/rate field.
Please Note:
QuickBooks does not allow updates to time entries that have been linked to an invoice.
Future time entries with this service item will include this rate amount.
Adding a Client, Project, or Phase on QuickBooks Online
Add a QuickBooks Customer for your Clients
Customer for your Clients- Go to the Sales menu.
- Select the Customers tab.
- Select New Customer.
- Enter your customer’s info.
- Select Save.
Tip: If you need to keep notes or mark a customer as tax-exempt, you can enter this when you create their profile.
Add a QuickBooks Sub-Customer/Job for your Projects
Sub-Customer/Job for your ProjectsYou can create sub-customers of main customers (also known as parent accounts). This is useful if you want to track individuals who are part of a group or specific accounts for a larger organization.
First, create a regular customer account for the group or organization. Then add each member or account as a sub-customer:
- Go to the Sales menu.
- Select the Customers tab.
- Select New Customer.
- Select the Is sub-customer checkbox.
- Enter the sub-customer’s info.
- In the Parent ▼ dropdown, select the parent account.
Tip: Select Bill with parent or Bill this customer if you want to bill sub-customers individually or as part of the group. - Select Save.
You can have unlimited sub-sub-customers. Main customers can have up to four levels down of sub-customers.
Add a Sub-Sub-Customer/Sub-Job for your Phases
Sub-Sub-Customer/Sub-Job for your PhasesYou can create sub-sub-customers of main customers (also known as parent accounts). This is useful if you want to track individuals who are part of a group or specific accounts for a larger organization.
First, create a regular customer account for the group or organization. Then add each member or account as a sub-customer:
- Go to the Sales menu.
- Select the Customers tab.
- Select New Customer.
- Select the Is sub-customer checkbox.
- Enter the sub-customer’s info.
- In the Parent ▼ dropdown, select the parent account.
Tip: Select Bill with parent or Bill this customer if you want to bill sub-customers individually or as part of the group. - Select Save.
You can have unlimited sub-sub-customers. Main customers can have up to four levels down of sub-customers.
Subphases
Please Note:
Subphases are an optional feature for customers who started using Mosaic prior to 2024.
You can create sub-sub-sub-customers of main customers (also known as parent accounts). This is useful if you want to track individuals who are part of a group or specific accounts for a larger organization.
First, create a regular customer account for the group or organization. Then add each member or account as a sub-customer:
Add a Sub-Sub-Sub-Customer/Sub-Sub-Job for your Subphases (Level 1)
Sub-Sub-Sub-Customer/Sub-Sub-Job for your Subphases (Level 1)- Go to the Sales menu.
- Select the Customers tab.
- Select New Customer.
- Select the Is sub-customer checkbox.
- Enter the sub-customer’s info.
- In the Parent ▼ dropdown, select the parent account.
Tip: Select Bill with parent or Bill this customer if you want to bill sub-customers individually or as part of the group. - Select Save.
You can have unlimited sub-sub-sub-customers. Main customers can have up to four levels down of sub-customers.
Add a Sub-Sub-Sub-Sub-Customer/Sub-Sub-Sub-Job for your Subphases (Level 2)
Sub-Sub-Sub-Sub-Customer/Sub-Sub-Sub-Job for your Subphases (Level 2)You can create sub-sub-sub-sub-customers of main customers (also known as parent accounts). This is useful if you want to track individuals who are part of a group or specific accounts for a larger organization.
First, create a regular customer account for the group or organization. Then add each member or account as a sub-customer:
- Go to the Sales menu.
- Select the Customers tab.
- Select New Customer.
- Select the Is sub-customer checkbox.
- Enter the sub-customer’s info.
- In the Parent ▼ dropdown, select the parent account.
Tip: Select Bill with parent or Bill this customer if you want to bill sub-customers individually or as part of the group. - Select Save.
You can have unlimited sub-sub-sub-sub-customers. Main customers can have up to four levels down of sub-customers.
Adding a Client, Project, or Phase on QuickBooks Desktop
Add a QuickBooks Customer for your Clients
Customer for your Clients- Open QuickBooks Desktop to the correct Company File.
- Go to the Customers menu and select Customer Center.
- In the Customer Center, select New Customer & Job at the top left.
- Choose New Customer from the dropdown.
- Enter your customer’s information in the New Customer window.
- Select OK to save the customer.

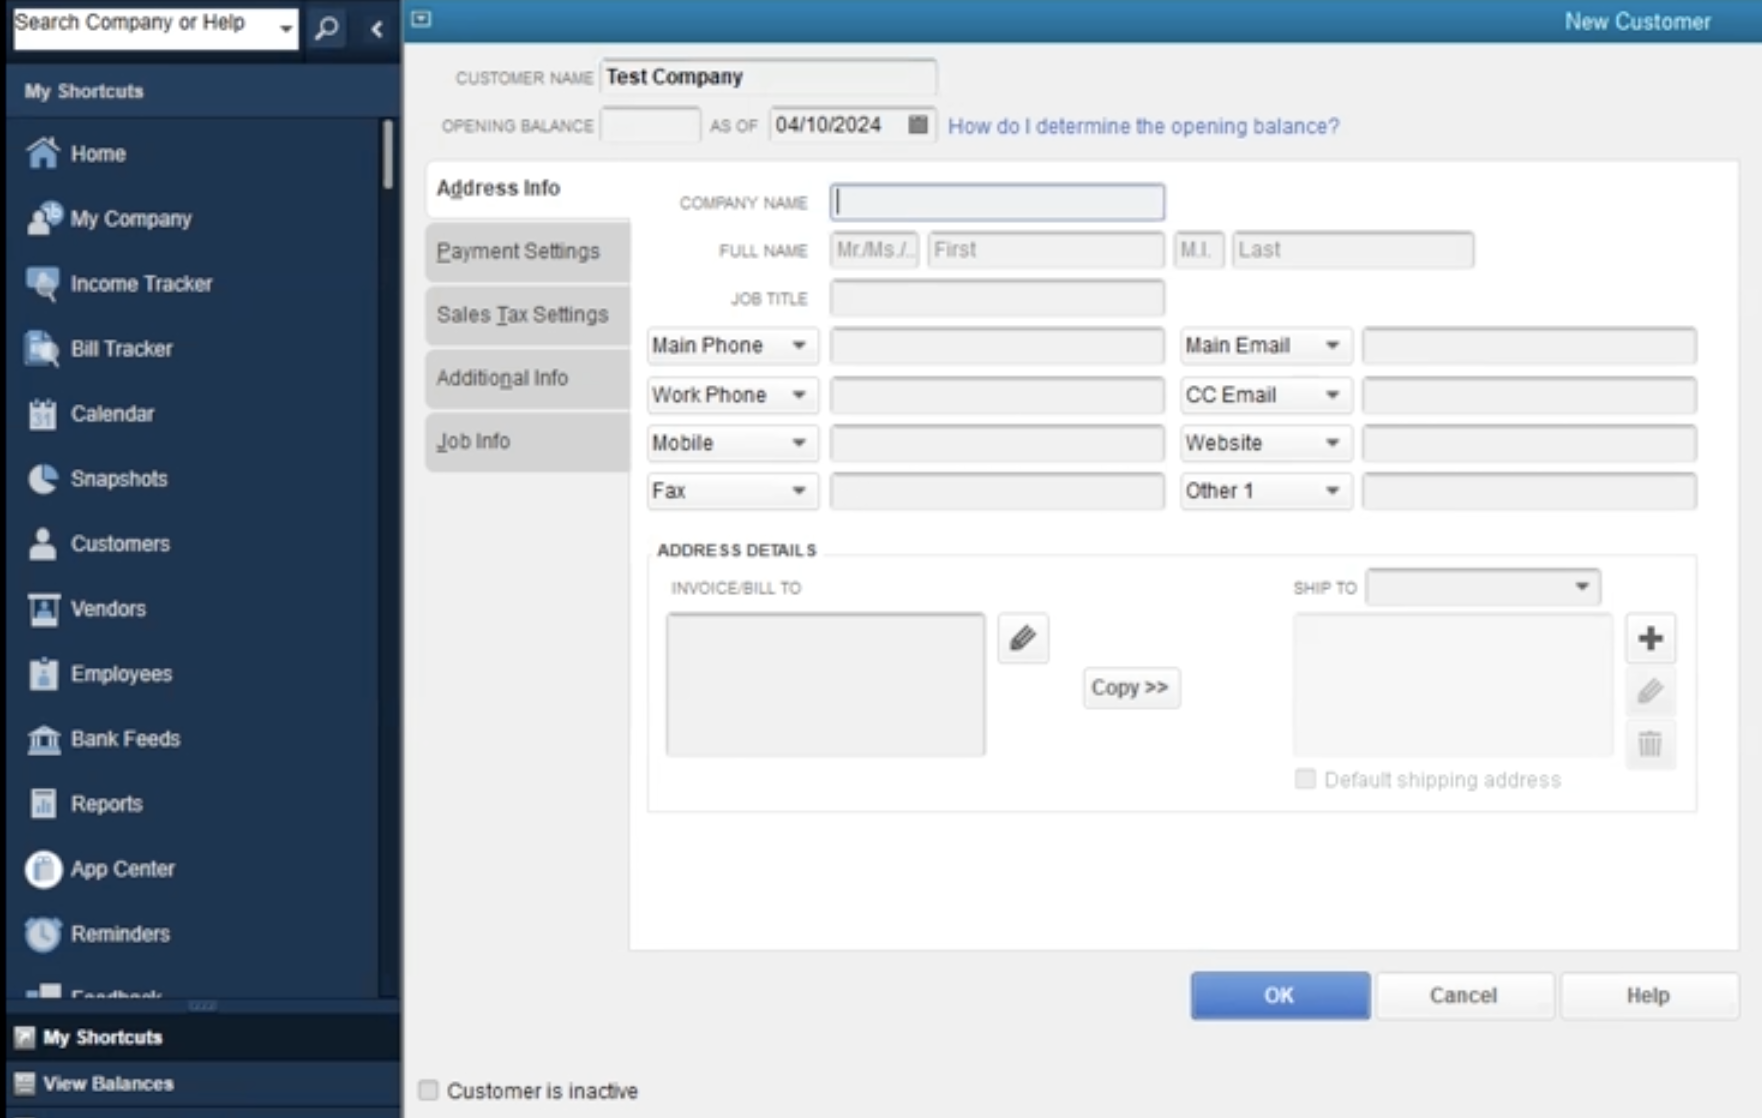
Tip: If you need to keep notes or mark a customer as tax-exempt, you can do this when creating their profile by using the Additional Info tab.
Add a QuickBooks Job for Your Projects
Job for Your ProjectsIn QuickBooks Desktop, projects are typically tracked as Jobs under a main Customer account. This is useful for managing different projects or contracts under the same client.
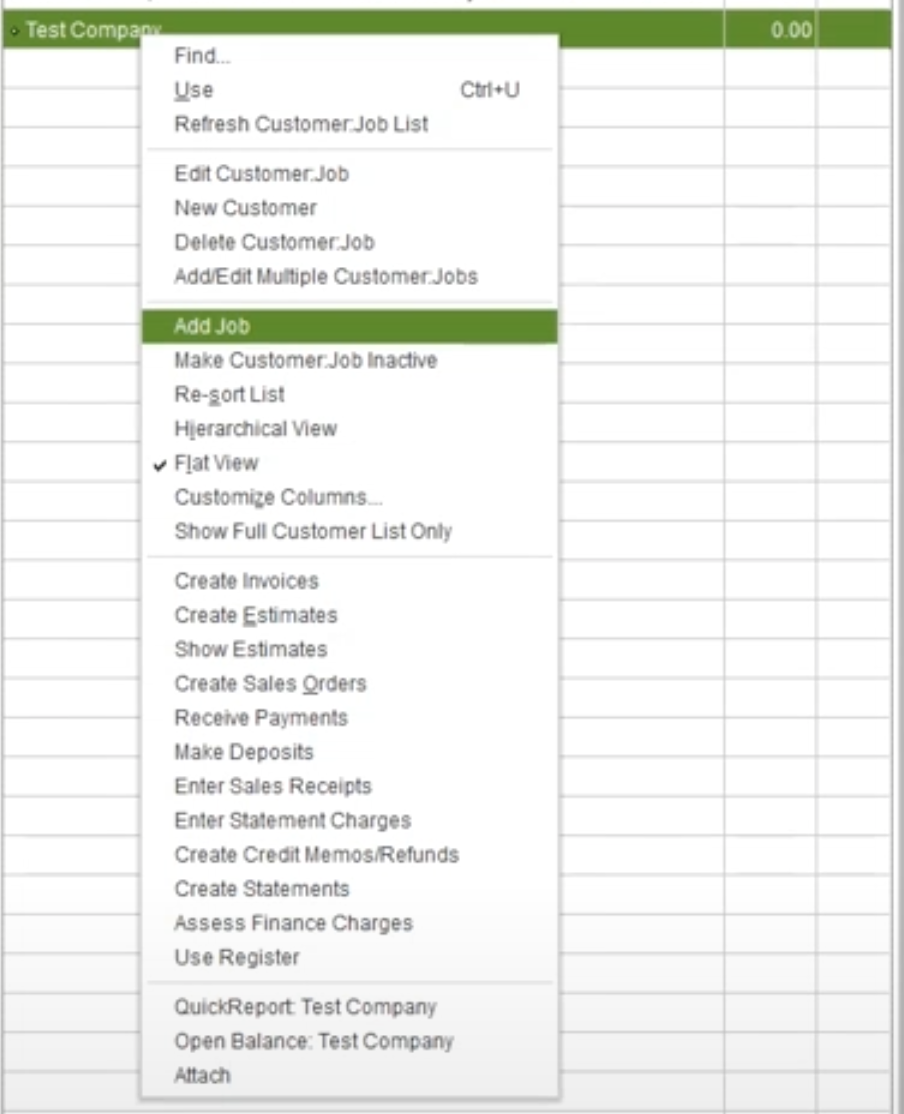
- Open QuickBooks Desktop and go to the Customers menu.
- Select Customer Center.
- In the Customer Center, right-click on the customer you want to add a project for, and select Add Job.
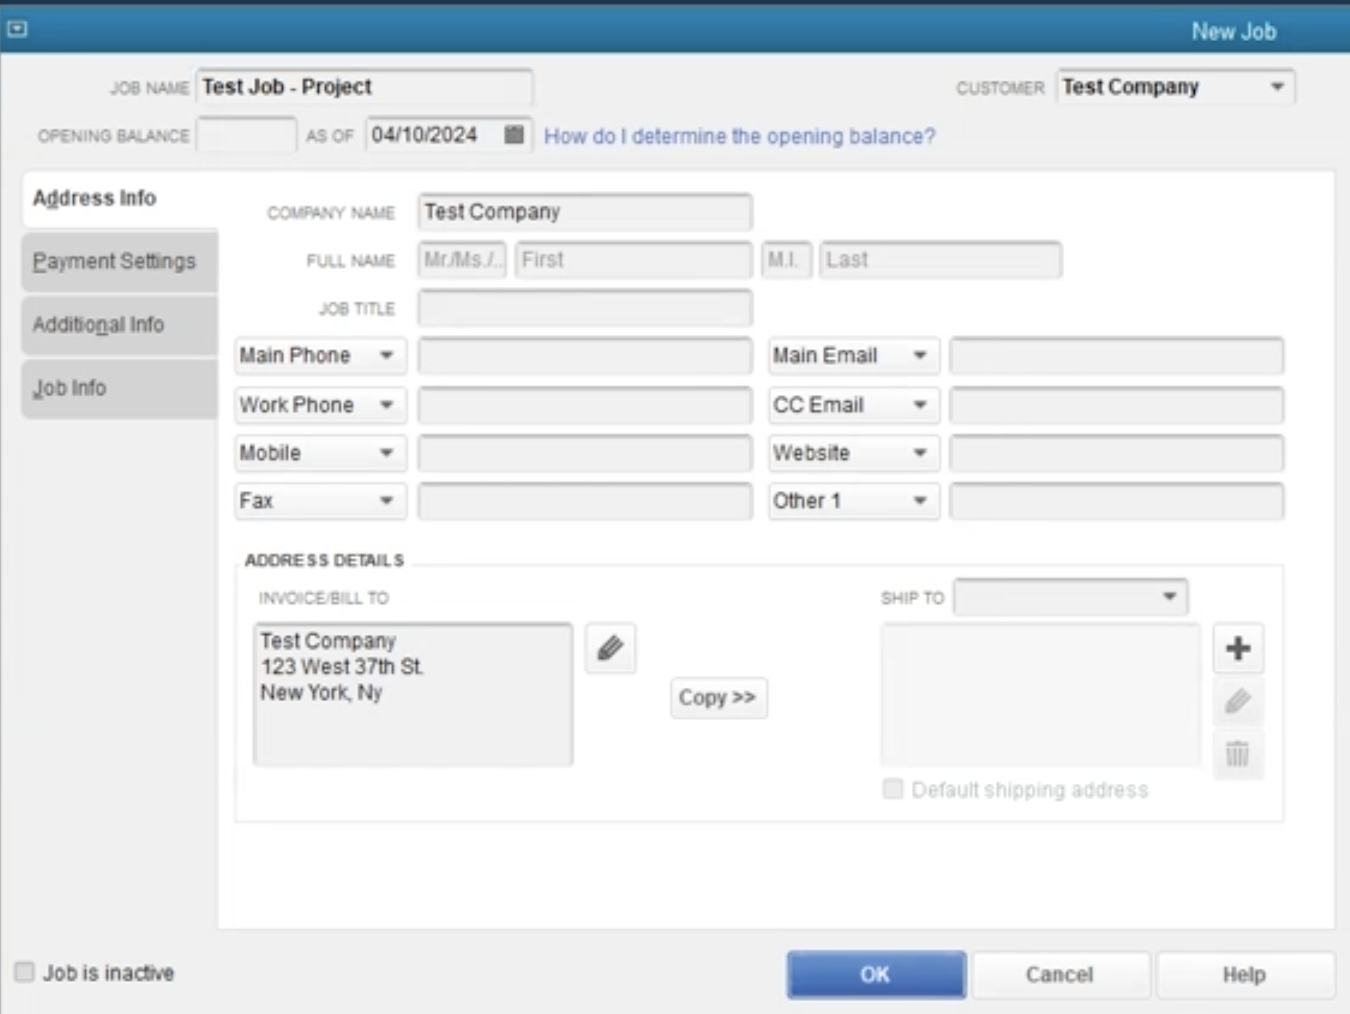
- Enter the Job’s information (this represents your project) in the New Job window.
- Select OK to save the job.
Add a Sub-Job for Your Phases
Sub-Job for Your PhasesIf you need to track specific phases of a project, you can create sub-jobs under a main job:
- Open QuickBooks Desktop and go to the Customers menu.
- Select Customer Center.
- In the Customer Center, right-click on the job (project) you want to add a phase for, and select Add Job.
- Enter the phase’s information in the New Job window.
- Ensure the
Customerfield has the Job reference in this format:<Customer>:<Job>.
- Ensure the
- Select OK to save the sub-job.
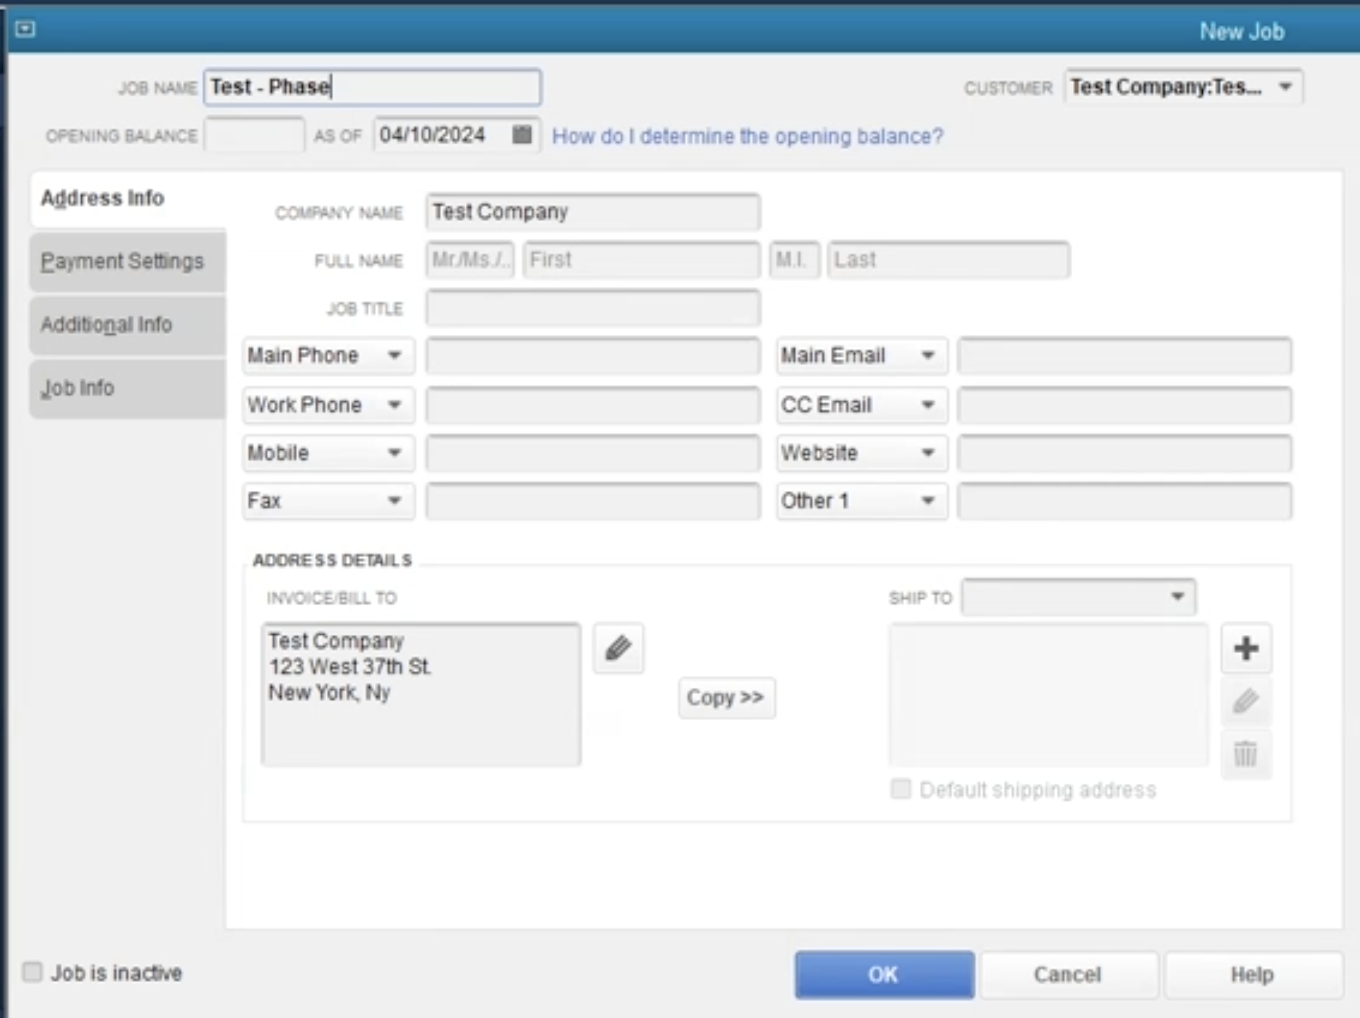
Tip: QuickBooks Desktop allows you to nest jobs within jobs (sub-jobs). This is useful for tracking different phases or components of a project. You can create as many levels of sub-jobs as needed.
Make a sub-customer into a regular customer or vice versa
Simply edit the sub-customer's profile and uncheck the Is sub-customer checkbox.
Merge duplicate customers
If you have duplicate customers, merge their profiles. This deletes one profile and moves their existing data into the profile you want to keep.
- Make sure both customers don't have any sub-customers. If they do, make their sub-customers into regular customers.
- Go to the Sales menu.
- Select the Customers tab.
- Select and open the customer profile you don’t want to keep.
- Select Edit.
- In the Display name as field, enter the name of the customer profile you want to keep. The names need to match exactly.
- Select Save.
- When asked if you want to merge the two profiles, select Yes.
Add a new product or service item for Work Categories
You only have to create a product or service once. After you create them, you can add them to sales forms as many times as you need. - Go to the Sales menu and select the Products and services tab.
- Select New.
- Select Non-inventory or Service.
- Add a name. If you track SKUs, enter a SKU for the product.
- From the Category ▼ dropdown, select the category that best describes your product or service. Learn more about item categories.
- When you're done, select Save and Close.
Tip: Already keeping track of your products and services in a spreadsheet? Save time and import them all at once.
Other Supported Data Formats
- Customer(s) associated with your Client(s)
- Sub-Customer for your Projects
- Service Item for Phases
- Customer(s) for your Project(s)
- Sub-Customer(s) for your Sub-Project(s)
- Service Item(s) for Phases
Mosaic Best Practices
How to promote and demote a QuickBooks customer on Mosaic
For missing Projects (QuickBooks sub-customer) that are showing up as Clients (QuickBooks customer) in Mosaic, you will need to demote the client to become a project.
For missing Clients (QuickBooks customer) that are showing up as Projects (QuickBooks sub-customer) in Mosaic, you will need to promote the project to become a client.
For missing Projects (QuickBooks sub-customer) that are showing up as Phases (QuickBooks sub-sub-customer) in Mosaic, you will need to promote the phase to become a project.
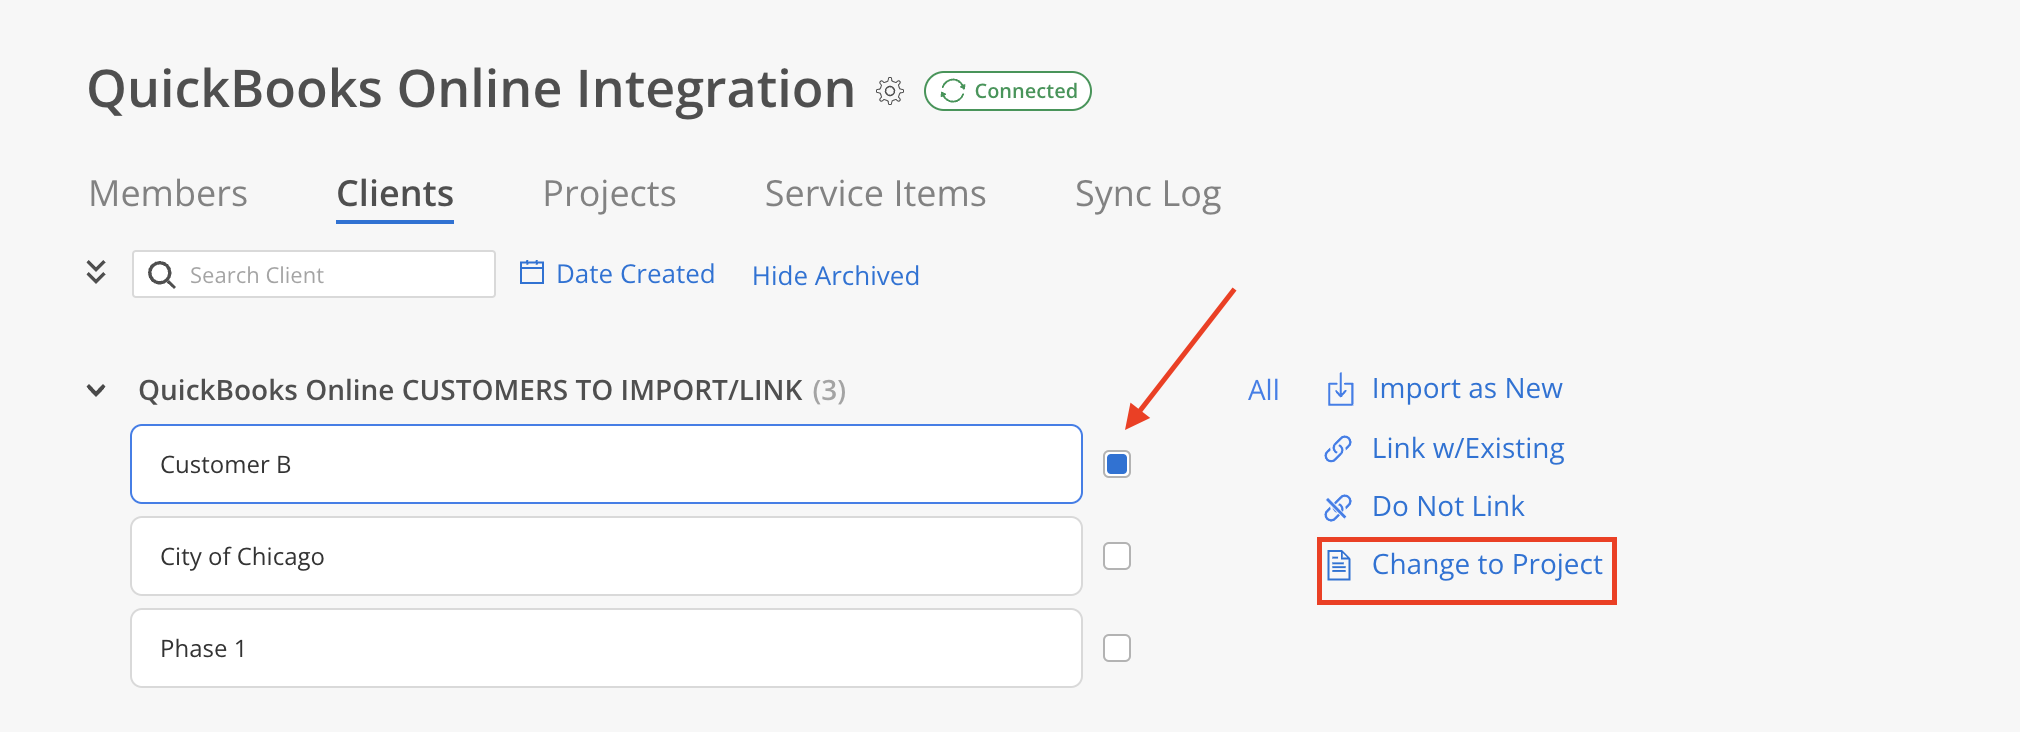
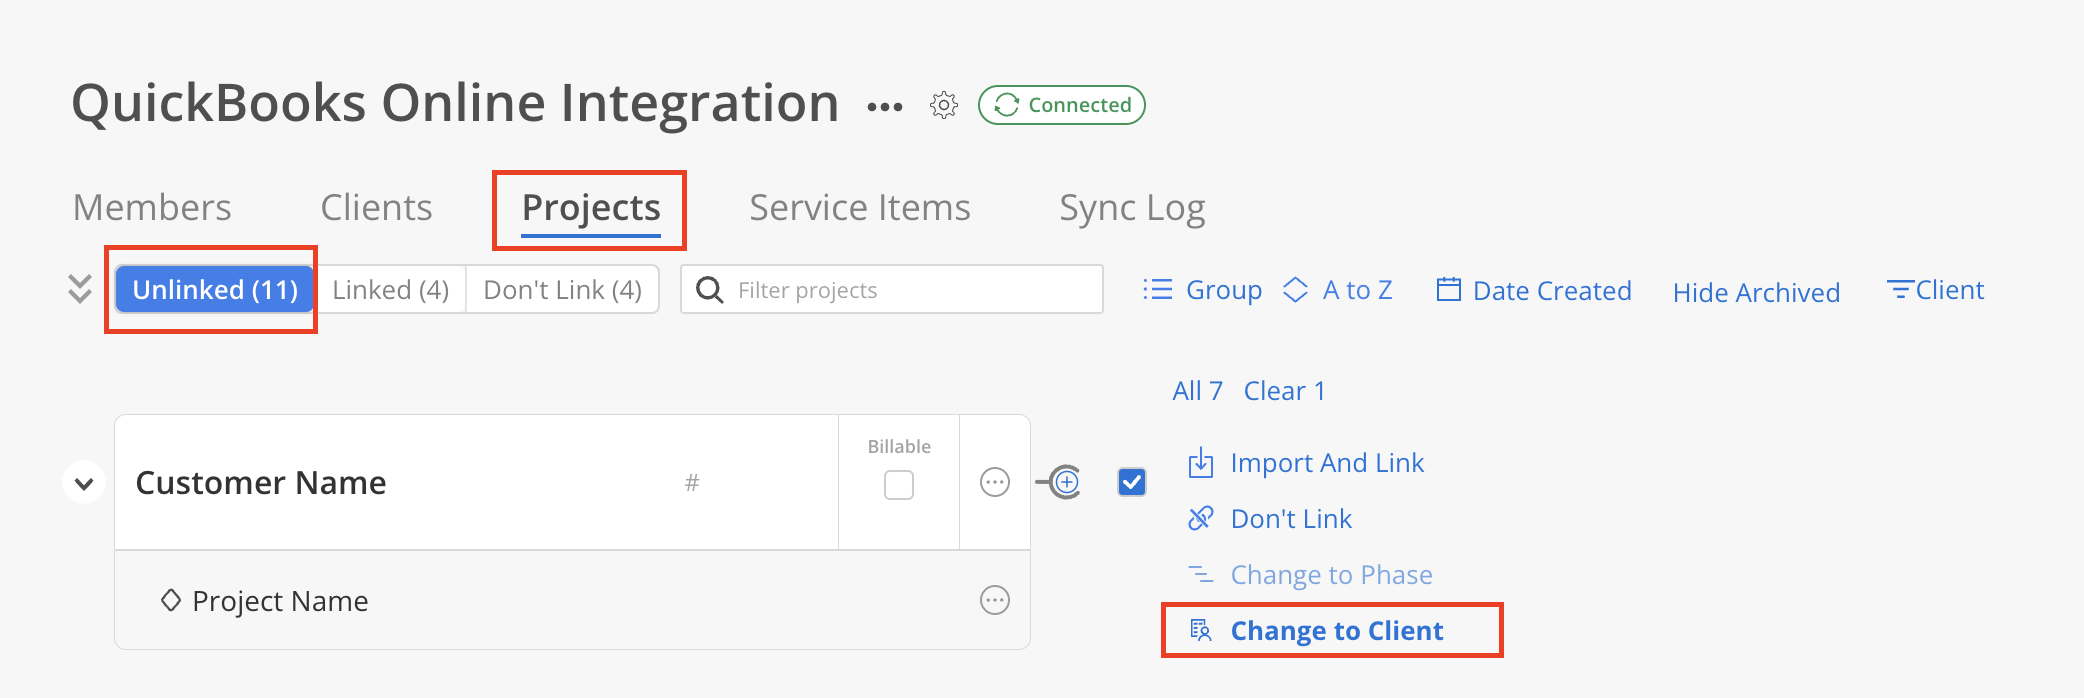
Demote a client (QuickBooks customer) to become a project (QuickBooks sub-customer)
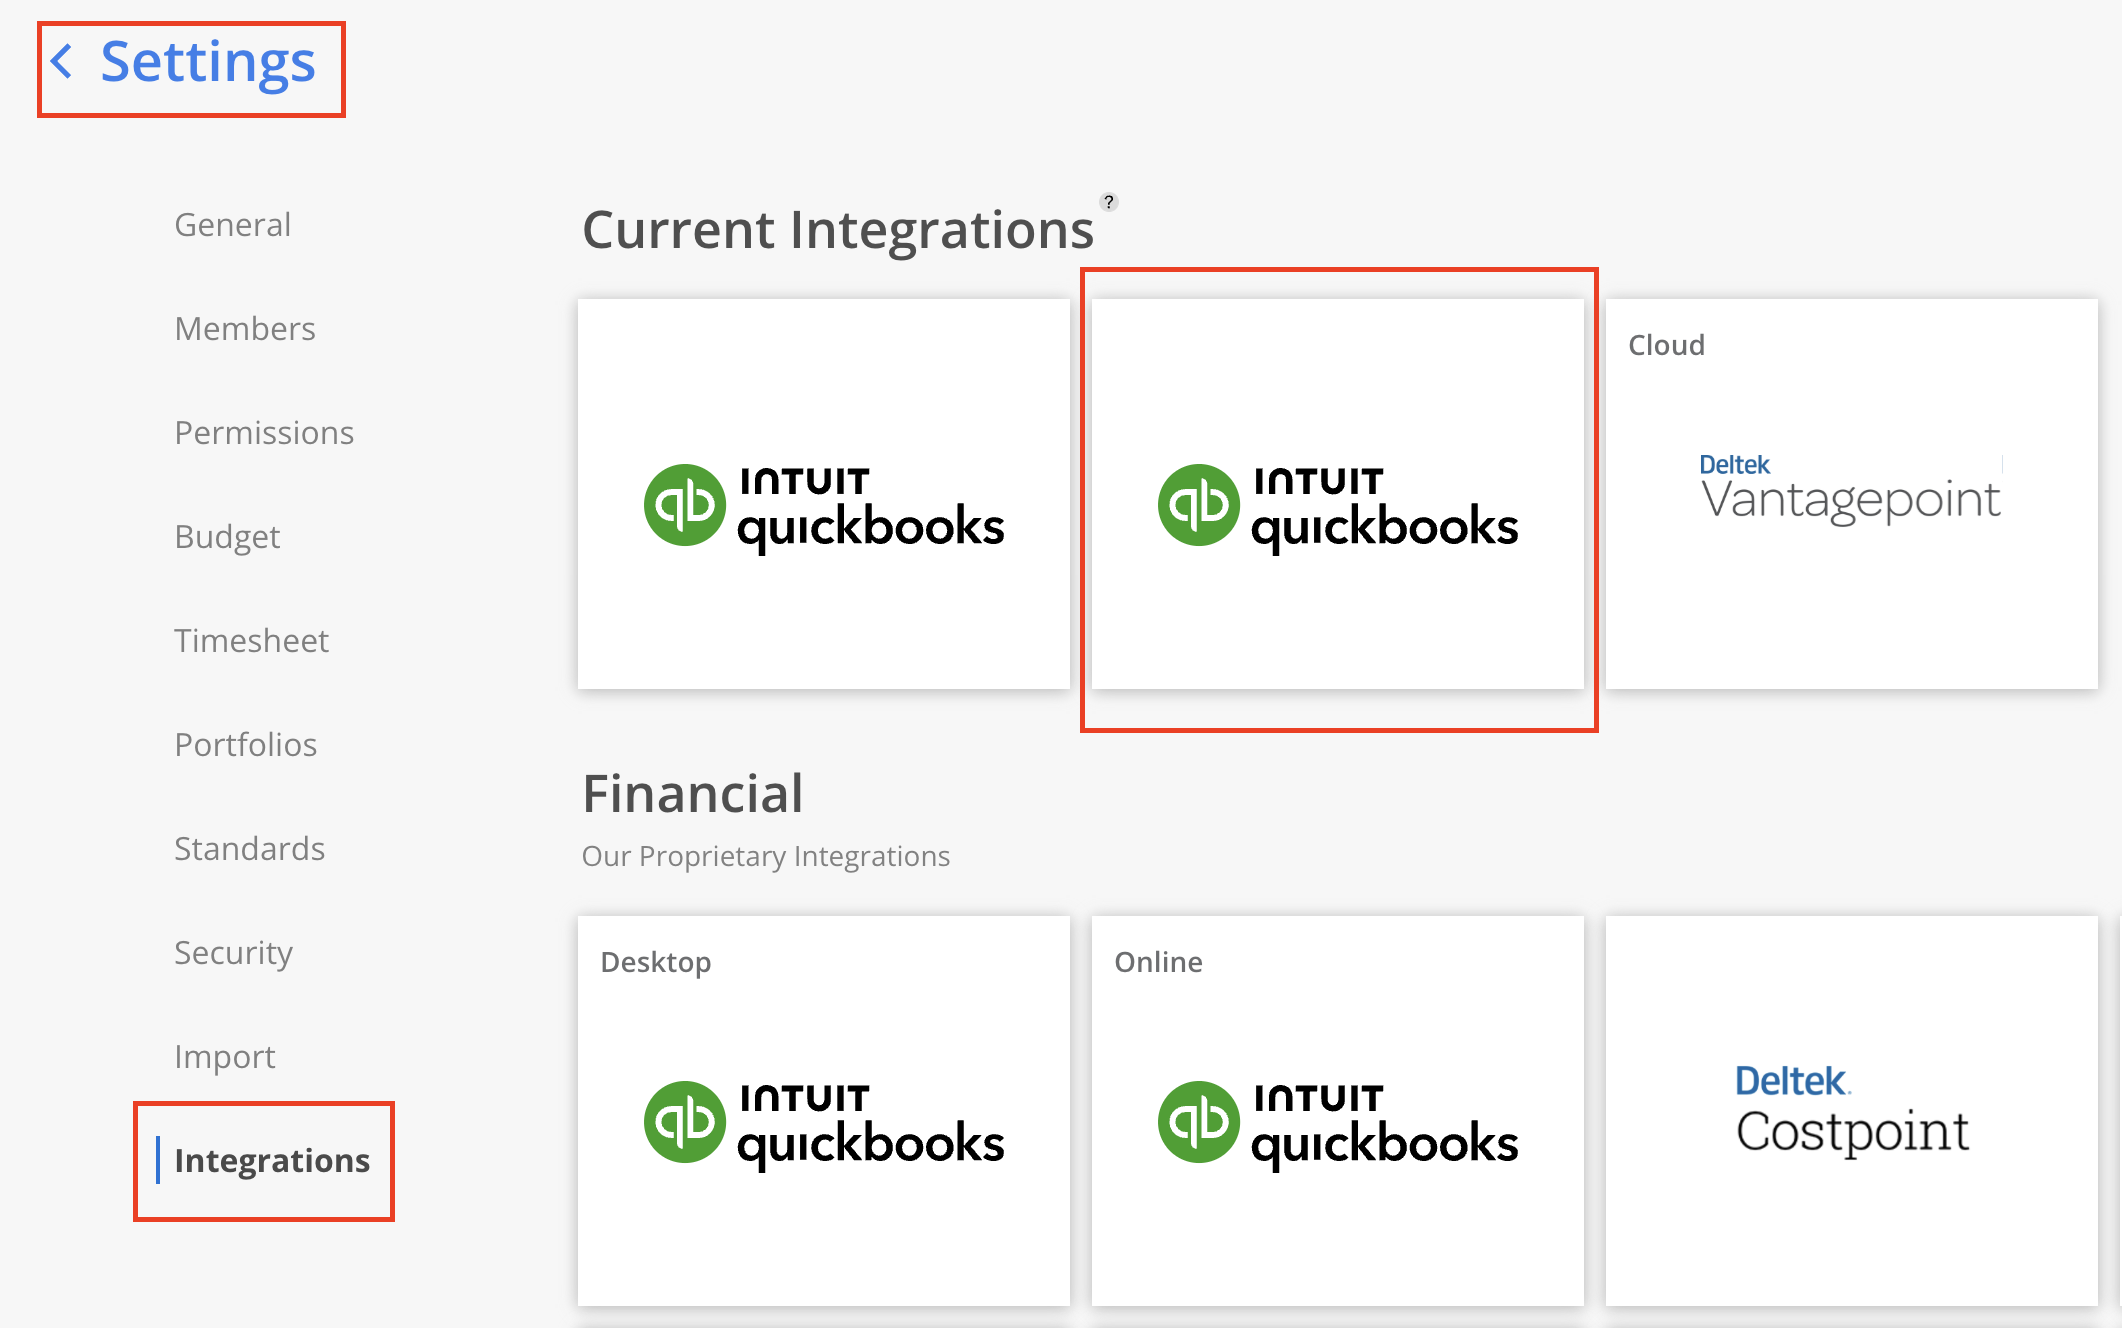
- On Mosaic, navigate to Organization Settings > Integrations > QuickBooks.

- In the Clients tab, identify the QuickBooks customer to be converted into a Project. Click the checkbox next to the desired customer and select
Change to Projecton the menu.
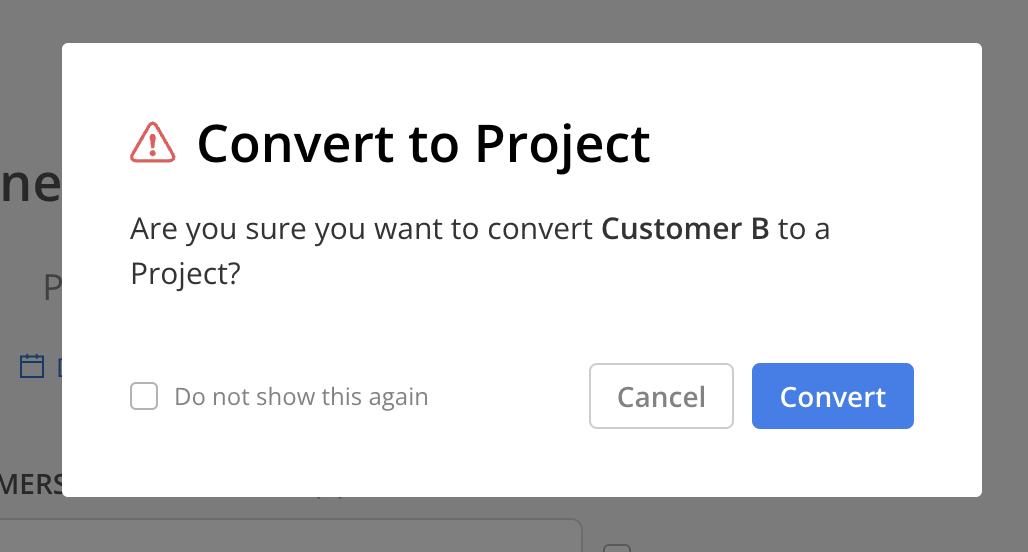
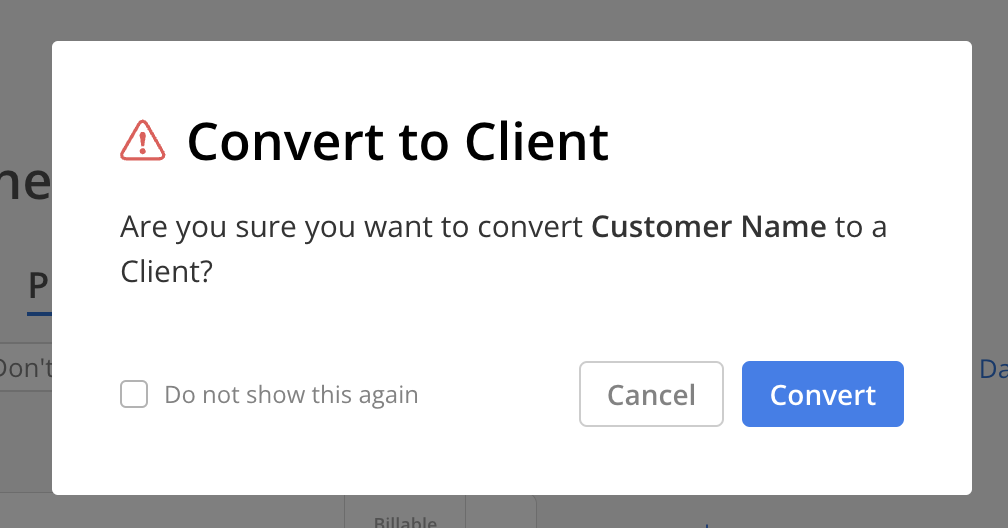
- In the confirmation modal, click
Convertto proceed.
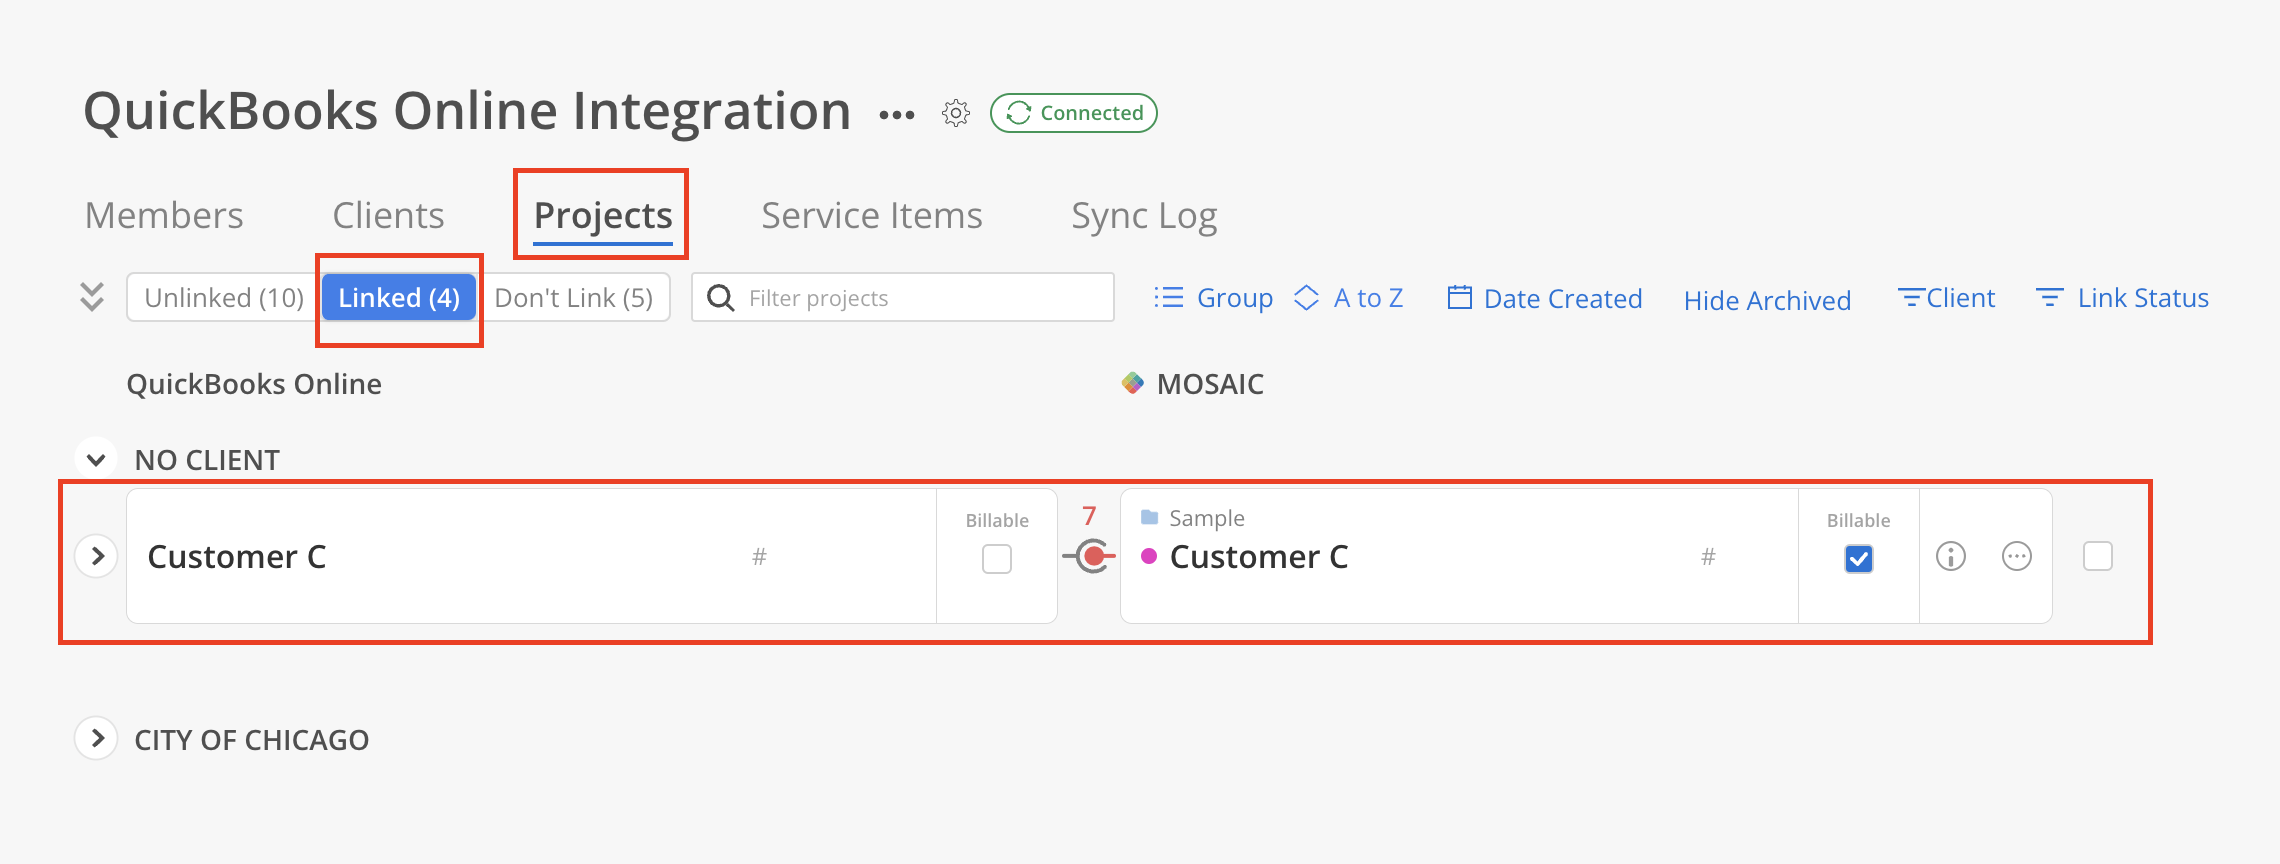
- Navigate to the Projects > Linked Tab , search for the client name that you just converted. It should show up.
Promote a project (QuickBooks sub-customer) to become a client (QuickBooks customer)
- On Mosaic, navigate to Organization Settings > Integrations > QuickBooks.
- Under the Projects tab, under unlinked section, locate the Project (QuickBooks sub-customer) that needs to be promoted to a Client.
Unlink project
If the project is linked already, unlink the project first

- Click
Converton the confirmation modal.
- Navigate to the Clients tab and you should find the new client listed under
QuickBooks Online CUSTOMERS TO IMPORT/LINKsection.

Please Note:
Only Projects without a Client can be promoted to become a Client
Promote a phase (QuickBooks sub-sub-customer) to become a project (QuickBooks sub-customer)
-
On Mosaic, go to Settings > Integrations > QuickBooks
-
Under the Projects tab > Unlinked, find the phase (QuickBooks sub-sub-customer) that you want to promote to a project. Click the three dots to the right of the phase and click
Change to Project.
Unlink the Project
If the project is linked, unlink the project first
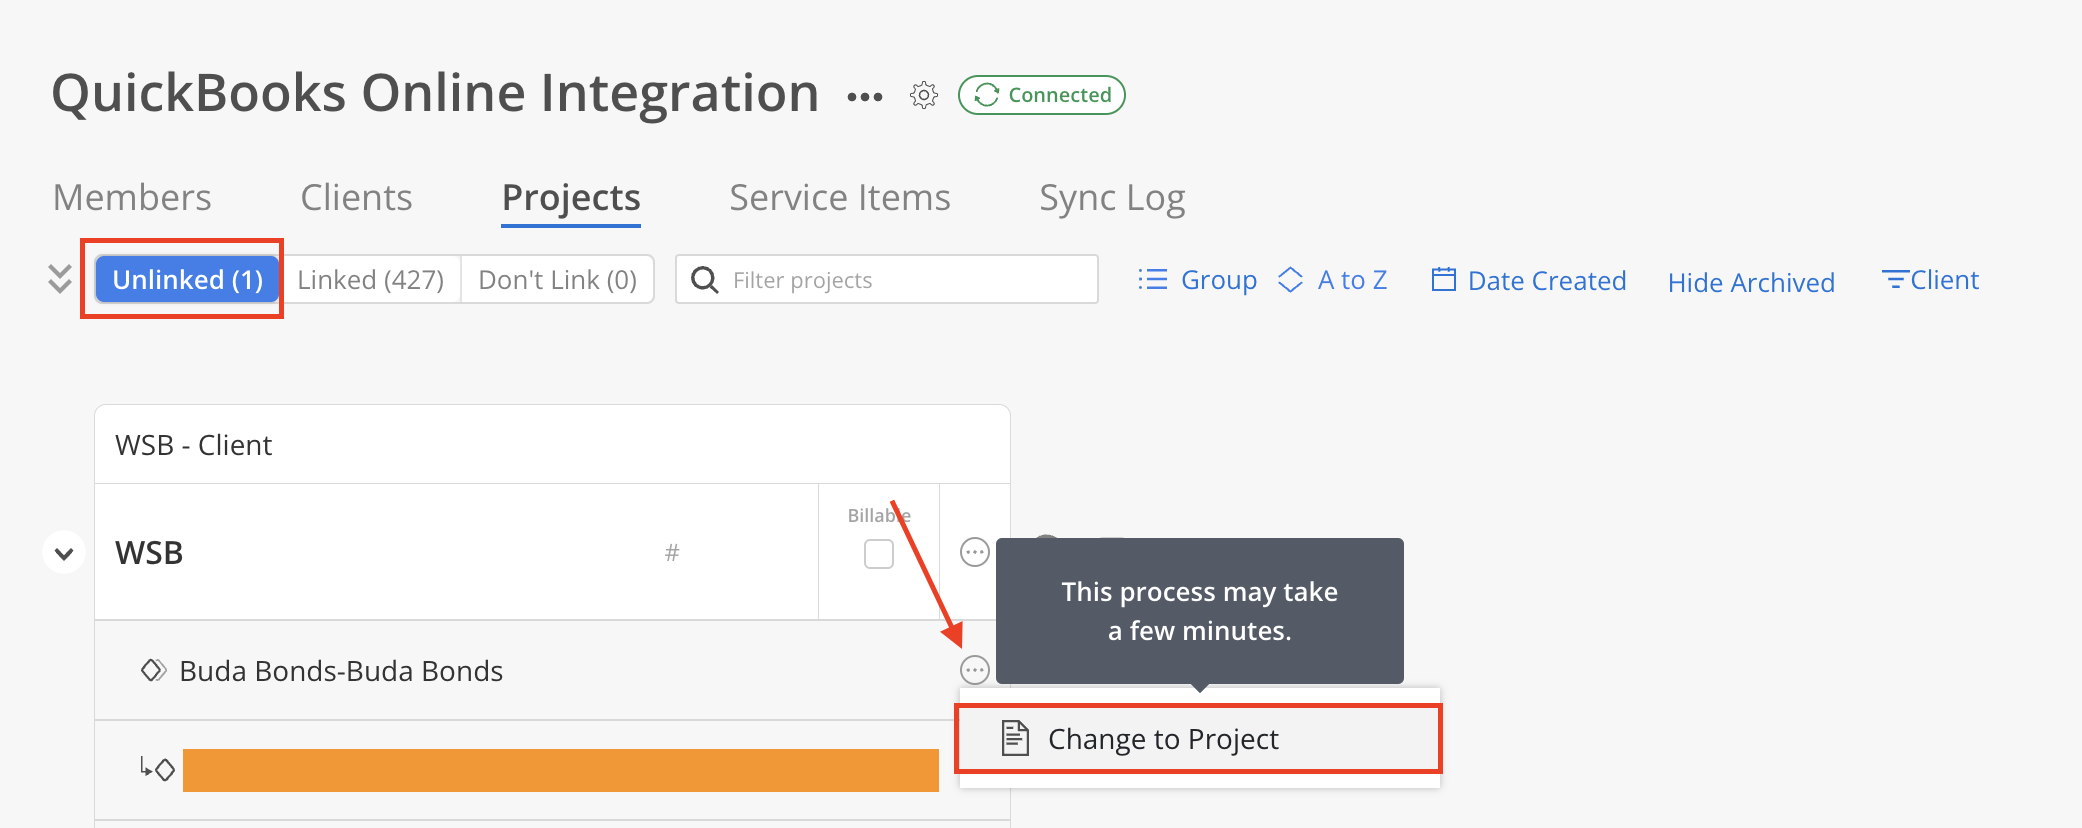
- You should find the phase now listed in the Linked tab as a project. Use the search bar on the top to narrow down the results quickly.

How to Link a QuickBooks Project to a Mosaic Project
When to use Make Main Project a Phase
Make Main Project a PhaseUse Make Main Project a Phase when:
- Scenario 1: You do not have phases on the QuickBooks project or Mosaic project.
- This syncs time entries directly under the Mosaic project to the QuickBooks project (and vice versa). Use this when you are expecting to add time to the main project on either Mosaic or QuickBooks.

Please Note:
If you have selected Make Main Project a Phase, time entries entered on QuickBooks (directly under the project) will sync to a default phase on the Mosaic project, and vice versa.
This default phase is not visible on the Integration Settings > Projects tab, but it is visible on the Project Budget modal, on each individual time entry, etc.
When to use Link all Phases to QuickBooks Project
Link all Phases to QuickBooks ProjectUse Link all Phases to QuickBooks Project if you have phases on the Mosaic project but do not have phases on the QuickBooks Project.
This syncs time entries under all phases in Mosaic to the QuickBooks project.

When to use Import all phases to Mosaic Project
Import all phases to Mosaic ProjectUse Import all phases to Mosaic Project if you have phases on the QuickBooks project but do not have phases on the Mosaic Project.
This syncs time entries under all phases in Mosaic to the corresponding phases in QuickBooks.

How to check if your project is linked
- A Green Link Icon indicates that all phases are linked or the main project is a phase.

- A Green and Red Link Icon indicates that some phases are linked. The tool tip on hover will display the number of QuickBooks / Mosaic Phases that are linked / not linked.

- A Red Link Icon indicates that none of the phases are linked or the main project is not a phase.
Please Note: No time entries will sync between the QuickBooks project and Mosaic project if you see a Red Link Icon for the project.
To resolve, you can:
- Make Main Project a Phase
- Link all phases to QuickBooks project
- Import all phases to Mosaic project
- Manually start importing or linking phases between the Integration Project and the Mosaic Project

Updated 25 days ago