Deltek Vantagepoint Cloud Integration Setup (Old)
| Direction | Est. Data Transfer Time | Vendor | Vendor Docs |
|---|---|---|---|
| 1-way from Deltek Vantagepoint to Mosaic. | Up to 24 hours. | Deltek Vantagepoint Product Website |
Part 1: Deltek Vantagepoint Integration Setup
You must generate an ID and a secret for Mosaic in order to access Vantagepoint through the API.
To set up access to the API:
- In the Navigation pane, select Utilities > Integrations > API Authorization.
- On the API Authorization form, click New API Authorization.
- Enter
https://vantagepoint-agent.us-east-1.prod.mosaicapp.comfor the Callback URL. - Enter the Take note of the Client ID, Client Secret, Database Name, Vantagepoint API Username/Password that your applications can use to access Vantagepoint through the API display. You will enter these credentials in Step #4 of "Integrating with Mosaic" below.
Instructions for Vantagepoint Cloud Version 5.0 and above:
- In the Navigation pane, select Utilities > Integrations > API Authorization.
- Select Allow Password Grant Type
- Take note of the Consumer Key (also known as Client ID), Secret (also known as Client Secret), Database Name, Vantagepoint API Username/Password that your applications can use to access Vantagepoint through the API display. You will enter these credentials in Step #4 of "Integrating with Mosaic" below.
Create a New Role
- Navigate to Security → Roles

- Add a new Role
- Set the “Type of Role” to Administrator and Accounting
- Select the following permissions:
- Hubs → Employees
- Hubs → Firms → Firms
- Hubs → Projects
- Utilities → Integrations → API Authorization
- Settings → Accounting → Labor Code
- If your enterprise has multiple Companies:
- Ensure that the new Role has access to the desired Companies. See this Deltek Guide for instructions.
Create a New User
- Navigate to Security → Users to add a new User
- Name the User something like “Mosaic”, and assign it the Role that you just created
- You do not need enter an associated Employee
- Ensure that the user is marked as “Active”
- Deselect the option “Force User to Reset Password at Next Login”
- (Optional) Use field level security to disallow access to any sensitive information. See Field Level Security for details.
Confirm Requirements for the Integration Setup:
- The username and password of the new user you’ve created
- The Client ID, Client Secret, Database Name, and Server URL for your web application.
The Server URL should look like this:
https://companyname.deltekfirst.com/CompanyName/api
To retrieve your Client ID and Secret:
Deltek Vantagepoint Versions 4.0 and 4.5
- Navigate to Integrations -> API Authorization.
- Locate the
Client ID,Client SecretandDatabase Name, which you'll enter in the Deltek Vantagepoint Cloud Connection Modal along with your web application URL.
Deltek Vantagepoint Version 5.0 and above
To retrieve your Client ID and Secret:
- Navigate to Integrations -> API Authorization.
- Click on New Authorization.
- Give the authorization a name like "Mosaic Integration".
- Choose Match Role Access for Scopes.
- Enter
https://vantagepoint-agent.us-east-1.prod.mosaicapp.comfor the Callback URL. - If you have an option for
Allow Password Grant Typeon the form, make sure that it is selected. - Provide the
Database Name,Consumer KeyandClient Secretto Mosaic along with your web application URL (Server URL).
Part 2: Integrate with Mosaic
Step 1: Upload Stored Procedures to Vantagepoint Cloud
To begin, please refer to our comprehensive guide on Adding Stored Procedures to Vantagepoint for detailed instructions on uploading stored procedures to your Deltek Vantagepoint Cloud environment. You can obtain the required scripts for the following processes by reaching out to your Customer Success Manager:
- For synchronizing Time Entries, you will need to upload the "Combined Time" Stored Procedure (Required).
- By default, Mosaic retrieves Combined time (both Posted and Unposted time). If you prefer to fetch only Posted time, please contact your Customer Success Manager.
- For synchronizing Work Plans, you can choose to upload the "Work Plans" Stored Procedure (Optional).
- If you wish to synchronize Profit Centers, you can also upload the "Profit Centers" Stored Procedure (Optional - Coming Soon).
Once Deltek has confirmed the successful upload of these stored procedures to your Deltek Vantagepoint Cloud environment, you can proceed to Step 2.
Step 2: Connect to Vantagepoint Cloud in Mosaic
- Login to Mosaic and navigate to the company settings from the Home screen.

- Select Integrations from the Settings menu.

3.Select Deltek Vantagepoint Cloud from the financial options.

- Enter your Username, Password, Client ID, Client Secret, Database name, and Server URL and click Connect.

Integration Settings
Fees
You can configure Mosaic to show your fees using your Direct Labor Fee + Direct Consult Fee, or just the Direct Labor Fee. In Vantagepoint, these fields are located in the Projects -> Budget & Revenue tab

Use just Direct Labor (blue) as your Direct Labor Fee in Mosaic, or the Direct Labor (blue) + Direct Consult (green) as your Fee in Mosaic
Deltek VantagePoint <> Mosaic Best Practices
Projects and Phases
How to Set Fees on Projects
Fees are synced from VantagePoint into Mosaic from the “Direct Labor” amount that is listed in your Projects and Phases, under Projects Hub → Contract Management → Compensation.

There are many ways that the Direct Labor amount can be set, but so long as there is a “Direct Labor” amount visible on this page, it should sync into Mosaic.
One way to set the Direct Labor amount is as follows:
-
Navigate to the Projects Hub under the Hubs menu in your VantagePoint web application

-
Inside the Projects Hub, select Contract Management, and choose your Project from the drop down at the top of the screen


Please Note:
If you are trying to set the fee for a particular Phase, you should use the Project Structure button to the left of the Project’s name to select the appropriate Phase
- Select Edit on the right hand side of your screen to make changes to this project. Add the fee that you wish to bring into Mosaic Under the Direct Compensation section as the Direct Labor amount and save the Project record.

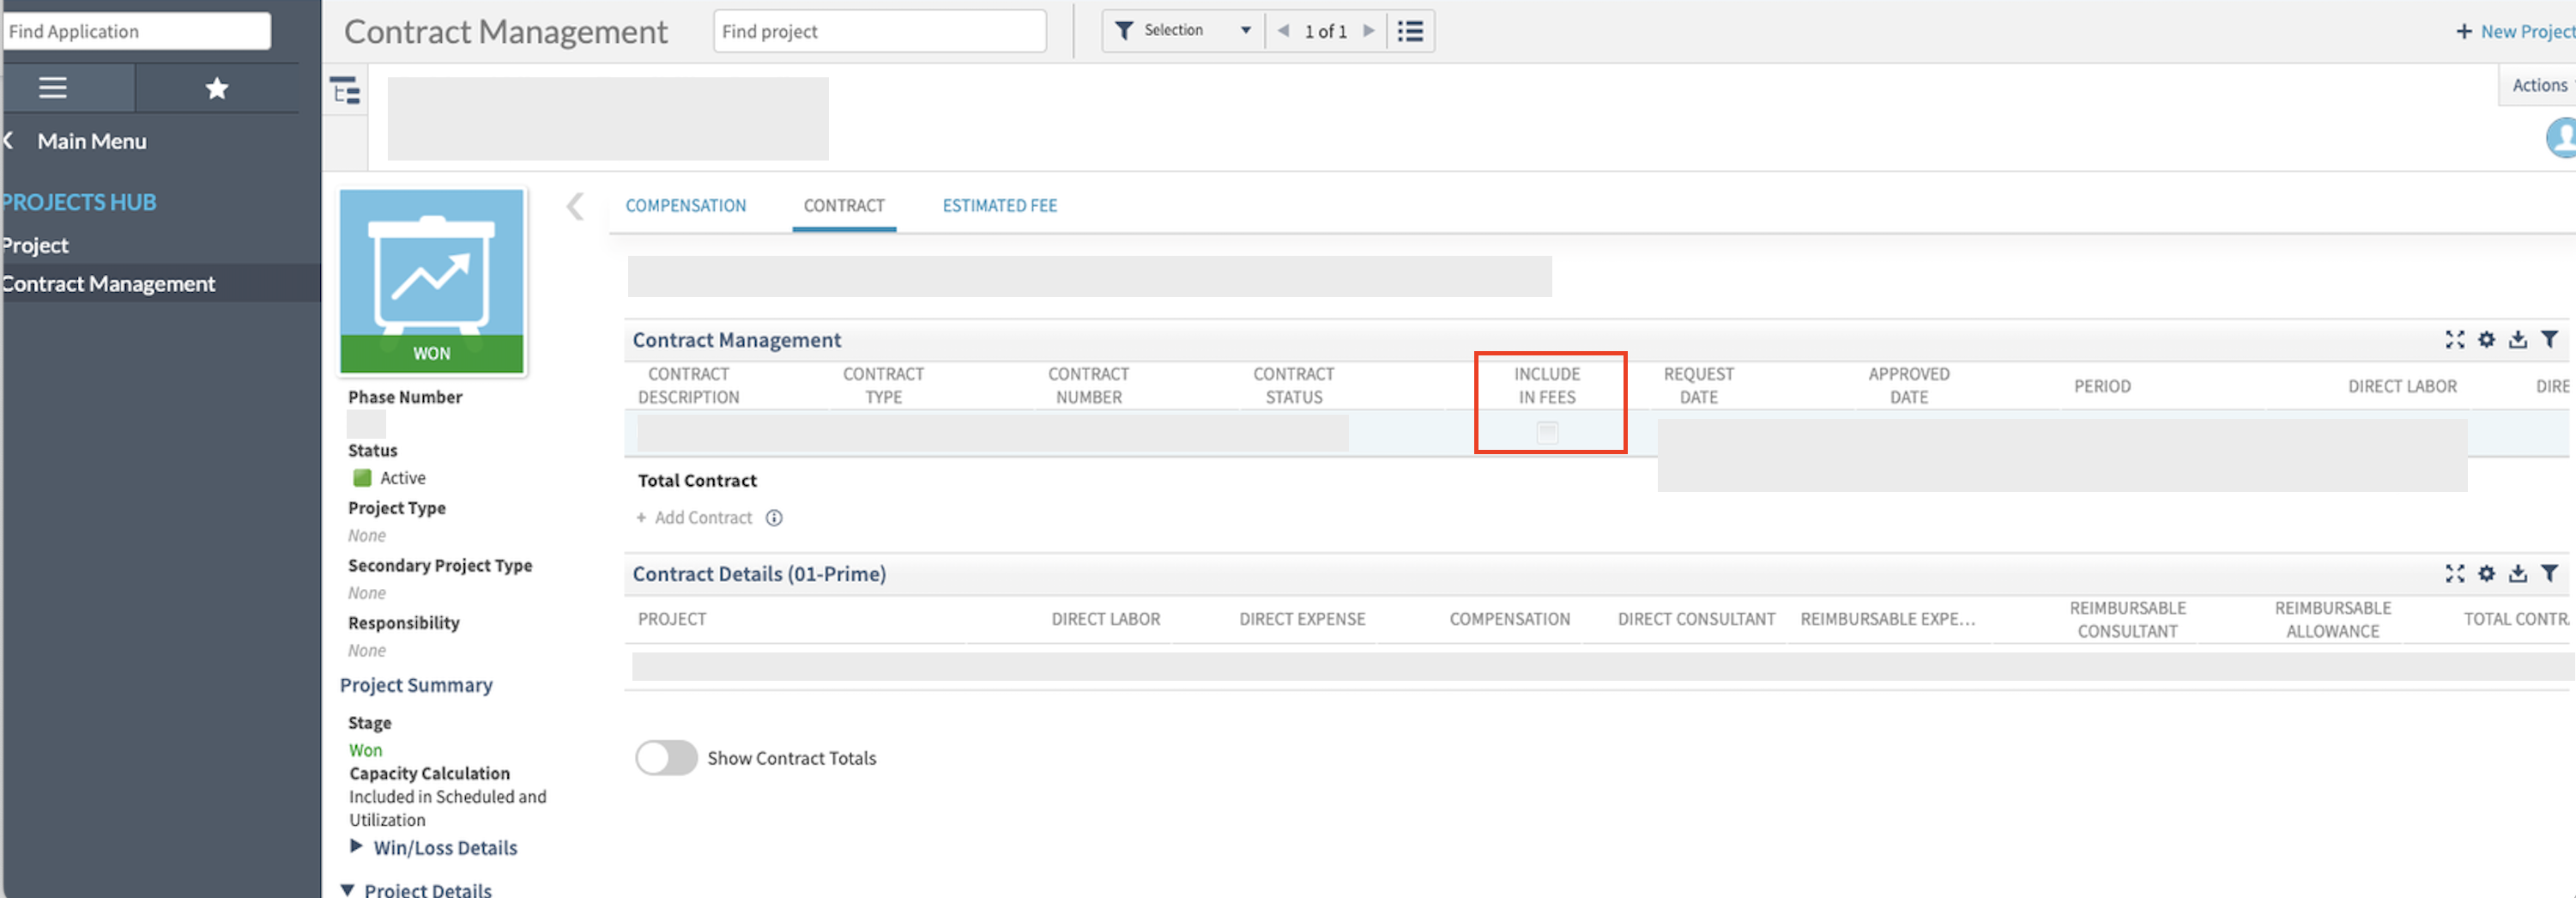
- After setting Fees on Phases, navigate to the Project's Contract tab, and select
Include In Feesfor the phases you wish to include in the Total Project Fee. Selecting this will populate the value under Direct Compensation > Direct Labor page. Mosaic can only sync phase budgets if it is visible under Direct Compensation > Direct Labor.
Start/End Dates
Start and End dates for Projects and Phases are synced into Mosaic from the dates that is listed in your Projects and Phases under Projects Hub → Plan → Schedule.

There are many ways that start and end dates can be set for Projects and Phases, but so long as you have the correct dates in the “PLAN START” and “PLAN END” columns, they should sync into Mosaic.
One way to set the start and end dates is as follows:
- Navigate to the Projects Hub under the Hubs menu in your VantagePoint web application
- Inside the Projects Hub, select Project, choose your Project from the drop down at the top of the screen, and select the Dates & Costs tab

Note: If you are trying to set the fee for a particular Phase, you should use the Project Structure button to the left of the Project’s name to select the appropriate Phase
- Click “Add Milestone”. Add Milestones for the start and end dates for your Project or Phase using “Estimated Start Date”, and “Estimated Completion Date” respectively.

Updated 9 days ago